Cisco实验ospf协议中接口与区域验证配置及区域中特殊性虚电路配置
ospf支持简单口令认证和MD5验证,认证分两种:
1)接口验证:明文和密文:可以按照直连来做
2)区域验证:明文和密文:一个区域内的所有设备都得做
注:区域验证中虚电路属于区域0.
一、 接口与区域验证
配置条件:接口与区域验证需要用到两个及以上路由器,本次实验以三个为基准,分别为R1、R2和R3.一字连接,其中R1与R2之间为区域0,用来做接口与区域明文验证,R2与R3之间为区域1,用来做接口与区域密文验证。例图解析如下

其中各地址条件(标记为第三节条件):
R1:lo0:1.1.1.1 s0/0:12.1.1.1
R2:lo0:2.2.2.2 s0/0:12.1.1.2 s0/1:23.1.1.2
R3:lo0:3.3.3.3 s0/1:23.1.1.3 s0/2:34.1.1.3
R4:lo0:4.4.4.4 s0/2:34.1.1.4

1.接口明文验证
对R1进行基本配置
R1(config)#int lo0
R1(config-if)#ip add 1.1.1.1 255.255.255.0
R1(config-if)#no sh
R1(config-if)#int s0/0
R1(config-if)#ip add 12.1.1.1 255.255.255.0
R1(config-if)#no sh
R1(config)#router ospf 1
R1(config-router)#router-id 1.1.1.1
R1(config-router)#network 1.1.1.1 0.0.0.0 area 0
R1(config-router)#network 12.1.1.1 0.0.0.0 area 0
对R2进行基本配置
R2(config)#int lo0
R2(config-if)#ip add 2.2.2.2 255.255.255.0
R2(config-if)#no sh
R2(config-if)#int s0/0
R2(config-if)#ip add 12.1.1.2 255.255.255.0
R2(config-if)#no sh
R2(config-if)#int s0/1
R2(config-if)#ip add 23.1.1.2 255.255.255.0
R2(config-if)#no sh
R2(config)#router ospf 1
R2(config-router)#router-id 2.2.2.2
R2(config-router)#network 2.2.2.2 0.0.0.0 area 0
R2(config-router)#network 12.1.1.2 0.0.0.0 area 0
R2(config-router)#network 23.1.1.2 0.0.0.0 area 1
接口明文配置:
R1(config)#int s0/0
R1(config-if)#ip ospf authentication//开启OSPF接口明文验证
R1(config-if)#ip ospf authentication-key fuckcisc//明文验证的密码
R2(config)#int s0/0
R2(config-if)#ip ospf authentication
R2(config-if)#ip ospf authentication-key fuckcisc
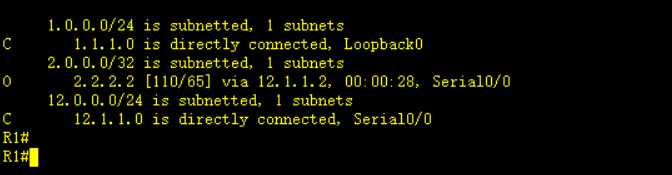
当只对R1或R2其中一个配置,就会出现下面如图所示(下图为只对R1进行配置)配置前进行show IP router 展示图片上半部,但中间会显示==*Mar 1 00:49:08.187: %OSPF-5-ADJCHG: Process 1, Nbr 2.2.2.2 on Serial0/0 from FULL to DOWN, Neighbor Down: Dead timer expired。==说明R2接口从FULL到DOWN,因此下面继续show IP router的表不再包含R2地址。

下面继续对R2进行配置

配置完成后在R2上show ip route会显示R1所有的地址

再接着看R1的路由条目,会发现消失的R2地址会重新出现。
所以我们此时在R1、R2的s0/0端口进行了明文验证,即两边密文都是cisco都为一样,所以可以连通。且大家可以试一下密文不同,两个路由器之间也并不会连通。
2.接口密文验证
密文配置与明文配置方法几乎不变,改变的是上面明文配置下的代码:
接口密文验证:
R2(config)#int s0/1
R2(config-if)#ip ospf authentication message-digest//开启密文验证
R2(config-if)#ip ospf message-digest-key 1 md5 fuckcisco//密文验证的密码,注意 key ID要一样
R3(config)#int s0/1
R3(config-if)#ip ospf authentication message-digest
R3(config-if)#ip ospf message-digest-key 1 md5 fuckcisco
3.区域明文验证
R1(config)#router ospf 1
R1(config-router)#area 0 authentication
R1(config)#int s0/0
R1(config-if)#ip ospf authentication-key cisco
R2(config)#router ospf 1
R2(config-router)#area 0 authentication
R2(config)#int s0/0
R2(config-if)#ip ospf authentication-key cisco
4.区域密文验证
R2(config)#router ospf 1
R2(config-router)#area 1 authentication message-digest
R2(config)#int s0/1
R2(config-if)#ip ospf message-digest-key 1 md5 cisco
R3(config)#router ospf 1
R3(config-router)#area 1 authentication message-digest
R3(config)#int s0/1
R3(config-if)#ip ospf message-digest-key 1 md5 cisco
==2.3.4与1中配置一样,唯一改变的就是在ospf协议下命令的不同,上面把不同的命令都给出来,大家可以尝试一下。
二、 区域下虚电路验证

切记:虚电路是属于区域0的
对R1~R4进行验证配置
虚电路验证配置是在R2、R3上的。
虚电路明文验证:
R2(config)#router ospf 1
R2(config-router)#area 1 virtual-link 3.3.3.3 authentication
R2(config-router)#area 1 virtual-link 3.3.3.3 authentication-key cisco
R3(config)#router ospf 1
R3(config-router)#area 1 virtual-link 2.2.2.2 authentication
R3(config-router)#area 1 virtual-link 2.2.2.2 authentication-key cisco
虚电路密文验证:
R2(config-router)#
R2(config-router)#area 1 virtual-link 3.3.3.3 authentication message-digest
R2(config-router)#area 1 virtual-link 3.3.3.3 message-digest-key 1 md5 cisco
R3(config-router)#area 1 virtual-link 2.2.2.2 authentication message-digest
R3(config-router)#area 1 virtual-link 2.2.2.2 message-digest-key 1 md5 cisco
对R2进行明文配置

对R3进行明文配置

以R4为例,下面两张图分别为配置验证密码前后通信路由条目。明显可见,虚电路实现验证后,R4能够收到其他路由条目。密文配置同样。


- 路由器OSPF协议的配置 CISCO之CCNA篇实验之四
- OSPF协议中,单区域实验配置
- 末节区域,完全末节区域,ospf以及rip,实验配置
- cisco路由器基本实验之三 动态路由之RIP协议的配置(Boson NetSim)
- CCNP路由实验---9、OSPF末节区域和绝对末节区域的配置
- OSPF 多区域配置实验
- Cisco 路由器 OSPF 协议配置
- cisco路由器基本实验之三 动态路由之RIP协议的配置(Boson NetSim)
- OSPF区域中的路由器接口配置
- CISCO 配置实验--OSPF
- 详解BSCI实验二、配置ospf验证,汇总,虚链路
- cisco路由器基本实验之四 动态路由之IGRP协议的配置(Boson NetSim)
- CCNP实验之---OSPF多区域配置
- 网络Cisco实验-静态路由协议配置
- OSPF单区域配置实验
- 实验十一、单区域OSPF 基本配置
- 25、OSPF配置实验之不规则区域Tunnel隧道
- CISCO PVST+配置和结果验证 per vlan spanning tree(51cto 实验10)
- 26、OSPF配置实验之不规则区域虚链路
- OSPF----单区域配置(实验)