Android学习——UI高级组件二
Android学习——UI高级组件二
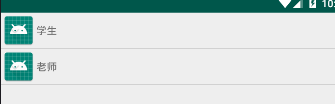
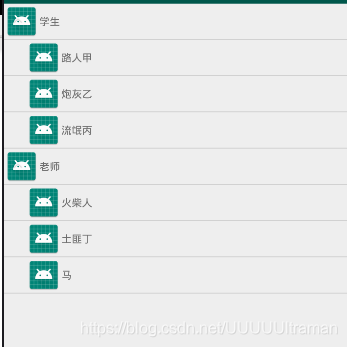
1.ExpandableListView(可扩展的listView)
设置一个ExpandableListView控件
<ExpandableListView
android:layout_width="match_parent"
android:layout_height="match_parent"
android:id="@+id/expandableListView"
android:layout_alignParentTop="true"
android:layout_alignParentStart="true"
android:layout_alignParentLeft="true"/>
在Activity类中
public class Main7Activity extends AppCompatActivity {
private ExpandableListView listView;
@Override
protected void onCreate(Bundle savedInstanceState) {
super.onCreate(savedInstanceState);
setContentView(R.layout.activity_main7);
listView=findViewById(R.id.expandableListView);
listView.setAdapter(new MyExpandableAdapter());

//注册单击事件
listView.setOnChildClickListener(new ExpandableListView.OnChildClickListener() {
@Override
public boolean onChildClick(ExpandableListView parent, View v, int groupPosition, int childPosition, long id) {
Toast.makeText(Main7Activity.this, childs[groupPosition][childPosition], Toast.LENGTH_SHORT).show();
return true;
}
});
}
private String[] groups={"学生","老师"};
private String[][] childs={{"路人甲","炮灰乙","流氓丙"},{"火柴人","土匪丁","马"}};
//适配器
class MyExpandableAdapter extends BaseExpandableListAdapter {

@Override
public int getGroupCount() {
return groups.length;
}

@Override
public int getChildrenCount(int groupPosition) {
return childs[groupPosition].length;
}

@Override
public Object getGroup(int groupPosition) {
return groups[groupPosition];
}

@Override
public Object getChild(int groupPosition, int childPosition) {
return childs[groupPosition][childPosition];
}

@Override
public long getGroupId(int groupPosition) {
return groupPosition;
}

@Override
public long getChildId(int groupPosition, int childPosition) {
return childPosition;
}

@Override
public boolean hasStableIds() {
return false;
}

@Override
public View getGroupView(int groupPosition, boolean isExpanded, View convertView, ViewGroup parent) {
if (convertView==null){
convertView=getLayoutInflater().inflate(R.layout.group_layout,null);
}
ImageView icon = convertView.findViewById(R.id.icon);
TextView title=convertView.findViewById(R.id.title);
//            icon.setImageResource();
title.setText(groups[groupPosition]);
return convertView;
}

@Override
public View getChildView(int groupPosition, int childPosition, boolean isLastChild, View convertView, ViewGroup parent) {
if (convertView==null){
convertView=getLayoutInflater().inflate(R.layout.child_layout,null);
}
ImageView icon = convertView.findViewById(R.id.icon);
TextView title=convertView.findViewById(R.id.title);
//            icon.setImageResource();
title.setText(childs[groupPosition][childPosition]);
return convertView;
}

@Override
public boolean isChildSelectable(int groupPosition, int childPosition) {
return true;
}
}
}
配置groups和childs的布局文件(布局方法相同)
<?xml version="1.0" encoding="utf-8"?>
<LinearLayout xmlns:android="http://schemas.android.com/apk/res/android"
android:layout_width="match_parent"
android:layout_height="wrap_content"
android:paddingLeft="30dp"
android:gravity="center_vertical">

<ImageView
android:layout_width="wrap_content"
android:layout_height="wrap_content"
android:id="@+id/icon"
android:maxWidth="64dp"
android:maxHeight="64dp"
android:adjustViewBounds="true"
android:src="@mipmap/ic_launcher"/>
<TextView
android:layout_width="wrap_content"
android:layout_height="wrap_content"
android:text="no date"
android:id="@+id/title"/>
</LinearLayout>
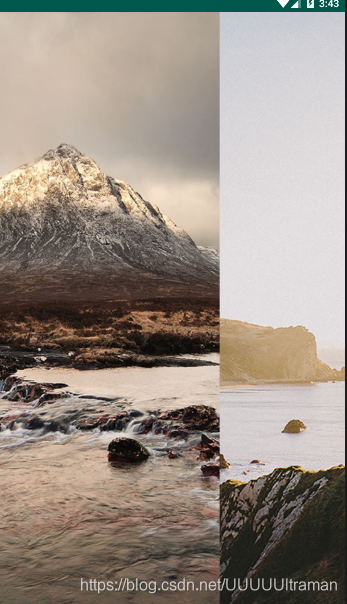
2.ImageSwitch图片切换和动画
ImageSwitch控制图片展示效果的控件,如幻灯片效果
布局文件
<ImageSwitcher
android:layout_width="match_parent"
android:layout_height="match_parent"
android:id="@+id/imageSwitcher"
android:layout_alignParentTop="true"
android:layout_alignParentStart="true"
android:layout_alignParentLeft="true"/>
Activity类中设置接口:ViewSwitcher.ViewFactory,View.OnTouchListener;
public class Main8Activity extends AppCompatActivity implements ViewSwitcher.ViewFactory,View.OnTouchListener {

private ImageSwitcher imageSwitcher;
private int[] images={R.mipmap.a,R.mipmap.b,R.mipmap.c};
private int index;
@Override
protected void onCreate(Bundle savedInstanceState) {
super.onCreate(savedInstanceState);
setContentView(R.layout.activity_main8);
imageSwitcher=(ImageSwitcher) findViewById(R.id.imageSwitcher);
imageSwitcher.setOnTouchListener(this);
imageSwitcher.setFactory(this);
}

@Override
public View makeView() {
//实例化
ImageView iv=new ImageView(this);
iv.setImageResource(images[0]);
return iv;
}

float startX=0.0f;
float endX = 0.0f;
//设置触屏事件,滑动图片效果
@Override
public boolean onTouch(View v, MotionEvent event) {
int action=event.getAction();//获取当前事件动作
//        System.out.println("action"+action);
if (action==MotionEvent.ACTION_DOWN){
startX=event.getX();
return true;
}
if (action==MotionEvent.ACTION_UP){
endX=event.getX();

if (startX-endX>20){//下一张
index=index+1<images.length?++index:0;
imageSwitcher.setImageResource(images[index]);
}else if (endX-startX>20){//上一张
index=index-1>=0?--index:images.length-1;
}
//            System.out.println("index"+index);
imageSwitcher.setImageResource(images[index]);
}

return true;
}
}
实现动画效果
主要修改下面这段代码
if (startX-endX>20){//下一张
index=index+1<images.length?++index:0;
imageSwitcher.setInAnimation(this,android.R.anim.fade_in);
imageSwitcher.setOutAnimation(this,android.R.anim.fade_out);
}else if (endX-startX>20){//上一张
index=index-1>=0?--index:images.length-1;
imageSwitcher.setInAnimation(this,android.R.anim.fade_in);
imageSwitcher.setOutAnimation(this,android.R.anim.fade_out);
}
3.TextSwitch文本切换
TextSwitcher与ImageSwitch的使用方法类似
<TextSwitcher
android:layout_width="match_parent"
android:layout_height="match_parent"
android:id="@+id/textSwitcher"
android:layout_alignParentTop="true"
android:layout_alignParentStart="true"
android:layout_alignParentLeft="true"/>
public class Main8Activity extends AppCompatActivity implements ViewSwitcher.ViewFactory,View.On
1d810
TouchListener {

private TextSwitcher textSwitcher;
private String[] texts={"书山有路勤为径","学海无涯苦作舟","天道酬勤","宁静致远"};
private int index;
@Override
protected void onCreate(Bundle savedInstanceState) {
super.onCreate(savedInstanceState);
setContentView(R.layout.activity_main8);

textSwitcher=findViewById(R.id.textSwitcher);
textSwitcher.setOnTouchListener(this);
textSwitcher.setFactory(this);
}

@Override
public View makeView() {
//实例化
TextView tv=new TextView(this);
tv.setText(texts[index]);
return tv;
}

float startX=0.0f;
float endX = 0.0f;
//触屏事件
@Override
public boolean onTouch(View v, MotionEvent event) {

int action=event.getAction();//获取当前事件动作
if (action==MotionEvent.ACTION_DOWN){
startX=event.getX();
return true;
}
if (action==MotionEvent.ACTION_UP){
endX=event.getX();

if (startX-endX>20){//下一张
index=index+1<texts.length?++index:0;
textSwitcher.setInAnimation(this,android.R.anim.fade_in);
textSwitcher.setOutAnimation(this,android.R.anim.fade_out);
}else if (endX-startX>20){//上一张
index=index-1>=0?--index:texts.length-1;
textSwitcher.setInAnimation(this,android.R.anim.fade_in);
textSwitcher.setOutAnimation(this,android.R.anim.fade_out);
}
textSwitcher.setText(texts[index]);
}

return true;
}
}
4.ViewFlipper
在action_main.xml文件中配置viewFlipper
<ViewFlipper
android:layout_width="match_parent"
android:layout_height="match_parent"
android:id="@+id/viewFliper"
android:layout_alignParentTop="true"
android:layout_alignParentStart="true"
android:layout_alignParentLeft="true">

<LinearLayout
android:layout_width="match_parent"
android:layout_height="match_parent">
<ImageView
android:layout_width="match_parent"
android:layout_height="match_parent"
android:scaleType="centerCrop"
android:src="@mipmap/b"/>
</LinearLayout>
<LinearLayout
android:layout_width="match_parent"
android:layout_height="match_parent">
<ImageView
android:layout_width="match_parent"
android:layout_height="match_parent"
android:scaleType="centerCrop"
android:src="@mipmap/d"/>
</LinearLayout>
<LinearLayout
android:layout_width="match_parent"
android:layout_height="match_parent">
<ImageView
android:layout_width="match_parent"
android:layout_height="match_parent"
android:scaleType="centerCrop"
android:src="@mipmap/e"/>
</LinearLayout>
</ViewFlipper>
自定义四个动画效果
in_leftright.xml(从左到右进)
<?xml version="1.0" encoding="utf-8"?>
<set xmlns:android="http://schemas.android.com/apk/res/android">
<translate android:fromXDelta="-100%p"
android:duration="3000"
android:toXDelta="0"/>
</set>
in_rightleft.xml(从右到左进)
<?xml version="1.0" encoding="utf-8"?>
<set xmlns:android="http://schemas.android.com/apk/res/android">
<translate android:fromXDelta="100%p"
android:duration="3000"
android:toXDelta="0"/>
</set>
out_rightleft.xml(从右到左出)
<?xml version="1.0" encoding="utf-8"?>
<set xmlns:android="http://schemas.android.com/apk/res/android">
<translate android:fromXDelta="0"
android:duration="3000"
android:toXDelta="100%p"/>
</set>
out_leftright.xml(从左到右出)
<?xml version="1.0" encoding="utf-8"?>
<set xmlns:android="http://schemas.android.com/apk/res/android">
<translate android:fromXDelta="0"
android:duration="3000"
android:toXDelta="100%p"/>
</set>
Activity
package com.example.myapplication;

import android.os.Bundle;
import android.support.design.widget.FloatingActionButton;
import android.support.design.widget.Snackbar;
import android.support.v7.app.AppCompatActivity;
import android.support.v7.widget.Toolbar;
import android.view.MotionEvent;
import android.view.View;
import android.widget.ImageSwitcher;
import android.widget.ImageView;
import android.widget.TextSwitcher;
import android.widget.TextView;
import android.widget.ViewFlipper;
import android.widget.ViewSwitcher;
/*imageSwitcher、textSwitcher配置时,需用到接口 implements ViewSwitcher.ViewFactory,View.OnTouchListener*/
public class Main8Activity extends AppCompatActivity {

private ViewFlipper viewFlipper;
@Override
protected void onCreate(Bundle savedInstanceState) {
super.onCreate(savedInstanceState);
setContentView(R.layout.activity_main8);

viewFlipper=findViewById(R.id.viewFlipper);
}

float startX=0.0f;
float endX = 0.0f;
//viewFliper
@Override
public boolean onTouchEvent(MotionEvent event) {
int action=event.getAction();
if (action==MotionEvent.ACTION_DOWN){
startX=event.getX();
}else if (action==MotionEvent.ACTION_UP){
if (startX>endX){//Next
viewFlipper.setInAnimation(this,R.anim.in_rightleft);
viewFlipper.setOutAnimation(this,R.anim.out_rightleft);
viewFlipper.showNext();
}else if (startX<endX){//Previous
viewFlipper.setInAnimation(this,R.anim.in_leftright);
viewFlipper.setOutAnimation(this,R.anim.out_leftright);
viewFlipper.showPrevious();
}
}

return super.onTouchEvent(event);
}
}
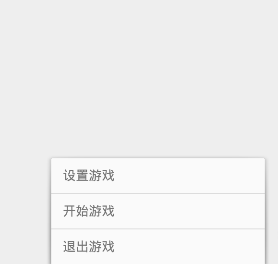
Menu选项菜单
//用于创建选项菜单的事件方法,再打开界面时会被自动调用
@Override
public boolean onCreateOptionsMenu(Menu menu) {
//添加菜单项(组ID,当前选项ID,排序,标题)
menu.add(0,100,1,"设置游戏");
menu.add(0,200,2,"开始游戏");
menu.add(0,300,3,"退出游戏");
return true;
}
//菜单选项的单击事件
@Override
public boolean onOptionsItemSelected(MenuItem item) {
int id=item.getItemId();
switch (id){
case 100:
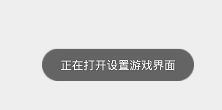
Toast.makeText(this, "正在打开设置游戏界面", Toast.LENGTH_SHORT).show();
break;
case 200:
Toast.makeText(this, "正在启动游戏", Toast.LENGTH_SHORT).show();
break;
case 300:
Toast.makeText(this, "正在退出游戏", Toast.LENGTH_SHORT).show();
break;
}
return super.onOptionsItemSelected(item);
}
若不显示标题栏,在清单文件中删除这一行代码即可。
菜单填充器:在res下新建一个menu目录
新建xml文件,写入菜单选项,给菜单选项加上图片
<?xml version="1.0" encoding="utf-8"?>
<menu xmlns:android="http://schemas.android.com/apk/res/android"
xmlns:app="http://schemas.android.com/apk/res-auto">
<item
android:id="@+id/t1"
android:title="游戏设置"
android:orderInCategory="100"
app:showAsAction="ifRoom"
android:icon="@android:drawable/ic_menu_set_as">
</item>
<item
android:id="@+id/t2"
android:title="启动游戏"
android:orderInCategory="200"
app:showAsAction="ifRoom"
android:icon="@android:drawable/ic_media_play">
</item>
<item
android:id="@+id/t3"
android:title="退出游戏"
android:orderInCategory="300"
app:showAsAction="ifRoom"
android:icon="@android:drawable/ic_delete">
</item>
</menu>
则单击事件修改为
switch (id){
case R.id.t1:
Toast.makeText(this, "正在打开设置游戏界面", Toast.LENGTH_SHORT).show();
break;
case R.id.t2:
Toast.makeText(this, "正在启动游戏", Toast.LENGTH_SHORT).show();
break;
case R.id.t3:
Toast.makeText(this, "正在退出游戏", Toast.LENGTH_SHORT).show();
break;
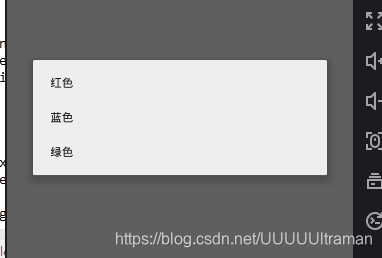
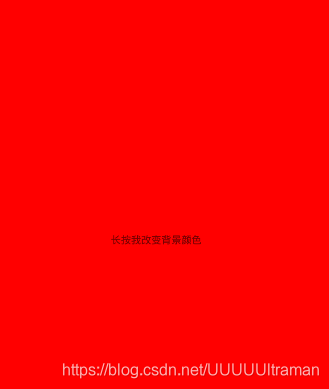
Context Menu(上下文菜单)
添加组件
<TextView
android:id="@+id/textView_bg"
android:layout_width="match_parent"
android:layout_height="match_parent"
android:gravity="center"
android:text="长按我改变背景颜色" />
设置菜单
<item
android:id="@+id/red"
android:title="红色"
android:orderInCategory="100">
</item>
<item
android:id="@+id/blue"
android:title="蓝色"
android:orderInCategory="200">
</item>
<item
android:id="@+id/green"
android:title="绿色"
android:orderInCategory="300">
</item>
改变背景颜色事件
/*
* 上下文菜单
* */
public class Main10Activity extends AppCompatActivity {

private TextView tv;
@Override
protected void onCreate(Bundle savedInstanceState) {
super.onCreate(savedInstanceState);
setContentView(R.layout.activity_main10);
tv=findViewById(R.id.textView_bg);
//注册上下文菜单到tv组件上
registerForContextMenu(tv);

}
//创建上下文菜单事件方法
@Override
public void onCreateContextMenu(ContextMenu menu, View v, ContextMenu.ContextMenuInfo menuInfo) {
super.onCreateContextMenu(menu, v, menuInfo);
getMenuInflater().inflate(R.menu.menu_main2,menu);
}
//上下文菜单单击事件

@Override
public boolean onContextItemSelected(MenuItem item) {
switch (item.getItemId()){
case R.id.red:
tv.setBackgroundColor(Color.RED);
break;
case R.id.blue:
tv.setBackgroundColor(Color.BLUE);
break;
case R.id.green:
tv.setBackgroundColor(Color.GREEN);
break;
}
return super.onContextItemSelected(item);
}
}
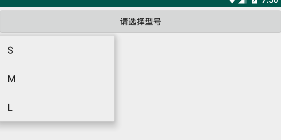
Popup Menu(弹出式菜单)
新建button按钮
<Button
android:layout_width="match_parent"
android:layout_height="wrap_content"
android:id="@+id/button_select"
android:text="请选择型号"
android:onClick="typeSizeClick"/>
/*弹出式菜单*/
public class Main11Activity extends AppCompatActivity implements PopupMenu.OnMenuItemClickListener {
private Button buttonSelect;
@Override
protected void onCreate(Bundle savedInstanceState) {
super.onCreate(savedInstanceState);
setContentView(R.layout.activity_main11);
buttonSelect=findViewById(R.id.button_select);
}
//按钮的单击事件
public void typeSizeClick(View v){
//创建弹出式菜单
PopupMenu popupMenu=new PopupMenu(this,v);
//获取菜单填充器
MenuInflater inflater=popupMenu.getMenuInflater();
//填充菜单
inflater.inflate(R.menu.menu_main3,popupMenu.getMenu());
//弹出式菜单选项的单击事件
popupMenu.setOnMenuItemClickListener(this);
popupMenu.show();
}

@Override
public boolean onMenuItemClick(MenuItem item) {
switch (item.getItemId()){
case R.id.s:
Toast.makeText(this, "你选择了S号", Toast.LENGTH_SHORT).show();
break;
case R.id.m:
Toast.makeText(this, "你选择了M号", Toast.LENGTH_SHORT).show();
break;
case R.id.l:
Toast.makeText(this, "你选择了L号", Toast.LENGTH_SHORT).show();
break;
}
return true;
}
}
菜单选项
<menu xmlns:android="http://schemas.android.com/apk/res/android">
<item android:id="@+id/s" android:title="S"
android:orderInCategory="100"/>
<item android:id="@+id/m" android:title="M"
android:orderInCategory="100"/>
<item android:id="@+id/l" android:title="L"
android:orderInCategory="100"/>
</menu>
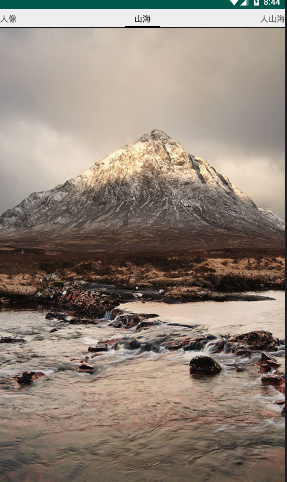
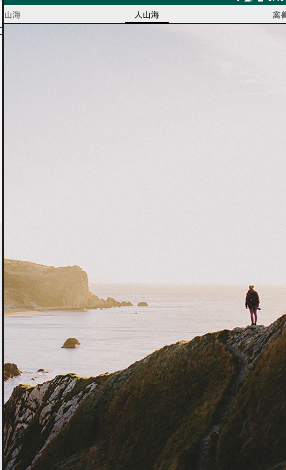
ViewPager
基本使用
先配置布局文件
<?xml version="1.0" encoding="utf-8"?>
<LinearLayout xmlns:android="http://schemas.android.com/apk/res/android"
xmlns:app="http://schemas.android.com/apk/res-auto"
xmlns:tools="http://schemas.android.com/tools"
android:layout_width="match_parent"
android:layout_height="match_parent"
tools:context=".Main12Activity">

<android.support.v4.view.ViewPager
android:id="@+id/viewPager"
android:layout_width="wrap_content"
android:layout_height="wrap_content"
android:layout_gravity="center" >
<!--导航条-->
<android.support.v4.view.PagerTabStrip
android:id="@+id/pagerTab"
android:layout_width="wrap_content"
android:layout_height="wrap_content"
android:layout_gravity="top" />//bottom,导航栏在下方
</android.support.v4.view.ViewPager>

</LinearLayout>
为界面自定义布局layout1.xml、layout2.xml、layout3.xml、layout4.xml
<?xml version="1.0" encoding="utf-8"?>
<LinearLayout xmlns:android="http://schemas.android.com/apk/res/android"
android:layout_width="match_parent"
android:layout_height="match_parent">

<ImageView
android:layout_width="match_parent"
android:layout_height="match_parent"
android:src="@mipmap/b"//自定义图片内容
android:scaleType="centerCrop"
android:id="@+id/imageView"/>
</LinearLayout>
Activity文件
package com.example.myapplication;
import android.os.Bundle;
import android.support.annotation.NonNull;
import android.support.annotation.Nullable;
import android.support.design.widget.FloatingActionButton;
import android.support.design.widget.Snackbar;
import android.support.v4.view.PagerAdapter;
import android.support.v4.view.PagerTabStrip;
import android.support.v4.view.ViewPager;
import android.support.v7.app.AppCompatActivity;
import android.support.v7.widget.Toolbar;
import android.view.View;
import android.view.ViewGroup;
import java.util.ArrayList;
/*
* viewpager组件的使用
* */
public class Main12Activity extends AppCompatActivity {
private ViewPager viewPager;
private PagerTabStrip pagerTabStrip;
//设置标题
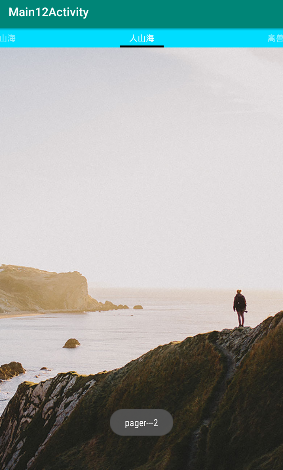
private String[] titles={"人像","山海","人山海","禽兽"};
//装布局
private ArrayList<View> views=new ArrayList<>();
@Override
protected void onCreate(Bundle savedInstanceState) {
super.onCreate(savedInstanceState);
setContentView(R.layout.activity_main12);
viewPager=findViewById(R.id.viewPager);
pagerTabStrip=findViewById(R.id.pagerTab);
initViews();
viewPager.setAdapter(new MyPagerAdapter());
}
private void initViews(){
views.add(getLayoutInflater().inflate(R.layout.layout1,null));
views.add(getLayoutInflater().inflate(R.layout.layout2,null));
views.add(getLayoutInflater().inflate(R.layout.layout3,null));
views.add(getLayoutInflater().inflate(R.layout.layout4,null));
}
//适配器
class MyPagerAdapter extends PagerAdapter{
@Override
public int getCount() {
return views.size();
}
//实例化选项卡
@NonNull
@Override
public Object instantiateItem(@NonNull ViewGroup container, int position) {
View v=views.get(position);
container.addView(v);
return v;
}
//删除选项卡
@Override
public void destroyItem(@NonNull ViewGroup container, int position, @NonNull Object object) {
container.removeView(views.get(position));
}
//获取标题
@Nullable
@Override
public CharSequence getPageTitle(int position) {
return titles[position];
}
//判断当前视图是否为返回对象
@Override
public boolean isViewFromObject(@NonNull View view, @NonNull Object o) {
return view==o;
}
}
}
ViewPager属性配置
设置标题栏颜色,在initViews()方法中添加
pagerTabStrip.setBackgroundColor(getResources().getColor(android.R.color.holo_blue_light));
pagerTabStrip.setBackgroundColor(getResources().getColor(android.R.color.holo_blue_bright));
pagerTabStrip.setTextColor(Color.WHITE);
设置事件方法,设置接口
implements ViewPager.OnPageChangeListener
设置方法
//页面被切换
@Override
public void onPageScrolled(int i, float v, int i1) {

}
//页面被选中
@Override
public void onPageSelected(int i) {
Toast.makeText(this, "pager---"+i, Toast.LENGTH_SHORT).show();
}
//页面状态正在发生变化
@Override
public void onPageScrollStateChanged(int i) {

}
在initViews()下注册事件
viewPager.setOnPageChangeListener(this);
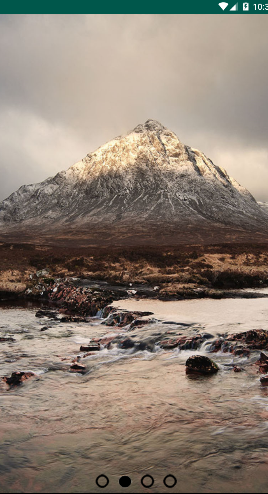
ViewPager程序首次启动引导案例
配置布局文件,添加小圆点图片
<?xml version="1.0" encoding="utf-8"?>
<FrameLayout xmlns:android="http://schemas.android.com/apk/res/android"
xmlns:app="http://schemas.android.com/apk/res-auto"
xmlns:tools="http://schemas.android.com/tools"
android:layout_width="match_parent"
android:layout_height="match_parent"
tools:context=".Main13Activity">

<android.support.v4.view.ViewPager
android:id="@+id/viewPager"
android:layout_width="wrap_content"
android:layout_height="wrap_content"
android:layout_gravity="center" />

<LinearLayout
android:layout_width="wrap_content"
android:layout_height="wrap_content"
android:layout_gravity="center|bottom"
android:id="@+id/point_layout">
<ImageView
android:layout_width="wrap_content"
android:layout_height="wrap_content"
android:src="@drawable/y1"/>
<ImageView
android:layout_width="wrap_content"
android:layout_height="wrap_content"
android:src="@drawable/y1"/>
<ImageView
android:layout_width="wrap_content"
android:layout_height="wrap_content"
android:src="@drawable/y1"/>
<ImageView
android:layout_width="wrap_content"
android:layout_height="wrap_content"
android:src="@drawable/y1"/>
</LinearLayout>

</FrameLayout>
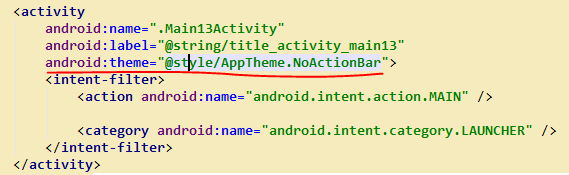
若要不显示标题栏,在清单文件中,添加一段代码

并且Activity类中的继承类也要改为Activity

改为

Activity文件
package com.example.myapplication;

import android.app.Activity;
import android.os.Bundle;
import android.support.annotation.NonNull;
import android.support.annotation.Nullable;
import android.support.design.widget.FloatingActionButton;
import android.support.design.widget.Snackbar;
import android.support.v4.view.PagerAdapter;
import android.support.v4.view.ViewPager;
import android.support.v7.app.AppCompatActivity;
import android.support.v7.widget.Toolbar;
import android.view.View;
import android.view.ViewGroup;
import android.widget.ImageView;
import android.widget.LinearLayout;

import java.util.ArrayList;

public class Main13Activity extends Activity implements ViewPager.OnPageChangeListener {
private ViewPager viewPager;
private ArrayList<View> views=new ArrayList<>();
private ImageView[] imageViews;
private int currentIndex=0;//当前正在显示的页面
@Override
protected void onCreate(Bundle savedInstanceState) {
super.onCreate(savedInstanceState);
setContentView(R.layout.activity_main13);
initViews();
initPoint();
}
private void initViews(){
viewPager=findViewById(R.id.viewPager);
views.add(getLayoutInflater().inflate(R.layout.layout1,null));
views.add(getLayoutInflater().inflate(R.layout.layout2,null));
views.add(getLayoutInflater().inflate(R.layout.layout3,null));
views.add(getLayoutInflater().inflate(R.layout.layout4,null));
//初始化view
viewPager.setOnPageChangeListener(this);
viewPager.setAdapter(new MyPagerAdapter());
}
private void initPoint(){
LinearLayout point_layout=findViewById(R.id.point_layout);
imageViews=new ImageView[views.size()];
for (int i=0;i<imageViews.length;i++){
imageViews[i]= (ImageView) point_layout.getChildAt(i);
}
currentIndex=0;
imageViews[currentIndex].setImageResource(R.drawable.y2);
}
//设置小圆点图片
private void setCurrentPoint(int position){
if (currentIndex<0||currentIndex==position||currentIndex>imageViews.length-1){
return;
}
imageViews[currentIndex].setImageResource(R.drawable.y1);
imageViews[position].setImageResource(R.drawable.y2);
currentIndex=position;
}
@Override
public void onPageScrolled(int i, float v, int i1) {

}

@Override
public void onPageSelected(int i) {
setCurrentPoint(i);
}

@Override
public void onPageScrollStateChanged(int i) {

}

//适配器
class MyPagerAdapter extends PagerAdapter {

@Override
public int getCount() {
return views.size();
}
//实例化选项卡
@NonNull
@Override
public Object instantiateItem(@NonNull ViewGroup container, int position) {
View v=views.get(position);
container.addView(v);
return v;
}
//删除选项卡
@Override
public void destroyItem(@NonNull ViewGroup container, int position, @NonNull Object object) {
container.removeView(views.get(position));
}

//判断当前视图是否为返回对象
@Override
public boolean isViewFromObject(@NonNull View view, @NonNull Object o) {
return view==o;
}
}
}


- Android高级界面组件的学习(一)
- Androidc学习笔记八之UI及高级开发技巧
- Android学习7--高级界面组件
- Android UI学习组件概述
- Android-高级UI控件_TabHost标签组件
- Android UI学习组件概述
- Android高级界面组件的学习(二)
- Android Action Bar【高级UI学习】
- Android高级界面组件的学习(三)
- Android UI新组件学习和使用
- [Android UI]基础组件的学习——ToggleButton的使用及样式修改
- Android UI学习组件概述
- Android UI学习 - Tab的学习和使用 推荐
- android 高级组件之Spinner
- Android 分享两个你学习android 平台开发必须碰到的几个知识点的组件【天气预报、日期】View 组件 推荐
- android 高级组件之 AutoCompleteTextView
- android开发_Intent高级学习(保存Activity状态)
- Android UI学习 - Tab的学习和使用【转】
- Android_文档学习_UI_Creating Dialogs
- Android UI学习 - Menu