Spring Boot学习笔记1:快速入门
2019-03-02 05:54
591 查看
Spring Boot学习笔记1:Hello World
使用Spring Initializr创建Spring Boot项目
Intellij中的
Spring Initializr工具,它同Web提供的创建功能一样,可以帮助快速的构建出一个基础的Spring Boot/Cloud工程。
- 菜单栏中选择
File=>New=>Project...
,可以看到如下图所示的创建功能窗口。其中Initial Service Url
指向的地址就是Spring官方提供的Spring Initializr工具地址,所以这里创建的工程实际上也是基于它的Web工具来实现的。

- 点击
Next
,等待片刻后,可以看到如下图所示的工程信息窗口,在这里可以编辑我们想要创建的工程信息。其中,Type
可以改变要构建的工程类型,比如:Maven、Gradle;Language
可以选择:Java、Groovy、Kotlin。

- 点击
Next
,进入选择Spring Boot版本和依赖管理的窗口。在这里值的关注的是,它不仅包含了Spring Boot Starter POMs中的各个依赖,还包含了Spring Cloud的各种依赖。这里我添加了Web项目的依赖。

- 点击
Next
,进入最后关于工程物理存储的一些细节。最后,点击Finish就能完成工程的构建了。
项目结构解析
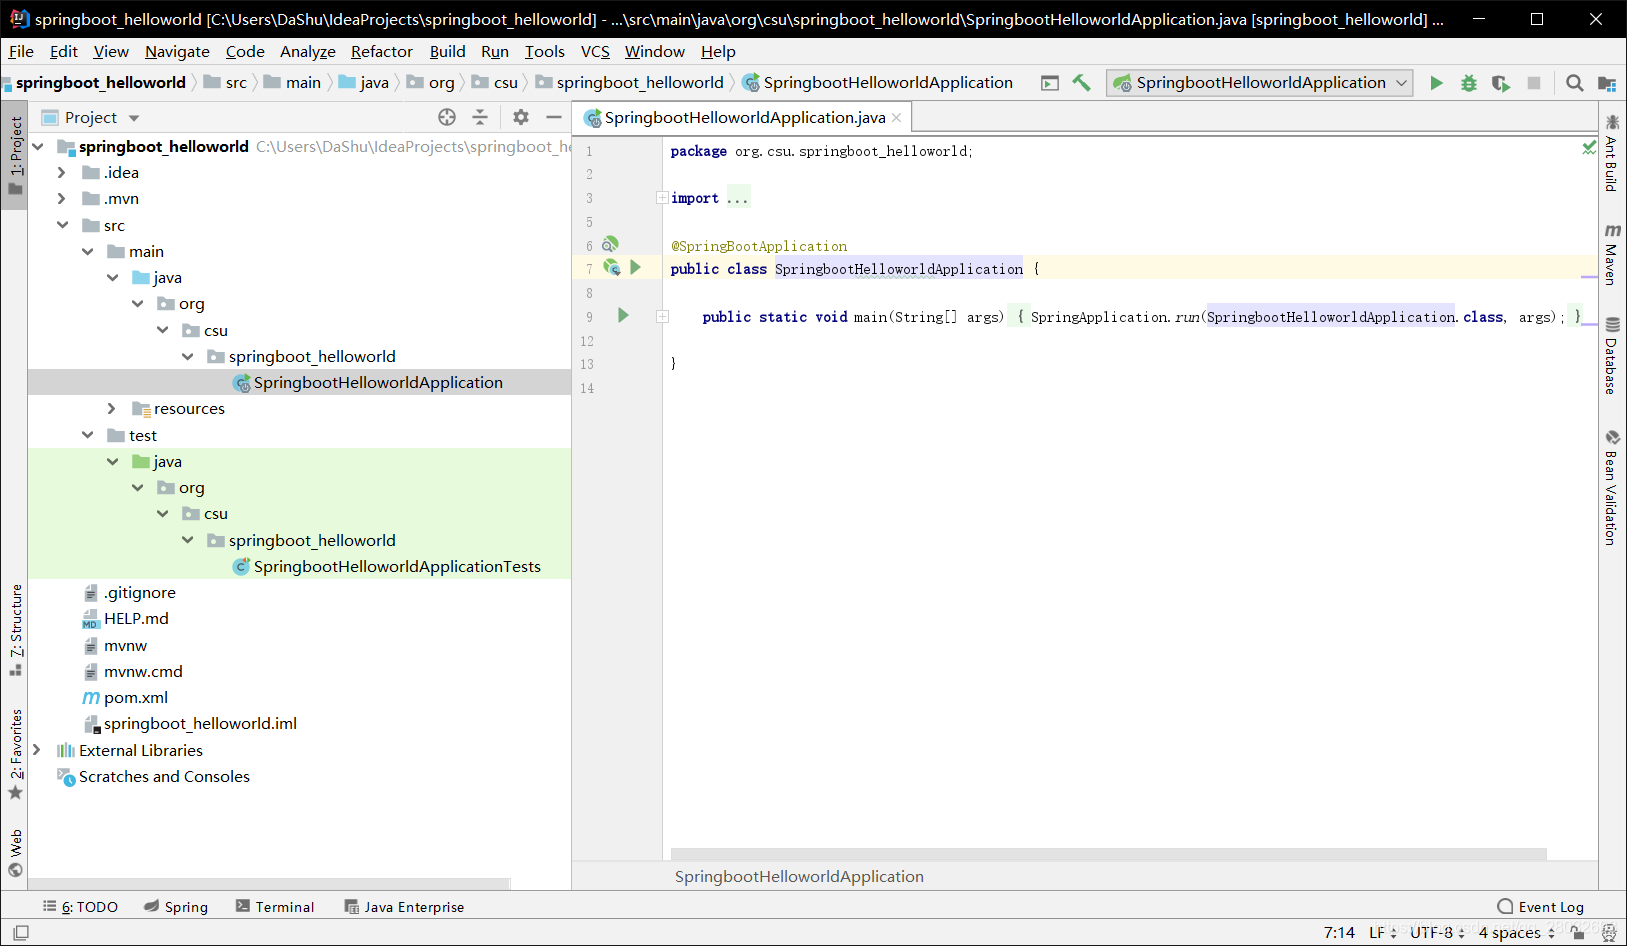
通过上面步骤完成了基础项目的创建,如上图所示,Spring Boot的基础结构共三个文件(具体路径根据用户生成项目时填写的Group所有差异):
src/main/java/
下的程序入口:SpringbootPropertiesApplication
src/main/resources/
下的配置文件:application.properties
src/test/
下的测试入口:SpringbootPropertiesApplicationTests
生成的
SpringbootPropertiesApplication和
SpringbootPropertiesApplicationTests类都可以直接运行来启动当前创建的项目,由于目前该项目未配合任何数据访问或Web模块,程序会在加载完Spring之后结束运行。
当前的pom.xml内容如下:
<?xml version="1.0" encoding="UTF-8"?>
<project xmlns="http://maven.apache.org/POM/4.0.0" xmlns:xsi="http://www.w3.org/2001/XMLSchema-instance"
xsi:schemaLocation="http://maven.apache.org/POM/4.0.0 http://maven.apache.org/xsd/maven-4.0.0.xsd">
<modelVersion>4.0.0</modelVersion>
<parent>
<groupId>org.springframework.boot</groupId>
<artifactId>spring-boot-starter-parent</artifactId>
<version>2.1.3.RELEASE</version>
<relativePath/> <!-- lookup parent from repository -->
</parent>
<groupId>org.csu</groupId>
<artifactId>springboot_helloworld</artifactId>
<version>0.0.1-SNAPSHOT</version>
<name>springboot_helloworld</name>
<description>Demo project for Spring Boot</description>

<properties>
<java.version>1.8</java.version>
</properties>

<dependencies>
<dependency>
<groupId>org.springframework.boot</groupId>
<artifactId>spring-boot-starter-web</artifactId>
</dependency>

<dependency>
<groupId>org.springframework.boot</groupId>
<artifactId>spring-boot-starter-test</artifactId>
<scope>test</scope>
</dependency>
</dependencies>

<build>
<plugins>
<plugin>
<groupId>org.springframework.boot</groupId>
<artifactId>spring-boot-maven-plugin</artifactId>
</plugin>
</plugins>
</build>

</project>
父级依赖:
spring-boot-starter-parent
:这是Spring Boot的父级依赖,这样当前的项目就是Spring Boot项目了。spring-boot-starter-parent 是一个特殊的starter,它用来提供相关的Maven默认依赖。使用它之后,常用的包依赖可以省去version标签。
两个模块:
spring-boot-starter-web
:Web模块。spring-boot-starter-test
:测试模块,包括JUnit、Hamcrest、Mockito。
编写HelloWorld服务
创建HelloController类,内容如下:
@RestController
public class HelloController {

@RequestMapping("/hello")
public String index() {
return "Hello World";
}
}
启动主程序,打开浏览器访问
http://localhost:8080/hello,可以看到页面输出Hello World
编写单元测试用例
在HelloController类中右键
Generate...–>Test...,在
src/test/下自动创建一个
HelloController的单元测试类
HelloControllerTest。
测试代码如下:
@RunWith(SpringRunner.class)
@WebMvcTest(HelloController.class)
public class HelloControllerTest {

@Autowired
private MockMvc mockMvc;

@Test
public void index() throws Exception {
mockMvc.perform(MockMvcRequestBuilders.get("/hello"))
.andExpect(MockMvcResultMatchers.status().isOk())
.andExpect(MockMvcResultMatchers.content().string("Hello World"));
}
}
至此已完成目标,通过Maven构建了一个空白Spring Boot项目,再通过引入web模块实现了一个简单的请求处理。
GitHub示例

相关文章推荐
- (小白学习笔记)Springboot入门(一):Specification
- spring boot框架学习1-认识spring boot和快速入门
- Spring Boot 学习笔记1——原理入门
- Spring学习笔记(3)——快速入门
- 01.Spring Cloud学习笔记之使用IDEA+Spring Boot快速构建Rest服务
- Spring Boot官方文档学习——Spring Boot快速入门
- Spring boot学习教程之快速入门篇
- SpringBoot学习笔记 入门
- springboot学习(二) Spring Boot 快速入门
- spring-boot入门学习笔记
- SpringBoot 快速入门笔记
- spring boot框架学习1-认识spring boot和快速入门
- spring boot框架学习1-认识spring boot和快速入门
- Springboot入门学习笔记(二)
- Spring Boot 学习笔记(一)——入门
- Spring boot入门实例 简易登录(精通Spring+4.x++企业应用开发实战 学习笔记二)
- Spring Boot学习笔记-快速示例
- Spring学习笔记[2] -- IOC快速入门
- Spring Boot 基础知识学习(一)——快速入门
- [Spring入门学习笔记][Spring Boot]