Linux中数据库的应用
2019-02-21 17:30
120 查看
1.mariadb下载
配置yum源
yum install mariadb-server.x86_64 -y

systemctl start mariadb
2.安全初始化
netstat -antlupe | grep mysql ##查看mysql接口是否开放
默认情况下,数据库网络接口是打开的
为了安全需要关闭此接口

vim /etc/my.cnf
10 skip-networking=1	##关闭网络接口
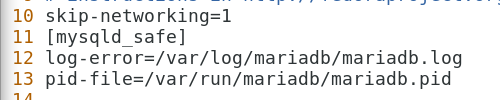
systemctl restart mariadb.service

数据库起始状态设定信息是不安全的,需要做以下设定:
mysql_secure_installation
NOTE: RUNNING ALL PARTS OF THIS SCRIPT IS RECOMMENDED FOR ALL MariaDB
SERVERS IN PRODUCTION USE!  PLEASE READ EACH STEP CAREFULLY!

In order to log into MariaDB to secure it, we'll need the current
password for the root user.  If you've just installed MariaDB, and
you haven't set the root password yet, the password will be blank,
so you should just press enter here.

Enter current password for root (enter for none): 		##原始密码为空,enter
OK, successfully used password, moving on...

Setting the root password ensures that nobody can log into the MariaDB
root user without the proper authorisation.

Set root password? [Y/n] 			##是否建立root密码
New password:
Re-enter new password:
Password updated successfully!
Reloading privilege tables..
... Success!

By default, a MariaDB installation has an anonymous user, allowing anyone
to log into MariaDB without having to have a user account created for
them.  This is intended only for testing, and to make the installation
go a bit smoother.  You should remove them before moving into a
production environment.

Remove anonymous users? [Y/n] 			##移除匿名用户登陆权限
... Success!

Normally, root should only be allowed to connect from 'localhost'.  This
ensures that someone cannot guess at the root password from the network.

Disallow root login remotely? [Y/n] 		##不允许root用户远程进入系统
... Success!

By default, MariaDB comes with a database named 'test' that anyone can
access.  This is also intended only for testing, and should be removed
before moving into a production environment.

Remove test database and access to it? [Y/n] 		##删除测试数据库
- Dropping test database...
... Success!
- Removing privileges on test database...
... Success!

Reloading the privilege tables will ensure that all changes made so far
will take effect immediately.

Reload privilege tables now? [Y/n] 			##立即重新加载状态信息表
... Success!

Cleaning up...

All done!  If you've completed all of the above steps, your MariaDB
installation should now be secure.

Thanks for using MariaDB!
3.数据库root密码修改
mysqladmin -uroot -pwestos password 123
当超级用户密码忘记时:
systemctl stop mariadb
mysqld_safe --skip-grant-tables &

mysql
update mysql.user set Password=password('westos') where User='root';
4000

ps aux | grep mysql		##查询mysql进程id

kill -9 mysql的所有进程id

systemctl start mariadb

测试:
mysql -uroot -p ##使用更改后密码

4.数据库的管理
1.建立
SHOW DATABASES;         ##列出库
CREATE DATABASE westos; ##建立库
USE westos;             ##进出库

CREATE TABLE  linux (   ##建立表
-> username varchar(50) not null,
-> password varchar(50) not null
-> );
DESC linux;          				##查看表结构

INSERT INTO linux VALUES ('wang','123');         ##插入数据到linux表中
SELECT * FROM linux;                            ##查询所有字段在linux表中
SELECT username,password  FROM linux;           ##查询指定字段在linux表中

2.更改
数据库名字不建议修改,如须修改需要备份,删除重建,再将备份数据导入
数据库中表的名字可以修改
MariaDB [westos]> SHOW TABLES;
+------------------+
| Tables_in_westos |
+------------------+
| linux            |
+------------------+
MariaDB [westos]> ALTER TABLE linux RENAME westos;		##修改表名称
Query OK, 0 rows affected (0.04 sec)

MariaDB [westos]> SHOW TABLES;
+------------------+
| Tables_in_westos |
+------------------+
| westos           |
+------------------+

UPDATE linux SET password=password('wang') where username='wang'; ##为wang设置加密密码

ALTER TABLE linux ADD class varchar(20);		##为linux表加class字段
MariaDB [westos]> SELECT * FROM linux;			##查看表
+----------+----------+-------+
| username | password | class |
+----------+----------+-------+
| ahaha    | 123      | NULL  |
| lee      | 123      | NULL  |
| zhao     | abc      | NULL  |
+----------+----------+-------+

ALTER TABLE linux DROP class; ##删除class字段

ALTER TABLE linux ADD age varchar(20) AFTER  password;		##将age添加在password之后
ALTER TABLE linux ADD class varchar(20) AFTER  username;

UPDATE linux SET class='linux';		##修改一个字段

UPDATE linux SET class='java' WHERE username='zhao'AND password=456;	##修改某一对象,条件越多越精确。

3.删除
DELETE FROM westos.linux WHERE username='lee';

DROP TABLE linux;			##删除linux表
MariaDB [westos]> DROP TABLE linux;
Query OK, 0 rows affected (0.38 sec)

MariaDB [westos]> SELECT * FROM linux;
ERROR 1146 (42S02): Table 'westos.linux' doesn't exist

DROP DATAASE westos; ##删除westos库

4.用户授权
CREATE USER  zhang@'localhost' identified by 'westos';		##添加普通用户zhang可以本地登陆
GRANT SELECT,INSERT on westos.* TO lee@localhost;		##对lee授权westos的
SHOW GRANTS FOR lee@localhost;					##查看lee的权限
REVOKE INSERT ON westos.*  FROM lee@localhost;			##撤销lee插入的权限
DROP USER lee@localhost						##删除lee
SELECT User from mysql.user;					##查询用户

FLUSH PRIVILEGES;       ##刷新
5.数据库的备份
mysqldump -uroot -pwestos westos > /mnt/westos.sql	##备份westos库到/mnt/westos.sql
mysqldump -uroot -pwestos westos  --no-data		##只备份表框架不备份信息
mysqldump -uroot -pwestos --all-database		##备份所有数据库
mysqldump -uroot -pwestos --all-database  --no-data	##备份所有库不包括数据
恢复方式1
mysql -uroot -pwestos -e "CREATE DATABASE westos;"
mysql -uroot -pwestos westos < /mnt/westos.sql

恢复方式2
mysql -uroot -pwestos  < /mnt/westos.sql
ERROR 1046 (3D000) at line 22: No database selected		##直接恢复会报错

vim /mnt/westos.sql
21 CREATE DATABASE westos;
22 USE westos;

mysql -uroot -pwestos < /mnt/wesoto.sql ##成功恢复

5 .安装phpmyadmin 数据库图形管理
1.下载phpMyAdmin-3.4.0-all-languages
2.yum install php php-mysql -y
3.systemctl restart httpd
4. tar jxf phpMyAdmin-3.4.0-all-languages -C /var/www/html ##解压到/var/www/html
5.mv phpMyAdmin-3.4.0-all-languages mysqladmin ##重命名
6.cd mysqladmin
7.cp config.sample.inc.php config.inc.php
8.vim config.inc.php
$cfg[‘blowfish_secret’] = ‘ba17c1ec07d65003’;

相关文章推荐
- Linux数据库系统MySQL应用概述
- linux企业版笔记之网络数据库MySQL的配置与应用
- 将数据库访问集成到 Linux 应用中
- [转] 将数据库访问集成到 Linux 应用中
- [转] 将数据库访问集成到 Linux 应用中
- Linux 下用 C 开发 MySql 数据库应用
- Sqlite 数据库在基于 Linux 的 Media NAS 系统中的应用
- 部署到Linux-部署J2EE应用-数据库准备
- 数据库_MySQL应用_Linux下 开放/关闭 mysql的访问权限
- Linux网络数据库MySQL服务的配置与应用
- [转] 将数据库访问集成到 Linux 应用中
- 程序中应用数据库(Linux)
- Linux数据库系统MySQL应用概述
- Manual | BSD手册| Linux手册 | 数据库手册 | 编程开发手册 | WEB开发手册 | 软件应用手册 | 网络技术手册 | GNU手册
- Linux下iptables端口转发实现跳转访问数据库应用场景:假设有A、B、C三台设备,A<
- Ruby on Rails,一个简单的CMS系统,创建应用骨架并与数据库连接
- IBM X3400服务器安装Linux操作系统和Oracle11G R2 64位数据库
- 数据库应用优化
- Vs2013在Linux开发中的应用(34):Ctrl + F5支持
- Linux下Patch的应用和制作方法介绍