基于TensorFlow的Cats vs. Dogs
2019-01-23 11:00
197 查看
Cats vs. Dogs(猫狗大战)是Kaggle大数据竞赛某一年的一道赛题,利用给定的数据集,用算法实现猫和狗的识别。
数据集可以从Kaggle官网上下载或者:网盘提取码:k7ik
电脑配置环境:win10+cuda9.0+cudnn v7+anaconda+tensorflow1.8(gpu)
IDE:pycham
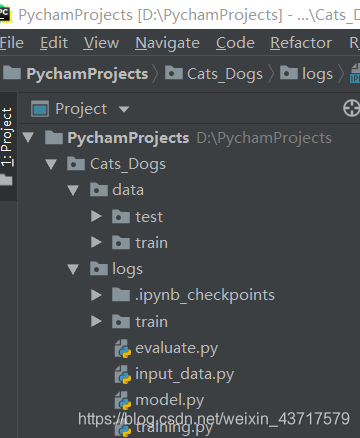
- 新建data文件夹下包含test和train两个子文件夹,分别用于存放测试数据和训练数据,下载的数据直接解压到相应的文件夹下即可
- logs文件夹用于存放我们训练时的模型结构以及训练参数
- input_data.py负责实现读取数据,生成批次(batch)
- model.py负责实现我们的神经网络模型
- training.py负责实现模型的训练以及评估
1. 数据的读取——input_data.py
函数
get_files(file_dir)的功能是获取给定路径
file_dir下的所有的训练数据(包括图片和标签),以list的形式返回。
由于训练数据前12500张是猫,后12500张是狗,如果直接按这个顺序训练,训练效果可能会受影响(我自己猜的),所以需要将顺序打乱,至于是读取数据的时候乱序还是训练的时候乱序可以自己选择(视频里说在这里乱序速度比较快)。因为图片和标签是一一对应的,所以要整合到一起乱序。
这里先用
np.hstack()方法将猫和狗图片和标签整合到一起,得到image_list和label_list,hstack((a,b))的功能是将a和b以水平的方式连接,比如原来cats和dogs是长度为12500的向量,执行了hstack(cats, dogs)后,image_list的长度为25000,同理label_list的长度也为25000。接着将一一对应的image_list和label_list再合并一次。temp的大小是2×25000,经过转置(变成25000×2),然后使用
np.random.shuffle()方法进行乱序。
最后从temp中分别取出乱序后的image_list和label_list列向量,作为函数的返回值。这里要注意,因为label_list里面的数据类型是字符串类型,所以加上label_list = [int(i) for i in label_list]这么一行将其转为int类型。
# coding=utf-8
import tensorflow as tf
import numpy as np
import os

train_dir = 'D:/PychamProjects/Cats_Dogs/data/train/'

def get_files(file_dir):
'''
Args:
file_dir: file directory
Returns:
list of images and labels
'''
cats = []
label_cats = []
dogs = []
label_dogs = []
for file in os.listdir(file_dir):
# name = file.split(sep='.')
name = file.split('.')
if name[0] == 'cat':
cats.append(file_dir + file)
label_cats.append(0)  #获取路径下所有猫的图片路径,存放到cats,同时贴上标签0
else:
dogs.append(file_dir + file)
label_dogs.append(1)
print('There are %d cats\nThere are %d dogs' % (len(cats), len(dogs)))
#把cat dog合起来组成一个list
image_list = np.hstack((cats, dogs))
label_list = np.hstack((label_cats, label_dogs))
#利用shuuffle打乱顺序
temp = np.array([image_list, label_list])
temp = temp.transpose()
np.random.shuffle(temp)
# 从打乱的temp中再取出list(img和lab
image_list = list(temp[:, 0])
label_list = list(temp[:, 1])
label_list = [int(i) for i in label_list]

return image_list, label_list

# 裁剪图片
#将上面生成的List传入get_batch() ,转换类型,产生一个输入队列queue,因为img和lab是分开的,
#所以使用tf.train.slice_input_producer(),然后用tf.read_file()从队列中读取图像
def get_batch(image, label, image_W, image_H, batch_size, capacity):
'''
Args:
image: list type
label: list type
image_W: image width
image_H: image height
batch_size: batch size
capacity: the maximum elements in queue
Returns:
image_batch: 4D tensor [batch_size, width, height, 3], dtype=tf.float32
label_batch: 1D tensor [batch_size], dtype=tf.int32
'''
# 转换类型
# 将python.list类型转换成tf能够识别的格式
image = tf.cast(image, tf.string)
label = tf.cast(label, tf.int32)

# make an input queue
input_queue = tf.train.slice_input_producer([image, label])

label = input_queue[1]
image_contents = tf.read_file(input_queue[0]) #read img from a queue
#将图像解码,不同类型的图像不能混在一起,要么只用jpeg,要么只用png等
image = tf.image.decode_jpeg(image_contents, channels=3)

#数据预处理,对图像进行旋转、缩放、裁剪、归一化等操作,让计算出的模型更健壮。
image = tf.image.resize_image_with_crop_or_pad(image, image_W, image_H)

# if you want to test the generated batches of images, you might want to comment the following line.
# 如果想看到正常的图片,请注释掉(标准化)和 (image_batch = tf.cast(image_batch, tf.float32))
# 训练时不要注释掉!
image = tf.image.per_image_standardization(image)
#生成batch
image_batch, label_batch = tf.train.batch([image, label],
batch_size=batch_size,
num_threads=64,
capacity=capacity)

# you can also use shuffle_batch
#    image_batch, label_batch = tf.train.shuffle_batch([image,label],
#                                                      batch_size=BATCH_SIZE,
#                                                      num_threads=64,
#                                                      capacity=CAPACITY,
#                                                      min_after_dequeue=CAPACITY-1)
# 重新排列label,行数为[batch_size]
label_batch = tf.reshape(label_batch, [batch_size])
image_batch = tf.cast(image_batch, tf.float32)

return image_batch, label_batch
函数
get_batch()用于将图片分批次,因为一次性将所有25000张图片载入内存不现实也不必要,所以将图片分成不同批次进行训练。这里传入的image和label参数就是函数get_files()返回的image_list和label_list,是python中的list类型,所以需要将其转为TensorFlow可以识别的tensor格式
可以用下面的代码测试获取图片是否成功,因为之前将图片转为float32了,因此这里imshow()出来的图片色彩会有点奇怪,因为本来imshow()是显示uint8类型的数据(灰度值在uint8类型下是0~255,转为float32后会超出这个范围,所以色彩有点奇怪),不过这不影响后面模型的训练。
BATCH_SIZE = 5  # 批次中的图像数量
CAPACITY = 256  # 队列中最多容纳元素的个数
IMG_W = 208
IMG_H = 208

train_dir = 'D:/PychamProjects/Cats_Dogs/data/train/'

image_list, label_list = get_files(train_dir)
image_batch, label_batch = get_batch(image_list, label_list, IMG_W, IMG_H,
BATCH_SIZE, CAPACITY)

with tf.Session() as sess:
print("start")
i = 0
# 开始输入队列监控
coord = tf.train.Coordinator()  #
threads = tf.train.start_queue_runners(coord=coord)  # 启动入队线程

try:
while not coord.should_stop() and i < 1:

img, label = sess.run([image_batch, label_batch])  # 输入list结构

# just test one batch
# arange返回一个array对象([ ])
for j in np.arange(BATCH_SIZE):
print('label: %d' % label[j])
plt.imshow(img[j, :, :, :])
plt.show()
i += 1
except tf.errors.OutOfRangeError:
print('done!')
finally:
print('finished')
coord.request_stop()  # 通知其它线程关闭
2.构建模型
import tensorflow as tf

# 一个简单的卷积神经网络,卷积+池化层x2,全连接层x2,最后一个softmax层做分类。
def inference(images, batch_size, n_classes):
'''Bulid the model
Args:
n_classes = 2:二分类
images: image batch, 4D tensor, tf.float32, [batch_size, width, height, channels]
Returns:
output tensor with the computed logits, float, [batch_size, n_classes]
'''
# cov1, shape = [kernel size, kernel size, channels, kernel numbers]
with tf.variable_scope('conv1') as scope:
weights = tf.get_variable('weights',
shape=[3, 3, 3, 16],  # 16[kernel numbers]:跟计算的精度有关 16个3x3的卷积核(3通道)
dtype=tf.float32,
initializer=tf.truncated_normal_initializer(stddev=0.1,
dtype=tf.float32))
biases = tf.get_variable('biases',
shape=[16],
dtype=tf.float32,
initializer=tf.constant_initializer(0.1))  # 初始化0.1
conv = tf.nn.conv2d(images, weights, strides=[1, 1, 1, 1], padding='SAME')
pre_activation = tf.nn.bias_add(conv, biases)
conv1 = tf.nn.relu(pre_activation, name=scope.name)

# pool1 and norm1 3x3最大池化,步长strides为2,池化后执行lrn()操作,局部响应归一化,对训练有利
with tf.variable_scope('poling_lrn') as scope:
pool1 = tf.nn.max_pool(conv1, ksize=[1, 3, 3, 1], strides=[1, 2, 2, 1],  # 标准数值
padding='SAME', name='pooling1')
norm1 = tf.nn.lrn(pool1, depth_radius=4, bias=1.0, alpha=0.001 / 9.0,  # 局部响应归一化函数。标准数值
beta=0.75, name='norm1')

# conv2
with tf.variable_scope('conv2') as scope:
weights = tf.get_variable('weights', shape=[3, 3, 16, 16], #16个3x3的卷积核(16通道)
dtype=tf.float32,
initializer=tf.truncated_normal_initializer(stddev=0.1,
dtype=tf.float32))
biases = tf.get_variable('biases',
shape=[16],
dtype=tf.float32,
initializer=tf.constant_initializer(0.1))
conv = tf.nn.conv2d(norm1, weights, strides=[1, 1, 1, 1], padding='SAME')
pre_activation = tf.nn.bias_add(conv, biases)
conv2 = tf.nn.relu(pre_activation, name='conv2')

# pool2 and norm2
with tf.variable_scope('pooling2_lrn') as scope:
norm2 = tf.nn.lrn(conv2, depth_radius=4, bias=1.0, alpha=0.001 / 9.0,
beta=0.75, name='norm2')
pool2 = tf.nn.max_pool(norm2, ksize=[1, 3, 3, 1], strides=[1, 1, 1, 1],
padding='SAME', name='pooling2')

# local3 128个神经元,将之前pool层的输出reshape成一行,激活函数relu()
with tf.variable_scope('local3') as scope:
reshape = tf.reshape(pool2, shape=[batch_size, -1])  # 变换成向量
dim = reshape.get_shape()[1].value
weights = tf.get_variable('weights',
shape=[dim, 128],  # 全连接个数,128
dtype=tf.float32,
initializer=tf.truncated_normal_initializer(stddev=0.005,
dtype=tf.float32))

biases = tf.get_variable('biases',
shape=[128],
dtype=tf.float32,
initializer=tf.constant_initializer(0.1))
local3 = tf.nn.relu(tf.matmul(reshape, weights) + biases, name=scope.name)

# local4
with tf.variable_scope('local4') as scope:
weights = tf.get_variable('weights',
shape=[128, 128],
dtype=tf.float32,
initializer=tf.truncated_normal_initializer(stddev=0.005,
dtype=tf.float32))
biases = tf.get_variable('biases',
shape=[128],
dtype=tf.float32,
initializer=tf.constant_initializer(0.1))
local4 = tf.nn.relu(tf.matmul(local3, weights) + biases, name='local4')

# softmax 将前面的FC层输出,做一个线性回归,计算出每一类的得分,在这里是2类,所以这个层输出的是两个得分。
with tf.variable_scope('softmax_linear') as scope:
weights = tf.get_variable('softmax_linear',
shape=[128, n_classes],  # n_classes:2,表示二分类
dtype=tf.float32,
initializer=tf.truncated_normal_initializer(stddev=0.005,
dtype=tf.float32))
biases = tf.get_variable('biases',
shape=[n_classes],
dtype=tf.float32,
initializer=tf.constant_initializer(0.1))
softmax_linear = tf.add(tf.matmul(local4, weights), biases, name='softmax_linear')

return softmax_linear

# %%
def losses(logits, labels):
with tf.variable_scope('lose') as scope:
cross_entropy = tf.nn.sparse_softmax_cross_entropy_with_logits \
(logits=logits, labels=labels, name='xentropy_per_example')
loss = tf.reduce_mean(cross_entropy, name='loss')
tf.summary.scalar(scope.name + '/loss', loss)

return loss

# %% 训练优化
def training(loss, learning_rate):
with tf.name_scope('optimizer'):
optimizer = tf.train.AdamOptimizer(learning_rate=learning_rate)
global_step = tf.Variable(0, name='global_step', trainable=False)
train_op = optimizer.minimize(loss, global_step=global_step)

return train_op

# %%
def evalution(logits, labels):
with tf.variable_scope('accuracy') as scope:
correct = tf.nn.in_top_k(logits, labels, 1)  # 取最大值
correct = tf.cast(correct, tf.float16)
accuracy = tf.reduce_mean(correct)
tf.summary.scalar(scope.name + '/accuracy', accuracy)
return accuracy
3训练模型
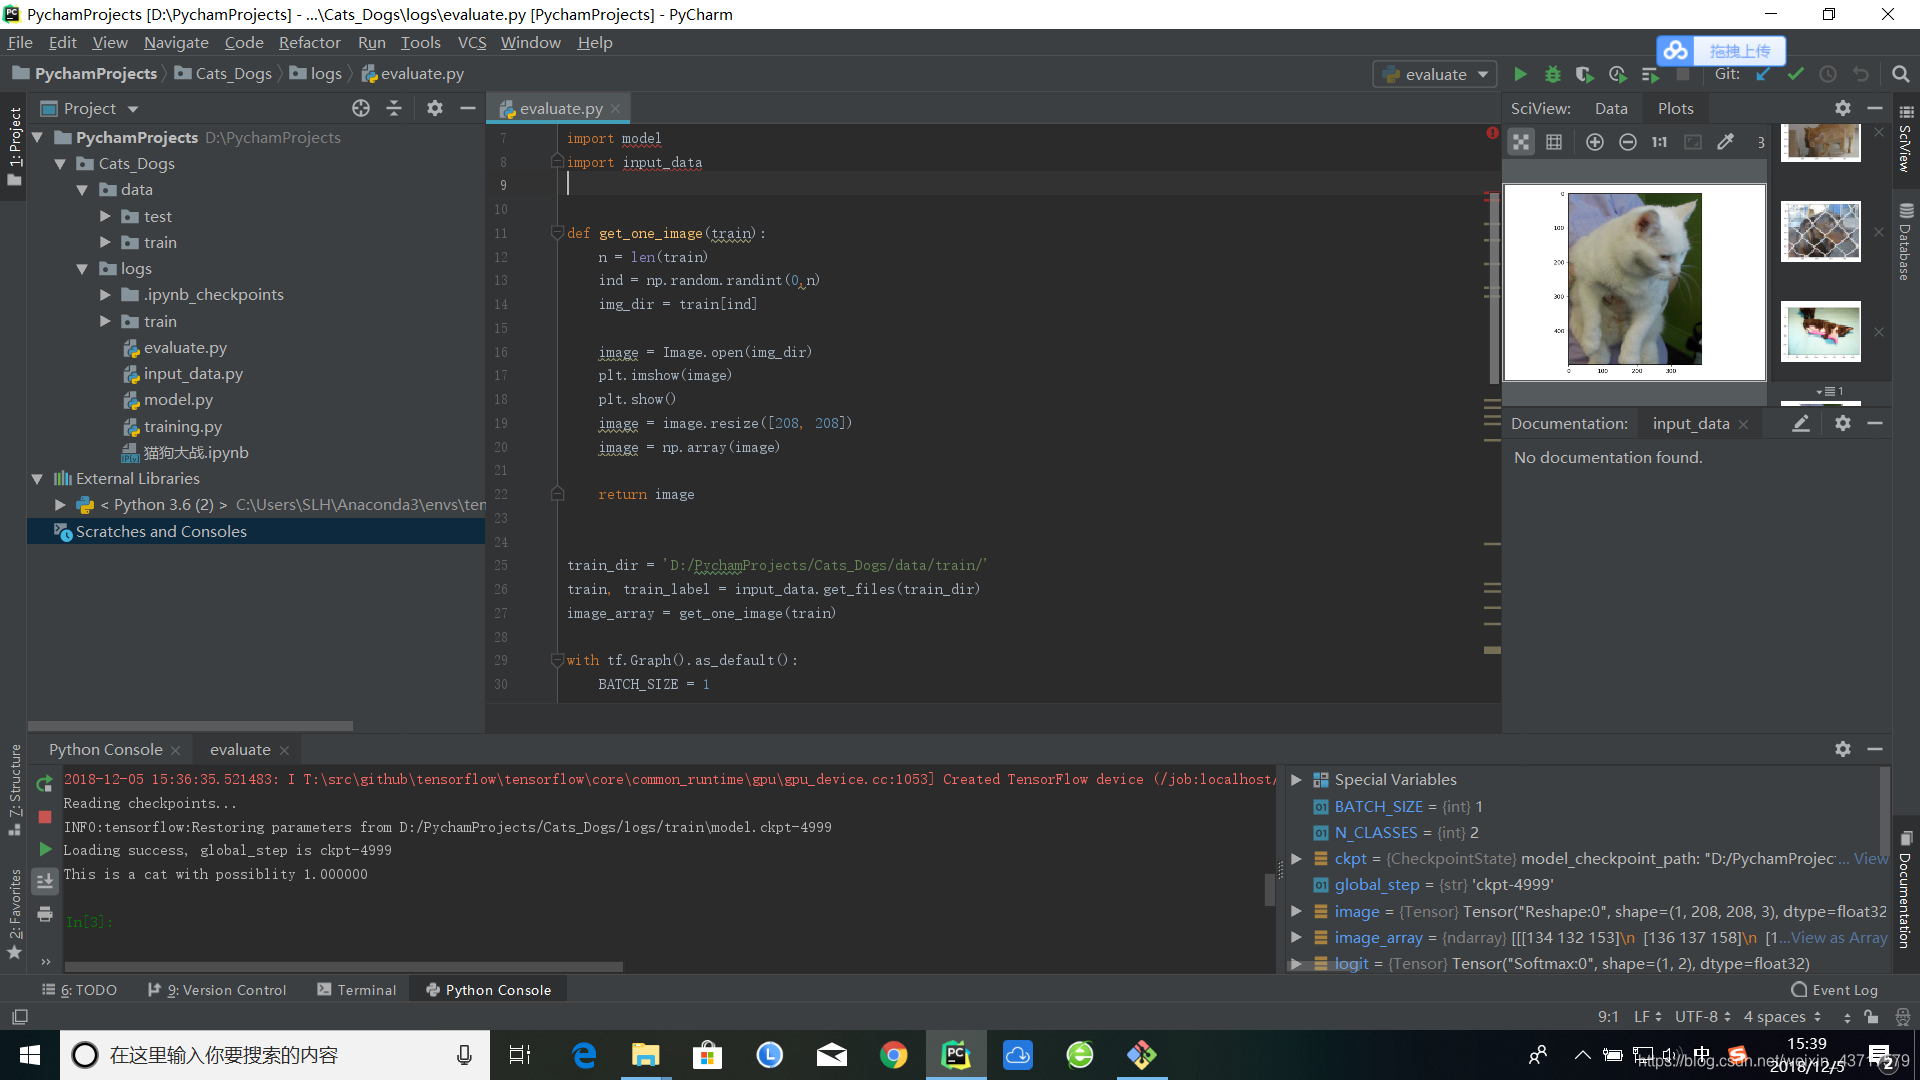
4.测试评估
evaluate.py
项目代码地址:codes github上传所用IDE为 jupyter notebook

相关文章推荐
- 基于TensorFlow的Cats vs. Dogs(猫狗大战)实现和详解(2)
- 基于TensorFlow的Cats vs. Dogs(猫狗大战)实现和详解(1)
- 深度学习8:Cats vs. Dogs实例学习
- Keras+Theano后端,CPU、GPU、cuDNN加速对比(Dogs vs. Cats和mnist)
- 使用VGG-16做kaggle cats vs dogs 图像分类
- Pytorch实战指南---使用Pytorch完成Kaggle上的经典比赛:Dogs vs Cats---updating
- Dogs vs. Cats Redux: Kernels Edition
- Kaggle : Using a Convolutional Neural Network for classifying Cats vs Dogs
- [catsVSdogs]猫狗大战代码注释讲解_1
- Kaggle Dogs vs. Cats Redux: Kernels Edition (猫狗大战)by Pytorch
- 如何在基于tensorflow的深度学习框架keras中指定GPU内存使用大小
- 基于栈的虚拟机 VS 基于寄存器的虚拟机
- windows环境VS2015编译TensorFlow C++程序完全攻略
- 个基于TensorFlow的简单故事生成案例:带你了解LSTM
- VS2012下基于Glut OpenGL GL_STENCIL_TEST示例程序:
- Win7环境下搭建Go开发环境,基于VSCode编辑器
- 基于TensorFlow的多层感知机
- VS2012下基于Glut 矩阵变换示例程序:
- 基于Tensorflow的android手写数字识别
- 发个小工具,基于VSS和VS的每日构建工具。