基于Linux系统部署Web服务器
部署Nginx+PHP环境
一、PHP的安装与使用
1)下载PHP
http://101.96.10.63/cn2.php.net/distributions/php-5.6.40.tar.gz
建议下载到终端,然后上传到Linux服务器,有时候效果比wget更佳。
2)通过yum安装依赖
#yum -y install libxml2-devel openssl-devel \
curl-devel libjpeg-devel libpng-devel freetype-devel
3)安装libmcrypt依赖
https://nchc.dl.sourceforge.net/project/mcrypt/Libmcrypt/2.5.8/libmcrypt-2.5.8.tar.gz
或者:ftp://mcrypt.hellug.gr/pub/crypto/mcrypt/libmcrypt
tar -zxvf libmcrypt-2.5.8.tar.gz
cd libmcrypt-2.5.8
./cofnigure
make && make install
4)安装PHP
#tar -zxvf php-5.6.40.tar.gz
#cd php-5.6.40
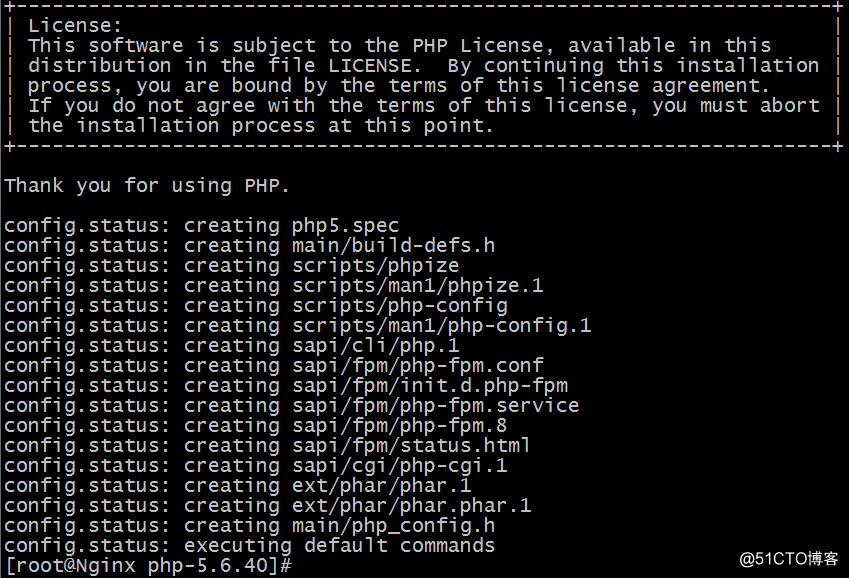
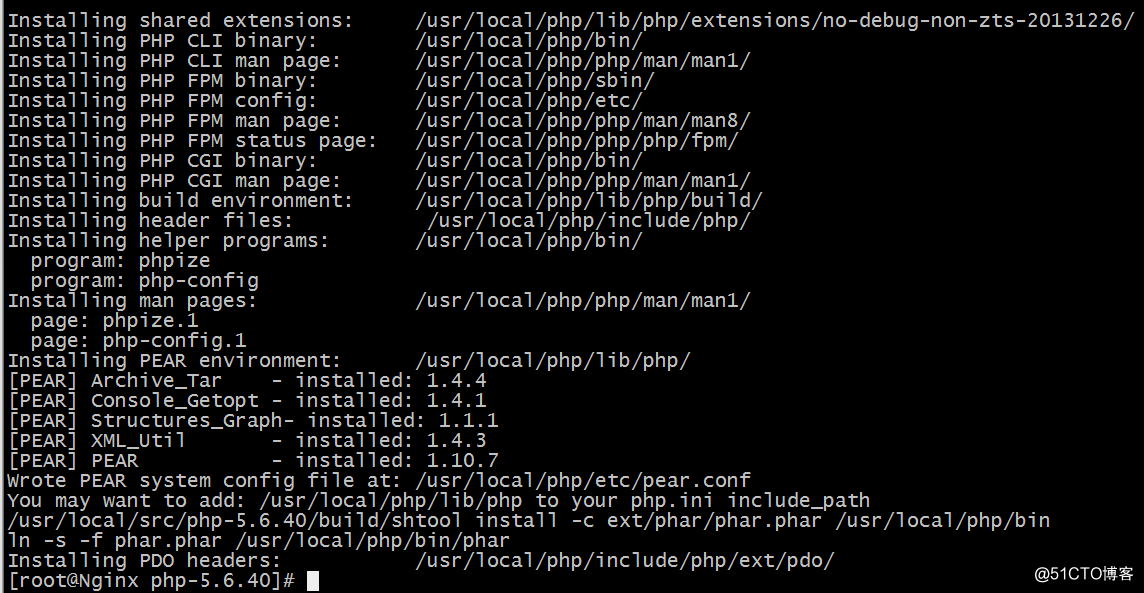
[root@Nginx php-5.6.40]# make && make install
5)测试PHP配置环境
通过php文件执行PHP代码
#vim test1.php
<?php
echo "Hello World!\n";
?>
[root@Nginx /]# /usr/local/php/bin/php -f test1.php
Hello World!
#vim test2.php
<?php
phpinfo();
?>
[root@Nginx /]# /usr/local/php/bin/php -f test2.php
......
#[root@Nginx /]# /usr/local/php/bin/php -f test2.php
直接执行PHP代码
[root@Nginx /]# /usr/local/php/bin/php -r 'echo 960+660,"\n";'
1620
二、PHP与Nginx整合
[root@Nginx /]# cd /usr/local/php/etc
[root@Nginx etc]# ls
pear.conf php-fpm.conf.default
[root@Nginx etc]# cp php-fpm.conf.default php-fpm.conf
[root@Nginx etc]# cd /usr//local/src/php-5.6.40
[root@Nginx php-5.6.40]# cp sapi/fpm/init.d.php-fpm /etc/init.d/php-fpm
通过chkconfig实现开机启动
[root@Nginx php-5.6.40]# chmod +x /etc/init.d/php-fpm
[root@Nginx php-5.6.40]# chkconfig --add php-fpm
或是
[root@Nginx php-5.6.40]# chkconfig --add /etc/init.d/php-fpm
通过service方式管理PHP-FPM,实现启动、重启或停止服务
[root@Nginx php-5.6.40]# /etc/init.d/php-fpm status
php-fpm is stopped
[root@Nginx /]# service php-fpm start
Starting php-fpm done
[root@Nginx /]# service php-fpm reload
Reload service php-fpm done
[root@Nginx /]# service php-fpm restart
Gracefully shutting down php-fpm . done
Starting php-fpm done
[root@Nginx /]# service php-fpm status
php-fpm (pid 13017) is running...
[root@Nginx /]# service php-fpm stop
查看程序进程和监听端口
[root@Nginx /]# netstat -lnt
Active Internet connections (only servers)
Proto Recv-Q Send-Q Local Address Foreign Address State
tcp 0 0 0.0.0.0:8001 0.0.0.0:* LISTEN
tcp 0 0 0.0.0.0:8002 0.0.0.0:* LISTEN
tcp 0 0 127.0.0.1:9000 0.0.0.0:* LISTEN
tcp 0 0 0.0.0.0:80 0.0.0.0:* LISTEN
tcp 0 0 0.0.0.0:22 0.0.0.0:* LISTEN
tcp 0 0 :::22 :::* LISTEN
[root@Nginx /]# ps aux|grep php
root 13017 0.0 0.1 105972 4808 ? Ss 14:21 0:00 php-fpm: master process (/usr/local/php/etc/php-fpm.conf)
nobody 13018 0.0 0.1 105972 4228 ? S 14:21 0:00 php-fpm: pool www
nobody 13019 0.0 0.1 105972 4228 ? S 14:21 0:00 php-fpm: pool www
root 13041 0.0 0.0 103332 904 pts/1 S+ 14:22 0:00 grep php
三、PHP配置文件
1)php.ini
[root@Nginx php-5.6.40]# ls |grep php.ini
php.ini-development
php.ini-production
[root@Nginx php-5.6.40]# cp php.ini-development /usr/local/php/lib/php.ini
2)在Nginx配置支持PHP
在虚拟机192.168.12.132为例,修改配置文件
[root@Nginx vhost]# vim 192.168.12.132
server {
listen 80;
server_name 192.168.12.132;
root html/192.168.12.132;
index index.html index.htm index.php;
location ~\.php$ {
fastcgi_pass 127.0.0.1:9000;
include fastcgi.conf;
}
}
3)在html/192.168.12.132目录中创建两个PHP文件用于测试
[root@Nginx www.ng.test]# echo '<?php echo OK;'>test.php;
[root@Nginx www.ng.test]# echo '<?php phpinfo();'>index.php;
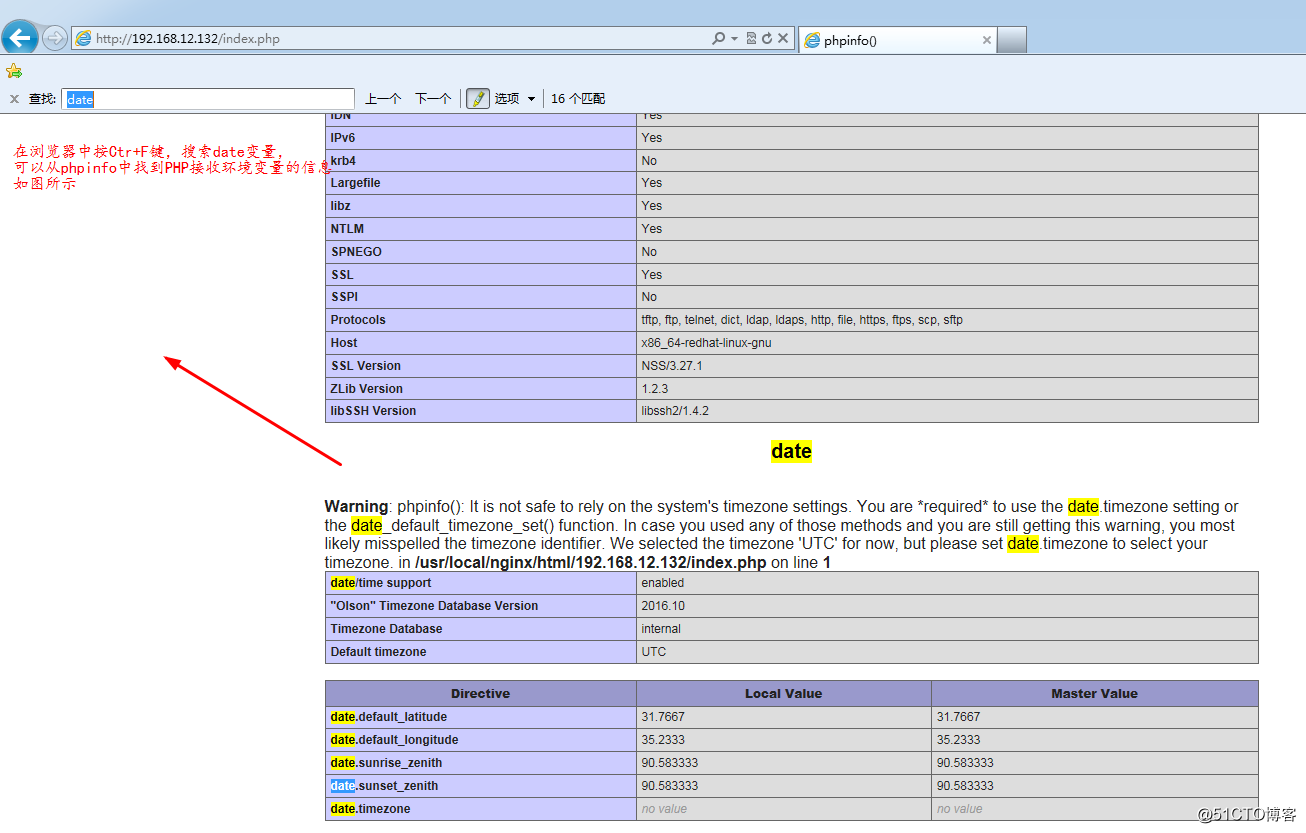
4)测试运行结果

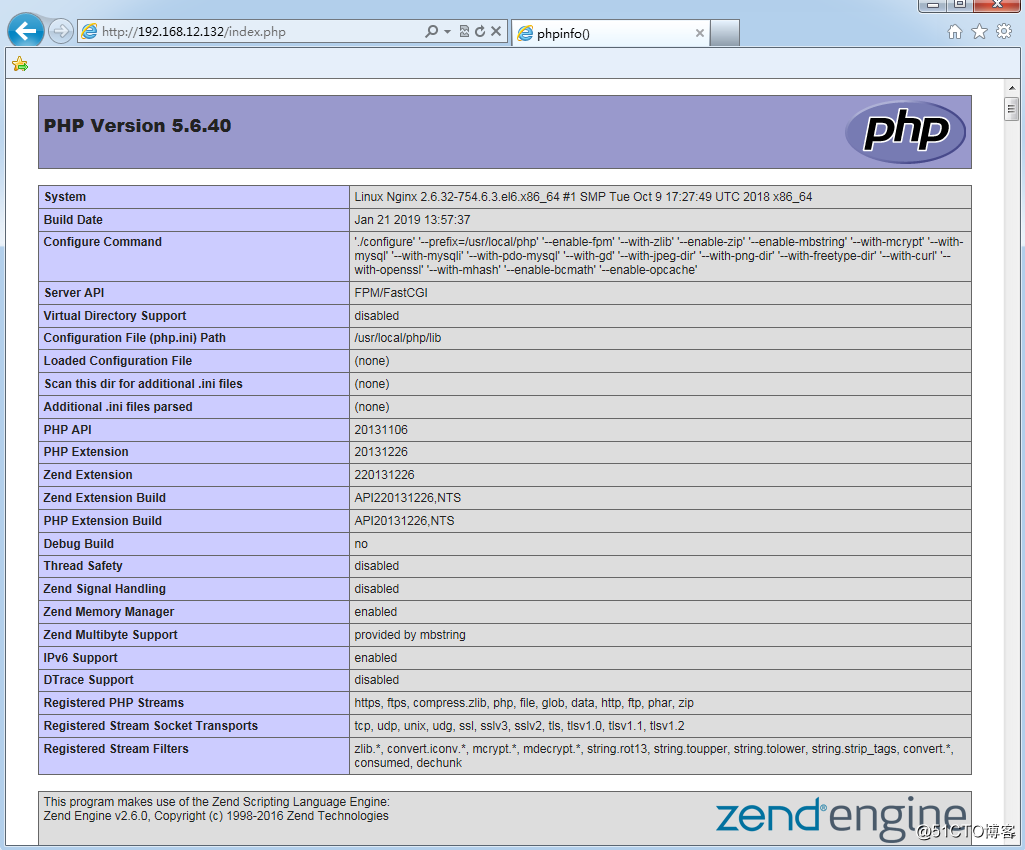
PHP编译源码:
#./configure --prefix=/usr/local/php --enable-fpm \
--with-zlib --enable-zip --enable-mbstring \
--with-mcrypt --with-mysql \
--with-mysqli --with-pdo-mysql --with-gd \
--with-jpeg-dir --with-png-dir \
--with-freetype-dir --with-curl \
--with-openssl --with-mhash \
--enable-bcmath --enable-opcache
Nginx+Apache环境搭建
http://archive.apache.org/dist/httpd/ #下载Apache
http://mirror.bit.edu.cn/apache/apr/ #下载依赖库APR、APR-util
[root@Nginx src]# tar -zxvf httpd-2.4.28.tar.gz
[root@Nginx src]# tar -zxvf apr-1.6.5.tar.gz
[root@Nginx src]# tar -zxvf apr-util-1.6.1.tar.gz
[root@Nginx src]# mv apr-1.6.5 httpd-2.4.28/srclib/apr
[root@Nginx src]# mv apr-util-1.6.1 httpd-2.4.28/srclib/apr-util
[root@Nginx src]# yum -y install pcre-devel openssl-devel #报如下错误
http://mirrors.cn99.com/centos/6.10/os/x86_64/repodata/repomd.xml: [Errno 14] PYCURL ERROR 6 - "Couldn't
resolve host 'mirrors.cn99.com'"尝试其他镜像。
解决上述问题:
#vi /etc/sysconfig/network-scripts/ifcfg-eth0
DNS2:8.8.8.8
编译安装Apache
[root@Nginx httpd-2.4.28]# ./configure --enable-so --enable--deflate \
> --enable-ssl
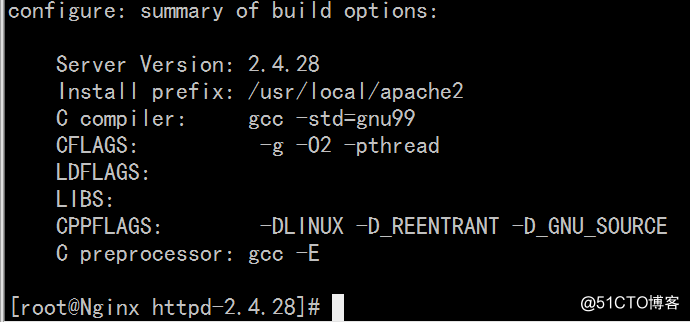
[root@Nginx httpd-2.4.28]# make && make install
xml/apr_xml.c:384: 错误:expected ‘;’, ‘,’ or ‘)’ before ‘*’ token
xml/apr_xml.c: 在函数‘apr_xml_parser_create’中:
xml/apr_xml.c:401: 错误:‘apr_xml_parser’没有名为‘xp’的成员
xml/apr_xml.c:402: 错误:‘apr_xml_parser’没有名为‘xp’的成员
xml/apr_xml.c:410: 错误:‘apr_xml_parser’没有名为‘xp’的成员
xml/apr_xml.c:411: 错误:‘apr_xml_parser’没有名为‘xp’的成员
xml/apr_xml.c:412: 错误:‘apr_xml_parser’没有名为‘xp’的成员
xml/apr_xml.c:424: 错误:‘apr_xml_parser’没有名为‘xp’的成员
xml/apr_xml.c:424: 错误:‘default_handler’未声明(在此函数内第一次使用)
xml/apr_xml.c:424: 错误:(即使在一个函数内多次出现,每个未声明的标识符在其
xml/apr_xml.c:424: 错误:所在的函数内也只报告一次。)
xml/apr_xml.c: 在函数‘do_parse’中:
xml/apr_xml.c:434: 错误:‘apr_xml_parser’没有名为‘xp’的成员
xml/apr_xml.c:438: 错误:‘apr_xml_parser’没有名为‘xp’的成员
xml/apr_xml.c:442: 错误:‘apr_xml_parser’没有名为‘xp_err’的成员
xml/apr_xml.c:442: 错误:‘apr_xml_parser’没有名为‘xp’的成员
xml/apr_xml.c: 在函数‘apr_xml_parser_geterror’中:
xml/apr_xml.c:500: 错误:‘apr_xml_parser’没有名为‘xp_err’的成员
xml/apr_xml.c:500: 错误:‘apr_xml_parser’没有名为‘xp_err’的成员
make[3]: *** [xml/apr_xml.lo] 错误 1
make[3]: Leaving directory `/usr/local/src/httpd-2.4.28/srclib/apr-util'
make[2]: *** [all-recursive] 错误 1
make[2]: Leaving directory `/usr/local/src/httpd-2.4.28/srclib/apr-util'
make[1]: *** [all-recursive] 错误 1
make[1]: Leaving directory `/usr/local/src/httpd-2.4.28/srclib'
make: *** [all-recursive] 错误 1
解决上述问题:
[root@Nginx httpd-2.4.28]# yum install expat-devel -y
[root@Nginx httpd-2.4.28]# make && make install
collect2: ld returned 1 exit status
make[2]: *** [htpasswd] 错误 1
make[2]: Leaving directory `/usr/local/src/httpd-2.4.28/support'
make[1]: *** [all-recursive] 错误 1
make[1]: Leaving directory `/usr/local/src/httpd-2.4.28/support'
make: *** [all-recursive] 错误 1
原来是apr apr-util 用了最新的1.6版本,用1.5版本即可解决问题。
http://archive.apache.org/dist/apr/ #重新下载
[root@Nginx src]# wget http://archive.apache.org/dist/apr/apr-1.5.2.tar.gz
[root@Nginx src]# wget http://archive.apache.org/dist/apr/apr-util-1.5.4.tar.gz
[root@Nginx src]# tar -zxvf apr-1.5.2.tar.gz
[root@Nginx src]# tar -zxvf apr-util-1.5.4.tar.gz
[root@Nginx src]# mv apr-1.5.2 httpd-2.4.28/srclib/apr
[root@Nginx src]# mv apr-util-1.5.4 httpd-2.4.28/srclib/apr-util
[root@Nginx httpd-2.4.28]# ./configure --enable-so --enable-deflate --enable-ssl
[root@Nginx httpd-2.4.28]# make && make install
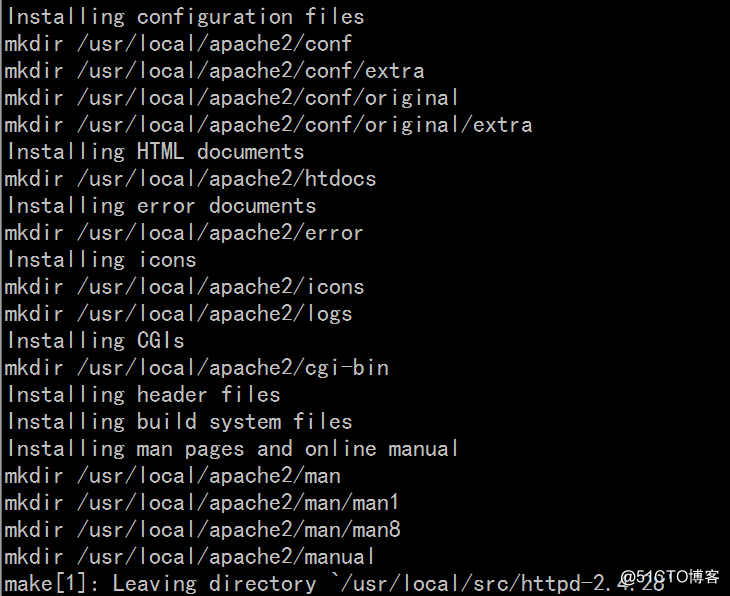
[root@Nginx httpd-2.4.28]# cd /usr/local/apache2/
[root@Nginx apache2]# ls
bin build cgi-bin conf error htdocs icons include lib logs man manual modules
配置Server命令管理Apache服务
[root@Nginx apache2]# vi /etc/init.d/httpd
#! /bin/bash
#chkconfig:35 85 15
/usr/local/apache2/bin/apachectl $1
[root@Nginx apache2]# chmod +x /etc/init.d/httpd
[root@Nginx apache2]# service httpd start
AH00558: httpd: Could not reliably determine the server's fully qualified domain name, using ::1. Set the 'ServerName' directive globally to suppress this message
(98)Address already in use: AH00072: make_sock: could not bind to address [::]:80
(98)Address already in use: AH00072: make_sock: could not bind to address 0.0.0.0:80
no listening sockets available, shutting down
AH00015: Unable to open logs
为什么报上述错误?
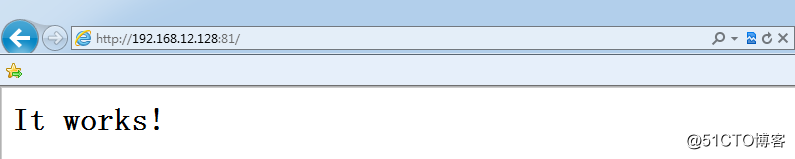
因之前Nginx已占用80端口,造成端口冲突,将Apache端口更改为81.
[root@Nginx conf]# vi httpd.conf
Listen 81
[root@Nginx ~]# chkconfig --add httpd
[root@Nginx conf]# service httpd start
httpd (pid 13380) already running
[root@Nginx conf]# service httpd stop
[root@Nginx conf]# service httpd restart
httpd not running, trying to start
[root@Nginx conf]# service httpd start
httpd (pid 13499) already running
[root@Nginx conf]# iptables -I INPUT -p tcp --dport 81 -j ACCEPT
[root@Nginx conf]# service iptables save
[root@Nginx conf]# ps aux|grep httpd
root 13499 0.0 0.0 70344 2136 ? Ss 09:10 0:00 /usr/local/apache2/bin/httpd -k restart
daemon 13500 0.0 0.1 414604 4164 ? Sl 09:10 0:00 /usr/local/apache2/bin/httpd -k restart
daemon 13501 0.0 0.1 414604 4208 ? Sl 09:10 0:00 /usr/local/apache2/bin/httpd -k restart
daemon 13502 0.0 0.1 480140 4780 ? Sl 09:10 0:00 /usr/local/apache2/bin/httpd -k restart
root 13798 0.0 0.0 103332 904 pts/0 S+ 09:16 0:00 grep httpd
访问测试
配置虚拟主机
#vi httpd.conf
# Virtual hosts
Include conf/extra/httpd-vhosts.conf
[root@Nginx extra]# pwd
/usr/local/apache2/conf/extra
[root@Nginx extra]# vi httpd-vhosts.conf
<VirtualHost *:80>
DocumentRoot "htdocs/www.sky9890.test"
ServerName www.sky9890.test
ServerAlias sky9890.test
</VirtualHost>
[root@Nginx htdocs]# pwd
/usr/local/apache2/htdocs
[root@Nginx htdocs]# mkdir www.sky9890.test
[root@Nginx htdocs]# echo 'Welcome www.sky9890.test' >index.html
测试虚拟主机:
[root@Nginx htdocs]# curl sky9890.test:81
Welcome www.sky9890.test
[root@Nginx htdocs]# curl www.sky9890.test:81
Welcomewww.sky9890.test
Apache与PHP整合
1)编译安装PHP
[root@Nginx php-5.6.40]#./configure --prefix=/usr/local/php --enable-fpm \
--with-apxs2=/usr/local/apache2/bin/apxs \
--with-zlib --enable-zip --enable-mbstring \
--with-mcrypt --with-mysql \
--with-mysqli --with-pdo-mysql --with-gd \
--with-jpeg-dir --with-png-dir \
--with-freetype-dir --with-curl \
--with-openssl --with-mhash \
--enable-bcmath --enable-opcache
[root@Nginx php-5.6.40]#make && make install
ext/standard/.libs/info.o: In function `php_info_print':
/usr/local/src/php-5.6.40/ext/standard/info.c:97: undefined reference to `ts_resource_ex'
ext/standard/.libs/info.o: In function `php_info_printf':
/usr/local/src/php-5.6.40/ext/standard/info.c:83: undefined reference to `ts_resource_ex'
ext/standard/.libs/info.o: In function `php_info_print_html_esc':
/usr/local/src/php-5.6.40/ext/standard/info.c:69: undefined reference to `ts_resource_ex'
ext/standard/.libs/info.o: In function `php_print_gpcse_array':
/usr/local/src/php-5.6.40/ext/standard/info.c:205: undefined reference to `executor_globals_id'
ext/standard/.libs/info.o: In function `php_print_info':
/usr/local/src/php-5.6.40/ext/standard/info.c:1109: undefined reference to `executor_globals_id'
collect2: ld returned 1 exit status
make: *** [sapi/cli/php] 错误 1
/usr/local/src/php-5.6.40/ext/iconv/iconv.c:2607: undefined reference to `libiconv_open'
collect2: ld returned 1 exit status
make: *** [sapi/cli/php] 错误 1
#wget http://ftp.gnu.org/pub/gnu/libiconv/libiconv-1.14.tar.gz
#tar -zxvf libiconv-1.14.tar.gz
#cd libiconv-1.14
#./configure --prefix=/usr/local/libiconv
#make && make install
[root@Nginx php-5.6.40]#make clean
[root@Nginx php-5.6.40]#./configure --prefix=/usr/local/php --enable-fpm \
--with-apxs2=/usr/local/apache2/bin/apxs \
--with-zlib --enable-zip --enable-mbstring \
--with-mcrypt --with-mysql \
--with-mysqli --with-pdo-mysql --with-gd \
--with-jpeg-dir --with-png-dir \
--with-iconv=/usr/local/libiconv \
--with-freetype-dir --with-curl \
--with-openssl --with-mhash \
--enable-bcmath --enable-opcache
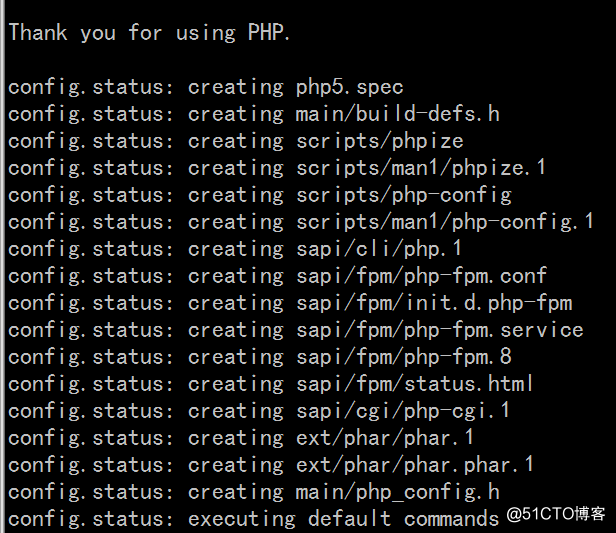
[root@Nginx php-5.6.40]#make && make install
.......................................................
libtool: warning: remember to run 'libtool --finish /usr/local/src/php-5.6.40/libs'
chmod 755 /usr/local/apache2/modules/libphp5.so
[activating module `php5' in /usr/local/apache2/conf/httpd.conf]
Installing shared extensions: /usr/local/php/lib/php/extensions/no-debug-zts-20131226/
Installing PHP CLI binary: /usr/local/php/bin/
Installing PHP CLI man page: /usr/local/php/php/man/man1/
Installing PHP FPM binary: /usr/local/php/sbin/
Installing PHP FPM config: /usr/local/php/etc/
Installing PHP FPM man page: /usr/local/php/php/man/man8/
Installing PHP FPM status page: /usr/local/php/php/php/fpm/
Installing PHP CGI binary: /usr/local/php/bin/
Installing PHP CGI man page: /usr/local/php/php/man/man1/
Installing build environment: /usr/local/php/lib/php/build/
Installing header files: /usr/local/php/include/php/
Installing helper programs: /usr/local/php/bin/
program: phpize
program: php-config
Installing man pages: /usr/local/php/php/man/man1/
page: phpize.1
page: php-config.1
Installing PEAR environment: /usr/local/php/lib/php/
[PEAR] Archive_Tar - already installed: 1.4.4
[PEAR] Console_Getopt - already installed: 1.4.1
[PEAR] Structures_Graph- already installed: 1.1.1
[PEAR] XML_Util - already installed: 1.4.3
[PEAR] PEAR - already installed: 1.10.7
Wrote PEAR system config file at: /usr/local/php/etc/pear.conf
You may want to add: /usr/local/php/lib/php to your php.ini include_path
/usr/local/src/php-5.6.40/build/shtool install -c ext/phar/phar.phar /usr/local/php/bin
ln -s -f phar.phar /usr/local/php/bin/phar
Installing PDO headers: /usr/local/php/include/php/ext/pdo/
[root@Nginx src]# chmod 755 /usr/local/apache2/modules/libphp5.so
[root@Nginx src]# cd /usr/local/apache2/
[root@Nginx apache2]# ls modules|grep php
libphp5.so
[root@Nginx apache2]# grep php conf/httpd.conf
LoadModule php5_module modules/libphp5.so
2)Apache相关配置
配置httpd.conf文件
<IfModule dir_module>
DirectoryIndex index.html index.htm index.php
Options Indexes
</IfModule>
<FilesMatch "\.php$">
setHandler application/x-httpd-php
</FilesMatch>
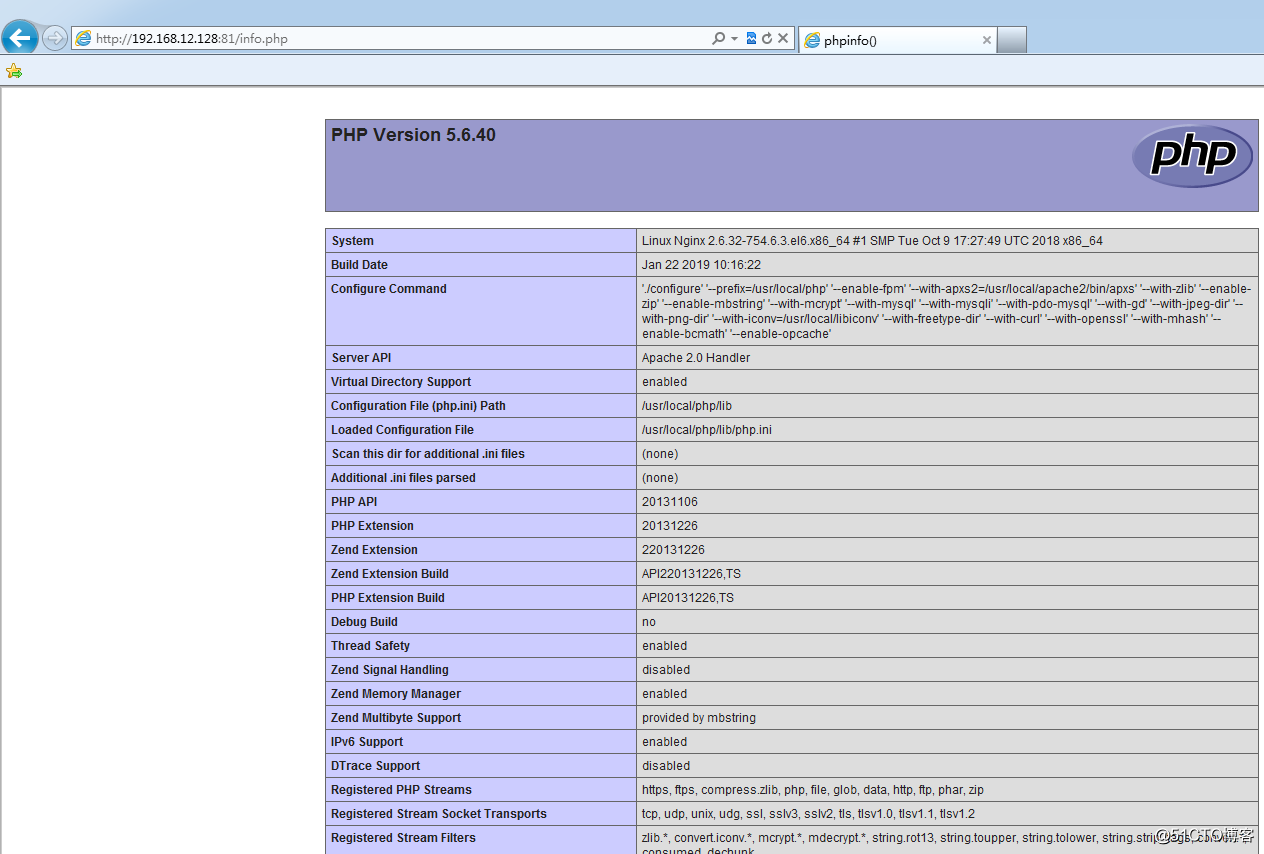
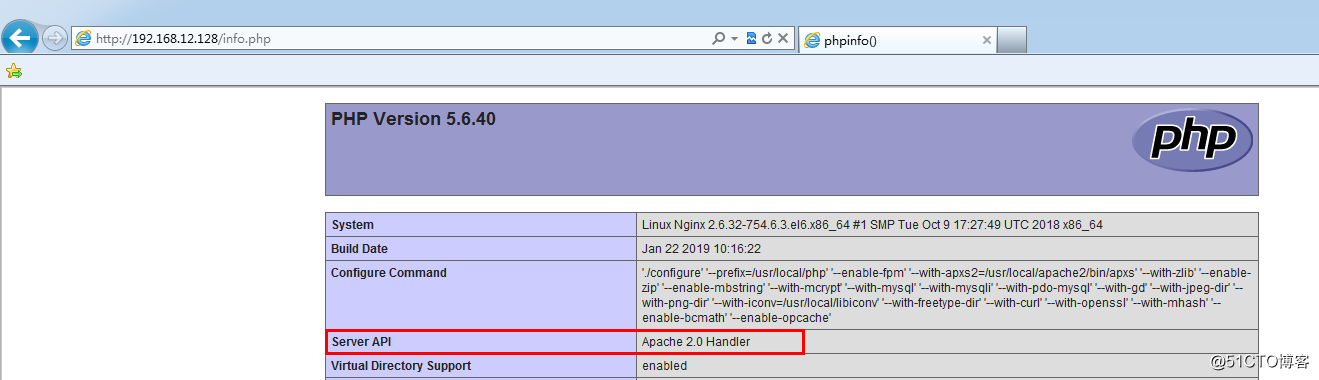
3)访问测试
[root@Nginx htdocs]# echo '<?php phpinfo();'>info.php
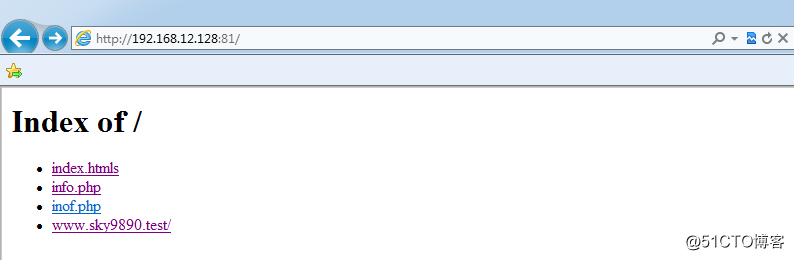
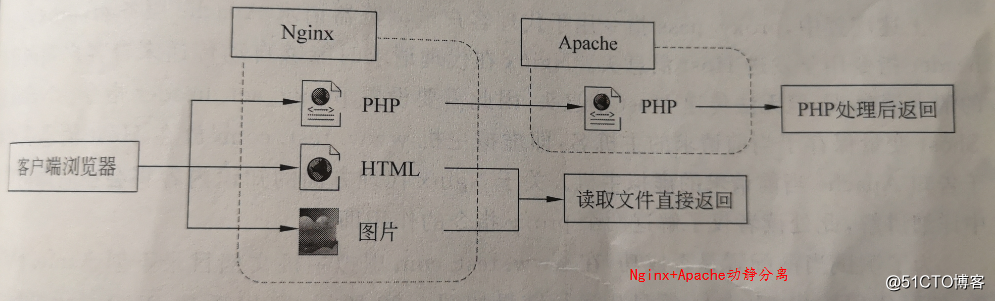
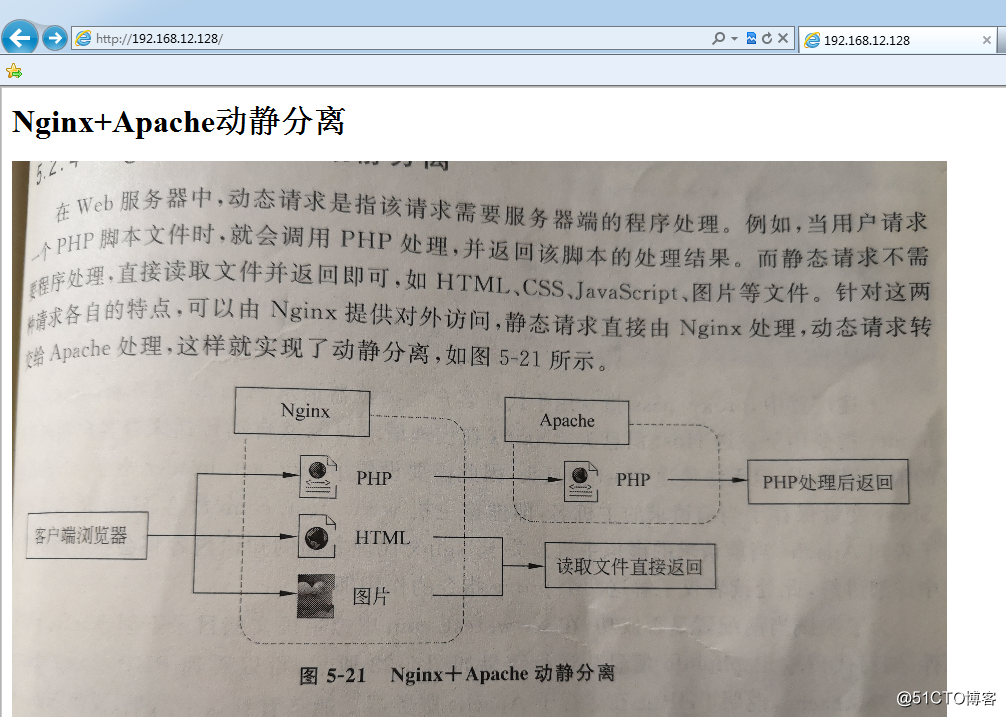
Nginx+Apache动静分离
在Web服务器中,可以由Nginx提供对外访问,静态请求直接由Nginx处理,动态请求转交给Apache处理,这样就实现了动静分离,如下图所示:
1.配置Apache
#vi /usr/local/apache2/conf/httpd.conf
Include conf/extra/httpd-vhosts.conf #去掉注释"#"
LoadModule remoteip_module modules/mod_remoteip.so #去掉注释"#"
RemoteIPHeader X-Client-IP #添加该行
RemoteIPInternalProxy 127.0.0.1 #添加该行
[root@Nginx extra]# pwd
/usr/local/apache2/conf/extra
[root@Nginx extra]# vim httpd-vhosts.conf
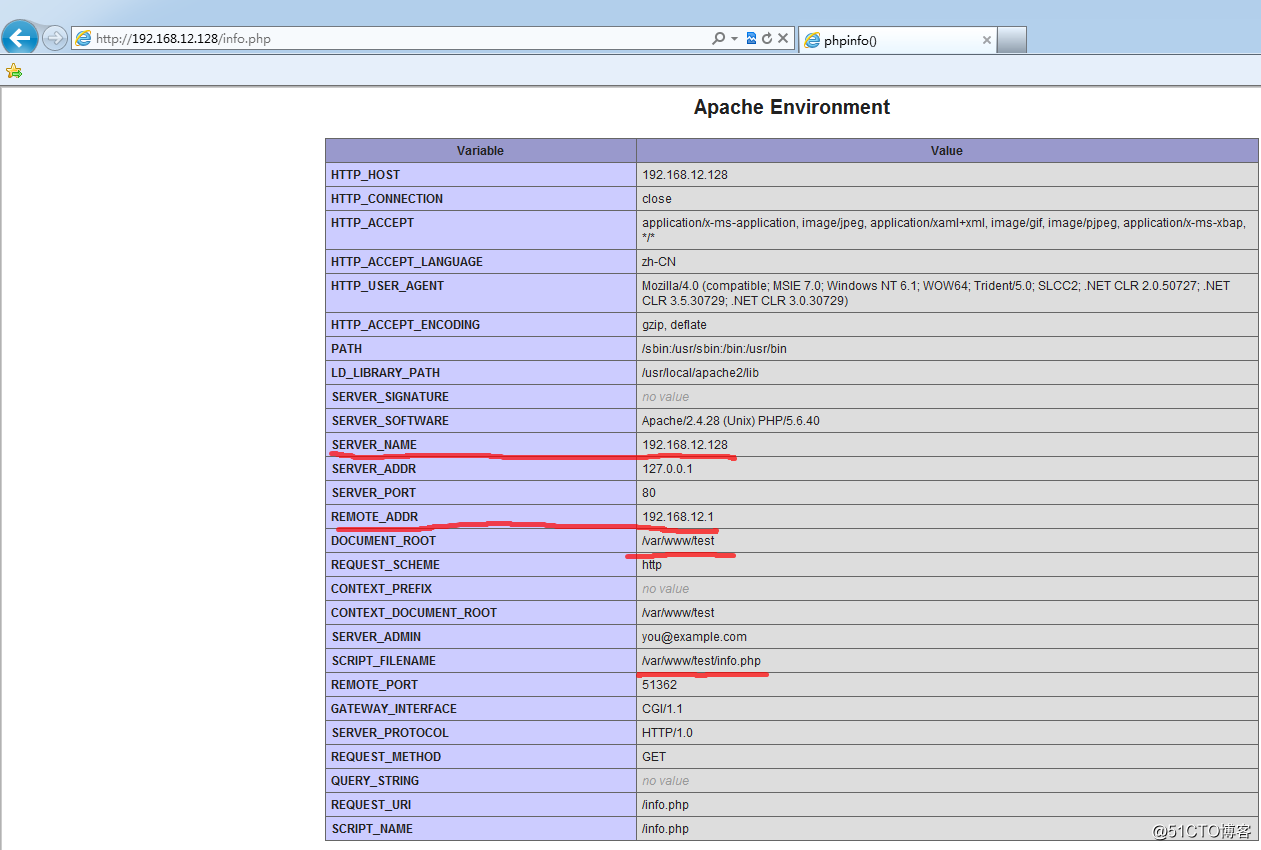
<VirtualHost *:81>
DocumentRoot "/var/www/test"
ServerName 192.168.12.128
</VirtualHost>
2.配置Nginx的动态请求处理
server {
listen 80;
server_name localhost;
root /var/www/test;
index index.html index.htm index.php;
location ~\.php$ {
proxy_pass http://127.0.0.1:81;
proxy_set_header Host $host;
proxy_set_header X-Client-IP $remote_addr;
}
3.测试运行结果
Nginx+Tomcat环境
Nginx处理静态资源的优势同样可以应用在Tomcat环境中,Tomcat处理请求的动态文件。
1.获取JRE与Tomcat
https://www.oracle.com/technetwork/java/javase/downloads/jre8-downloads-2133155.html
https://tomcat.apache.org/download-80.cgi
2.JRE和Tomcat的安装
[root@Nginx src]# tar -zxvf jre-8u201-linux-x64.tar.gz
[root@Nginx src]# tar -zxvf apache-tomcat-8.5.37.tar.gz
[root@Nginx src]# mv jre1.8.0_201/ /usr/local/jre
[root@Nginx src]#mv apache-tomcat-8.5.37 /usr/local/tomcat /usr/local/tomcat
[root@Nginx tomcat]# ls
bin BUILDING.txt conf CONTRIBUTING.md lib LICENSE logs NOTICE README.md RELEASE-NOTES RUNNING.txt temp webapps work
3)将Tomcat添加为系统服务
[root@Nginx /]# vim /etc/init.d/tomcat
#! /bin/bash
#chkconfig:35 85 15
export JRE_HOME=/usr/local/jre
case "$1" in
start)
sudo -E -u nobody /usr/local/tomcat/bin/startup.sh
;;
stop)
/usr/local/tomcat/bin/shutdown.sh
;;
restart)
$0 stop
$0 start
;;
esac
[root@Nginx /]# chown -R nobody:nobody /usr/local/tomcat
[root@Nginx local]# chmod +x /etc/init.d/tomcat
[root@Nginx local]# chkconfig --add tomcat
[root@Nginx local]# service tomcat start
Using CATALINA_BASE: /usr/local/tomcat
Using CATALINA_HOME: /usr/local/tomcat
Using CATALINA_TMPDIR: /usr/local/tomcat/temp
Using JRE_HOME: /usr/local/jre
Using CLASSPATH: /usr/local/tomcat/bin/bootstrap.jar:/usr/local/tomcat/bin/tomcat-juli.jar
Tomcat started.
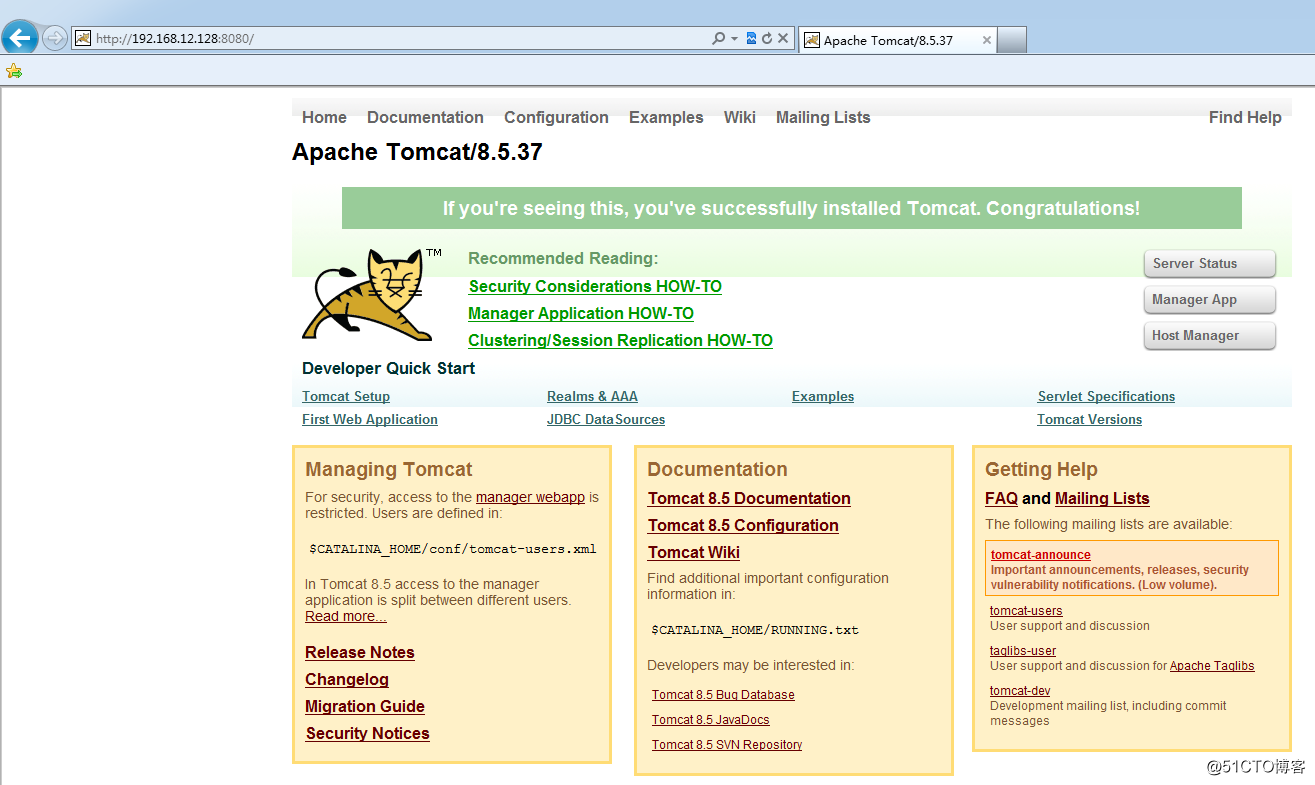
4)测试配置运行结果
[root@Nginx local]# ps aux|grep tomcat
nobody 2223 5.2 2.5 4488552 101272 pts/0 Sl 11:23 0:03 /usr/local/jre/bin/java -Djava.util.logging.config.file=/usr/local/tomcat/conf/logging.properties -Djava.util.logging.manager=org.apache.juli.ClassLoaderLogManager -Djdk.tls.ephemeralDHKeySize=2048 -Djava.protocol.handler.pkgs=org.apache.catalina.webresources -Dorg.apache.catalina.security.SecurityListener.UMASK=0027 -Dignore.endorsed.dirs= -classpath /usr/local/tomcat/bin/bootstrap.jar:/usr/local/tomcat/bin/tomcat-juli.jar -Dcatalina.base=/usr/local/tomcat -Dcatalina.home=/usr/local/tomcat -Djava.io.tmpdir=/usr/local/tomcat/temp org.apache.catalina.startup.Bootstrap start
root 2276 0.0 0.0 103332 904 pts/0 S+ 11:24 0:00 grep tomcat
[root@Nginx local]# netstat -tnlp|grep java
tcp 0 0 ::ffff:127.0.0.1:8005 :::* LISTEN 2223/java
tcp 0 0 :::8009 :::* LISTEN 2223/java
tcp 0 0 :::8080 :::* LISTEN 2223/java
[root@Nginx local]# iptables -I INPUT -p tcp --dport 8080 -j ACCEPT
[root@Nginx local]# service iptables save
[root@Nginx bin]# ./shutdown.sh
Neither the JAVA_HOME nor the JRE_HOME environment variable is defined
At least one of these environment variable is needed to run this program
[root@Nginx bin]# ./startup.sh
Neither the JAVA_HOME nor the JRE_HOME environment variable is defined
At least one of these environment variable is needed to run this program
[root@Nginx ~]# vim /etc/profile
export JRE_HOME=/usr/local/jre
#source /etc/profile
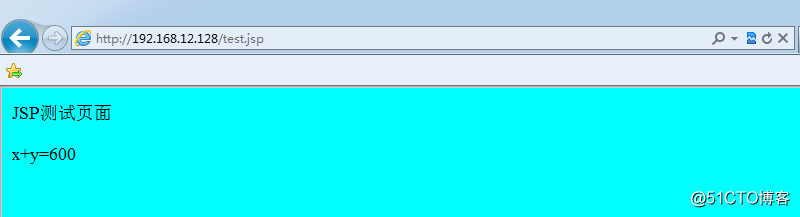
Nginx+Tomcat动静分离
1)配置nginx.conf文件
#vim /usr/local/nginx/conf/nginx.conf
server {
server_name 192.168.12.128;
root /usr/local/tomat/webapps/ROOT;
index index.html index.htm index.jsp index.do;
location ~/(WEB-INF|META-INF){
deny all;
}
location ~ \.(jsp|do)$ {
proxy_pass http://127.0.0.1:8080;
proxy_set_header X-Client-IP $remote_addr;
}
2)测试运行结果
小结:
1.使用开源软件最大的优点就是免费,可靠,稳定等特点,最大的麻烦是版本之间是否配备、是否兼容,否则编译、配置、安装调式会通不过;
2.Nginx+PHP环境,程序测试通过;
3.Apache+PHP环境,程序测试通过;
4.Nginx+Apache+PHP环境,程序测试通过;
5.以上环境是在虚拟机单操作系统上测试通过,下次做Nginx+Apache动静分离web服务时,尝试虚拟两台主机做动静分离;
6.配置nginx.conf和vhost两个文件时,要注意是否重复绑定了server name,否则会警告,但不会影响到服务器运行。对于重复配置,有优先执行权限,有时候很有可能会导致无法响应动态解析。
7.Nginx、Apache web的默认端口是"80",避免引起端口冲突,需要保留一个"80"端口,另设其他端口,只要不与系统端口冲突即可。
8.下次做Nginx+Tomcat动静分离时,尝试虚拟两台主机做动静分离。

- 基于ARM+LINUX的无线视频采集系统设计----------搭建嵌入式web服务器
- Linux系统使用weblogic服务器部署web项目
- [置顶] 阿里云服务器基于Linux系统部署javaweb项目,详解
- 基于ARM+LINUX的无线视频采集系统设计----------搭建嵌入式web服务器
- 基于ARM+LINUX的无线视频采集系统设计----------搭建嵌入式web服务器
- Linux系统——将web应用部署到tomcat服务器上
- 移植Boa Web服务器到ARM-Linux系统
- 移植Boa Web服务器到ARM-Linux系统
- 基于自主开发Web服务器的校内成绩查询系统
- pxe网络安装系统---------基于windows xp做服务器(dhcp+ftp)安装linux系统
- 基于Linux平台的Lotus Domino 8系统部署五部曲(全视频展示)
- 搭建基于Linux6.3+Nginx1.2+PHP5+MySQL5.5的Web服务器全过程
- 搭建基于Linux6.3+Nginx1.2+PHP5+MySQL5.5的Web服务器全过程(参考)
- 【转】移植thttpd Web服务器到ARM-Linux系统
- linux配置DNS服务器并基于域名IP端口配置虚拟web服务器【实验】
- 如何在CentOS/RHEL中安装基于Web的监控系统 linux-dash
- JavaCV部署到web服务器上 Javacv linux 环境配置
- 基于WEB的智能家居系统—服务器搭建
- linux web项目部署到tomcat服务器
- linux -- 基于mysql tomcat 部署web项目