linux下网络配置续(用文件配置网络;虚拟机通过真机上网;dhcp服务)软件管理(挂载点的设置,卸载;配置本地yum源,共享型yum源的部署)
2019-01-19 02:05
901 查看
管理网络文件
1.网络配置目录
/etc/sysconfig/network-scripts/
HWADDR=52:54:00:00:00:OA        #mac地址
TYPE=Ethernet                   #网络类型
BOOTPROTO=none|static|dhcp      #网络设备的工作方式(静态|静态|动态)
IPADDR0=172.25.254.200          #ip地址
PREFIX0=24                      #子网掩码
NAME=redhat                     #网络名称
ONBOOT=yes                      #网络设备开启时自动激活网卡
示例:
配置前需用图形将以前的网络删除
1.1 静态网络设定文件
[root@desktop144 ~]# vim /etc/sysconfig/network-scripts/ifcfg-redhat
配置文件内容:
DEVICE=eth0
ONBOT=yes
IPADDR=172.25.254.144      #IP
NETMASK=255.255.255.0      #子网掩码
BOOTPROTO=static
NAME=westos
重启网络
[root@desktop144 ~]# systemctl restart network
1. 2 配置多个网络:
[root@desktop144 ~]# vim /etc/sysconfig/network-scripts/ifcfg-redhat
配置文件内容:
DEVICE=eth0
ONBOOT=yes
IPADDR0=172.25.254.144
NETMASK=255.255.255.0
BOOTPROTO=static
NAME=westos
IPADDR1=172.25.45.99 #内网网段,不能写全0,全1和要连接对象的IP 例;172.25.45.250
PREFIX1=24
重启网络
[root@desktop144 ~]# systemctl restart network
1.3 网关(真机有网,虚拟机要通过真机上网)
(1)把真实主机变成路由器(路由器上配置的ip就是网关)
[root@foundation44 ~]# systemctl start firewalld
[root@foundation44 ~]# firewall-cmd --list-all
trusted (active)
target: ACCEPT
icmp-block-inversion: no
interfaces: br0 enp0s25
sources:
services:
ports:
protocols:
masquerade: no                 #地址伪装功能
forward-ports:
sourceports:
icmp-blocks:
rich rules:
[root@foundation44 ~]# firewall-cmd --permanent --add-masquerade   #开启地址伪装
success
[root@foundation44 ~]# firewall-cmd --reload                #防火墙热启动
success
[root@foundation44 ~]# firewall-cmd --list-all
trusted (active)
target: ACCEPT
icmp-block-inversion: no
interfaces: br0 enp0s25
sources:
services:
ports:
protocols:
masquerade: yes      #地址伪装功能开启,真实主机变成路由器
forward-ports:
sourceports:
icmp-blocks:
rich rules:
(2)给虚拟机设定网关
[root@desktop144 ~]# vim /etc/sysconfig/network #全局网关,针对所有没有设定网关的网卡上的网络生效
配置文件内容:
NETWORKING=yes
NOZEROCONF=yes
GATEWAY=172.25.254.44  #网卡中只有一个IP地址(使用全局网关)
[root@desktop144 ~]# systemctl restart network  #重启网络
[root@desktop144 ~]# route -n        #查看网关
Kernel IP routing table
Destination     Gateway         Genmask         Flags Metric Ref    Use Iface
0.0.0.0         172.25.254.44   0.0.0.0         UG    1024   0        0 eth0
172.25.0.0      0.0.0.0         255.255.0.0     U     0      0        0 eth0
172.25.45.0     0.0.0.0         255.255.255.0   U     0      0
(3)设定DNS
[root@desktop144 ~]# vim /etc/resolv.conf
# Generated by NetworkManager
search example.com
nameserver 114.114.114.114

[root@desktop144 network-scripts]# vim /etc/sysconfig/network-scripts/ifcfg-redhat
DNS=114.114.114.114

或者直接记录在本地文件:
vim /etc/hosts   #本地解析文件
ip       域名
(4)系统默认优先级
/etc/hosts  > /etc/resolv.conf

[root@desktop144 ~]# vim /etc/nsswitch.conf
39 hosts:      dns  files  #/etc/resolv.conf dns执向优先
39 hosts:      files dns   #/etc/host 优先
1.4 dhcp服务配置(配置动态ip)
搭建环境,为了得到yum源中的dhcp服务,若有yum源,则不需要此操作直接进行下一步========================================= [root@desktop144 ~]# vim /etc/hosts 配置文件内容: 127.0.0.1 localhost localhost.localdomain localhost4 localhost4.localdomain4 ::1 localhost localhost.localdomain localhost6 localhost6.localdomain6 172.25.254.254 classroom.example.com 172.25.254.250 content.example.com [root@desktop144 ~]# vim /etc/yum.repos.d/rhel_dvd.repo # Created by cloud-int on Thu, 10 Jul 2014 22:19:11 +0000 [rhel_dvd] gpgcheck = 0 enabled = 1 baseurl = http://content.example.com/rhel7.0/x86_64/dvd name = Remote classroom copy of dvd ============================================下载dhcp服务,更改配置文件
[root@desktop144 Desktop]# yum install dhcp -y    #下载yum源
cp /usr/share/doc/dhcp-4.2.5/dhcpd.conf.example /etc/dhcp/dhcp.conf
7 option domain-name "example.org";
8 option domain-name-servers 114.114.114.114;
27   删除
28   删除

30 subnet 172.25.254.0 netmask 255.255.255.0 {  #子网设定
31   range 172.25.254.100 172.25.254.130;     #IP池(IP范围)
32   option routers 172.25.254.44;   #网关(真机)
33 }
#以下内容全部删除
systemctl start dhcpd

两台虚拟机 : systemctl stop firewalld
测试:
在desktop上配好服务后,在server上配网时,直接启动dhcp进行配网
linux的软件管理 (yum源要跟系统版本匹配)
1.让镜像文件被系统识别(挂载)
[root@server94 Desktop]# df    #查看挂载点
Filesystem     1K-blocks    Used Available Use% Mounted on
/dev/vda1       10473900 6816320   3657580  66% /
devtmpfs          469332       0    469332   0% /dev
tmpfs             484920      80    484840   1% /dev/shm
tmpfs             484920   12740    472180   3% /run
tmpfs             484920       0    484920   0% /sys/fs/cgroup

[root@server94 Desktop]# mount rhel-server-7.0-x86_64-dvd.iso /mnt  #将镜像挂载到mnt中
镜像文件                   挂载点
mount: /dev/loop0 is write-protected, mounting read-only
##被挂载的目录要为空目录,因为执行此命令时,镜像文件会将目录进行全面覆盖
[root@server94 Desktop]# df
Filesystem     1K-blocks    Used Available Use% Mounted on
/dev/vda1       10473900 6816320   3657580  66% /
devtmpfs          469332       0    469332   0% /dev
tmpfs             484920      80    484840   1% /dev/shm
tmpfs             484920   12744    472176   3% /run
tmpfs             484920       0    484920   0% /sys/fs/cgroup
/dev/loop0       3654720 3654720         0 100% /mnt             #挂载成功
2.卸载
[root@server94 Desktop]# umount /mnt          #卸载挂载点
[root@server94 Desktop]# umount /dev/loop0
###注意:以上为卸载的两种命令形式
[root@server94 Desktop]# df
Filesystem     1K-blocks    Used Available Use% Mounted on
/dev/vda1       10473900 6816320   3657580  66% /
devtmpfs          469332       0    469332   0% /dev
tmpfs             484920      80    484840   1% /dev/shm
tmpfs             484920   12744    472176   3% /run
tmpfs             484920       0    484920   0% /sys/fs/cgroup        #卸载成功
3.开机自动挂载
[root@server94 ~]# vim /etc/rc.d/rc.local  #编辑配置文件
配置文件(在最后一行)内容:
69 mount /root/Desktop/rhel-server-7.0-x86_64-dvd.iso (绝对路径) /mnt
[root@server94 rc.d]# chmod 755 /etc/rc.d/rc.local   #设定权限
测试: 重启reboot
4.配置本地yum源
(1)获得一个与本机系统版本一致的系统镜像
(2)挂载镜像(让镜像被系统识别和使用)
(3)设定系统安装源指定
[root@server94 Desktop]# cd /etc/yum.repos.d/    #清空此目录下的文件
[root@server94 yum.repos.d]# rm -rf *
[root@server94 yum.repos.d]# vim yum.repo        #注意要在在/etc/yum.repos.d/下建立
文件名称一定要以.repo结尾
[rhel7.0]                      #仓库描述
name=rhel7.0 server            #对软件源的描述
baseurl=file:///mnt            #镜像挂载地址
gpgcheck=0                     #不检测gpgkey(是否为正版)
enabled=1                      #此yum源语句块立即生效
测试:
[root@server94 yum.repos.d]# yum clean all    #清空之前本地yum源
Loaded plugins: langpacks
Cleaning repos: rhel7.0
Cleaning up everything
[root@server94 yum.repos.d]# yum repolist     #列出yum的信息
Loaded plugins: langpacks
rhel7.0                                                  | 4.1 kB     00:00
(1/2): rhel7.0/group_gz                                    | 134 kB   00:00
(2/2): rhel7.0/primary_db                                  | 3.4 MB   00:00
repo id                          repo name                                status
rhel7.0                          rhel7.0 server                           4,305
[root@server94 yum.repos.d]# yum install gcc -y  #下载gcc服务
Loaded plugins: langpacks
Resolving Dependencies
--> Running transaction check
---> Package gcc.x86_64 0:4.8.2-16.el7 will be installed
--> Processing Dependency: cpp = 4.8.2-16.el7 for package: gcc-4.8.2-16.el7.x86_64
--> Processing Dependency: glibc-devel >= 2.2.90-12 for package: gcc-4.8.2-16.el7.
......
注意:以上挂载操作每次开机都要进行手动挂载
5.共享型yum源的部署
(1)在一台已经建立好本地yum源的主机中安装httpd
yum install httpd -y #下载http服务
(2)挂载到apache服务目录下
systemctl stop firewalld #关闭防火墙
systemctl disable firewalld
systemctl start httpd #启动httpd服务
mkdir /var/www/html/rhel7.0 #建立阿帕奇目录
[root@server94 yum.repos.d]# umount /mnt #卸载前一个挂载点
[root@server94 yum.repos.d]# mount /root/rhel-server-7.0-x86_64-dvd.iso /var/www/html/rhel7.0/
#挂载到阿帕奇目录
##### (3)在客户端
cd /etc/yum.repos.d
vim yum.repo
配置文件:
[rhel7.0]
name=rhel7.0 server
baseurl=http://172.25.44.250/rhel7.0 #地址(与浏览器访问相同)
gpgcheck=0
enabled=1
yum clean all
yum repolist
##systemctl stop firwalld #关闭防火墙
###### 用虚拟机进入火狐网,172.25.44.250/rhel7.0会看到效果 (IP为服务端的IP) 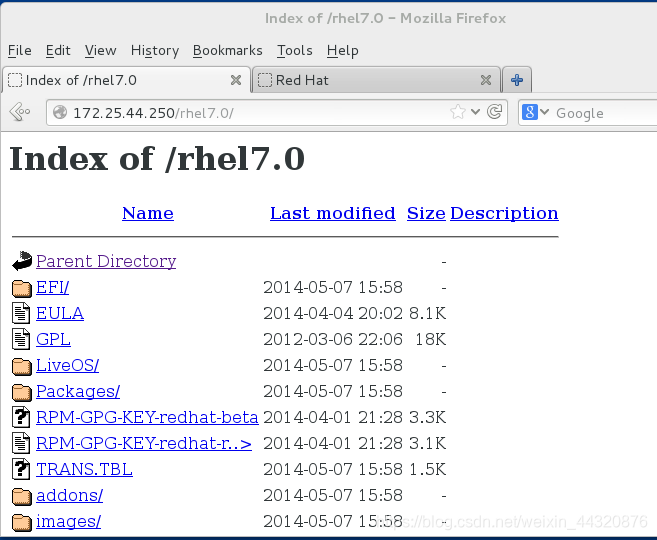

相关文章推荐
- Linux软件安装管理:挂载本地iso光盘镜像、配置yum软件仓库
- linux系统之间通过nfs网络文件系统挂载设置方法
- linux 系统、文件、磁盘、网络配置管理,软件包
- LFCS 系列第五讲:如何在 Linux 中挂载/卸载本地文件系统和网络文件系统(Samba 和 NF
- 通过物理机dhcp配置虚拟机网络(wifi上网)
- Linux基础(网络管理、配置虚拟机和配置yum源)
- window7 输入什么命令可以快速打开服务管理?? 虚拟机设置了NAT网络连接方式,还是无法上网?
- Linux--网络管理(7层结构、netstat、ifconfig、配置文件、虚拟机中的网络连接)
- Linux系统网络服务配置文件详解
- 如何配置Hyper-V的虚拟机通过主机网络上网 (NAT)
- Linux网络管理 (一)虚拟机网络配置
- 安装linux下面用来配置网络,防火墙,系统服务等设置的图形小工具Setup
- linux网络文件系统挂载配置
- Linux 使用本地yum源及软件包管理
- 虚拟机上装的red hat linux 9通过NAT方式上网配置
- Linux网络服务配置文件详解
- linux 配置iso 文件为本地yum源
- Linux系列:Ubuntu虚拟机设置固定IP上网(配置IP、网关、DNS、防止resolv.conf被重写)(转载)
- window主机访问Linux主机通过samba服务共享的目录 和Linux主机挂载window主机共享目录到本地
- 总结Linux常用软件的配置文件和服务名