SpringBoot RedisMQ消息队列与发布订阅
2018-09-28 16:21
761 查看
SpringBoot简单整合RedisMQ消息队列和发布订阅
注:RedisMq消息队列使用redis数组实现,leftpush存一,rightpop取一。
1.application.properties
server.port=8080

#thymeleaf配置
#是否启用模板缓存。
spring.thymeleaf.cache=false
#是否为Web框架启用Thymeleaf视图解析。
spring.thymeleaf.enabled=true
#在SpringEL表达式中启用SpringEL编译器。
spring.thymeleaf.enable-spring-el-compiler=true
#模板文件编码。
spring.thymeleaf.encoding=UTF-8
#要应用于模板的模板模式。另请参见Thymeleaf的TemplateMode枚举。
spring.thymeleaf.mode=HTML5
#在构建URL时添加前缀以查看名称的前缀。
spring.thymeleaf.prefix=classpath:/templates/
#Content-Type写入HTTP响应的值。
spring.thymeleaf.servlet.content-type=text/html
#在构建URL时附加到视图名称的后缀。
spring.thymeleaf.suffix=.html

##单服务器
spring.redis.host=192.168.159.129
##单端口
spring.redis.port=6379
## 连接池最大连接数(使用负值表示没有限制)
spring.redis.pool.max-active=300
## Redis数据库索引(默认为0)
spring.redis.database=0
## 连接池最大阻塞等待时间(使用负值表示没有限制)
spring.redis.pool.max-wait=-1
## 连接池中的最大空闲连接
spring.redis.pool.max-idle=100
## 连接池中的最小空闲连接
spring.redis.pool.min-idle=20
## 连接超时时间(毫秒)
spring.redis.timeout=60000
2.pom.xml
<?xml version="1.0" encoding="UTF-8"?>
<project xmlns="http://maven.apache.org/POM/4.0.0" xmlns:xsi="http://www.w3.org/2001/XMLSchema-instance"
xsi:schemaLocation="http://maven.apache.org/POM/4.0.0 http://maven.apache.org/xsd/maven-4.0.0.xsd">
<modelVersion>4.0.0</modelVersion>

<groupId>com.szw.learn</groupId>
<artifactId>redis_mq_01</artifactId>
<version>0.0.1-SNAPSHOT</version>
<name>redis_mq_01</name>
<description>redis mq example</description>

<parent>
<groupId>org.springframework.boot</groupId>
<artifactId>spring-boot-starter-parent</artifactId>
<version>1.5.16.RELEASE</version>
</parent>

<properties>
<project.build.sourceEncoding>UTF-8</project.build.sourceEncoding>
<project.reporting.outputEncoding>UTF-8</project.reporting.outputEncoding>
<java.version>1.8</java.version>
<maven.test.skip>true</maven.test.skip>
<skipTests>true</skipTests>
<start-class>com.szw.learn.redis.RedisMqApplication</start-class>
</properties>

<dependencies>
<!-- 使用web启动器 -->
<dependency>
<groupId>org.springframework.boot</groupId>
<artifactId>spring-boot-starter-web</artifactId>
</dependency>

<!-- 测试 -->
<dependency>
<groupId>org.springframework.boot</groupId>
<artifactId>spring-boot-starter-test</artifactId>
<scope>test</scope>
</dependency>

<!-- 模板引擎 -->
<dependency>
<groupId>org.springframework.boot</groupId>
<artifactId>spring-boot-starter-thymeleaf</artifactId>
</dependency>

<!-- redis artifactId与1.5之前版本变了 -->
<dependency>
<groupId>org.springframework.boot</groupId>
<artifactId>spring-boot-starter-data-redis</artifactId>
</dependency>
</dependencies>

<repositories>
<repository>
<id>nexus-aliyun</id>
<name>Nexus aliyun</name>
<url>http://maven.aliyun.com/nexus/content/groups/public</url>
<releases>
<enabled>true</enabled>
</releases>
<snapshots>
<enabled>false</enabled>
</snapshots>
</repository>
</repositories>
<pluginRepositories>
<pluginRepository>
<id>nexus-aliyun</id>
<name>Nexus aliyun</name>
<url>http://maven.aliyun.com/nexus/content/groups/public</url>
<releases>
<enabled>true</enabled>
</releases>
<snapshots>
<enabled>false</enabled>
</snapshots>
</pluginRepository>
</pluginRepositories>

<build>
<plugins>
<!-- 要将源码放上去,需要加入这个插件 -->
<plugin>
<groupId>org.apache.maven.plugins</groupId>
<artifactId>maven-source-plugin</artifactId>
<configuration>
<attach>true</attach>
</configuration>
<executions>
<execution>
<phase>compile</phase>
<goals>
<goal>jar</goal>
</goals>
</execution>
</executions>
</plugin>
<!-- 打包 -->
<plugin>
<groupId>org.springframework.boot</groupId>
<artifactId>spring-boot-maven-plugin</artifactId>
<configuration>
<fork>true</fork>
</configuration>
</plugin>
</plugins>
</build>
</project>
3.RedisMqApplication.java启动类
package com.szw.learn.redis;

import org.springframework.boot.SpringApplication;
import org.springframework.boot.autoconfigure.SpringBootApplication;

@SpringBootApplication
public class RedisMqApplication {
public static void main(String[] args) {
System.setProperty("spring.devtools.restart.enabled", "false");
SpringApplication.run(RedisMqApplication.class, args);
}
}
4.消息队列测试(生产者和消费者)
生产者:
package com.szw.learn.redis.mq;

import javax.annotation.PostConstruct;

import org.junit.Test;
import org.junit.runner.RunWith;
import org.springframework.beans.factory.annotation.Autowired;
import org.springframework.boot.test.context.SpringBootTest;
import org.springframework.data.redis.core.ListOperations;
import org.springframework.data.redis.core.StringRedisTemplate;
import org.springframework.test.context.junit4.SpringRunner;

import com.szw.learn.redis.RedisMqApplication;

/**
* @author 七脉
* 描述:生产者测试类
*/
@SpringBootTest(classes = RedisMqApplication.class, webEnvironment = SpringBootTest.WebEnvironment.RANDOM_PORT)
@RunWith(SpringRunner.class)
public class MQProducerTest {
@Autowired
private StringRedisTemplate redisTemplate;
//redis的消息队列直接使用redis数组实现
private ListOperations<String, String> listRedis;

/**
* <br>描 述: 初始化时赋值
* <br>作 者: shizhenwei
* <br>历 史: (版本) 作者 时间 注释
*/
@PostConstruct
private void init(){
listRedis = redisTemplate.opsForList();
}

@Test
public void test() {
for(int i=1; i<=10; i++){
//从左边向堆栈顺序存放1~10个消息
listRedis.leftPush("storage", i+"");
}
}
}
消费者:
package com.szw.learn.redis.mq;

import javax.annotation.PostConstruct;

import org.junit.Test;
import org.junit.runner.RunWith;
import org.springframework.beans.factory.annotation.Autowired;
import org.springframework.boot.test.context.SpringBootTest;
import org.springframework.data.redis.core.ListOperations;
import org.springframework.data.redis.core.StringRedisTemplate;
import org.springframework.test.context.junit4.SpringRunner;
import org.springframework.util.StringUtils;

import com.szw.learn.redis.RedisMqApplication;
/**
* @author 七脉
* 描述:消费者测试类
*/
@SpringBootTest(classes = RedisMqApplication.class, webEnvironment = SpringBootTest.WebEnvironment.RANDOM_PORT)
@RunWith(SpringRunner.class)
public class MQConsumerTest {
@Autowired
private StringRedisTemplate redisTemplate;
//redis的消息队列直接使用redis数组实现
private ListOperations<String, String> listRedis;

/**
* <br>描 述: 初始化时赋值
* <br>作 者: shizhenwei
* <br>历 史: (版本) 作者 时间 注释
*/
@PostConstruct
private void init(){
listRedis = redisTemplate.opsForList();
}

@Test
public void test() {
while(true){
//从右边取堆栈顺序取1~10个消息
String msg = listRedis.rightPop("storage");
if(StringUtils.isEmpty(msg)){
System.out.println("消息已经全部取出了。。。。");
break;
}
System.out.println(msg);
}
}
}
测试结果:

5.发布订阅
订阅监听类:
package com.szw.learn.redis.mq;

import org.springframework.data.redis.connection.Message;
import org.springframework.data.redis.connection.MessageListener;

/**
* @author 七脉 描述:订阅监听类
*/
public class SubscribeListener implements MessageListener {
/**
* 订阅接收发布者的消息
*/
@Override
public void onMessage(Message message, byte[] pattern) {
// 缓存消息是序列化的,需要反序列化。然而new String()可以反序列化,但静态方法valueOf()不可以
System.out.println(new String(pattern) + "主题发布:" + new String(message.getBody()));
}
}
发布service:
package com.szw.learn.redis.mq;

import org.springframework.beans.factory.annotation.Autowired;
import org.springframework.data.redis.core.StringRedisTemplate;
import org.springframework.stereotype.Component;

/**
* @author 七脉 描述:发布service
*/
@Component
public class PublishService {
@Autowired
StringRedisTemplate redisTemplate;

/**
* @author 七脉 描述:发布方法
* @param channel 消息发布订阅 主题
* @param message 消息信息
*/
public void publish(String channel, Object message) {
// 该方法封装的 connection.publish(rawChannel, rawMessage);
redisTemplate.convertAndSend(channel, message);
}
}
添加定义监听主题:
package com.szw.learn.redis.mq;

import org.springframework.beans.factory.annotation.Autowired;
import org.springframework.context.annotation.Bean;
import org.springframework.context.annotation.Configuration;
import org.springframework.data.redis.connection.jedis.JedisConnectionFactory;
import org.springframework.data.redis.listener.PatternTopic;
import org.springframework.data.redis.listener.RedisMessageListenerContainer;

@Configuration
public class RedisConfig {
@Autowired
private JedisConnectionFactory jedisConnectionFactory;

/**
* @author 七脉 描述:需要手动定义RedisMessageListenerContainer加入IOC容器
* @return
*/
@Bean
public RedisMessageListenerContainer redisMessageListenerContainer() {

RedisMessageListenerContainer container = new RedisMessageListenerContainer();

container.setConnectionFactory(jedisConnectionFactory);

/**
* 添加订阅者监听类,数量不限.PatternTopic定义监听主题,这里监听dj主题
*/
container.addMessageListener(new SubscribeListener(), new PatternTopic("dj"));
return container;

}
}
发布订阅测试:
package com.szw.learn.redis.mq;
import org.junit.Test;
import org.junit.runner.RunWith;
import org.springframework.beans.factory.annotation.Autowired;
import org.springframework.boot.test.context.SpringBootTest;
import org.springframework.test.context.junit4.SpringRunner;
import com.szw.learn.redis.RedisMqApplication;
/**
* @author 七脉
* 描述:消息发布
*/
@SpringBootTest(classes = RedisMqApplication.class, webEnvironment = SpringBootTest.WebEnvironment.RANDOM_PORT)
@RunWith(SpringRunner.class)
public class PublishTest {
@Autowired
private PublishService publishService;
@Test
public void test() {
for(int i=1; i<=10; i++){
//向dj主题里发布10个消息
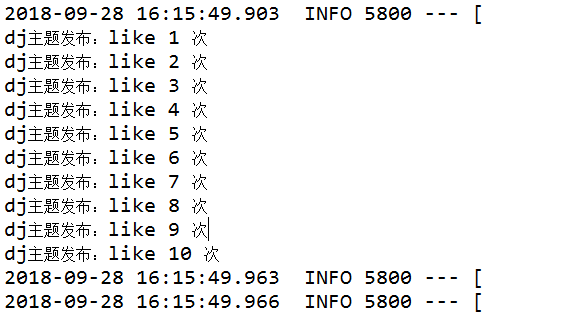
publishService.publish("dj", "like "+i+" 次");
}
}
}
测试结果:

相关文章推荐
- 【转】redis 消息队列发布订阅模式spring boot实现
- redis 消息队列发布订阅模式spring boot实现
- spring boot-同时使用jms的Queue(队列)和Topic(发布订阅)
- Spring Boot使用Redis进行消息的发布订阅
- springboot入门--springboot集成redis实现消息发布订阅模式
- Spring Boot使用Redis进行消息的发布订阅
- Spring Boot使用Redis进行消息的发布订阅
- Spring Data Redis实现消息队列——发布/订阅模式
- kafka分布式消息队列使用(springboot和springmvc)
- Redis_发布订阅(Spring Boot)
- Spring Boot系列(十二)Spring Boot整合ActiveQ实现消息收发和订阅
- 消息队列 概念 配合SpringBoot使用Demo
- 消息队列点对点和发布订阅区别
- SpringBoot中如何监听两个不同源的RabbitMQ消息队列
- springboot干货——(十三【二】)整合redis实现消息队列
- SpringBoot对消息队列(MQ)的支持
- spring boot 集成activeMQ消息队列
- spring boot Rabbitmq集成,延时消息队列实现
- redis的消息队列和发布订阅demo
- 消息队列中点对点与发布订阅区别