tensorflow 移植自己的模型到android
2018-03-28 12:39
316 查看
一 训练神经网络
注意在神经网络中输入x为“x-input”,输出layer2为“0”,在之后保存图结构的时候需要用到这两个名字
x = tf.placeholder(tf.float32, [None, INPUT_NODE], name='x-input')layer2 = tf.add(tf.matmul(layer1, w2), b2, name="O")
保存图结构的两种方法
1.以变量的形式保存图,这里的output_node_names的名字是之前layer2的名字
output_graph_def = tf.graph_util.convert_variables_to_constants(sess, sess.graph_def, output_node_names=['O'])
with tf.gfile.FastGFile("MNIST_data/model-graph2.pb", "wb") as f:
f.write(output_graph_def.SerializeToString())2.以常量的形式保存图,这里需要用到冻结图
以MNIST手写字体识别为例,代码如下import numpy as np
import sklearn.preprocessing as prep
import tensorflow as tf
from tensorflow.examples.tutorials.mnist import input_data
mnist = input_data.read_data_sets('MNIST_data', one_hot=True)
n_samples = int(mnist.train.num_examples)
training_epochs = 10000
batch_size = 100
REGULARIZATION_RATE = 0.0001
MOVING_AVERAGE_DECAY = 0.99
INPUT_NODE = 784
OUTPUT_NODE = 10
hidden_1 = 500
hidden_2 = 10
x = tf.placeholder(tf.float32, [None, INPUT_NODE], name='x-input')
y = tf.placeholder(tf.float32, [None, OUTPUT_NODE], name='y-input')
w1 = tf.Variable(tf.truncated_normal([INPUT_NODE, hidden_1], stddev=0.1), name="w1")
w2 = tf.Variable(tf.truncated_normal([hidden_1, hidden_2], stddev=0.1), name="w2")
b1 = tf.Variable(tf.constant(0.1, shape=[hidden_1]), name="b1")
b2 = tf.Variable(tf.constant(0.1, shape=[hidden_2]), name="b2")
global_step = tf.Variable(0, trainable=False)
layer1 = tf.nn.relu(tf.add(tf.matmul(x, w1), b1), name="l1")
layer2 = tf.add(tf.matmul(layer1, w2), b2, name="O")
cross_entropy = tf.nn.sparse_softmax_cross_entropy_with_logits(logits=layer2, labels=tf.argmax(y, 1))
cross_entropy_mean = tf.reduce_mean(cross_entropy)
regularizer = tf.contrib.layers.l2_regularizer(REGULARIZATION_RATE)
regularization = regularizer(w1) + regularizer(w2)
loss = cross_entropy_mean + regularization
learning_rate = tf.train.exponential_decay(0.01, global_step, mnist.train.num_examples / batch_size, 0.96)
train_op = tf.train.GradientDescentOptimizer(learning_rate=learning_rate).minimize(loss)
#指定依赖关系
#train_op = tf.group(train_step, variables_op)
correct_prediction = tf.equal(tf.argmax(layer2, 1), tf.argmax(y, 1))
accuracy = tf.reduce_mean(tf.cast(correct_prediction, tf.float32))
saver = tf.train.Saver()
with tf.Session() as sess:
sess.run(tf.global_variables_initializer())
for epoch in range(training_epochs):
global_step = epoch
#total_batch = int(n_samples / batch_size)
if (epoch+1) % 1000 == 0:
validate_acc = sess.run(accuracy, feed_dict={x: mnist.validation.images, y: mnist.validation.labels})
print("After %d trainning step(s), validation accuracy "
"using average model is %g" % (epoch+1, validate_acc))
batch_xs, batch_ys = mnist.train.next_batch(batch_size)
sess.run(train_op, feed_dict={x: batch_xs, y: batch_ys})
# 一
#tf.train.write_graph(sess.graph_def, '.', 'MNIST_data/model.pbtxt')
#saver.save(sess, "MNIST_data/model.ckpt")
# 二
output_graph_def = tf.graph_util.convert_variables_to_constants(sess, sess.graph_def, output_node_names=['O'])
with tf.gfile.FastGFile("MNIST_data/model-graph2.pb", "wb") as f:
f.write(output_graph_def.SerializeToString())
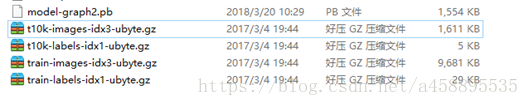
生成的.pb文件如下
二 配置android工程
本人的android stdio版本为3.01,注意需要abdroid API>=21,Build tools API >=23,官方的解释是这样的:
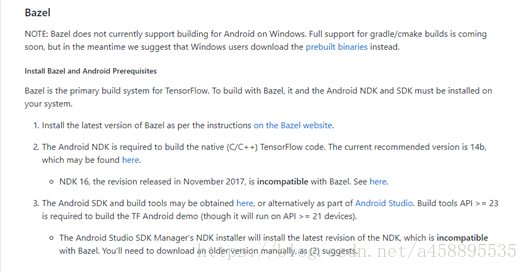
Bazel 现不支持windows版tensorflow,需要自己编译接口的请参考官方教程
这里直接下载编译好的文件:地址
据说Google刚刚推出最新版Bazel已经支持windows但是本人没有经过测试
在安卓工程下新建libs目录和assets目录,将下载的文件放入libs目录,将模型文件放入assets目录
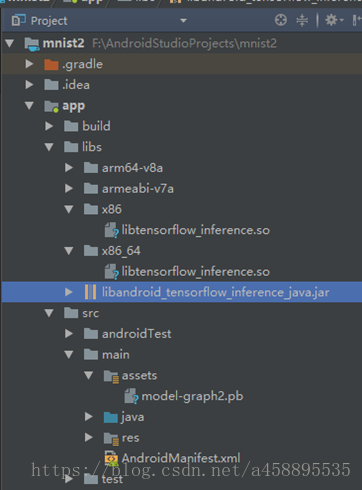
之后还要在build.gradle中加入这几行代码sourceSets {
main {
jniLibs.srcDirs = ['libs']
}
}
我的工程配置如下:

之后就可以在工程中加入tensorflow接口import org.tensorflow.contrib.android.TensorFlowInferenceInterface;三 编写程序
在java类中加入static {
System.loadLibrary("tensorflow_inference");
}
定义模型文件路径,及变量名称,注意INPUT_NODE和OUTPUT_NODE名称同神经网络中x和layer2的名称
private static final String mode_file = "file:///android_asset/model-graph2.pb";
private static final String INPUT_NODE = "x-input"; //模型中输入变量的名称
private static final String OUTPUT_NODE = "O"; //模型中输出变量的名称
private static final int NUM_CLASSES = 10; //样本集的类别数量,mnist数据集对应10
定义输入输出数据,定义tensorflow接口private int logit; //输出数组中最大值的下标
private float[] inputs_data = new float[784]
private float[] outputs_data = new float[NUM_CLASSES];
private TensorFlowInferenceInterface inferenceInterface;
导入模型文件
//输入节点名称 输入数据 数据大小
//填充数据 1,784为神经网络输入层的矩阵大小
inferenceInterface.feed(INPUT_NODE, inputs_data, 1,784);
Trace.endSection();
Trace.beginSection("run");
//运行
inferenceInterface.run(new String[]{OUTPUT_NODE});
Trace.endSection();
Trace.beginSection("fetch");
//取出数据
//输出节点名称 输出数组
inferenceInterface.fetch(OUTPUT_NODE, outputs_data);
Trace.endSection();
android代码如下: package org.mnist2;
import android.content.res.Resources;
import android.graphics.Bitmap;
import android.graphics.BitmapFactory;
import android.os.Bundle;
import android.os.Trace;
import android.support.v7.app.AppCompatActivity;
import android.util.Log;
import android.widget.ImageView;
import android.widget.TextView;
import org.tensorflow.contrib.android.TensorFlowInferenceInterface;
public class MainActivity extends AppCompatActivity {
static {
System.loadLibrary("tensorflow_inference");
}
private static final String mode_file = "file:///android_asset/model-graph2.pb";
private static final String INPUT_NODE = "x-input"; //模型中输入变量的名称
private static final String OUTPUT_NODE = "O"; //模型中输出变量的名称
private static final int NUM_CLASSES = 10; //样本集的类别数量,mnist数据集对应10
private static final int HEIGHT = 78; //输入图片的像素高
private static final int WIDTH = 78; //输入图片的像素宽
private static final int CHANNEL = 1; //输入图片的通道数:RGB
private int logit; //输出数组中最大值的下标
private float[] inputs_data = new float[784];
private float[] outputs_data = new float[NUM_CLASSES];
private TensorFlowInferenceInterface inferenceInterface;
@Overri
4000
de
protected void onCreate(Bundle savedInstanceState) {
super.onCreate(savedInstanceState);
setContentView(R.layout.activity_main);
TextView text = (TextView) findViewById(R.id.textView);
inferenceInterface = new TensorFlowInferenceInterface(getAssets(), mode_file);
getPicturePixel();//获取图片像素
Trace.beginSection("feed");
//输入节点名称 输入数据 数据大小
//填充数据 1,784为神经网络输入层的矩阵大小
inferenceInterface.feed(INPUT_NODE, inputs_data, 1,784);
Trace.endSection();
Trace.beginSection("run");
//运行
inferenceInterface.run(new String[]{OUTPUT_NODE});
Trace.endSection();
Trace.beginSection("fetch");
//取出数据
//输出节点名称 输出数组
inferenceInterface.fetch(OUTPUT_NODE, outputs_data);
Trace.endSection();
logit = 0;
//找出预测的结果
for(int i=1;i<NUM_CLASSES;i++)
{
if(outputs_data[i]>outputs_data[logit])
logit=i;
}
text.setText("The number is "+ logit);
}
private void getPicturePixel() {
try{
Resources res = getResources();
Bitmap bitmap = BitmapFactory.decodeResource(res,R.mipmap.picture_0);
ImageView img= (ImageView) findViewById(R.id.img);
img.setImageBitmap(bitmap);
int width = bitmap.getWidth();
int height = bitmap.getHeight();
int by = bitmap.getPixel(0,0);
Log.d("tag", width+" "+height);
// 保存所有的像素的数组,图片宽×高
int[] pixels = new int[width * height];
float[] pixels_f = new float[width * height];
bitmap.getPixels(pixels, 0, width, 0, 0, width, height);
for (int i = 0; i < pixels.length; i++) {
inputs_data[i] = (float)pixels[i];
}
}catch (Exception e){
Log.d("tag", e.getMessage());
}
}
}在工程中放入测试图片
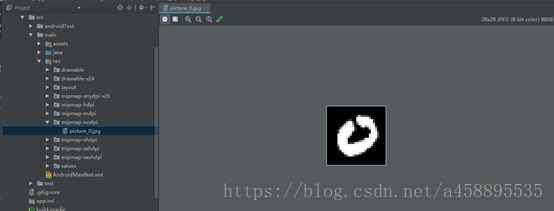
运行就可以测试结果
注意在神经网络中输入x为“x-input”,输出layer2为“0”,在之后保存图结构的时候需要用到这两个名字
x = tf.placeholder(tf.float32, [None, INPUT_NODE], name='x-input')layer2 = tf.add(tf.matmul(layer1, w2), b2, name="O")
保存图结构的两种方法
1.以变量的形式保存图,这里的output_node_names的名字是之前layer2的名字
output_graph_def = tf.graph_util.convert_variables_to_constants(sess, sess.graph_def, output_node_names=['O'])
with tf.gfile.FastGFile("MNIST_data/model-graph2.pb", "wb") as f:
f.write(output_graph_def.SerializeToString())2.以常量的形式保存图,这里需要用到冻结图
以MNIST手写字体识别为例,代码如下import numpy as np
import sklearn.preprocessing as prep
import tensorflow as tf
from tensorflow.examples.tutorials.mnist import input_data
mnist = input_data.read_data_sets('MNIST_data', one_hot=True)
n_samples = int(mnist.train.num_examples)
training_epochs = 10000
batch_size = 100
REGULARIZATION_RATE = 0.0001
MOVING_AVERAGE_DECAY = 0.99
INPUT_NODE = 784
OUTPUT_NODE = 10
hidden_1 = 500
hidden_2 = 10
x = tf.placeholder(tf.float32, [None, INPUT_NODE], name='x-input')
y = tf.placeholder(tf.float32, [None, OUTPUT_NODE], name='y-input')
w1 = tf.Variable(tf.truncated_normal([INPUT_NODE, hidden_1], stddev=0.1), name="w1")
w2 = tf.Variable(tf.truncated_normal([hidden_1, hidden_2], stddev=0.1), name="w2")
b1 = tf.Variable(tf.constant(0.1, shape=[hidden_1]), name="b1")
b2 = tf.Variable(tf.constant(0.1, shape=[hidden_2]), name="b2")
global_step = tf.Variable(0, trainable=False)
layer1 = tf.nn.relu(tf.add(tf.matmul(x, w1), b1), name="l1")
layer2 = tf.add(tf.matmul(layer1, w2), b2, name="O")
cross_entropy = tf.nn.sparse_softmax_cross_entropy_with_logits(logits=layer2, labels=tf.argmax(y, 1))
cross_entropy_mean = tf.reduce_mean(cross_entropy)
regularizer = tf.contrib.layers.l2_regularizer(REGULARIZATION_RATE)
regularization = regularizer(w1) + regularizer(w2)
loss = cross_entropy_mean + regularization
learning_rate = tf.train.exponential_decay(0.01, global_step, mnist.train.num_examples / batch_size, 0.96)
train_op = tf.train.GradientDescentOptimizer(learning_rate=learning_rate).minimize(loss)
#指定依赖关系
#train_op = tf.group(train_step, variables_op)
correct_prediction = tf.equal(tf.argmax(layer2, 1), tf.argmax(y, 1))
accuracy = tf.reduce_mean(tf.cast(correct_prediction, tf.float32))
saver = tf.train.Saver()
with tf.Session() as sess:
sess.run(tf.global_variables_initializer())
for epoch in range(training_epochs):
global_step = epoch
#total_batch = int(n_samples / batch_size)
if (epoch+1) % 1000 == 0:
validate_acc = sess.run(accuracy, feed_dict={x: mnist.validation.images, y: mnist.validation.labels})
print("After %d trainning step(s), validation accuracy "
"using average model is %g" % (epoch+1, validate_acc))
batch_xs, batch_ys = mnist.train.next_batch(batch_size)
sess.run(train_op, feed_dict={x: batch_xs, y: batch_ys})
# 一
#tf.train.write_graph(sess.graph_def, '.', 'MNIST_data/model.pbtxt')
#saver.save(sess, "MNIST_data/model.ckpt")
# 二
output_graph_def = tf.graph_util.convert_variables_to_constants(sess, sess.graph_def, output_node_names=['O'])
with tf.gfile.FastGFile("MNIST_data/model-graph2.pb", "wb") as f:
f.write(output_graph_def.SerializeToString())
生成的.pb文件如下
二 配置android工程
本人的android stdio版本为3.01,注意需要abdroid API>=21,Build tools API >=23,官方的解释是这样的:
Bazel 现不支持windows版tensorflow,需要自己编译接口的请参考官方教程
这里直接下载编译好的文件:地址
据说Google刚刚推出最新版Bazel已经支持windows但是本人没有经过测试
在安卓工程下新建libs目录和assets目录,将下载的文件放入libs目录,将模型文件放入assets目录
之后还要在build.gradle中加入这几行代码sourceSets {
main {
jniLibs.srcDirs = ['libs']
}
}
我的工程配置如下:
之后就可以在工程中加入tensorflow接口import org.tensorflow.contrib.android.TensorFlowInferenceInterface;三 编写程序
在java类中加入static {
System.loadLibrary("tensorflow_inference");
}
定义模型文件路径,及变量名称,注意INPUT_NODE和OUTPUT_NODE名称同神经网络中x和layer2的名称
private static final String mode_file = "file:///android_asset/model-graph2.pb";
private static final String INPUT_NODE = "x-input"; //模型中输入变量的名称
private static final String OUTPUT_NODE = "O"; //模型中输出变量的名称
private static final int NUM_CLASSES = 10; //样本集的类别数量,mnist数据集对应10
定义输入输出数据,定义tensorflow接口private int logit; //输出数组中最大值的下标
private float[] inputs_data = new float[784]
private float[] outputs_data = new float[NUM_CLASSES];
private TensorFlowInferenceInterface inferenceInterface;
导入模型文件
inferenceInterface = new TensorFlowInferenceInterface(getAssets(), mode_file);运行Trace.beginSection("feed");
//输入节点名称 输入数据 数据大小
//填充数据 1,784为神经网络输入层的矩阵大小
inferenceInterface.feed(INPUT_NODE, inputs_data, 1,784);
Trace.endSection();
Trace.beginSection("run");
//运行
inferenceInterface.run(new String[]{OUTPUT_NODE});
Trace.endSection();
Trace.beginSection("fetch");
//取出数据
//输出节点名称 输出数组
inferenceInterface.fetch(OUTPUT_NODE, outputs_data);
Trace.endSection();
android代码如下: package org.mnist2;
import android.content.res.Resources;
import android.graphics.Bitmap;
import android.graphics.BitmapFactory;
import android.os.Bundle;
import android.os.Trace;
import android.support.v7.app.AppCompatActivity;
import android.util.Log;
import android.widget.ImageView;
import android.widget.TextView;
import org.tensorflow.contrib.android.TensorFlowInferenceInterface;
public class MainActivity extends AppCompatActivity {
static {
System.loadLibrary("tensorflow_inference");
}
private static final String mode_file = "file:///android_asset/model-graph2.pb";
private static final String INPUT_NODE = "x-input"; //模型中输入变量的名称
private static final String OUTPUT_NODE = "O"; //模型中输出变量的名称
private static final int NUM_CLASSES = 10; //样本集的类别数量,mnist数据集对应10
private static final int HEIGHT = 78; //输入图片的像素高
private static final int WIDTH = 78; //输入图片的像素宽
private static final int CHANNEL = 1; //输入图片的通道数:RGB
private int logit; //输出数组中最大值的下标
private float[] inputs_data = new float[784];
private float[] outputs_data = new float[NUM_CLASSES];
private TensorFlowInferenceInterface inferenceInterface;
@Overri
4000
de
protected void onCreate(Bundle savedInstanceState) {
super.onCreate(savedInstanceState);
setContentView(R.layout.activity_main);
TextView text = (TextView) findViewById(R.id.textView);
inferenceInterface = new TensorFlowInferenceInterface(getAssets(), mode_file);
getPicturePixel();//获取图片像素
Trace.beginSection("feed");
//输入节点名称 输入数据 数据大小
//填充数据 1,784为神经网络输入层的矩阵大小
inferenceInterface.feed(INPUT_NODE, inputs_data, 1,784);
Trace.endSection();
Trace.beginSection("run");
//运行
inferenceInterface.run(new String[]{OUTPUT_NODE});
Trace.endSection();
Trace.beginSection("fetch");
//取出数据
//输出节点名称 输出数组
inferenceInterface.fetch(OUTPUT_NODE, outputs_data);
Trace.endSection();
logit = 0;
//找出预测的结果
for(int i=1;i<NUM_CLASSES;i++)
{
if(outputs_data[i]>outputs_data[logit])
logit=i;
}
text.setText("The number is "+ logit);
}
private void getPicturePixel() {
try{
Resources res = getResources();
Bitmap bitmap = BitmapFactory.decodeResource(res,R.mipmap.picture_0);
ImageView img= (ImageView) findViewById(R.id.img);
img.setImageBitmap(bitmap);
int width = bitmap.getWidth();
int height = bitmap.getHeight();
int by = bitmap.getPixel(0,0);
Log.d("tag", width+" "+height);
// 保存所有的像素的数组,图片宽×高
int[] pixels = new int[width * height];
float[] pixels_f = new float[width * height];
bitmap.getPixels(pixels, 0, width, 0, 0, width, height);
for (int i = 0; i < pixels.length; i++) {
inputs_data[i] = (float)pixels[i];
}
}catch (Exception e){
Log.d("tag", e.getMessage());
}
}
}在工程中放入测试图片
运行就可以测试结果

相关文章推荐
- 详解如何将TensorFlow训练的模型移植到Android手机
- 将tensorflow训练好的模型移植到android
- TensorFlow自己训练的SSD mobilenet模型 安卓移植
- 手写选择题识别-封装tensorflow模型-移植到android程序
- 将tensorflow训练好的模型移植到android
- 将TensorFlow训练的模型移植到Android手机
- 将tensorflow训练好的模型移植到android
- 详解如何将TensorFlow训练的模型移植到Android手机
- 将tensorflow训练好的模型移植到android
- 将tensorflow训练好的模型移植到android
- tsnsorflow学习笔记七:详解如何将TensorFlow训练的模型移植到Android手机
- 搭建自己的ffmpeg的android移植开发环境
- 第三课:把tensorflow,模型和测试数据导入Android工程
- CoreML尝鲜:将自己训练的 caffe 模型移植到 IOS 上
- tensorflow 迁移学习(在已有类别的模型上添加自己的类别)
- TensorFlow——训练自己的数据(二)模型设计
- yolo模型移植到android手机端
- 用tensorflow训练自己的数据_3、训练模型
- Tensorflow模型Android上的使用
- Tensorflow之基于slim训练自己的模型