使用Arduino驱动基于ST7533芯片的TFT屏
2018-03-13 10:38
831 查看
在合宙通信买了一个1.8寸的TFT屏,驱动芯片是ST7533,本来打算使用Air800直接驱动,但由于其他原因,放弃了。于是尝试使用arduino驱动,为了屏幕刷新速度更快,采用硬件SPI。
硬件连接
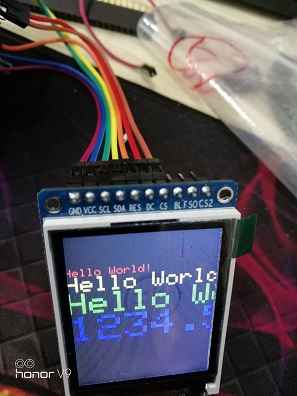
屏幕引脚如下图所示:

主要用到的引脚有:
GND:地
VCC:电源
SCL:时钟
SDA:数据
RES:复位
DC:数据/命令选择
CS:片选
分别对应arduino的以下引脚:
GND:地 —————— GND
VCC:电源 —————— VCC
SCL:时钟 —————— SPI_SCL(D13)
SDA:数据 —————— SPI_MOSI(D11)
RES:复位 —————— D8
DC:数据/命令选择 —————— D9
CS:片选 —————— D10
程序部分
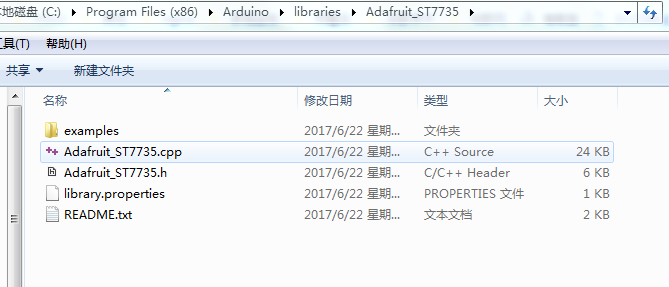
下载以下两个库:Adafruit GFX 程序,Adafruit ST7735 程序库,然后解压到Arduino IDE安装文件下的libraries文件夹下。
结果如下图:


打开Adafruit_ST7735/examples/graphicstest/graphicstest.ino文件,根据上述引脚连接,修改以下代码:
// For the breakout, you can use any 2 or 3 pins
// These pins will also work for the 1.8" TFT shield
#define TFT_CS     10
#define TFT_RST    8  // you can also connect this to the Arduino reset
// in which case, set this #define pin to -1!
#define TFT_DC     9

// Option 1 (recommended): must use the hardware SPI pins
// (for UNO thats sclk = 13 and sid = 11) and pin 10 must be
// an output. This is much faster - also required if you want
// to use the microSD card (see the image drawing example)
Adafruit_ST7735 tft = Adafruit_ST7735(TFT_CS,  TFT_DC, TFT_RST);

// Option 2: use any pins but a little slower!
#define TFT_SCLK 13   // set these to be whatever pins you like!
#define TFT_MOSI 11   // set these to be whatever pins you like!
//Adafruit_ST7735 tft = Adafruit_ST7735(TFT_CS, TFT_DC, TFT_MOSI, TFT_SCLK, TFT_RST);
相关文章推荐
- 树莓派与Arduino Leonardo使用NRF24L01无线模块通信之基于RF24库 (一) 配置与测试
- 使用 Spring 2.5 基于注解驱动的 Spring MVC
- 使用 Spring 2.5 基于注解驱动的 Spring MVC
- 基于TX2440开发板在ADS1.2中编写LED的驱动(GPIO的使用)裸机程序
- Tcar:智能车之基于L298N电机驱动芯片的驱动模块
- 使用 Spring 2.5 基于注解驱动的 Spring MVC(一)
- Linux芯片级移植与底层驱动(基于3.7.4内核)(GPIO&&pinctrl&&clk)
- 使用 Rational Software Architect 进行模型驱动和基于模式的开发,第 1 部分: 使用模式的模型驱动开发范例的概述
- Android Framework 基于 IPC Binder驱动使用 RPC
- 基于STM32的常用数码管芯片TM1650驱动
- 使用 Spring 2.5 基于注解驱动的 Spring MVC
- Linux芯片级移植与底层驱动(基于3.7.4内核)
- CentOS6.4 编译安装RTL8192CU芯片驱动,使用TP_LINK wn823n无线网卡
- 使用 Spring 2.5 基于注解驱动的 Spring MVC(二)
- Linux芯片级移植与底层驱动(基于3.7.4内核)
- 使用 Spring 2.5 基于注解驱动的 Spring MVC
- 使用 Spring 2.5 基于注解驱动的 Spring MVC
- Linux芯片级移植与底层驱动(基于3.7.4内核)
- Linux芯片级移植与底层驱动(基于3.7.4内核) --SMP多核启动以及CPU热插拔驱动
- 使用 Spring 2.5 基于注解驱动的 Spring MVC
