openstack安装keystone
2018-02-24 19:27
211 查看
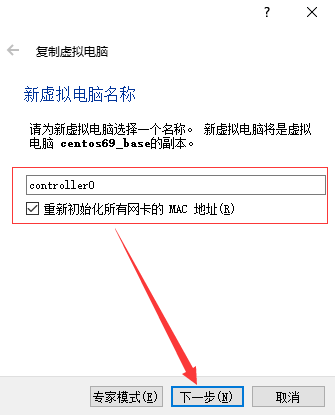
一 基于模板复制虚拟机输入CTRL+o,弹出复制电脑

二 启动虚拟机controller0并登陆
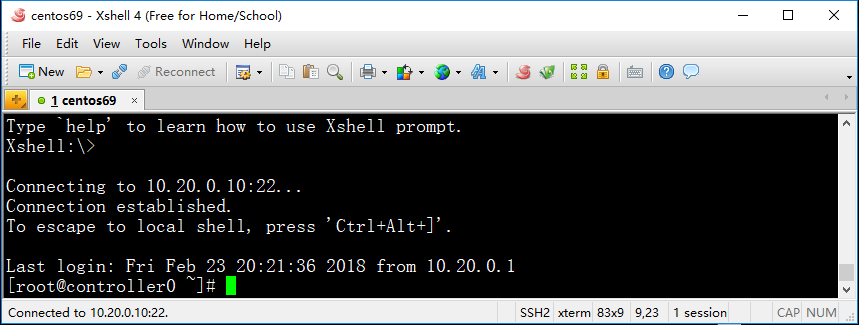
登陆成功。
三 控制节点安装(controller0)1 主机名设置
四 基本服务安装与配置(controller0)1 MySQL服务安装
五 安装消息服务
六安装keystone
七 为keystone设置admin账户token
八 配置keystone.conf文件
九 设置keystone用PKI tokens
十 初始化keystone数据库
二 启动虚拟机controller0并登陆
登陆成功。
[root@controller0 ~]# ifconfig
eth0      Link encap:Ethernet  HWaddr 08:00:27:26:76:FC
inet addr:10.20.0.10  Bcast:10.20.0.255  Mask:255.255.255.0
inet6 addr: fe80::a00:27ff:fe26:76fc/64 Scope:Link
UP BROADCAST RUNNING MULTICAST  MTU:1500  Metric:1
RX packets:48 errors:0 dropped:0 overruns:0 frame:0
TX packets:56 errors:0 dropped:0 overruns:0 carrier:0
collisions:0 txqueuelen:1000
RX bytes:5243 (5.1 KiB)  TX bytes:6141 (5.9 KiB)
Interrupt:19 Base address:0xd020
eth3      Link encap:Ethernet  HWaddr 08:00:27:BE:44:59
inet addr:10.0.5.15  Bcast:10.0.5.255  Mask:255.255.255.0
inet6 addr: fe80::a00:27ff:febe:4459/64 Scope:Link
UP BROADCAST RUNNING MULTICAST  MTU:1500  Metric:1
RX packets:3 errors:0 dropped:0 overruns:0 frame:0
TX packets:12 errors:0 dropped:0 overruns:0 carrier:0
collisions:0 txqueuelen:1000
RX bytes:809 (809.0 b)  TX bytes:1182 (1.1 KiB)
lo        Link encap:Local Loopback
inet addr:127.0.0.1  Mask:255.0.0.0
inet6 addr: ::1/128 Scope:Host
UP LOOPBACK RUNNING  MTU:65536  Metric:1
RX packets:3 errors:0 dropped:0 overruns:0 frame:0
TX packets:3 errors:0 dropped:0 overruns:0 carrier:0
collisions:0 txqueuelen:0
RX bytes:228 (228.0 b)  TX bytes:228 (228.0 b)
三 控制节点安装(controller0)1 主机名设置
[root@controller0 ~]# cat /etc/sysconfig/network
NETWORKING=yes
HOSTNAME=controller0
2 网卡配置
[root@controller0 ~]# cat /etc/sysconfig/network-scripts/ifcfg-eth0
DEVICE=eth0
TYPE=Ethernet
ONBOOT=yes
NM_CONTROLLED=yes
BOOTPROTO=static
IPADDR=10.20.0.10
NETMASK=255.255.255.0
四 基本服务安装与配置(controller0)1 MySQL服务安装
[root@controller0 ~]# yum install -y mysql mysql-server MySQL-python2 修改MySQL配置
[root@controller0 ~]# cat /etc/my.cnf
[mysqld]
datadir=/var/lib/mysql
socket=/var/lib/mysql/mysql.sock
user=mysql
# Disabling symbolic-links is recommended to prevent assorted security risks
symbolic-links=0
bind-address = 0.0.0.0
default-storage-engine = innodb
innodb_file_per_table
collation-server = utf8_general_ci
init-connect = 'SET NAMES utf8'
character-set-server = utf8
[mysqld_safe]
log-error=/var/log/mysqld.log
pid-file=/var/run/mysqld/mysqld.pid
3 启动MySQL服务
[root@controller0 ~]# service mysqld start
[root@controller0 ~]# chkconfig mysqld on
4 交互式配置MySQL root 密码,设置密码为“openstack”
[root@controller0 ~]# mysql_secure_installation
NOTE: RUNNING ALL PARTS OF THIS SCRIPT IS RECOMMENDED FOR ALL MySQL
SERVERS IN PRODUCTION USE!  PLEASE READ EACH STEP CAREFULLY!
In order to log into MySQL to secure it, we'll need the current
password for the root user.  If you've just installed MySQL, and
you haven't set the root password yet, the password will be blank,
so you should just press enter here.
Enter current password for root (enter for none):
OK, successfully used password, moving on...
Setting the root password ensures that nobody can log into the MySQL
root user without the proper authorisation.
Set root password? [Y/n] y
New password:
Re-enter new password:
Password updated successfully!
Reloading privilege tables..
... Success!
By default, a MySQL installation has an anonymous user, allowing anyone
to log into MySQL without having to have a user account created for
them.  This is intended only for testing, and to make the installation
go a bit smoother.  You should remove them before moving into a
production environment.
Remove anonymous users? [Y/n] y
... Success!
Normally, root should only be allowed to connect from 'localhost'.  This
ensures that someone cannot guess at the root password from the network.
Disallow root login remotely? [Y/n] n
... skipping.
By default, MySQL comes with a database named 'test' that anyone can
access.  This is also intended only for testing, and should be removed
before moving into a production environment.
Remove test database and access to it? [Y/n] n
... skipping.
Reloading the privilege tables will ensure that all changes made so far
will take effect immediately.
Reload privilege tables now? [Y/n] y
... Success!
Cleaning up...
All done!  If you've completed all of the above steps, your MySQL
installation should now be secure.
Thanks for using MySQL!
5 验证
[root@controller0 ~]# mysql -uroot -popnstack
ERROR 1045 (28000): Access denied for user 'root'@'localhost' (using password: YES)
[root@controller0 ~]# mysql -uroot -popenstack
Welcome to the MySQL monitor.  Commands end with ; or \g.
Your MySQL connection id is 8
Server version: 5.1.73 Source distribution
Copyright (c) 2000, 2013, Oracle and/or its affiliates. All rights reserved.
Oracle is a registered trademark of Oracle Corporation and/or its
affiliates. Other names may be trademarks of their respective
owners.
Type 'help;' or '\h' for help. Type '\c' to clear the current input statement.
mysql> show databases;
+--------------------+
| Database           |
+--------------------+
| information_schema |
| mysql              |
| test               |
+--------------------+
3 rows in set (0.00 sec)
mysql> exit
Bye
五 安装消息服务
[root@controller0 ~]# yum install -y qpid-cpp-server
[root@controller0 ~]# cat /etc/qpidd.conf
cluster-mechanism=DIGEST-MD5 ANONYMOUS
acl-file=/etc/qpid/qpidd.acl
auth=no
[root@controller0 ~]# service qpidd start
Starting Qpid AMQP daemon:                                 [  OK  ]
[root@controller0 ~]# chkconfig qpidd on
六安装keystone
[root@controller0 ~]# yum install openstack-keystone python-keystoneclient -y
七 为keystone设置admin账户token
[root@controller0 ~]# ADMIN_TOKEN=$(openssl rand -hex 10)
[root@controller0 ~]# echo $ADMIN_TOKEN
e2bba11cab6778b3e374
[root@controller0 ~]# openstack-config --set /etc/keystone/keystone.conf DEFAULT admin_token $ADMIN_TOKEN
八 配置keystone.conf文件
[root@controller0 ~]# openstack-config --set /etc/keystone/keystone.conf sql connection mysql://keystone:openstack@controller0/keystone
[root@controller0 ~]# openstack-config --set /etc/keystone/keystone.conf DEFAULT debug True
[root@controller0 ~]# openstack-config --set /etc/keystone/keystone.conf DEFAULT verbose True
九 设置keystone用PKI tokens
[root@controller0 ~]# keystone-manage pki_setup --keystone-user keystone --keystone-group keystone
Generating RSA private key, 2048 bit long modulus
..+++
.......................................+++
e is 65537 (0x10001)
Generating RSA private key, 2048 bit long modulus
................................+++
.........+++
e is 65537 (0x10001)
Using configuration from /etc/keystone/ssl/certs/openssl.conf
Check that the request matches the signature
Signature ok
The Subject's Distinguished Name is as follows
countryName           :PRINTABLE:'US'
stateOrProvinceName   :ASN.1 12:'Unset'
localityName          :ASN.1 12:'Unset'
organizationName      :ASN.1 12:'Unset'
commonName            :ASN.1 12:'www.example.com';
Certificate is to be certified until Feb 22 11:05:08 2028 GMT (3650 days)
Write out database with 1 new entries
Data Base Updated
[root@controller0 ~]# chown -R keystone:keystone /etc/keystone/ssl
[root@controller0 ~]# chmod -R o-rwx /etc/keystone/ssl
十 初始化keystone数据库
[root@controller0 ~]# openstack-db --init --service keystone --password openstack
Please enter the password for the 'root' MySQL user:
Verified connectivity to MySQL.
Creating 'keystone' database.
Updating 'keystone' database password in /etc/keystone/keystone.conf
Initializing the keystone database, please wait...
Traceback (most recent call last):
File "/usr/bin/keystone-manage", line 51, in <module>
cli.main(argv=sys.argv, config_files=config_files)
File "/usr/lib/python2.6/site-packages/keystone/cli.py", line 189, in main
config.setup_logging()
File "/usr/lib/python2.6/site-packages/keystone/config.py", line 56, in setup_logging
log.setup('keystone')
File "/usr/lib/python2.6/site-packages/keystone/openstack/common/log.py", line 461, in setup
_setup_logging_from_conf(product_name, version)
File "/usr/lib/python2.6/site-packages/keystone/openstack/common/log.py", line 525, in _setup_logging_from_conf
filelog = logging.handlers.WatchedFileHandler(logpath)
File "/usr/lib64/python2.6/logging/handlers.py", line 377, in __init__
logging.FileHandler.__init__(self, filename, mode, encoding, delay)
File "/usr/lib64/python2.6/logging/__init__.py", line 835, in __init__
StreamHandler.__init__(self, self._open())
File "/usr/lib64/python2.6/logging/__init__.py", line 854, in _open
stream = open(self.baseFilename, self.mode)
IOError: [Errno 13] Permission denied: '/var/log/keystone/keystone.log'
Error updating the database. Please see /var/log/keystone/ logs for details.
[root@controller0 ~]# rm /var/log/keystone/keystone.log
rm: remove regular file `/var/log/keystone/keystone.log'? y
[root@controller0 ~]# openstack-db --init --service keystone --password openstack
Please enter the password for the 'root' MySQL user:
Verified connectivity to MySQL.
Database 'keystone' already exists. Please consider first running:
/usr/bin/openstack-db --drop --service keystone
[root@controller0 ~]# /usr/bin/openstack-db --drop --service keystone
Please enter the password for the 'root' MySQL user:
Verified connectivity to MySQL.
Dropping 'keystone' database.
Complete!
[root@controller0 ~]# openstack-db --init --service keystone --password openstack
Please enter the password for the 'root' MySQL user:
Verified connectivity to MySQL.
Creating 'keystone' database.
Updating 'keystone' database password in /etc/keystone/keystone.conf
Initializing the keystone database, please wait...
Complete!
十 一启动keystone[root@controller0 ~]# service openstack-keystone start [root@controller0 ~]# ps -ef|grep keystone keystone 25253 1 0 19:15 ? 00:00:00 /usr/bin/python /usr/bin/keystone-all root 25268 2225 0 19:18 pts/0 00:00:00 grep keystone [root@controller0 ~]# vi /var/log/keystone/keystone.log [root@controller0 ~]# vi /var/log/keystone/keystone-startup.log [root@controller0 ~]# chkconfig openstack-keystone on

相关文章推荐
- Openstack(Kilo)安装系列之Keystone(五)
- CentOS6.2下源码安装openStack keystone
- openstack keystone源码安装遇到的问题
- 安装OpenStack启动Keystone时HTTP报500内部错误解决
- [部署篇2]VMWare搭建Openstack——控制节点的KeyStone的安装
- Ubuntu下LDAP和OpenStack Keystone安装集成小结
- CentOS 7部署OpenStack(2)―安装keystone服务
- Ubuntu 14.04一步一步安装Openstack Kilo版本-7(keystone)
- Centos7手动安装OpenStack Mitaka版本--KeyStone安装
- openstack【Kilo】入门 【keystone篇】五:keystone安装与配置
- <手动安装Openstack Mikita>之(二) Keystone安装
- openstack安装keystone过程中提示requires:PyYAML的解决方案
- Ubuntu 14.04 LTS 安装 Juno 版 OpenStack Keystone
- Centos7手动部署Openstack Mitaka版安装配置--(三)安装keystone认证服务
- 在一套安装了keystone的环境上,安装openstack swift(centos6.5)
- OpenStack安装部署之keystone&&Glance
- openstack-o版安装keystone
- openstack的keystone安装运行总结
- [连载教程二]CentOS 6.3上通过源码安装Openstack Folsom之Keystone安装
- openstack----03_ 安装Keystone