Android地图开发-BingMap基础教程
2018-02-13 17:51
489 查看
原文请参考:http://blog.csdn.net/mad1989/article/details/9733133开端本文皆在指引大家在自己的项目里嵌入BingMap,并可以在地图上添加覆盖物、折线等常用地图功能。
BingMap的android版 SDK并没有集成在微软的网站里,而是放在了其开源网站:CodePlex。
该网页并没有相关的API文档以及example。

或是从网上下载一个bing.jar包,这个包是从项目中抽离出来的API,我打成了jar包,可以放在项目libs里,跟上边的方法一样的效果,那一个都可以。

1.2.2 BingMapsAndroidSDK下assets里的资源和js文件全部拷贝到自己项目下:

xmlns:tools="http://schemas.android.com/tools"
android:layout_width="match_parent"
android:layout_height="match_parent" >
<org.bingmaps.sdk.BingMapsView
android:id="@+id/myBingMapview"
android:layout_width="fill_parent"
android:layout_height="fill_parent" >
</org.bingmaps.sdk.BingMapsView>
<LinearLayout
android:layout_width="wrap_content"
android:layout_height="wrap_content"
android:layout_alignParentBottom="true"
android:layout_alignParentRight="true"
android:layout_gravity="center|bottom"
android:background="@android:drawable/zoom_plate"
android:paddingLeft="15dip"
android:paddingRight="15dip" >
<LinearLayout
android:layout_width="wrap_content"
android:layout_height="wrap_content"
android:paddingTop="5dip" >
<ZoomButton
android:id="@+id/zoomInBtn"
android:layout_width="wrap_content"
android:layout_height="wrap_content"
android:background="@android:drawable/btn_plus" />
<ZoomButton
android:id="@+id/zoomOutBtn"
android:layout_width="wrap_content"
android:layout_height="wrap_content"
android:background="@android:drawable/btn_minus" />
</LinearLayout>
</LinearLayout>
</RelativeLayout>
MainActivity.java[java] view plain copymBingMapView = (BingMapsView) findViewById(R.id.myBingMapview);
inButton = (ZoomButton) findViewById(R.id.zoomInBtn);
outButton = (ZoomButton) findViewById(R.id.zoomOutBtn);
inButton.setOnClickListener(this);
outButton.setOnClickListener(this);
Coordinate coordinate = new Coordinate(39.901873, 116.326655);
mBingMapView.loadMap(BINGMAPVIEW_API_KEY, coordinate,Constants.DefaultGPSZoomLevel);
mBingMapView.setMapStyle(MapStyles.Auto);
mBingMapView.setCenterAndZoom(coordinate, Constants.DefaultGPSZoomLevel);
真机效果:
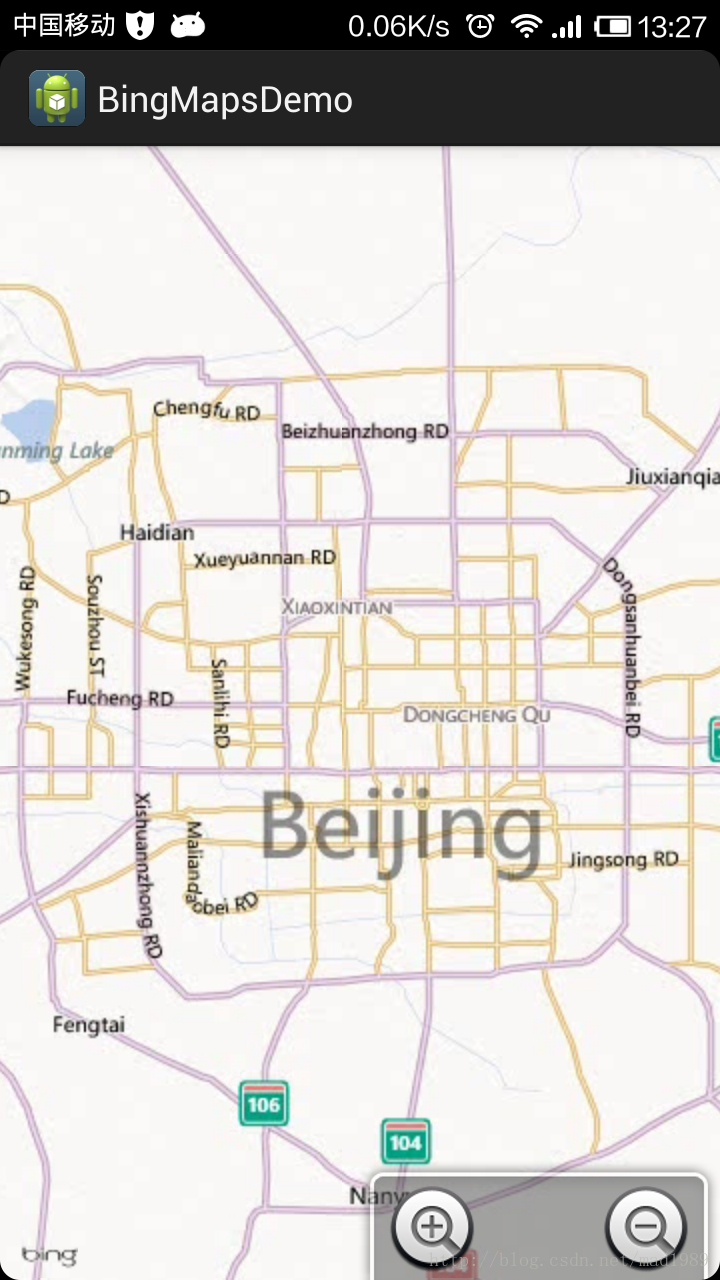
使用感受:Map加载不是特别快,手指触摸缩放地图不流畅,使用地图需要申请Key。地图体验效果明显没有IOS版好。在平板或手机上,有时加载不出地图会有如下的显示:

其实这个SDK是把js代码封装成了常用的java类,java类通过调用js代码,获取mapview相关信息,js代码再把返回的内容传递给java类,看一下项目assets里的js代码和html就明白了。

EntityLayer entityLayer = (EntityLayer) mBingMapView.getLayerManager()
.getLayerByName(Constants.DataLayers.Search);
if (entityLayer == null) {
entityLayer = new EntityLayer(Constants.DataLayers.Search);
}
entityLayer.clear();
double longitude = Double.parseDouble("116.36212");
double latitude = Double.parseDouble("39.946057");
Coordinate coord = new Coordinate(latitude, longitude);
// 实现标记必须用到 Pushpin 来做标记。
// PushpinOptions可以对 Pushpin所要标记的设置属性
// opt.Icon图标 opt.Anchor点的位置
PushpinOptions opt = new PushpinOptions();
opt.Icon = "file:///android_asset/start.png";
opt.Width = 50;
opt.Height = 50;
opt.Anchor = new Point(11, 10);
Pushpin p = new Pushpin(coord, opt);
p.Title = "I`m a title ";//不设置title属性,不会显示infobox(吹出框)
if (p.Location != null) {
listCoord.add(coord);
entityLayer.add(p);
}
mBingMapView.getLayerManager().addLayer(entityLayer);
entityLayer.updateLayer();
真机效果:
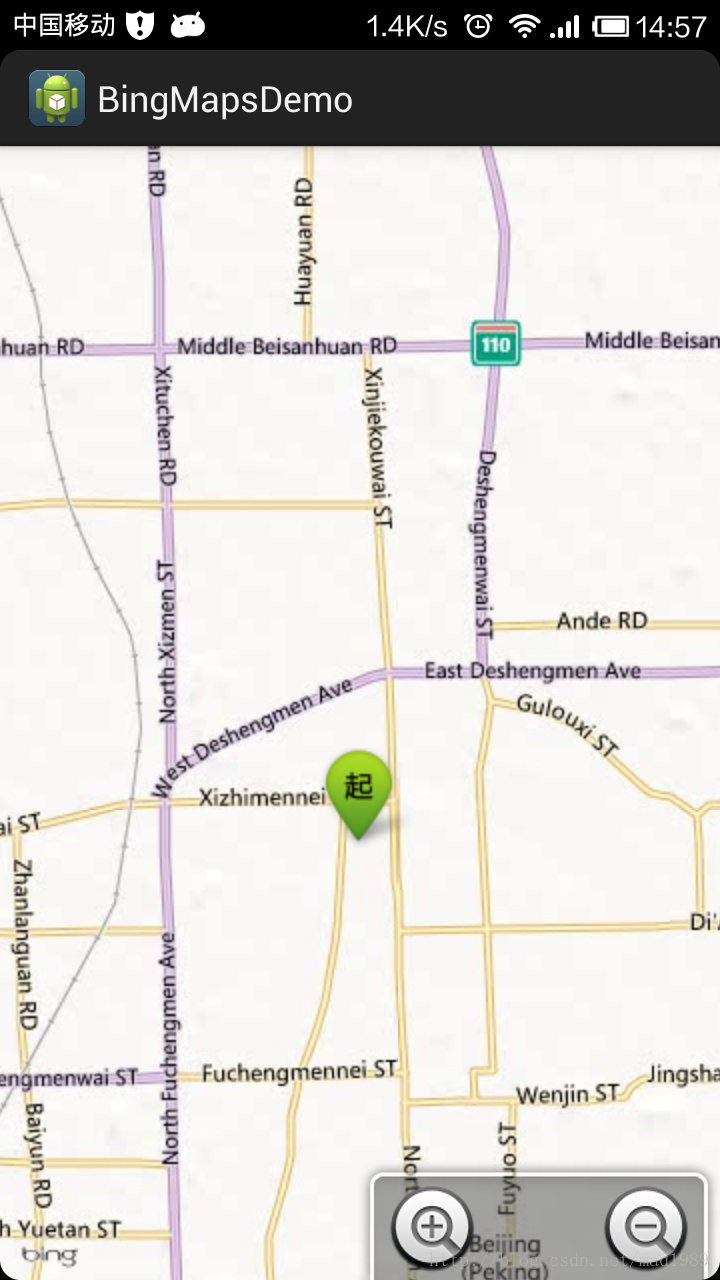
EntityLayer相当于常用的Overlay,只是添加Overlay方式跟web版类似,官网也没有相关的API说明和示例代码,添加起来比较麻烦,设置各个属性参数不是很灵活,得花费一段时间看源码。Mapview设置EntityclickListener监听,Pushpin设置titile属性,点击Marker中的title,才能触发EntityClickListener,这个监听相当于吹出框title点击事件,如果想添加更多的监听事件,请查阅SDK 源码,如果没有想要的监听,则需要自己扩充实现,这个SDK已经好长时间没有人来维护了。
Coordinate cd1 = new Coordinate(39.946251, 116.362228);
Coordinate cd2 = new Coordinate(39.954548, 116.379188);
Coordinate cd3 = new Coordinate(39.955543, 116.414402);
Coordinate cd4 = new Coordinate(39.939391, 116.424175);
Coordinate cd5 = new Coordinate(39.929765, 116.42475);
List<Coordinate> lists = new ArrayList<Coordinate>();
lists.add(cd1);
lists.add(cd2);
lists.add(cd3);
lists.add(cd4);
lists.add(cd5);
// 在bing地图中画线所要用到 Polyline
// PolylineOptions 是对线的属性设置
// polylineOptions.StrokeThickness 为线的大小
// polylineOptions.StrokeColor 线的颜色值
Polyline routeLine = new Polyline(lists);
PolylineOptions polylineOptions = new PolylineOptions();
polylineOptions.StrokeThickness = 3;
routeLine.Options = polylineOptions;
entityLayer.add(routeLine);
entityLayer.updateLayer();
效果图:


结尾微软BingMap 对android支持不是太好,唯一指定SDK最后一次更新是2011.08,并且目前的版本,问题很多,也可以自己写js代码,转换java的代码,这样会耗费很大的精力。当前的SDK也可以实现添加marker画线,由于点击事件无法触发,吹出框自定义是个问题,当前的版本地图监听事件太少,移植过程需要不断扩展SDK。
BingMapSDK 地址:Bing.jar地址:http://download.csdn.net/detail/mad1989/5863893
(bing.jar只是我把SDK的东西打包成了一个jar包,BingMapSDK是官方的SDK,任选一个就可以了)
本文Demo地址:http://download.csdn.net/detail/mad1989/5864029
1.1 SDK 和API
http://bingmapsandroidsdk.codeplex.com/BingMap的android版 SDK并没有集成在微软的网站里,而是放在了其开源网站:CodePlex。
该网页并没有相关的API文档以及example。
1.2 BingMapsAndroidSDK(bing.jar)
1.2.1 下载的SDK是一个android Library,该SDK并未整合成一个jar包(像百度高德地图那样),所以在project.properties添加:android.library=true;然后在自己项目properties添加library引用。或是从网上下载一个bing.jar包,这个包是从项目中抽离出来的API,我打成了jar包,可以放在项目libs里,跟上边的方法一样的效果,那一个都可以。
1.2.2 BingMapsAndroidSDK下assets里的资源和js文件全部拷贝到自己项目下:
1.3 地图实例化
activity_main.xml[java] view plain copy<RelativeLayout xmlns:android="http://schemas.android.com/apk/res/android"xmlns:tools="http://schemas.android.com/tools"
android:layout_width="match_parent"
android:layout_height="match_parent" >
<org.bingmaps.sdk.BingMapsView
android:id="@+id/myBingMapview"
android:layout_width="fill_parent"
android:layout_height="fill_parent" >
</org.bingmaps.sdk.BingMapsView>
<LinearLayout
android:layout_width="wrap_content"
android:layout_height="wrap_content"
android:layout_alignParentBottom="true"
android:layout_alignParentRight="true"
android:layout_gravity="center|bottom"
android:background="@android:drawable/zoom_plate"
android:paddingLeft="15dip"
android:paddingRight="15dip" >
<LinearLayout
android:layout_width="wrap_content"
android:layout_height="wrap_content"
android:paddingTop="5dip" >
<ZoomButton
android:id="@+id/zoomInBtn"
android:layout_width="wrap_content"
android:layout_height="wrap_content"
android:background="@android:drawable/btn_plus" />
<ZoomButton
android:id="@+id/zoomOutBtn"
android:layout_width="wrap_content"
android:layout_height="wrap_content"
android:background="@android:drawable/btn_minus" />
</LinearLayout>
</LinearLayout>
</RelativeLayout>
MainActivity.java[java] view plain copymBingMapView = (BingMapsView) findViewById(R.id.myBingMapview);
inButton = (ZoomButton) findViewById(R.id.zoomInBtn);
outButton = (ZoomButton) findViewById(R.id.zoomOutBtn);
inButton.setOnClickListener(this);
outButton.setOnClickListener(this);
Coordinate coordinate = new Coordinate(39.901873, 116.326655);
mBingMapView.loadMap(BINGMAPVIEW_API_KEY, coordinate,Constants.DefaultGPSZoomLevel);
mBingMapView.setMapStyle(MapStyles.Auto);
mBingMapView.setCenterAndZoom(coordinate, Constants.DefaultGPSZoomLevel);
真机效果:
使用感受:Map加载不是特别快,手指触摸缩放地图不流畅,使用地图需要申请Key。地图体验效果明显没有IOS版好。在平板或手机上,有时加载不出地图会有如下的显示:
其实这个SDK是把js代码封装成了常用的java类,java类通过调用js代码,获取mapview相关信息,js代码再把返回的内容传递给java类,看一下项目assets里的js代码和html就明白了。
1.4 EntityLayer
[java] view plain copy示例代码:EntityLayer entityLayer = (EntityLayer) mBingMapView.getLayerManager()
.getLayerByName(Constants.DataLayers.Search);
if (entityLayer == null) {
entityLayer = new EntityLayer(Constants.DataLayers.Search);
}
entityLayer.clear();
double longitude = Double.parseDouble("116.36212");
double latitude = Double.parseDouble("39.946057");
Coordinate coord = new Coordinate(latitude, longitude);
// 实现标记必须用到 Pushpin 来做标记。
// PushpinOptions可以对 Pushpin所要标记的设置属性
// opt.Icon图标 opt.Anchor点的位置
PushpinOptions opt = new PushpinOptions();
opt.Icon = "file:///android_asset/start.png";
opt.Width = 50;
opt.Height = 50;
opt.Anchor = new Point(11, 10);
Pushpin p = new Pushpin(coord, opt);
p.Title = "I`m a title ";//不设置title属性,不会显示infobox(吹出框)
if (p.Location != null) {
listCoord.add(coord);
entityLayer.add(p);
}
mBingMapView.getLayerManager().addLayer(entityLayer);
entityLayer.updateLayer();
真机效果:
EntityLayer相当于常用的Overlay,只是添加Overlay方式跟web版类似,官网也没有相关的API说明和示例代码,添加起来比较麻烦,设置各个属性参数不是很灵活,得花费一段时间看源码。Mapview设置EntityclickListener监听,Pushpin设置titile属性,点击Marker中的title,才能触发EntityClickListener,这个监听相当于吹出框title点击事件,如果想添加更多的监听事件,请查阅SDK 源码,如果没有想要的监听,则需要自己扩充实现,这个SDK已经好长时间没有人来维护了。
1.5 Polyline
[java] view plain copy示例代码:Coordinate cd1 = new Coordinate(39.946251, 116.362228);
Coordinate cd2 = new Coordinate(39.954548, 116.379188);
Coordinate cd3 = new Coordinate(39.955543, 116.414402);
Coordinate cd4 = new Coordinate(39.939391, 116.424175);
Coordinate cd5 = new Coordinate(39.929765, 116.42475);
List<Coordinate> lists = new ArrayList<Coordinate>();
lists.add(cd1);
lists.add(cd2);
lists.add(cd3);
lists.add(cd4);
lists.add(cd5);
// 在bing地图中画线所要用到 Polyline
// PolylineOptions 是对线的属性设置
// polylineOptions.StrokeThickness 为线的大小
// polylineOptions.StrokeColor 线的颜色值
Polyline routeLine = new Polyline(lists);
PolylineOptions polylineOptions = new PolylineOptions();
polylineOptions.StrokeThickness = 3;
routeLine.Options = polylineOptions;
entityLayer.add(routeLine);
entityLayer.updateLayer();
效果图:
1.6路径规划、逆地址解析
自带的SDK有相关的类,实现需要看代码研究,时间有限,本文就不再一一列举。结尾微软BingMap 对android支持不是太好,唯一指定SDK最后一次更新是2011.08,并且目前的版本,问题很多,也可以自己写js代码,转换java的代码,这样会耗费很大的精力。当前的SDK也可以实现添加marker画线,由于点击事件无法触发,吹出框自定义是个问题,当前的版本地图监听事件太少,移植过程需要不断扩展SDK。
BingMapSDK 地址:Bing.jar地址:http://download.csdn.net/detail/mad1989/5863893
(bing.jar只是我把SDK的东西打包成了一个jar包,BingMapSDK是官方的SDK,任选一个就可以了)
本文Demo地址:http://download.csdn.net/detail/mad1989/5864029

相关文章推荐
- Android地图开发之BingMap基础教程
- Android地图开发之OpenStreetMap基础教程
- ios地图开发之-OpenStreetMap基础教程
- Android Map开发基础知识学习笔记
- android开发基础教程汇总
- 使用Google Map Api在Android平台上开发地图应用2
- Android Map开发基础知识学习笔记(转)
- ArcGIS Engine基础开发教程之地图查询
- 使用Google Map Api在Android平台上开发地图应用3
- Android Map开发基础知识学习笔记
- 使用Google Map Api在Android平台上开发地图应用4
- Android Map开发基础知识学习笔记
- ArcGIS Engine基础开发教程之地图查询
- 【Android开发教程】一、基础概念
- 【Android开发教程】一、基础概念
- Android简明开发教程二十一:访问Internet 绘制在线地图
- 在Android上使用AutoNavi Map API开发自己的地图应用程序
- Android简明开发教程二十一:访问Internet 绘制在线地图
- Android Map开发基础知识学习笔记
- 【Android开发教程】一、基础概念