Linux服务器文件实时同步方案设计和实现(rsync+inotify-tools)
2018-02-09 00:00
1091 查看
Linux服务器文件实时同步方案设计和实现(rsync+inotify-tools,Debian9.3和CentOS7.4):
假设两个服务器:
192.168.0.1 源服务器 目录 /root/test/
192.168.0.2 目标服务器 目录 /root/bak/test/
实现的目的就是保持这两个服务器某个文件目录保持实时同步
实现方式:通过rsync+inotify-tools结合来实现(将源服务器的目录实时同步到目标服务器上, 单项同步)
需要安装软件:
1. rsync 同步软件
源服务器和目标服务器都需要安装
源服务器:是rsync客户端, 不需要配置
目标服务器:是rsync服务器端,需要配置/etc/rsyncd.conf里的内容
rsync: 同步软件下载安装
https://download.samba.org/pub/rsync/src/
tar xf rsync-3.1.3.tar.gz
cd rsync-3.1.3
./configure
make -j8
make install
安装后需要新建配置文件:/etc/rsyncd.conf
配置文件在: /etc/
文件内容如下:
uid = root
gid = root
use chroot = no
max connections = 100
strict modes = yes
pid file=/var/run/rsyncd.pid
lock file=/var/run/rsyncd.lock
log file= =/var/run/rsyncd.log
[www]
path= /root/bak/test/
comment= analyse
read only = false
hosts allow = 192.168.0.1
hosts deny = *
#hosts allow = *
启动:
rsync --daemon
自启动:
Debian 9下Debian 9 默认不带
为了解决这个问题,我们需要手工添加一个 /etc/rc.local文件
echo '#!/bin/sh -e' > /etc/rc.local
echo "/usr/local/bin/rsync --daemon --config=/etc/rsyncd.conf" >> /etc/rc.local
echo "exit 0" >> /etc/rc.local
赋予权限:
chmod +x /etc/rc.local
启动
查看状态:

2. inotify-tools 工具(源服务器安装, 目标服务器上不需要安装)
该工具为文件实时监控工具,需要linux操作系统内核支持,内核支持需要至少版本为2.6.13
检查操作系统linux kernel版本是否支持,执行如下:
uname -r
3.10.0-693.11.1.el7.x86_64 (CentOS 7.4)
4.9.0-4-amd64 (Debian 9.3)
则表示版本3.10.0-693.11.1.el7.x86_64/4.9.0-4-amd64 大于2.6.13,则支持。
inotify-tools 安装:
https://github.com/rvoicilas/inotify-tools/releases
tar xf inotify-tools-3.20.1.tar.gz
cd inotify-tools-3.20.1
./autogen.sh
./configure
make -j8
make install
ls /proc/sys/fs/inotify
有三项输出,则表示默认支持inotify,可以安装inotify-tools工具
安装inotify-tools后会在相关安装目录下生成如下两个文件:inotifywait和inotifywatch
which inotifywait
/usr/local/bin/inotifywait
which inotifywatch
/usr/local/bin/inotifywait
3. 在源服务器上新建脚本inotify_bak.sh:
#!/bin/bash
src=/root/test
/usr/local/bin/inotifywait -mrq --timefmt '%d/%m/%Y %H:%M:%S ' --format '%T%w%f %e' -e attrib,close_write,create,delete,delete_self,modify,move,moved_to,moved_from,move_self,moved_from $src | while read file
do
/usr/bin/rsync -arzuqP --delete $src 192.168.0.191::www/
echo " ${file} was rsynced" >> /root/log/rsync.log 2>&1
done
注意: 这里的 www 是在目标服务器/etc/rsyncd.conf里配置的模块名称:[www]
赋予执行权限: chmod +x inotify_bak.sh
然后执行: inotify_bak.sh& 放入后台执行
4. 关于启动
目标服务器:先启动rsync后台服务: /usr/local/bin/rsync --daemon
来源服务器: 执行 inotify_bak.sh&
5. 测试:
源服务器目录中新建目录和文件,inotify_bak.sh脚本会检测到,然后同步到目标服务器的相关目录下.
可以查看日志文件: /opt/soft/log/rsync.log 命令如下:观察实时同步的情况。
tail -f /root/log/rsync.log
tailf /root/log/rsync.log
假设两个服务器:
192.168.0.1 源服务器 目录 /root/test/
192.168.0.2 目标服务器 目录 /root/bak/test/
实现的目的就是保持这两个服务器某个文件目录保持实时同步
实现方式:通过rsync+inotify-tools结合来实现(将源服务器的目录实时同步到目标服务器上, 单项同步)
需要安装软件:
1. rsync 同步软件
源服务器和目标服务器都需要安装
源服务器:是rsync客户端, 不需要配置
目标服务器:是rsync服务器端,需要配置/etc/rsyncd.conf里的内容
rsync: 同步软件下载安装
https://download.samba.org/pub/rsync/src/
tar xf rsync-3.1.3.tar.gz
cd rsync-3.1.3
./configure
make -j8
make install
安装后需要新建配置文件:/etc/rsyncd.conf
配置文件在: /etc/
文件内容如下:
uid = root
gid = root
use chroot = no
max connections = 100
strict modes = yes
pid file=/var/run/rsyncd.pid
lock file=/var/run/rsyncd.lock
log file= =/var/run/rsyncd.log
[www]
path= /root/bak/test/
comment= analyse
read only = false
hosts allow = 192.168.0.1
hosts deny = *
#hosts allow = *
启动:
rsync --daemon
自启动:
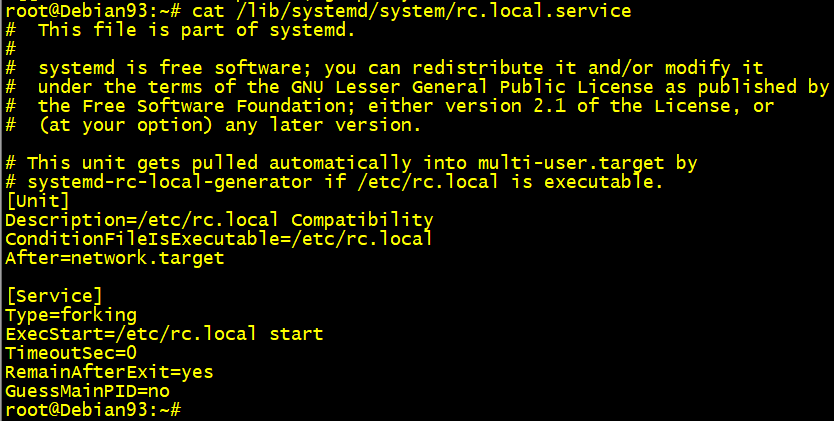
Debian 9下Debian 9 默认不带
/etc/rc.local文件,而
rc.local服务却还是自带的:
cat /lib/systemd/system/rc.local.service
为了解决这个问题,我们需要手工添加一个 /etc/rc.local文件
echo '#!/bin/sh -e' > /etc/rc.local
echo "/usr/local/bin/rsync --daemon --config=/etc/rsyncd.conf" >> /etc/rc.local
echo "exit 0" >> /etc/rc.local
赋予权限:
chmod +x /etc/rc.local
启动
rc-local服务:
systemctl start rc-local
查看状态:
systemctl status rc-local
2. inotify-tools 工具(源服务器安装, 目标服务器上不需要安装)
该工具为文件实时监控工具,需要linux操作系统内核支持,内核支持需要至少版本为2.6.13
检查操作系统linux kernel版本是否支持,执行如下:
uname -r
3.10.0-693.11.1.el7.x86_64 (CentOS 7.4)
4.9.0-4-amd64 (Debian 9.3)
则表示版本3.10.0-693.11.1.el7.x86_64/4.9.0-4-amd64 大于2.6.13,则支持。
inotify-tools 安装:
https://github.com/rvoicilas/inotify-tools/releases
tar xf inotify-tools-3.20.1.tar.gz
cd inotify-tools-3.20.1
./autogen.sh
./configure
make -j8
make install
ls /proc/sys/fs/inotify
有三项输出,则表示默认支持inotify,可以安装inotify-tools工具
安装inotify-tools后会在相关安装目录下生成如下两个文件:inotifywait和inotifywatch
which inotifywait
/usr/local/bin/inotifywait
which inotifywatch
/usr/local/bin/inotifywait
3. 在源服务器上新建脚本inotify_bak.sh:
#!/bin/bash
src=/root/test
/usr/local/bin/inotifywait -mrq --timefmt '%d/%m/%Y %H:%M:%S ' --format '%T%w%f %e' -e attrib,close_write,create,delete,delete_self,modify,move,moved_to,moved_from,move_self,moved_from $src | while read file
do
/usr/bin/rsync -arzuqP --delete $src 192.168.0.191::www/
echo " ${file} was rsynced" >> /root/log/rsync.log 2>&1
done
注意: 这里的 www 是在目标服务器/etc/rsyncd.conf里配置的模块名称:[www]
赋予执行权限: chmod +x inotify_bak.sh
然后执行: inotify_bak.sh& 放入后台执行
4. 关于启动
目标服务器:先启动rsync后台服务: /usr/local/bin/rsync --daemon
来源服务器: 执行 inotify_bak.sh&
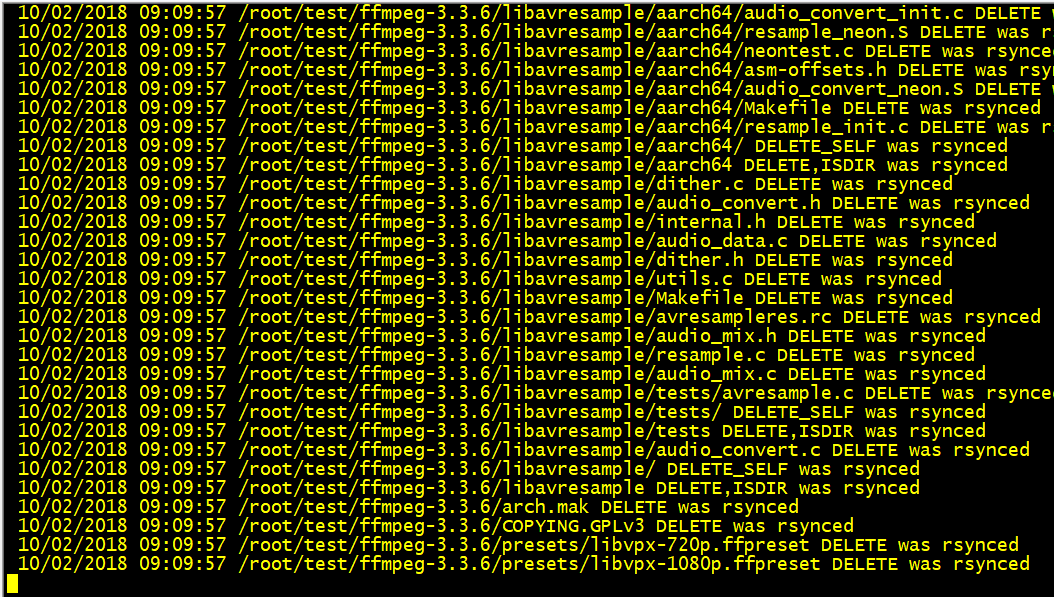
5. 测试:
源服务器目录中新建目录和文件,inotify_bak.sh脚本会检测到,然后同步到目标服务器的相关目录下.
可以查看日志文件: /opt/soft/log/rsync.log 命令如下:观察实时同步的情况。
tail -f /root/log/rsync.log
tailf /root/log/rsync.log

相关文章推荐
- linux下两台服务器文件实时同步方案设计和实现
- linux系统中rsync+inotify实现服务器之间文件实时同步
- linux系统中rsync+inotify实现服务器之间文件实时同步
- linux下两台服务器文件实时同步方案设计和实现
- linux下两台服务器文件实时同步方案设计和实现
- linux下两台服务器文件实时同步方案设计和实现
- linux系统中rsync+inotify实现服务器之间文件实时同步
- linux下两台服务器文件实时同步方案设计和实现
- linux下两台服务器文件实时同步方案设计和实现
- 【2017/8/11】Linux7 rsync+inotify实现服务器之间文件实时同步
- linux使用rsync+inotify-tools+ssh实现文件实时同步
- linux下两台服务器文件实时同步方案设计和实现
- linux下两台服务器文件实时同步方案设计和实现
- Linux下两台服务器文件实时同步方案设计和实现
- linux系统中rsync+inotify实现服务器之间文件实时同步
- rsync+inotify实现服务器之间文件实时同步
- rsync+inotify实现服务器之间文件实时同步
- rsync+inotify实现服务器之间文件实时同步
- rsync+inotify实现服务器之间文件实时同步
- Linux下Rsync+Inotify-tools实现数据实时同步