MYSQL 5.6源码编译部署实录
2018-02-07 09:55
295 查看
[root@king01 ~]# echo "192.168.1.201 king01" >>/etc/hosts
[root@king01 ~]# cat /etc/hosts
127.0.0.1 localhost localhost.localdomain localhost4 localhost4.localdomain4
::1 localhost localhost.localdomain localhost6 localhost6.localdomain6
192.168.1.201 king01
[root@king01 ~]# useradd mysql
[root@king01 ~]# id mysql
uid=500(mysql) gid=500(mysql) groups=500(mysql)
[root@king01 ~]# cat >> /etc/security/limits.conf <<EOF
mysql soft nproc 2047
mysql hard nproc 16384
mysql soft nofile 1024
mysql hard nofile 65536
EOF
[root@king01 ~]# cat /etc/security/limits.conf
# End of file
mysql soft nproc 2047
mysql hard nproc 16384
mysql soft nofile 1024
mysql hard nofile 65536
[root@king01 ~]# cd /usr/local/src
[root@king01 src]# ll
total 39976
-rw-r--r-- 1 root root 6721965 Nov 11 21:46 cmake-3.4.1.tar.gz
-rw-r--r-- 1 root root 14540 Nov 11 21:45 epel-release-6-8.noarch.rpm
-rw-r--r-- 1 root root 1245683 Nov 11 21:47 google-perftools-1.9.tar.gz
-rw-r--r-- 1 root root 747369 Nov 11 21:47 libunwind-1.2.tar.gz
-rw-r--r-- 1 root root 32192348 Nov 11 21:46 mysql-5.6.36.tar.gz
[root@king01 src]# rpm -ivh epel-release-6-8.noarch.rpm
[root@king01 src]# yum install -y libaio* ncurses-devel
[root@king01 src]# tar zxvf libunwind-1.2.tar.gz
[root@king01 src]# cd libunwind-1.2
[root@king01 libunwind-1.2]# ./configure
[root@king01 libunwind-1.2]# make && make install
[root@king01 src]# tar zxvf google-perftools-1.9.tar.gz
[root@king01 src]# cd google-perftools-1.9
[root@king01 google-perftools-1.9]# ./configure
[root@king01 google-perftools-1.9]# make && make install
[root@king01 src]# tar zxvf cmake-3.4.1.tar.gz
[root@king01 src]# cd cmake-3.4.1
[root@king01 cmake-3.4.1]# ./configure
[root@king01 cmake-3.4.1]# gmake && make install
[root@king01 src]# echo "/usr/local/lib" > /etc/ld.so.conf.d/usr_local_lib.conf
[root@king01 src]# ldconfig
[root@king01 src]# tar zxvf mysql-5.6.36.tar.gz
[root@king01 src]# cd mysql-5.6.36
[root@king01 mysql-5.6.36]#cmake . \
-DCMAKE_BUILD_TYPE=Release \
-DCMAKE_INSTALL_PREFIX=/usr/local/mysql \
-DMYSQL_DATADIR=/usr/local/mysql/data \
-DSYSCONFDIR=/etc \
-DMYSQL_UNIX_ADDR=/tmp/mysql.sock \
-DWITH_INNOBASE_STORAGE_ENGINE=1 \
-DWITH_CSV_STORAGE_ENGINE=1 \
-DWITH_ARCHIVE_STORAGE_ENGINE=1 \
-DWITH_BLACKHOLE_STORAGE_ENGINE=1 \
-DWITH_FEDERATED_STORAGE_ENGINE=1 \
-DWITH_PARTITION_STORAGE_ENGINE=1 \
-DWITH_PERFSCHEMA_STORAGE_ENGINE=1 \
-DDEFAULT_CHARSET=utf8 \
-DDEFAULT_COLLATION=utf8_general_ci
[root@king01 mysql-5.6.36]# make && make install
[root@king01 mysql-5.6.36]# cd support-files/[root@king01 support-files]# cp mysql.server /etc/init.d/mysqld
[root@king01 support-files]# chmod a+x /etc/init.d/mysqld
[root@king01 ~]# chkconfig --add mysqld
[root@king01 ~]# chkconfig --level 345 mysqld on
[root@king01 ~]# chkconfig --list |grep mysqld
mysqld 0:off 1:off 2:on 3:on 4:on 5:on 6:off
[root@king01 ~]# /usr/local/mysql/bin/resolveip king01
IP address of king01 is 192.168.1.201
[root@king01 ~]# vim /etc/my.cnf [mysqld]
port = 3306
user = mysql
basedir = /usr/local/mysql
datadir = /usr/local/mysql/data
socket = /tmp/mysql.sock
pid-file=/usr/local/mysql/data/mysql.pid
log_error = /usr/local/mysql/data/mysql.err
explicit_defaults_for_timestamp
sql_mode=NO_ENGINE_SUBSTITUTION,STRICT_TRANS_TABLES
skip-external-locking
federated
max_connections = 500
max_connect_errors = 10000
key_buffer_size = 16M
max_allowed_packet = 16M
read_buffer_size = 1M
read_rnd_buffer_size = 1M
sort_buffer_size = 1M
join_buffer_size = 1M
log_bin = mysql-bin
binlog_format = row
sync_binlog = 1
binlog_cache_size = 16M
max_binlog_cache_size = 32M
max_binlog_size = 512M
expire_logs_days = 7
relay_log = relay-bin
relay_log_recovery = 1
master_info_repository = table
relay_log_info_repository = table
slow_query_log = 1
long_query_time = 5
log-queries-not-using-indexes
slow-query-log-file = /usr/local/mysql/data/slow-query.log
innodb_buffer_pool_size=2G
innodb_buffer_pool_instances=2
innodb_log_file_size=128M
innodb_log_files_in_group=3
innodb_log_buffer_size=16M
innodb_undo_logs= 128
innodb_undo_tablespaces = 3
innodb_file_format=Barracuda
innodb_data_file_path=ibdata1:1024M:autoextend
[mysqldump]
quick
max_allowed_packet = 16M
[mysql]
no-auto-rehash
[client]
socket = /tmp/mysql.sock
[root@king01 ~]# cd /usr/local/mysql
[root@king01 mysql]# scripts/mysql_install_db --user=mysql --basedir=/usr/local/mysql --datadir=/usr/local/mysql/data
[root@king01 ~]# vim /etc/profile
PATH=$PATH:/usr/local/mysql/bin
[root@king01 ~]# source /etc/profile
[root@king01 ~]# vi /usr/local/mysql/bin/mysqld_safe
export LD_PRELOAD=/usr/local/lib/libtcmalloc.so
[root@test01 ~]# service mysqld start
Starting MySQL....... [ OK ]
[root@test01 ~]# service mysqld status
MySQL running (15612) [ OK ]
[root@king01 ~]# netstat -tupln |grep mysqld
tcp 0 0 :::3306 :::* LISTEN 10101/mysqld
[root@king01 ~]# lsof -n | grep tcmalloc
mysqld 10101 mysql mem REG 8,2 2212357 441654 /usr/local/lib/libtcmalloc.so.0.3.0
[root@king01 ~]# echo "/usr/local/mysql/lib" > /etc/ld.so.conf.d/mysql.conf
[root@king01 ~]# ldconfig
[root@king01 ~]# mysql_secure_installation
NOTE: RUNNING ALL PARTS OF THIS SCRIPT IS RECOMMENDED FOR ALL MySQL
SERVERS IN PRODUCTION USE! PLEASE READ EACH STEP CAREFULLY!
In order to log into MySQL to secure it, we'll need the current
password for the root user. If you've just installed MySQL, and
you haven't set the root password yet, the password will be blank,
so you should just press enter here.
Enter current password for root (enter for none):
OK, successfully used password, moving on...
Setting the root password ensures that nobody can log into the MySQL
root user without the proper authorisation.
Set root password? [Y/n] Y
New password:
Re-enter new password:
Password updated successfully!
Reloading privilege tables..
... Success!
By default, a MySQL installation has an anonymous user, allowing anyone
to log into MySQL without having to have a user account created for
them. This is intended only for testing, and to make the installation
go a bit smoother. You should remove them before moving into a
production environment.
Remove anonymous users? [Y/n] Y
... Success!
Normally, root should only be allowed to connect from 'localhost'. This
ensures that someone cannot guess at the root password from the network.
Disallow root login remotely? [Y/n] Y
... Success!
By default, MySQL comes with a database named 'test' that anyone can
access. This is also intended only for testing, and should be removed
before moving into a production environment.
Remove test database and access to it? [Y/n] Y
- Dropping test database...
... Success!
- Removing privileges on test database...
... Success!
Reloading the privilege tables will ensure that all changes made so far
will take effect immediately.
Reload privilege tables now? [Y/n] Y
... Success!
All done! If you've completed all of the above steps, your MySQL
installation should now be secure.
Thanks for using MySQL!
Cleaning up...
[root@king01 ~]# mysql -uroot -pabcd.1234
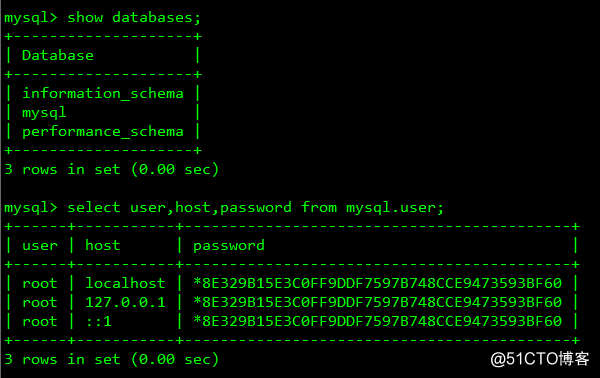
mysql> show databases;
mysql> select user,host,password from mysql.user;
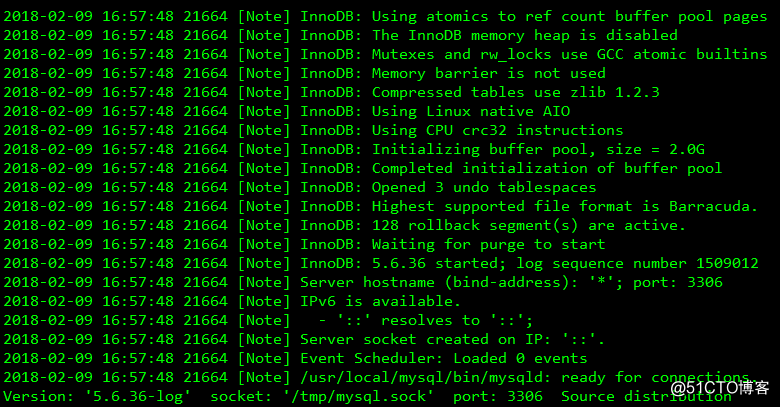
[root@king01 ~]# cd /usr/local/mysql/data/
[root@king01 data]# cat mysql.err
[root@king01 ~]# cat /etc/hosts
127.0.0.1 localhost localhost.localdomain localhost4 localhost4.localdomain4
::1 localhost localhost.localdomain localhost6 localhost6.localdomain6
192.168.1.201 king01
[root@king01 ~]# useradd mysql
[root@king01 ~]# id mysql
uid=500(mysql) gid=500(mysql) groups=500(mysql)
[root@king01 ~]# cat >> /etc/security/limits.conf <<EOF
mysql soft nproc 2047
mysql hard nproc 16384
mysql soft nofile 1024
mysql hard nofile 65536
EOF
[root@king01 ~]# cat /etc/security/limits.conf
# End of file
mysql soft nproc 2047
mysql hard nproc 16384
mysql soft nofile 1024
mysql hard nofile 65536
[root@king01 ~]# cd /usr/local/src
[root@king01 src]# ll
total 39976
-rw-r--r-- 1 root root 6721965 Nov 11 21:46 cmake-3.4.1.tar.gz
-rw-r--r-- 1 root root 14540 Nov 11 21:45 epel-release-6-8.noarch.rpm
-rw-r--r-- 1 root root 1245683 Nov 11 21:47 google-perftools-1.9.tar.gz
-rw-r--r-- 1 root root 747369 Nov 11 21:47 libunwind-1.2.tar.gz
-rw-r--r-- 1 root root 32192348 Nov 11 21:46 mysql-5.6.36.tar.gz
[root@king01 src]# rpm -ivh epel-release-6-8.noarch.rpm
[root@king01 src]# yum install -y libaio* ncurses-devel
[root@king01 src]# tar zxvf libunwind-1.2.tar.gz
[root@king01 src]# cd libunwind-1.2
[root@king01 libunwind-1.2]# ./configure
[root@king01 libunwind-1.2]# make && make install
[root@king01 src]# tar zxvf google-perftools-1.9.tar.gz
[root@king01 src]# cd google-perftools-1.9
[root@king01 google-perftools-1.9]# ./configure
[root@king01 google-perftools-1.9]# make && make install
[root@king01 src]# tar zxvf cmake-3.4.1.tar.gz
[root@king01 src]# cd cmake-3.4.1
[root@king01 cmake-3.4.1]# ./configure
[root@king01 cmake-3.4.1]# gmake && make install
[root@king01 src]# echo "/usr/local/lib" > /etc/ld.so.conf.d/usr_local_lib.conf
[root@king01 src]# ldconfig
[root@king01 src]# tar zxvf mysql-5.6.36.tar.gz
[root@king01 src]# cd mysql-5.6.36
[root@king01 mysql-5.6.36]#cmake . \
-DCMAKE_BUILD_TYPE=Release \
-DCMAKE_INSTALL_PREFIX=/usr/local/mysql \
-DMYSQL_DATADIR=/usr/local/mysql/data \
-DSYSCONFDIR=/etc \
-DMYSQL_UNIX_ADDR=/tmp/mysql.sock \
-DWITH_INNOBASE_STORAGE_ENGINE=1 \
-DWITH_CSV_STORAGE_ENGINE=1 \
-DWITH_ARCHIVE_STORAGE_ENGINE=1 \
-DWITH_BLACKHOLE_STORAGE_ENGINE=1 \
-DWITH_FEDERATED_STORAGE_ENGINE=1 \
-DWITH_PARTITION_STORAGE_ENGINE=1 \
-DWITH_PERFSCHEMA_STORAGE_ENGINE=1 \
-DDEFAULT_CHARSET=utf8 \
-DDEFAULT_COLLATION=utf8_general_ci
[root@king01 mysql-5.6.36]# make && make install
[root@king01 mysql-5.6.36]# cd support-files/[root@king01 support-files]# cp mysql.server /etc/init.d/mysqld
[root@king01 support-files]# chmod a+x /etc/init.d/mysqld
[root@king01 ~]# chkconfig --add mysqld
[root@king01 ~]# chkconfig --level 345 mysqld on
[root@king01 ~]# chkconfig --list |grep mysqld
mysqld 0:off 1:off 2:on 3:on 4:on 5:on 6:off
[root@king01 ~]# /usr/local/mysql/bin/resolveip king01
IP address of king01 is 192.168.1.201
[root@king01 ~]# vim /etc/my.cnf [mysqld]
port = 3306
user = mysql
basedir = /usr/local/mysql
datadir = /usr/local/mysql/data
socket = /tmp/mysql.sock
pid-file=/usr/local/mysql/data/mysql.pid
log_error = /usr/local/mysql/data/mysql.err
explicit_defaults_for_timestamp
sql_mode=NO_ENGINE_SUBSTITUTION,STRICT_TRANS_TABLES
skip-external-locking
federated
max_connections = 500
max_connect_errors = 10000
key_buffer_size = 16M
max_allowed_packet = 16M
read_buffer_size = 1M
read_rnd_buffer_size = 1M
sort_buffer_size = 1M
join_buffer_size = 1M
log_bin = mysql-bin
binlog_format = row
sync_binlog = 1
binlog_cache_size = 16M
max_binlog_cache_size = 32M
max_binlog_size = 512M
expire_logs_days = 7
relay_log = relay-bin
relay_log_recovery = 1
master_info_repository = table
relay_log_info_repository = table
slow_query_log = 1
long_query_time = 5
log-queries-not-using-indexes
slow-query-log-file = /usr/local/mysql/data/slow-query.log
innodb_buffer_pool_size=2G
innodb_buffer_pool_instances=2
innodb_log_file_size=128M
innodb_log_files_in_group=3
innodb_log_buffer_size=16M
innodb_undo_logs= 128
innodb_undo_tablespaces = 3
innodb_file_format=Barracuda
innodb_data_file_path=ibdata1:1024M:autoextend
[mysqldump]
quick
max_allowed_packet = 16M
[mysql]
no-auto-rehash
[client]
socket = /tmp/mysql.sock
[root@king01 ~]# cd /usr/local/mysql
[root@king01 mysql]# scripts/mysql_install_db --user=mysql --basedir=/usr/local/mysql --datadir=/usr/local/mysql/data
[root@king01 ~]# vim /etc/profile
PATH=$PATH:/usr/local/mysql/bin
[root@king01 ~]# source /etc/profile
[root@king01 ~]# vi /usr/local/mysql/bin/mysqld_safe
export LD_PRELOAD=/usr/local/lib/libtcmalloc.so
[root@test01 ~]# service mysqld start
Starting MySQL....... [ OK ]
[root@test01 ~]# service mysqld status
MySQL running (15612) [ OK ]
[root@king01 ~]# netstat -tupln |grep mysqld
tcp 0 0 :::3306 :::* LISTEN 10101/mysqld
[root@king01 ~]# lsof -n | grep tcmalloc
mysqld 10101 mysql mem REG 8,2 2212357 441654 /usr/local/lib/libtcmalloc.so.0.3.0
[root@king01 ~]# echo "/usr/local/mysql/lib" > /etc/ld.so.conf.d/mysql.conf
[root@king01 ~]# ldconfig
[root@king01 ~]# mysql_secure_installation
NOTE: RUNNING ALL PARTS OF THIS SCRIPT IS RECOMMENDED FOR ALL MySQL
SERVERS IN PRODUCTION USE! PLEASE READ EACH STEP CAREFULLY!
In order to log into MySQL to secure it, we'll need the current
password for the root user. If you've just installed MySQL, and
you haven't set the root password yet, the password will be blank,
so you should just press enter here.
Enter current password for root (enter for none):
OK, successfully used password, moving on...
Setting the root password ensures that nobody can log into the MySQL
root user without the proper authorisation.
Set root password? [Y/n] Y
New password:
Re-enter new password:
Password updated successfully!
Reloading privilege tables..
... Success!
By default, a MySQL installation has an anonymous user, allowing anyone
to log into MySQL without having to have a user account created for
them. This is intended only for testing, and to make the installation
go a bit smoother. You should remove them before moving into a
production environment.
Remove anonymous users? [Y/n] Y
... Success!
Normally, root should only be allowed to connect from 'localhost'. This
ensures that someone cannot guess at the root password from the network.
Disallow root login remotely? [Y/n] Y
... Success!
By default, MySQL comes with a database named 'test' that anyone can
access. This is also intended only for testing, and should be removed
before moving into a production environment.
Remove test database and access to it? [Y/n] Y
- Dropping test database...
... Success!
- Removing privileges on test database...
... Success!
Reloading the privilege tables will ensure that all changes made so far
will take effect immediately.
Reload privilege tables now? [Y/n] Y
... Success!
All done! If you've completed all of the above steps, your MySQL
installation should now be secure.
Thanks for using MySQL!
Cleaning up...
[root@king01 ~]# mysql -uroot -pabcd.1234
mysql> show databases;
mysql> select user,host,password from mysql.user;
[root@king01 ~]# cd /usr/local/mysql/data/
[root@king01 data]# cat mysql.err

相关文章推荐
- centos6.x源码编译安装mysql5.6
- MYSQL 5.6 REPLICATION 部署实录
- SUSE Linux下源码编译方式安装MySQL 5.6过程分享
- 高可用架构篇 MySQL源码编译安装(CentOS-6.6+MySQL-5.6)
- mysql5.6源码拷贝不编译安装
- 分布式架构学习之:033--MySQL源码编译安装(CentOS-6.7+MySQL-5.6)
- mysql5.6源码编译安装
- 分布式架构学习之:MySQL源码编译安装(CentOS-6.7+MySQL-5.6)
- 源码包编译安装mysql5.6脚本
- MySQL源码编译安装(CentOS-6.6+MySQL-5.6)
- 分布式架构高可用架构篇_06_MySQL源码编译安装(CentOS-6.7+MySQL-5.6)
- SUSE Linux源码编译安装MySQL 5.6
- CentOS 7源码编译安装PHP5.6和Nginx1.7.9及MySQL(搭建LNMP环境)
- 高可用架构篇 MySQL源码编译安装(CentOS-6.6+MySQL-5.6)
- 高可用架构篇 MySQL源码编译安装(CentOS-6.6+MySQL-5.6)
- 分布式架构学习之:MySQL源码编译安装(CentOS-6.7+MySQL-5.6)
- Centos6 源码部署MySQL5.6
- 【MySQL学习笔记】CentOS 6.6上源码编译方式安装MySQL 5.6
- MySQL5.6源码编译安装(CentOS-6.6+MySQL-5.6)(一)