PXE远程装机服务批量部署LINUX系统
2018-02-01 00:16
696 查看
一、搭建FTP服务并配置ftp的本地yum源:
二、搭建DHCP服务:
三、搭建TFTP服务和syslinux:
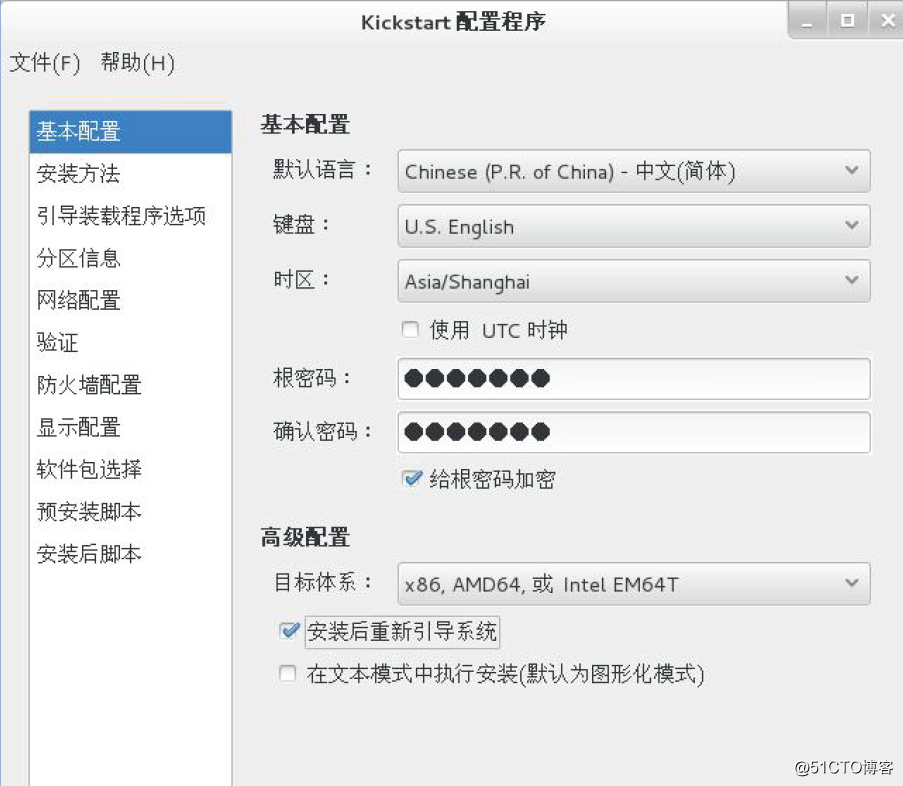
四、安装system-config-kickstart并配置生成上面指定的配置文件:
当然,这个配置文件也可以手动编辑了:
五、配置防火墙,开放相关服务和端口:
六、测试:
只要要安装系统的主机和此服务器在一个网段或者其他网段能通过DHCP中继获取地址就可以自动安装了
# mkdir /mnt/cdrom
# mount /dev/sr0 /mnt/cdrom/    # 挂载Centos7光盘
# yum -y install vsftpd    # 安装ftp服务
# vim /etc/vsftpd/vsftpd.conf    # 修改ftp配置文件,添加下面三行到connect_from_port_20=YES后面
pasv_enable=YES    # 使用被动模式
pasv_min_port=3001    # 设定被动模式监听端口号范围
pasv_max_port=3100    # 设定被动模式监听端口号范围
# systemctl start vsftpd.service    # 启动vsftp服务
# mkdir /var/ftp/yum    # ftp目录下创建yum目录
# cp -rf /mnt/cdrom/* /var/ftp/yum    # 将光盘的所有内容复制到yum目录下作为yum源
# mkdir /etc/yum.repos.d/old
# mv /etc/yum.repos.d/*.repo /etc/yum.repos.d/old    # 移动备份下现有的yum源配置文件
# vim /etc/yum.repos.d/CentOS-cr.repo    # 创建一个新的yum源配置文件,内容如下:
[cr]
name=CentOS-$releasever - cr
baseurl=ftp://192.168.8.10/yum
gpgcheck=1
gpgkey=file:///etc/pki/rpm-gpg/RPM-GPG-KEY-CentOS-7
enabled=1
# yum clean all
# yum makecache
二、搭建DHCP服务:
# yum -y install dhcp
# cp /usr/share/doc/dhcp-4.2.5/dhcpd.conf.example /etc/dhcp/dhcp.conf    # 通过帮助模板创建DHCP配置文件
# vim /etc/dhcp/dhcpd.conf    # 修改DHCP配置文件
default-lease-time 600;
max-lease-time 7200;
log-facility local7;
subnet 192.168.8.0 netmask 255.255.255.0 {
range 192.168.8.100 192.168.8.200;
option routers 192.168.8.2;
option broadcast-address 192.168.8.255;
default-lease-time 600;
max-lease-time 7200;
next-server 192.168.8.10;    # 指定PXE引导服务器
filename "pxelinux.0";    # 指定引导文件
}
# systemctl start dhcpd.service    # 启动DHCP服务
三、搭建TFTP服务和syslinux:
# yum -y install tftp-server
# yum -y install syslinux
# vim /etc/xinetd.d/tftp    # 开启tftp服务,因为tftp是xinetd控制的,所以要修改相关配置文件后重启xinetd服务
disable= no    # 把yes改成no代表开启tftp服务
# systemctl start xinetd.service
# cp /usr/share/syslinux/pxelinux.0 /var/lib/tftpboot/
# cp /var/ftp/yum/isolinux/{vmlinuz,initrd.img,vesamenu.c32,boot.msg} /var/lib/tftpboot/
# mkdir /var/lib/tftpboot/pxelinux.cfg
# cp /var/ftp/yum/isolinux/isolinux.cfg /var/lib/tftpboot/pxelinux.cfg/default    # 复制并重命名为default
# vim /var/lib/tftpboot/pxelinux.cfg/default    # 修改default文件,添加下面的内容,注意:记得同时删除后面原有的menu default
label centos7
menu label ^Install CentOS 7 Li networkserver
menu default
kernel vmlinuz
append initrd=initrd.img inst.stage2=ftp://192.168.8.10/yum inst.ks=ftp://192.168.8.10/ks.cfg quiet    # 指定安装系统软件时的软件地址,和安装系统的配置文件
四、安装system-config-kickstart并配置生成上面指定的配置文件:
# yum -y install system-config-kickstart
# system-config-kickstart    # 进入图形化配置生成界面,配置完成后将文件保存在上面指定的位置,即:/var/ftp/ks.cfg
当然,这个配置文件也可以手动编辑了:
# vim /var/ftp/ks.cfg
#platform=x86, AMD64, or Intel EM64T
#version=DEVEL
# Install OS instead of upgrade
install
# Keyboard layouts
keyboard 'us'# Reboot after installation
reboot
# Root password
rootpw --iscrypted $1$uP/6KVVM$domD73qgFbtoo5.Udls1V.
# System timezone
timezone Asia/Shanghai
# Use network installation
url --url="ftp://192.168.8.10/yum"
# System language
lang en_US
# Firewall configuration
firewall --enabled --ssh
# Network information
network  --bootproto=dhcp --device=eth0
# System authorization information
auth  --useshadow  --passalgo=sha512
# Use graphical install
graphical
# Run the Setup Agent on first boot
firstboot --enable
# SELinux configuration
selinux --enforcing
# System bootloader configuration
bootloader --location=mbr
# Clear the Master Boot Record
zerombr
# Partition clearing information
clearpart --all --initlabel
# Disk partitioning information
part /boot --fstype="ext4" --size=1024
part /home --fstype="ext4" --size=4096
part swap --fstype="swap" --size=2048
part / --fstype="ext4" --size=10240
%packages    # 这一段是将要安装的软件包组
@base
@core
@desktop-debugging
@dial-up
@directory-client
@fonts
@gnome-desktop
@guest-agents
@guest-desktop-agents
@input-methods
@internet-browser
@java-platform
@multimedia
@network-file-system-client
@networkmanager-submodules
@print-client
@x11
kexec-tools
%end
%post --interpreter=/bin/bash    # 这一段是需要部署完成后运行的脚本,非必须,下面两个脚本分别是我加的配置yum源和更新ssh
mkdir /etc/yum/old
cp -rf /etc/yum.repos.d/* /etc/yum/old
rm -rf /etc/yum.repos.d/*
echo '# CentOS-Base.repo
#
# The mirror system uses the connecting IP address of the client and the
# update status of each mirror to pick mirrors that are updated to and
# geographically close to the client.  You should use this for CentOS updates
# unless you are manually picking other mirrors.
#
# If the mirrorlist= does not work for you, as a fall back you can try the
# remarked out baseurl= line instead.
#
#

[base]
name=CentOS-$releasever - Base - mirrors.aliyun.com
failovermethod=priority
baseurl=ftp://192.168.8.10/yum
gpgkey=file:///etc/pki/rpm-gpg/RPM-GPG-KEY-CentOS-7
gpgcheck=1
enabled=1
' >/etc/yum.repos.d/CentOS7.repo
wget ftp://192.168.8.10/pub/openssh-7.6p1.tar.gz tar -xf openssh-7.6p1.tar.gz
cd openssh-7.6p1
yum -y install gcc
yum install -y zlib-devel
yum -y install openssl-devel
./configure --prefix=/usr --sysconfdir=/etc/ssh
make
rpm -e --nodeps `rpm -qa | grep openssh`
cp -rf /etc/ssh ./ssh.bak
rm -rf /etc/ssh/*
make install
echo "#$OpenBSD: sshd_config,v 1.101 2017/03/14 07:19:07 djm Exp $
# This is the sshd server system-wide configuration file.  See
# sshd_config(5) for more information.
# This sshd was compiled with PATH=/usr/bin:/bin:/usr/sbin:/sbin:/usr/local/ssh/bin
# The strategy used for options in the default sshd_config shipped with
# OpenSSH is to specify options with their default value where
# possible, but leave them commented.  Uncommented options override the
# default value.
#Port 22
#AddressFamily any
#ListenAddress 0.0.0.0
#ListenAddress ::
#HostKey /etc/ssh/ssh_host_rsa_key
#HostKey /etc/ssh/ssh_host_dsa_key
#HostKey /etc/ssh/ssh_host_ecdsa_key
#HostKey /etc/ssh/ssh_host_ed25519_key
# Ciphers and keying
#RekeyLimit default none
# Logging
#SyslogFacility AUTH
#LogLevel INFO
# Authentication:
#LoginGraceTime 2m
PermitRootLogin yes
#StrictModes yes
#MaxAuthTries 6
#MaxSessions 10
#PubkeyAuthentication yes
# The default is to check both .ssh/authorized_keys and .ssh/authorized_keys2
# but this is overridden so installations will only check .ssh/authorized_keys
AuthorizedKeysFile.ssh/authorized_keys
#AuthorizedPrincipalsFile none
#AuthorizedKeysCommand none
#AuthorizedKeysCommandUser nobody
# For this to work you will also need host keys in /etc/ssh/ssh_known_hosts
#HostbasedAuthentication no
# Change to yes if you don't trust ~/.ssh/known_hosts for
# HostbasedAuthentication
#IgnoreUserKnownHosts no
# Don't read the user's ~/.rhosts and ~/.shosts files
#IgnoreRhosts yes
# To disable tunneled clear text passwords, change to no here!
#PasswordAuthentication yes
#PermitEmptyPasswords no
# Change to no to disable s/key passwords
#ChallengeResponseAuthentication yes
# Kerberos options
#KerberosAuthentication no
#KerberosOrLocalPasswd yes
#KerberosTicketCleanup yes
#KerberosGetAFSToken no
# GSSAPI options
#GSSAPIAuthentication no
#GSSAPICleanupCredentials yes
# Set this to 'yes' to enable PAM authentication, account processing,
# and session processing. If this is enabled, PAM authentication will
# be allowed through the ChallengeResponseAuthentication and
# PasswordAuthentication.  Depending on your PAM configuration,
# PAM authentication via ChallengeResponseAuthentication may bypass
# the setting of "PermitRootLogin without-password".
# If you just want the PAM account and session checks to run without
# PAM authentication, then enable this but set PasswordAuthentication
# and ChallengeResponseAuthentication to 'no'.
#UsePAM no
#AllowAgentForwarding yes
#AllowTcpForwarding yes
#GatewayPorts no
#X11Forwarding yes
#X11DisplayOffset 10
#X11UseLocalhost yes
#PermitTTY yes
#PrintMotd yes
#PrintLastLog yes
#TCPKeepAlive yes
#UseLogin no
#PermitUserEnvironment no
#Compression delayed
#ClientAliveInterval 0
#ClientAliveCountMax 3
#UseDNS no
#PidFile /var/run/sshd.pid
#MaxStartups 10:30:100
#PermitTunnel no
#ChrootDirectory none
#VersionAddendum none
# no default banner path
#Banner none
# override default of no subsystems
Subsystemsftp/usr/libexec/sftp-server
# Example of overriding settings on a per-user basis
#Match User anoncvs
#X11Forwarding no
#AllowTcpForwarding no
#PermitTTY no
#ForceCommand cvs server
">/etc/ssh/sshd_config
cp /openssh-7.6p1/contrib/redhat/sshd.init /etc/init.d/sshd
setenforce 0
chkconfig --add sshd
systemctl start sshd.service
%end
五、配置防火墙,开放相关服务和端口:
# firewall-cmd --permanent --add-service=ftp    # 防火墙开启ftp服务(tcp21)
# firewall-cmd --permanent --add-service=dhcp    # 防火墙开启DHCP服务(udp67)
# firewall-cmd --permanent --add-port=69/udp    # 防火墙开启tftp服务(udp69)
# firewall-cmd --permanent --add-port=3001-3100/tcp    # 防火墙开启ftp被动监听的端口段
# systemctl restart firewalld.service    # 重启防火墙使配置生效,或者firewall-cmd--reload
六、测试:
只要要安装系统的主机和此服务器在一个网段或者其他网段能通过DHCP中继获取地址就可以自动安装了

相关文章推荐
- Linux系统下PXE装机服务的搭建与部署(附完整命令与截图)
- PXE装机linux(服务器的批量部署)
- PXE+kickstart实现批量部署linux系统
- Linux6.5中配置PXE自动装机,实现批量装机服务。
- 部署PXE远程安装系统并通过Kickstart无人值守装机
- PXE项目实战,通过编写脚本自动安装系统时批量部署服务器所需要的所有服务
- 百晓生带你玩转linux系统服务搭建系列----pxe远程安装服务器的搭建及无人值守安装
- 初学linux网络服务之PXE网络部署系统实验
- PXE实现批量安装部署(win与linux系统)
- linux-DHCP服务、PXE网络批量自动装机
- 部署PXE高效批量网络装机并实现Kickstart无人值守自动安装
- Linux下批量部署安装--PXE
- 【原创】远程管理linux系统---telnet服务
- Linux系统安装--PXE网络装机
- 批量管理远程Linux系统工具
- 部署PXE远程安装服务实现Kickstart无人值守安装
- 部署一:PXE+ Kickstart 实现网络安装 单 发行版LINUX系统
- 基于Dubbo的分布式系统架构-在Linux操作系统上手工部署Dubbo服务
- 使用RHEL6.4部署PXE+kickstart,实现自动安装linux系统
- Windows系统远程安装服务及PXE技术