vue.js 2.0系列之 路由的使用
2018-01-27 22:39
597 查看
1,首先下载vue-router
npm install vue-router --save
4000
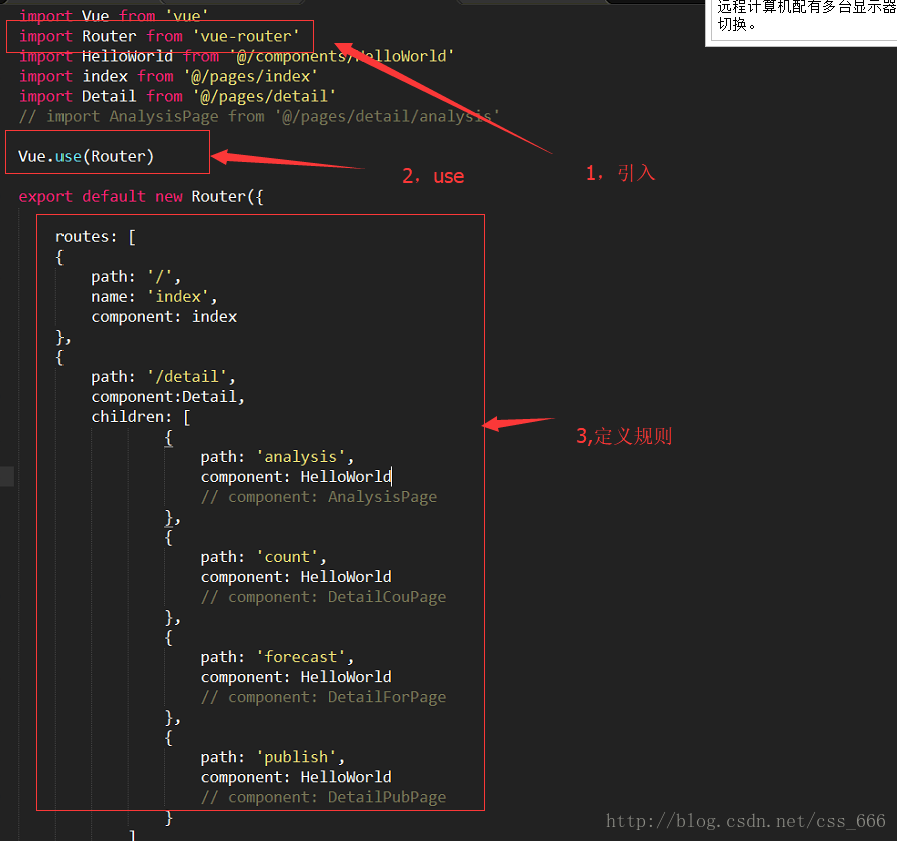
2,引入并use
import Vue from "vue"
import Router from "vue-router"
Vue.use(Router)
在template中的使用:
keep-alive可以缓存组件,提高渲染效率。保持用户对页面的修改
<keep-alive>
<router-view></router-view>
</keep-alive>
router-link可以使改变路由,
:to=”{ path: item.path }” 表示要跳转的路径
tag=”li” 表示最中渲染成li
<ul>
<router-link v-for="(item,index) in products"
:key="index"
:to="{ path: item.path }"
tag="li"
active-class="active">
{{ item.name }}
</router-link>
</ul>
3,获取路由参数
路由配置routes: [
{
path: '/home/:cur',
component: index
},在js里姐可以使用$route获取参数
this.$route.path //cur
4,导航守卫
路由跳转前做一些验证,比如登录验证(未登录去登录页),是网站中的普遍需求const vueRouter = new Router({
routes: [
//......
{
path: '/account',
name: 'account',
component: Account,
children: [
{name: 'course', path: 'course', component: CourseList},
{name: 'order', path: 'order', component: OrderList}
]
}
]
});
vueRouter.beforeEach(function (to, from, next) {
const nextRoute = [ 'account', 'order', 'course'];
const auth = store.state.auth;
//跳转至上述3个页面
if (nextRoute.indexOf(to.name) >= 0) {
//未登录
if (!store.state.auth.IsLogin) {
vueRouter.push({name: 'login'})
}
}
//已登录的情况再去登录页,跳转至首页
if (to.name === 'login') {
if (auth.IsLogin) {
vueRouter.push({name: 'home'});
}
}
next();
});5,js里改变路由
this.$router.push({path: '/coach/' + this.$route.params.id, query: queryData});6,视图中制定不同的组件
在路由配置中: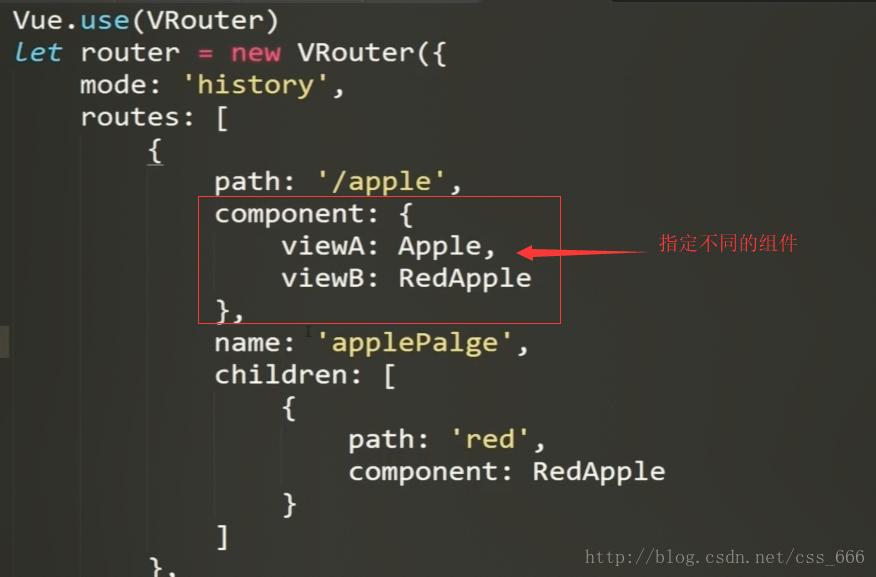
template中:

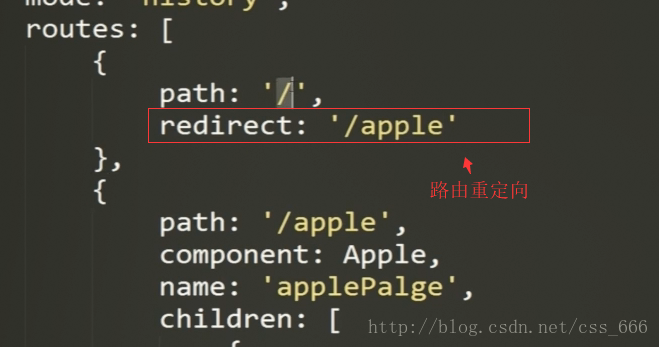
7,路由重定向

相关文章推荐
- Vue.js学习系列(九)---使用路由搭建单页应用(二)
- Vue.js学习系列(八)---使用路由搭建单页应用(一)
- vue.js中的路由vue-router2.0使用
- vue.js 2.0系列之 插件的使用
- 基于vue.js 2.0,不使用webpack的nodejs服务,只在浏览器上单独使用在Element UI的Tree树形控件
- Vue.js学习系列(四十三)-- 使用props传递数据
- 详解Vue.js 2.0 如何使用axios
- vue2.0使用Sortable.js实现的拖拽功能
- [js高手之路] vue系列教程 - 组件定义与使用上部(7)
- 前端框架vue.js系列(13):路由
- Vue.js学习系列(四十七)-- 路由
- Vue.js 2.0 中#$on与$emit如何使用之实例讲解
- 使用Vue.js 2.0搭建单页应用:从构建到部署
- Vue.js框架路由使用方法实例详解
- vue2.0使用Sortable.js实现的拖拽功能
- 使用 Vue.js 2.0 框架开发和运行
- vue2.0使用Sortable.js实现的拖拽功能
- Vue.js:使用Vue-Router 2实现路由功能介绍
- Vue.js路由组件vue-router的使用方法
- Vue.js学习系列(八)---如何使用组件