Android基础学习笔记-简单实现绘画板
2018-01-27 09:13
465 查看
前言:这是一个初学者的笔记.....感觉在学校搞来搞去的一大堆课程,很多东西学了不久又会忘记,这个假期在家看视频学习,准备将学习过程的一些实例放到博客里,这样自己再查看代码也就方便一点了。
黑马Android视频学习笔记,Android简单实现绘画板笔记
主要涉及内容:OnTouchListener触摸监听、Canvas、Paint、Bitmap保存图片
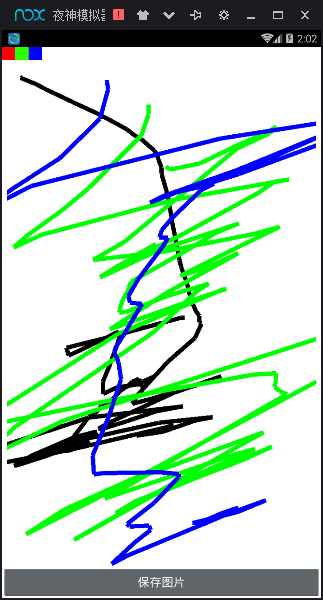
界面截图
public class MainActivity extends Activity implements View.OnClickListener{

private ImageView iv;
private Paint paint;
private Canvas canvas;
private TextView tv_red;
private TextView tv_green;
private TextView tv_blue;
private Bitmap bitmap;

@Override
protected void onCreate(Bundle savedInstanceState) {
super.onCreate(savedInstanceState);
setContentView(R.layout.activity_main);
iv = findViewById(R.id.iv);
tv_red = findViewById(R.id.tv_red);
tv_green = findViewById(R.id.tv_green);
tv_blue = findViewById(R.id.tv_blue);
tv_red.setOnClickListener(this);
tv_green.setOnClickListener(this);
tv_blue.setOnClickListener(this);

//1.获取屏幕大小
int width = getWindowManager().getDefaultDisplay().getWidth();
int height = getWindowManager().getDefaultDisplay().getHeight();
//2.创建一张和屏幕大小一样纸
bitmap = Bitmap.createBitmap(width,height,Bitmap.Config.ARGB_8888);
//3.创建画板,将纸放入
canvas = new Canvas(bitmap);
canvas.drawColor(Color.WHITE);
paint = new Paint();
paint.setColor(Color.BLACK);
paint.setStrokeWidth(10); //画笔宽度

iv.setOnTouchListener(new View.OnTouchListener() {
int startX;
int startY;
@Override
public boolean onTouch(View v, MotionEvent event) {
switch (event.getAction()){
case MotionEvent.ACTION_DOWN: //按下动作
Log.d("MainActivity", "onTouch: 按下");
startX = (int) event.getRawX();  //获取按下位置距离屏幕左边缘的距离
startY = (int) event.getRawY();  //获取按下位置激励屏幕上边缘的距离
break;
case MotionEvent.ACTION_MOVE:  //移动动作
Log.d("MainActivity", "onTouch: 移动");
int endX = (int) event.getRawX(); //获取移动后的坐标
int endY = (int) event.getRawY();
//将起始坐标和画笔传入画板,画直线
canvas.drawLine(startX,startY,endX,endY,paint);
//重新定义起始位置
startX = (int) event.getRawX();
startY = (int) event.getRawY();
iv.setImageBitmap(bitmap);
break;
case MotionEvent.ACTION_UP:
Log.d("MainActivity", "onTouch: 放开");
}

return true;
}
});
}
/*
* TextView修改Paint画笔颜色*/
@Override
public void onClick(View v) {
switch (v.getId()){
case R.id.tv_red:
paint.setColor(Color.RED);
break;
case R.id.tv_green:
paint.setColor(Color.GREEN);
break;
case R.id.tv_blue:
paint.setColor(Color.BLUE);
break;
}
}

//保存图片
public void saveImage(View v) {
try {
File file = new File(Environment.getExternalStorageDirectory(),
System.currentTimeMillis() + ".jpg");     //Android4.0之后保存需要手动授权
FileOutputStream fos = new FileOutputStream(file);
bitmap.compress(Bitmap.CompressFormat.JPEG, 100, fos); //100表示图片输出质量
fos.close();
Toast.makeText(this, "保存成功", Toast.LENGTH_SHORT).show();
//模拟SD卡cherub事件
Intent intent = new Intent();
intent.setAction(Intent.ACTION_MEDIA_MOUNTED);
intent.setData(Uri.fromFile(Environment.getExternalStorageDirectory()));
sendBroadcast(intent);
}catch (Exception e){
e.printStackTrace();
Toast.makeText(this, "保存失败", Toast.LENGTH_SHORT).show();
}
}
}
记得注册SD卡读写权限
布局文件代码
<?xml version="1.0" encoding="utf-8"?>
<RelativeLayout xmlns:android="http://schemas.android.com/apk/res/android"
xmlns:app="http://schemas.android.com/apk/res-auto"
xmlns:tools="http://schemas.android.com/tools"
android:layout_width="match_parent"
android:layout_height="match_parent"
tools:context="com.zran.ontouch.MainActivity">
<ImageView
android:layout_width="match_parent"
android:layout_height="match_parent"
android:id="@+id/iv"
android:background="#ffffff"
/>
<LinearLayout
android:layout_width="match_parent"
android:layout_height="wrap_content">
<TextView
android:id="@+id/tv_red"
android:layout_width="20dp"
android:layout_height="20dp"
android:background="#ff0008"
/>
<TextView
android:id="@+id/tv_green"
android:layout_width="20dp"
android:layout_height="20dp"
android:background="#2bff00"
/>
<TextView
android:id="@+id/tv_blue"
android:layout_width="20dp"
android:layout_height="20dp"
android:background="#0400ff"
/>
</LinearLayout>
<Button
android:onClick="saveImage"
android:layout_alignParentBottom="true"
android:layout_width="match_parent"
android:layout_height="wrap_content"
android:text="保存图片"/>

</RelativeLayout>

相关文章推荐
- Android(java)学习笔记218:开发一个多界面的应用程序之人品计算器的简单实现
- Android开发学习笔记一:Android启动界面的简单实现
- Android基础学习笔记之-ListView进阶用法(item圆角效果实现)
- Android基础学习笔记之-基本文件读写实现
- Android基础学习总结(七)——简单实现新闻选项卡滑动效果(CoordinatorLayout+AppBarLayout+Toolbar+TabLayout+ViewPager大合成)
- Android开发学习笔记(六):最简单的办法实现APP欢迎界面
- Android 学习笔记之如何实现简单相机功能
- android基础学习之一个简单的歌词滚动软件的实现
- APIDemo学习笔记——Android上几种简单的Animation使用方法(三)——3D Transition
- Silverlight学习笔记一(理解一下机制,使用一下布局,实现一个简单的用户登录)
- android简单demo学习系例之菜单实现
- Android Map开发基础知识学习笔记
- Java基础学习笔记(七)Set接口及其实现子类
- APIDemo学习笔记——Android上几种简单的Animation使用方法(二)
- 《面向对象基础:C++实现》学习笔记之一
- Android Map开发基础知识学习笔记
- 【JfaceTextFramework学习笔记之四】TextViewer实现原理简单分析
- J2ME 3D学习笔记——实现简单的界面(附代码)
- Android(OPhone) 学习笔记 - 代码基础
- (二)数据结构学习笔记 简单堆栈,STL中堆栈的实现