OPENCV学习笔记3-1_算法设计中使用策略模式
2018-01-21 19:43
741 查看
Building a bug-free(无BUG) application is just the beginning. What you really want is an application that you and the programmers working with you(团队) will be able to easily adapt and evolve (修改和升级)as new requirements come in(随着新的需求进入,面临新的需求).
Basically(总体来说), a design pattern is a sound(可靠的), reusable solution (可重用)to a generic problem that occurs frequently in software designing. Many software patterns have been introduced and well documented. Good programmers should build a working knowledge of these existing patterns.
The objective of(目的) the Strategy [ˈstrætədʒi] design pattern (策略设计模式)is to encapsulate (封装)an algorithm in(算法) a class.
示例
构建一个简单的算法,用来识别图像中具有某种颜色的所有像素。这个算法必须输入一个图像和一个颜色,并且返回一个二值图像,显示具有指定颜的像素。The tolerance(公差) with which we want to accept a color will be another parameter to be specified(规定,指定) before running the algorithm [ˈælgərɪðəm].
一旦用策略设计模式把算法封装进类,就可以通过创建类的实例来部署算法,实例通常是在程序初始化的时候创建的。在运行构造函数时,类的实例会用默认值初始化算法的各种参数,以便它能立即进入可用状态。
let's start with an example on how it can be deployed(部署) and used.
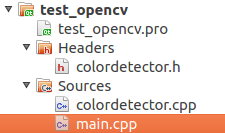


main.cpp
colordetector.h
colordetector.cpp

Basically(总体来说), a design pattern is a sound(可靠的), reusable solution (可重用)to a generic problem that occurs frequently in software designing. Many software patterns have been introduced and well documented. Good programmers should build a working knowledge of these existing patterns.
The objective of(目的) the Strategy [ˈstrætədʒi] design pattern (策略设计模式)is to encapsulate (封装)an algorithm in(算法) a class.
示例
构建一个简单的算法,用来识别图像中具有某种颜色的所有像素。这个算法必须输入一个图像和一个颜色,并且返回一个二值图像,显示具有指定颜的像素。The tolerance(公差) with which we want to accept a color will be another parameter to be specified(规定,指定) before running the algorithm [ˈælgərɪðəm].
一旦用策略设计模式把算法封装进类,就可以通过创建类的实例来部署算法,实例通常是在程序初始化的时候创建的。在运行构造函数时,类的实例会用默认值初始化算法的各种参数,以便它能立即进入可用状态。
let's start with an example on how it can be deployed(部署) and used.
#include <opencv2/core/core.hpp>
#include <opencv2/highgui/highgui.hpp>

#include "colordetector.h"

int main()
{
// 1. Create image processor object
ColorDetector cdetect;

// 2. Read input image
cv::Mat image= cv::imread("test_F.jpg");
if (image.empty())
return 0;

// 3. Set input parameters
cdetect.setTargetColor(0,0,250); // here blue sky

// 4. Process the image and display the result
cv::namedWindow("result");
cv::imshow("result",cdetect.process(image));
cv::waitKey();
return 0;
}
main.cpp
#if !defined COLORDETECT
#define COLORDETECT

#include <opencv2/core/core.hpp>
#include <opencv2/imgproc/imgproc.hpp>

#include<iostream>
using namespace std;
using namespace cv;

class ColorDetector {
private:
int maxDist;    // minimum acceptable distance
Vec3b target;   // target color
Mat result;     // image containing resulting binary map
public:
/*
使用策略设计模式的原因之一,让算法的部署尽可能简单。
最简单的构造函数是空函数。它会创建一个算法类的实例,并处于有效状态。
然后我们在构造函数中初始化全部输入参数,设置为默认值。
*/
// empty constructor    default parameter initialization here
// ColorDetector():minDist(20){target[0]=target[1]=target[2]=0;}
ColorDetector() : maxDist(255), target(0,0,0){}    //构造函数
/*
此时,创建该算法类的用户可以立即调用处理方法并传入一个有效的图像,然后得到一个有效的输出。
这是策略模式的另一个目的,即保证只要参数正确,算法就能正常运行。可由多个构造函数.
*/

// Computes the distance from target color.

int getDistanceToTargetColor(const Vec3b& color) const;      //  no{ }
/*
Vec3b target;   // target color

int ColorDetector::getDistanceToTargetColor(const Vec3b& color) const{
return getColorDistance(color, target);
}
void  ColorDetector::setTargetColor(Vec3b color) {
target = color;
}
*/

int getColorDistance(const Vec3b& color1, const Vec3b& color2) const;

// Processes the image. Returns a 1-channel binary image.
Mat process(const Mat &image);

/*------用户显然希望使用个性化设置,可以用相应的设计方法和获取方法来实现这个功能。-----*/
void setColorDistanceThreshold(int distance);
// Gets the color distance threshold
int getColorDistanceThreshold() const;

/*
提供了setTargetColor方法的两种定义。 第一个版本用三个参数表示三个颜色组件,第二个版本用cv::Vec3b保存颜色值。
让算法类更便于使用,用户只需要选择最合适的设值函数。
*/
// Sets the color to be detected
void setTargetColor(uchar blue, uchar green, uchar red);
// Sets the color to be detected
void setTargetColor(Vec3b color);

// Gets the color to be detected
Vec3b getTargetColor() const;
};  // semicolons need

#endif
colordetector.h
#include "colordetector.h"
#include <vector>

int ColorDetector::getDistanceToTargetColor(const Vec3b& color) const{
return getColorDistance(color, target);
}

int ColorDetector::getColorDistance(const Vec3b& color1, const Vec3b& color2) const{
return abs(color1[0] - color2[0]) + abs(color1[1] - color2[1]) + abs(color1[2] - color2[2]);
}

void ColorDetector::setColorDistanceThreshold(int distance){
if (distance < 0)
distance = 0;
maxDist = distance;
}

int ColorDetector::getColorDistanceThreshold() const {
return maxDist;
}

void  ColorDetector::setTargetColor(uchar blue, uchar green, uchar red) {
target = Vec3b(blue, green, red);                //Vec3b color
}

void  ColorDetector::setTargetColor(Vec3b color) {
target = color;
}

Vec3b ColorDetector::getTargetColor() const {
return target;
}

Mat ColorDetector::process(const cv::Mat &image) {
// re-allocate binary map if necessary same size as input image, but 1-channel
result.create(image.size(),CV_8U);
// get the iterators
Mat_<cv::Vec3b>::const_iterator it= image.begin<Vec3b>();
Mat_<cv::Vec3b>::const_iterator itend= image.end<Vec3b>();
Mat_<uchar>::iterator itout= result.begin<uchar>();
for ( ; it!= itend; ++it, ++itout)
{
// compute distance from target color
if (getDistanceToTargetColor(*it) < maxDist) {

a112
*itout= 255;
}
else {
*itout= 0;
}
}
return result;
}
colordetector.cpp

相关文章推荐
- OpenCV 2 学习笔记(13): 算法的基本设计模式<4> :使用Model-View-Controller模式创建一个应用程序
- OpenCV 2 学习笔记(10): 算法的基本设计模式<1>:策略模式(strategy pattern)
- OpenCV 2 学习笔记(11): 算法的基本设计模式<2>:使用Controller
- OpenCV 2 学习笔记(12): 算法的基本设计模式<3>:单例模式(Singleton pattern)
- 二 策略模式——设计模式学习笔记
- 步步为营 .NET 设计模式学习笔记 三、Strategy(策略模式)
- 设计模式学习笔记——策略模式
- 设计模式学习笔记-策略模式
- 设计模式学习笔记之策略模式
- 《Head First 设计模式》学习笔记:策略模式与观察者模式
- 设计模式学习笔记(5) - 策略模式
- 【HeadFirst 设计模式学习笔记】1.策略模式
- 步步为营 .NET 设计模式学习笔记 三、Strategy(策略模式)
- java 设计模式学习笔记十五 strategy 策略设计模式
- 设计模式学习笔记之策略模式
- 设计模式学习笔记-策略模式
- HeadFirst 设计模式学习笔记1--策略模式
- HeadFirst 设计模式学习笔记1--策略模式
- 设计模式学习笔记(六)之策略模式(Strategy)
- 学习笔记 ---- 设计模式之策略模式