5、微信小程序学习: Tabbar的实现
2018-01-18 09:46
756 查看
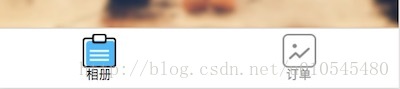
1、底部TabBar的实现
在app.json 里面添加代码:"tabBar":{
"color":"#999999",
"selectedColor":"#000000",
"borderStyle":"black",
"backgroundColor": "#ffffff",
"list":[{
"pagePath":"pages/login/login",
"text":"相册",
"iconPath": "./assets/image/tab1_a.png",
"selectedIconPath": "./assets/image/tab1_b.png"
},{
"pagePath": "pages/orderlist/orderlist",
"text": "订单",
"iconPath": "./assets/image/tab2_a.png",
"selectedIconPath": "./assets/image/tab2_b.png"
}]
}
2、顶部TabBar的实现
1、wxml<!--pages/orderlist/orderlist.wxml-->
<view class="swiper-tab">
<view class= "swiper-tab-list {{currentTab==0 ? 'on':''}}" data-current='0' bindtap='swichNav'>全部订单</view>
<view class="swiper-tab-list' {{currentTab==1 ? 'on':''}}" data-current='1' bindtap='swichNav'>待付款</view>
<view class="swiper-tab-list' {{currentTab==2 ? 'on':''}}" data-current='2' bindtap='swichNav'>待验收</view>
<view class="swiper-tab-list' {{currentTab==3 ? 'on':''}}" data-current='3' bindtap='swichNav'>待确认</view>
<view class="swiper-tab-list' {{currentTab==4 ? 'on':''}}" data-current='4' bindtap='swichNav'>已完成</view>
</view>
<swiper current='{{currentTab}}' class='swiper-box' duration='300' style='height:{{winHeight-31}}px' bindchange='bindchange'>
<swiper-item>1</swiper-item>
<swiper-item>2</swiper-item>
<swiper-item>3</swiper-item>
<swiper-item>4</swiper-item>
<swiper-item>5</swiper-item>
</swiper>2、wxss
/* pages/orderlist/orderlist.wxss */
.swiper-tab {
width: 100%;
border-bottom: 2rpx solid #777777;
text-align: center;
line-height: 80rpx;
}
.swiper-tab-list {
font-size: 30rpx;
display: inline-block;
width: 20%;
color: #777777;
}
.on {
color: #da7c0c;
border-bottom:5rpx solid #da7c0c;
}
.swiper-box {
display: block;
width: 100%;
height: 100%;
overflow: hidden;
}
.swiper-box view {
text-align: center;
}
3、js
var app = getApp()
Page({
data: {
winWidth: 0,
winHeight: 0,
// tab切换
currentTab: 0,
},
onLoad: function () {
var that = this;
wx.getSystemInfo({

success: function (res) {
that.setData({
winWidth: res.windowWidth,
winHeight: res.windowHeight
});
}

});
},
bindChange: function (e) {

var that = this;
that.setData({ currentTab: e.detail.current });

},
swichNav: function (e) {

var that = this;

if (this.data.currentTab === e.target.dataset.current) {
return false;
} else {
that.setData({
currentTab: e.target.dataset.current
})
}
}
})

相关文章推荐
- 微信小程序之tabBar学习
- 微信小程序开发之实现选项卡(窗口顶部TabBar)页面切换
- 微信小程序 新建登录页并实现tabBar隐藏
- 微信小程序开发之自定义tabBar的实现
- 微信小程序学习笔记--20170425--登录验证实现
- 微信小程序学习笔记--20170520--服务端实现
- 微信小程序开发之tabbar图标和颜色的实现
- 微信小程序-TabBar功能实现
- 微信小程序学习笔记--20170425--登录验证实现
- 微信小程序学习笔记(六)tabBar
- 微信小程序如何实现自定义tabBar
- Android多媒体学习十:利用AudioRecord类实现自己的音频录制程序
- Android多媒体学习九:利用MediaRecorder类实现自己的音频录制程序
- 友善之臂视频监控方案源码学习(2) - 主程序实现细节
- SVM实现多分类的程序基础工作(二)——通过一个简单libsvm例子迈入libsvm学习的大门
- 【程序33】学习gotoxy()与clrscr()函数(TC实现版本)
- iOS学习笔记7—程序实现国际化 (即本地多语言化)
- Android多媒体学习十:利用AudioRecord类实现自己的音频录制程序
- linux0.11学习笔记-技术铺垫-简单AB任务切换程序(1)-实现一个简单的bootloader
- Android多媒体学习十:利用AudioRecord类实现自己的音频录制程序