Vue 递归实现树形结构
2018-01-17 00:00
561 查看
摘要: 项目需求文档中心按照树形结构递归显示,这里有参考Echarts的文档中心的结构
项目中假设为后台管理系统,一般左侧导航都是树形递归,当然现在也有很多的UI框架,随便套一下也是可以用的;
楼主这里要总结的是vue组件化的时候,当前树形结构组件自行调用;
仅供项目总结,如有不对的地方,请多多包涵。
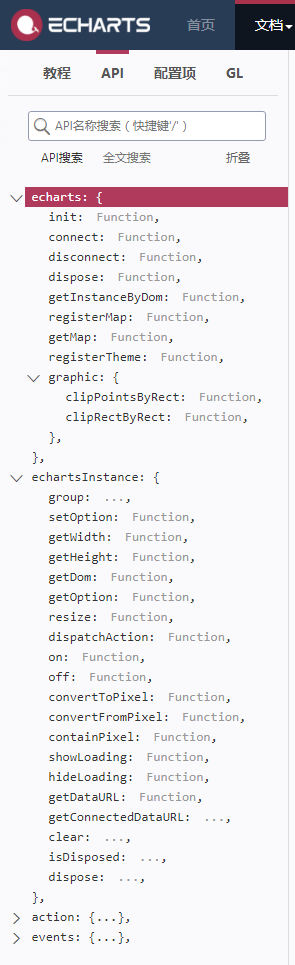
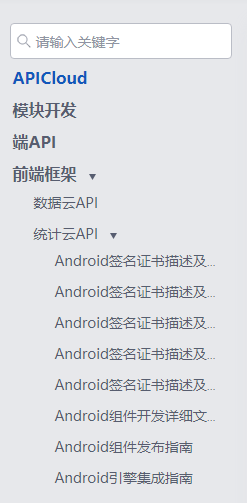
结果展示
先给出两张效果图,左侧是百度Echarts的文档中心截图,右侧是我个人结合项目中文档中心截图项目中假设为后台管理系统,一般左侧导航都是树形递归,当然现在也有很多的UI框架,随便套一下也是可以用的;
楼主这里要总结的是vue组件化的时候,当前树形结构组件自行调用;
仅供项目总结,如有不对的地方,请多多包涵。
代码结构
mTree.vue<template>
<li class="tree-items"
:class="{'active':model.path === this.$route.params.filePath}">
<a class="item-title"
@click="toggle(model)"
:class="{'item-hover': model.type === 'file'}">
{{ model.name }}
<span
class="item-icon"
:class="{'openmenu': open}"
v-if="model.type !== 'file'">
</span>
</a>
<ul v-show="open" v-if="model.type === 'directory'" class="child-list-box">
<m-tree v-for="item in model.files" :model="item" :key="item.name"></m-tree>
</ul>
</li>
</template>
<script>
export default {
name: 'mTree',
props: ['model', 'index'],
data() {
return {
open: true
}
},
methods: {
toggle: function (model) {
let self = this;
if (model.type === "directory") {
this.open = !this.open;
} else {
console.log('file');
}
}
}
}
</script>
<style lang="less">
.tree-items {
margin: 8px 0 0 0;
padding: 3px;
color: #575d6f;
border-radius: 5px;
cursor: pointer;
user-select: none;
&.active {
.item-title {
color: #1357ba;
}
}
&.onHitClass {
background-color: #dbdce0;
}
.item-title {
line-height: 1px;
font-size: 16px;
font-weight: bold;
color: #575d6f;
&.item-hover {
&:hover {
color: #1357ba;
}
}
}
.item-icon {
display: inline-block;
transform: rotate(-180deg);
margin-left: 12px;
width: 7px;
height: 7px;
background: url('三角形的图片.png') no-repeat center;
transition: all .3s;
&.openmenu {
transform: rotate(0deg);
}
}
.child-list-box {
padding-left: 17px;
.tree-items {
margin: 5px 0;
color: #666;
text-decoration: none;
display: block;
font-weight: 300;
padding: 4px;
overflow: hidden;
text-overflow: ellipsis;
white-space: nowrap;
.item-title {
font-size: 14px;
margin-bottom: 12px;
font-weight: normal;
}
}
}
}
</style>
mDemo.vue
<template>
<div class="doc-center-wrap">
<div class="doc-center-slide">
<div class="doc-center-searbox">
<span class="doc-center-searimg"></span>
<Input size="large" placeholder="请输入关键字" @on-keyup="searchKeywords" v-model="keywords"/>
</div>
<div class="doc-center-tree" id="tree-slide">
<ul class="tree-menu-ul" v-for="(menuItem, index) in treeModel" :key="index">
<m-tree :model="menuItem" :index="index"></m-tree>
</ul>
</div>
</div>
</div>
</template>
<script>
import MTree from "./mTree.vue";
let data = [{
"type": "file",
"name": "前端框架",
"path": "about"
}, {
"type": "file",
"name": "前端框架",
"path": "guide"
}, {
"type": "file",
"name": "前端框架",
"path": "zip-guide"
}, {
"type": "file",
"name": "UI模块引擎",
"path": "remote-debugging"
},
{
"type": "directory",
"name": "云API",
"files": [{
"type": "file",
"name": "数据云API",
"path": "component-album"
}, {
"type": "file",
"name": "数据云API",
"path": "component-app"
}]
}
]
let fileFrist = [];
function showFristFile(data) {
for (let i in data) {
let fileModel = data[i];
if (fileModel.type === "file") {
fileFrist.push(fileModel);
} else {
showFristFile(fileModel.files);
}
}
return fileFrist;
}
export default {
data(){
return {
treeModel: data,
retrievalWords: showFristFile(data),
keywords:''
}
},
components: {
MTree
},
methods:{
searchKeywords() {
let self = this;
let retrievalWords = self.retrievalWords;
let keywords = self.keywords;
if (!keywords) {
self.treeModel= self.treeModel;
} else {
let arrKeywords = [];
for (let i = 0; i < retrievalWords.length; i++) {
if (retrievalWords[i].name.toLowerCase().indexOf(keywords.toLowerCase()) !== -1) {
arrKeywords.push(retrievalWords[i]);
}
}
self.treeModel = arrKeywords;
}
}
}
}
</script>
总结
整理的有点杂乱,有空重新整理一下,并且贴出完整的代码
项目总结,请多多包涵。

相关文章推荐
- 将树形结构的数据转换为二维数组 (续 PHP非递归方式实现无限分类(转载))
- vue左侧菜单,树形图递归实现代码
- java、js中实现无限层级的树形结构(类似递归)
- thinkPHP实现递归循环栏目并按照树形结构无限极输出的方法
- Hibernate注解实现单表递归树形结构
- C# 非递归列表转树形结构的实现
- 【079】利用“剪叶子”算法实现树形结构的搜索功能,用Vue.js实现
- Java实现通过递归遍历树形结构
- Java递归实现删除树形结构的任一节点
- Vue.js 递归组件实现树形菜单(实例分享)
- Hibernate注解实现单表递归树形结构
- thinkPHP实现递归循环栏目并按照树形结构无限极输出的方法
- Vue组件模板形式实现对象数组数据循环为树形结构(实例代码)
- java、js中实现无限层级的树形结构方法(类似递归)
- Hibernate注解实现单表递归树形结构
- 递归删除树形结构的所有子节点(java和mysql实现)
- java、js中实现无限层级的树形结构(类似递归)
- 使用递归删除树形结构的所有子节点(java和mysql实现)
- 使用Oracle数据库实现树形结构表的子-父级迭代(递归)查询和删除,通过级联菜单简单举例
- php实现数据树形结构 递归方法