Open-falcon安装(Open-Falcon超级详细安装步骤)
2017-12-20 15:38
465 查看
一、go环境部署
1、go环境的安装,安装open-falcon之前配置go环境下载go包,http://www.golangtc.com/download 老被墙没办法,百度最新安装包,云盘之类的下载一个对应系统版本下载即可。https://pan.baidu.com/s/1pL0Ca4V?errno=0&errmsg=Auth
Login Sucess&&bduss=&ssnerror=0&traceid=#list/path=%2Fgo%2F1.9rc2
解压下载好的go二进制包会看到go目录
[root@hadoop3 software]# pwd
/root/software
[root@hadoop3 software]# tar -zxvf go1.9.linux-amd64.tar.gz
配置go环境: 先建立一个gopath,在gopath目录下分别建立src、pkg、bin目录,这和go语言的运行机制相关,照做就是。
[root@hadoop3 software]# mkdir gopath
[root@hadoop3 software]# cd gopath/
[root@hadoop3 gopath]# mkdir src pkg bin
配置go环境的参考,在 .bash_profile 之类的环境文件中添加下面设置,注意路劲一定要根据你自己路劲来。
export GOROOT=/root/software/go
export GOPATH=/root/software/gopath
export GOBIN=$GOPATH/bin
export PATH=$PATH:$GOBIN:$GOROOT/bin
执行source ~/.bash_profile让配置生效,之后你可以使用go env 、go version等命令查看你的配置。
[root@hadoop3 software]# go env
GOARCH="amd64"
GOBIN="/root/software/gopath/bin"
GOEXE=""
GOHOSTARCH="amd64"
GOHOSTOS="linux"
GOOS="linux"
GOPATH="/root/software/gopath"
GORACE=""
GOROOT="/root/software/go"
GOTOOLDIR="/root/software/go/pkg/tool/linux_amd64"
GCCGO="gccgo"
CC="gcc"
GOGCCFLAGS="-fPIC -m64 -pthread -fmessage-length=0 -fdebug-prefix-map=/tmp/go-build922399512=/tmp/go-build"
.................................
二、安装open-falcon
源码安装和直接下载编译好的二进制包都可以,下面分别介绍两种方法
1、源码编译安装,open-falcon是go语言写的,所以要用go环境来编译。
使用go get命令下载源码,下载文件会自动放到你配置的(export GOPATH=/root/software/gopath)go环境中gopath/src/github.com目录下面 /root/software/gopath/src/github.com/open-falcon/falcon-plus[root@hadoop3 dashboard]# go get github.com/open-falcon/falcon-plus [root@hadoop3 falcon-plus]# pwd /root/software/gopath/src/github.com/open-falcon/falcon-plus
cd $GOPATH/src/github.com/open-falcon/falcon-plus/
make all modules
make all
make specified module
make agent
pack all modules
make pack使用make all编译所有组件,然后使用make pack打包编译好的组件,使用ll命令能看到你打包好的tar文件open-falcon-v0.2.1.tar.gz
2、直接下载open-falcon-v0.2.1.tar.gz解压到指定的目录
下载open-falcon-v0.2.1.tar.gz地址:https://github.com/open-falcon/falcon-plus/releases
创建open-falcon目录,tar命令解压到此目录中。
[root@hadoop3 software]# mkdir open-falcon
[root@hadoop3 software]# tar -zxvf open-falcon-v0.2.1.tar.gz -C open-falcon
三、准备mysql
在$GOPATH/src/github.com/open-falcon/falcon-plus/scripts这个目录中能到数据库表创建的文件cd $GOPATH/src/github.com/open-falcon/falcon-plus/scripts/mysql/db_schema/
[root@hadoop3 falcon-plus]# cd scripts/
[root@hadoop3 scripts]# ll
total 4
drwxr-xr-x 3 root root 4096 Dec 19 20:00 mysql
[root@hadoop3 scripts]# pwd
/root/software/gopath/src/github.com/open-falcon/falcon-plus/scripts
[root@hadoop3 scripts]# ll
total 4
drwxr-xr-x 3 root root 4096 Dec 19 20:00 mysql
[root@hadoop3 scripts]# cd mysql/
[root@hadoop3 mysql]# ll
total 20
drwxr-xr-x 2 root root  4096 Dec 20 09:33 db_schema
-rw-r--r-- 1 root root 11358 Dec 19 20:00 LICENSE
-rw-r--r-- 1 root root   462 Dec 19 20:00 NOTICE
[root@hadoop3 mysql]# cd db_schema/
[root@hadoop3 db_schema]# ll
total 24
-rw-r--r-- 1 root root 1952 Dec 19 20:00 1_uic-db-schema.sql
-rw-r--r-- 1 root root 7573 Dec 19 20:00 2_portal-db-schema.sql
-rw-r--r-- 1 root root 3391 Dec 19 20:00 3_dashboard-db-schema.sql
-rw-r--r-- 1 root root 1807 Dec 19 20:00 4_graph-db-schema.sql
-rw-r--r-- 1 root root 2560 Dec 19 20:00 5_alarms-db-schema.sql
mysql -h 127.0.0.1 -u root -p < 1_uic-db-schema.sql
mysql -h 127.0.0.1 -u root -p < 2_portal-db-schema.sql
mysql -h 127.0.0.1 -u root -p < 3_dashboard-db-schema.sql
mysql -h 127.0.0.1 -u root -p < 4_graph-db-schema.sql
mysql -h 127.0.0.1 -u root -p < 5_alarms-db-schema.sql
pis:根据实际情况修改你的mysql配置,执行上面命令创建组件要使用到的数据库表项。
四、安装Dashboard
dashboard是面向用户的查询界面。在这里,用户可以看到push到graph中的所有数据,并查看其趋势图。参考安装:http://book.open-falcon.org/zh/install_from_src/dashboard.html使用go get 命令下载dashboard,你会在go配置GOPATH目录下/root/software/gopath/src/github.com/open-falcon/dashboard之类的目录中看到下载的文件。
[root@hadoop3 src]# go get github.com/open-falcon/dashboard

[root@hadoop3 open-falcon]# ll
total 4
drwxr-xr-x 6 root root 4096 Dec 19 17:56 dashboard
[root@hadoop3 open-falcon]# cd dashboard/
安装依赖包 yum install -y python-virtualenv
yum install -y python-devel
yum install -y openldap-devel
yum install -y mysql-devel
yum groupinstall "Development tools"
[root@hadoop3 dashboard]# yum install -y python-virtualenv
如果安装不了按照下面的方法安装:使用pip安装pip install virtualenv
[root@hadoop3 pip-1.5.4]# wget "https://pypi.python.org/packages/source/p/pip/pip-1.5.4.tar.gz#md5=834b2904f92d46aaa333267fb1c922bb" --no-check-certificate
[root@hadoop3 software]# tar -zxvf pip-1.5.4.tar.gz
[root@hadoop3 software]# cd  pip-1.5.4
[root@hadoop3 pip-1.5.4]# python setup.py install
[root@hadoop3 db_schema]# pip install virtualenv
[root@hadoop3 dashboard]# virtualenv ./env
[root@hadoop3 dashboard]# ./env/bin/pip install -r pip_requirements.txt
五、修改各个配置文件和启动项目
1、进入到下面的目录中,即open-falcon-v0.2.1.tar.gz解压的目录中。
[root@hadoop3 open-falcon]# ll
total 3936
drwxr-xr-x 7 1002 1002    4096 Jun 19  2017 agent
drwxr-xr-x 5 1002 1002    4096 Jun 19  2017 aggregator
drwxr-xr-x 5 1002 1002    4096 Jun 19  2017 alarm
drwxr-xr-x 6 1002 1002    4096 Jun 19  2017 api
drwxr-xr-x 3 root root    4096 Dec 20 09:52 data
drwxr-xr-x 5 1002 1002    4096 Jun 19  2017 gateway
drwxr-xr-x 6 1002 1002    4096 Jun 19  2017 graph
drwxr-xr-x 5 1002 1002    4096 Jun 19  2017 hbs
drwxr-xr-x 5 1002 1002    4096 Jun 19  2017 judge
drwxr-xr-x 5 1002 1002    4096 Jun 19  2017 nodata
-rwxr-xr-x 1 1002 1002 3983373 Jun 19  2017 open-falcon
lrwxrwxrwx 1 1002 1002      16 Dec 19 17:47 plugins -> ./agent/plugins/
lrwxrwxrwx 1 1002 1002      15 Dec 19 17:47 public -> ./agent/public/
drwxr-xr-x 5 1002 1002    4096 Jun 19  2017 transfer
修改各个组件config目录下面cfg.json,这些组件包含agent、aggregator、alarm、api、gateway、graph、hbs、judge、nodata、open-falcon、transfer
例如:vim aggregator/config/cfg.json ,修改database中mysql连接的用户和密码ip之类的,每个配置文件中都需要根据实际情况修改,参考如下:
[root@hadoop3 open-falcon]# vim aggregator/config/cfg.json
{
"debug": true,
"http": {
"enabled": true,
"listen": "0.0.0.0:6055"
},
"database": {
"addr": "root:123456@tcp(127.0.0.1:3306)/falcon_portal?loc=Local&parseTime=true",
"idle": 10,
"ids": [1, -1],
"interval": 55
},
"api": {
"connect_timeout": 500,
"request_timeout": 2000,
"plus_api": "http://127.0.0.1:8080",
"plus_api_token": "default-token-used-in-server-side",
"push_api": "http://127.0.0.1:1988/v1/push"
}
}
pis:再次强调,根据mysql配置依次修改每个组件配置文件中数据连接用户和密码,ip之类的。
完成修改之后启动服务:
./open-falcon start

# check modules status
./open-falcon check
2、进入到Dashboard目中修改配置文件。
[root@hadoop3 dashboard]# cd $GOPATH/src/github.com/open-falcon/dashboard
[root@hadoop3 dashboard]# ll
total 80
-rw-r--r--  1 root root    97 Dec 19 17:56 babel.cfg
-rwxr-xr-x  1 root root  2125 Dec 19 17:56 control
-rw-r--r--  1 root root   567 Dec 19 17:56 Dockerfile
-rw-r--r--  1 root root   319 Dec 19 17:56 entrypoint.sh
drwxr-xr-x  5 root root  4096 Dec 19 18:51 env
-rw-r--r--  1 root root   170 Dec 19 17:56 gunicorn.conf
-rw-r--r--  1 root root  1235 Dec 19 17:56 i18n.md
-rw-r--r--  1 root root 11358 Dec 19 17:56 LICENSE
-rw-r--r--  1 root root   462 Dec 19 17:56 NOTICE
-rw-r--r--  1 root root   140 Dec 19 17:56 pip_requirements.txt
-rw-r--r--  1 root root  5247 Dec 19 17:56 README.md
drwxr-xr-x 10 root root  4096 Dec 20 09:02 rrd
drwxr-xr-x  2 root root  4096 Dec 19 17:56 screenshots
drwxr-xr-x  2 root root  4096 Dec 19 17:56 scripts
drwxr-xr-x  2 root root  4096 Dec 20 09:53 var
-rwxr-xr-x  1 root root   916 Dec 19 17:56 wsgi.py
-rw-r--r--  1 root root   621 Dec 19 18:54 wsgi.pyc
修改数据库的连接,参考如下:
PORTAL_DB_HOST = os.environ.get("PORTAL_DB_HOST","192.168.0.154")
PORTAL_DB_PORT = int(os.environ.get("PORTAL_DB_PORT",3306))
PORTAL_DB_USER = os.environ.get("PORTAL_DB_USER","root")
PORTAL_DB_PASS = os.environ.get("PORTAL_DB_PASS","123456")
PORTAL_DB_NAME = os.environ.get("PORTAL_DB_NAME","falcon_portal")
启动dashboard
服务部署

部署dashboard,包括配置修改、启动服务、停止服务等。在此之前,需要进入dashboard的部署目录,然后执行下列步骤

# 修改配置。各配置的含义,见下文。
vim ./gunicorn.conf
vim ./rrd/config.py

# 启动服务
./control start

# 校验服务
# TODO

...
# 停止服务
./control stop
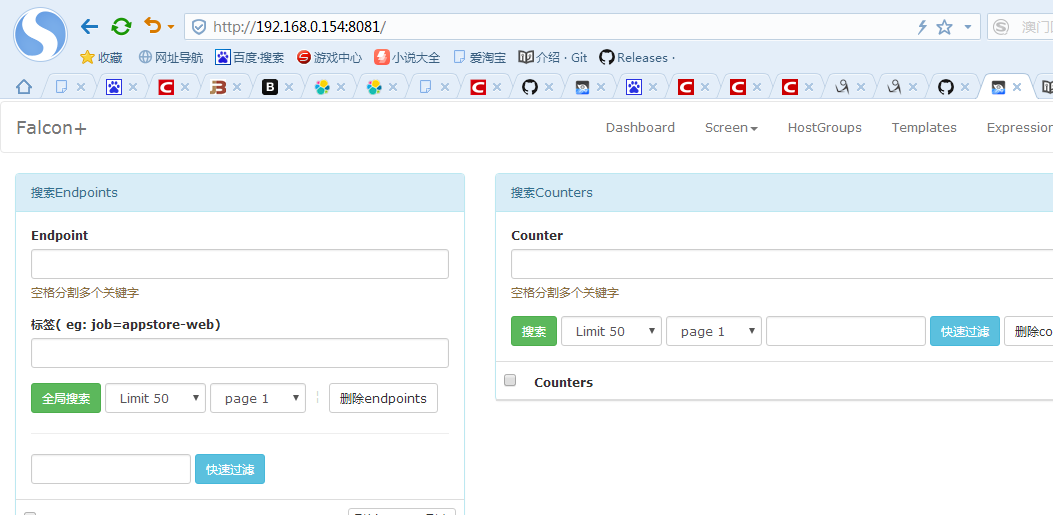
六、前端web页面访问
打开地址: http://192.168.0.154:8081/pis:如果某些页面提示访问不了,检查一下数据库是否可以连接;修改mysql任意地址任意ip可以远程登录。以及在本机上(服务和mysql在同一台机器上)是否一定需要密码登录?有时候mysql在本机不需要密码而你确使用密码登录会造成访问不了。自行测试。

相关文章推荐
- 安装java 配置java环境 超级详细步骤有图有真相
- 安装java 配置java环境 超级详细步骤有图有真相
- Dell OpenManage IT Assistant (ITA)7.0 安装与配置详细步骤
- 一步一步超级详细的zabbix安装教程
- NodeJS入门(一)---nodejs详细安装步骤
- 腾讯云服务器CentOS7.0安装JDK+Tomcat+MySQL详细步骤以及自己遇到的一些问题
- Linux安装JDK及eclipse详细步骤
- Open-Falcon安装详解
- Linux安装openssh详细步骤及遇到问题的解决方案
- 安装虚拟机win 7操作系统的步骤详细截图
- Ubuntu JDK与Eclipse安装配置的详细步骤
- Cacti详细安装步骤
- 7_小米监控Open-Falcon安装绘图数据的组件- Graph
- MySQL的安装步骤及详细图解
- Openfire服务器的安装部署详细步骤
- U盘安装CentOS 6.2(超级详细图解教程)
- Win8系统下安装网络打印机的详细步骤(全程图解)
- 在mac系统安装Apache Tomcat的详细步骤
- Vmware安装CentOS详细步骤