JavaScript限定范围拖拽及自定义滚动
2017-12-04 00:00
176 查看
学习笔记:
拖拽div要发生三个事件:
鼠标按下onmousedown;
鼠标移动onmousemove;
鼠标松开onmouseup;
注意事项:
(1)要防止div移出可视框,要限制div移动的横纵坐标;
(2)防止火狐的bug, 要在最后写上return false,阻止默认事件;
(3)防止鼠标运动时移出div,所以要用document.onmousemove和document.onmouseup,不能用oDiv.onmousemove;
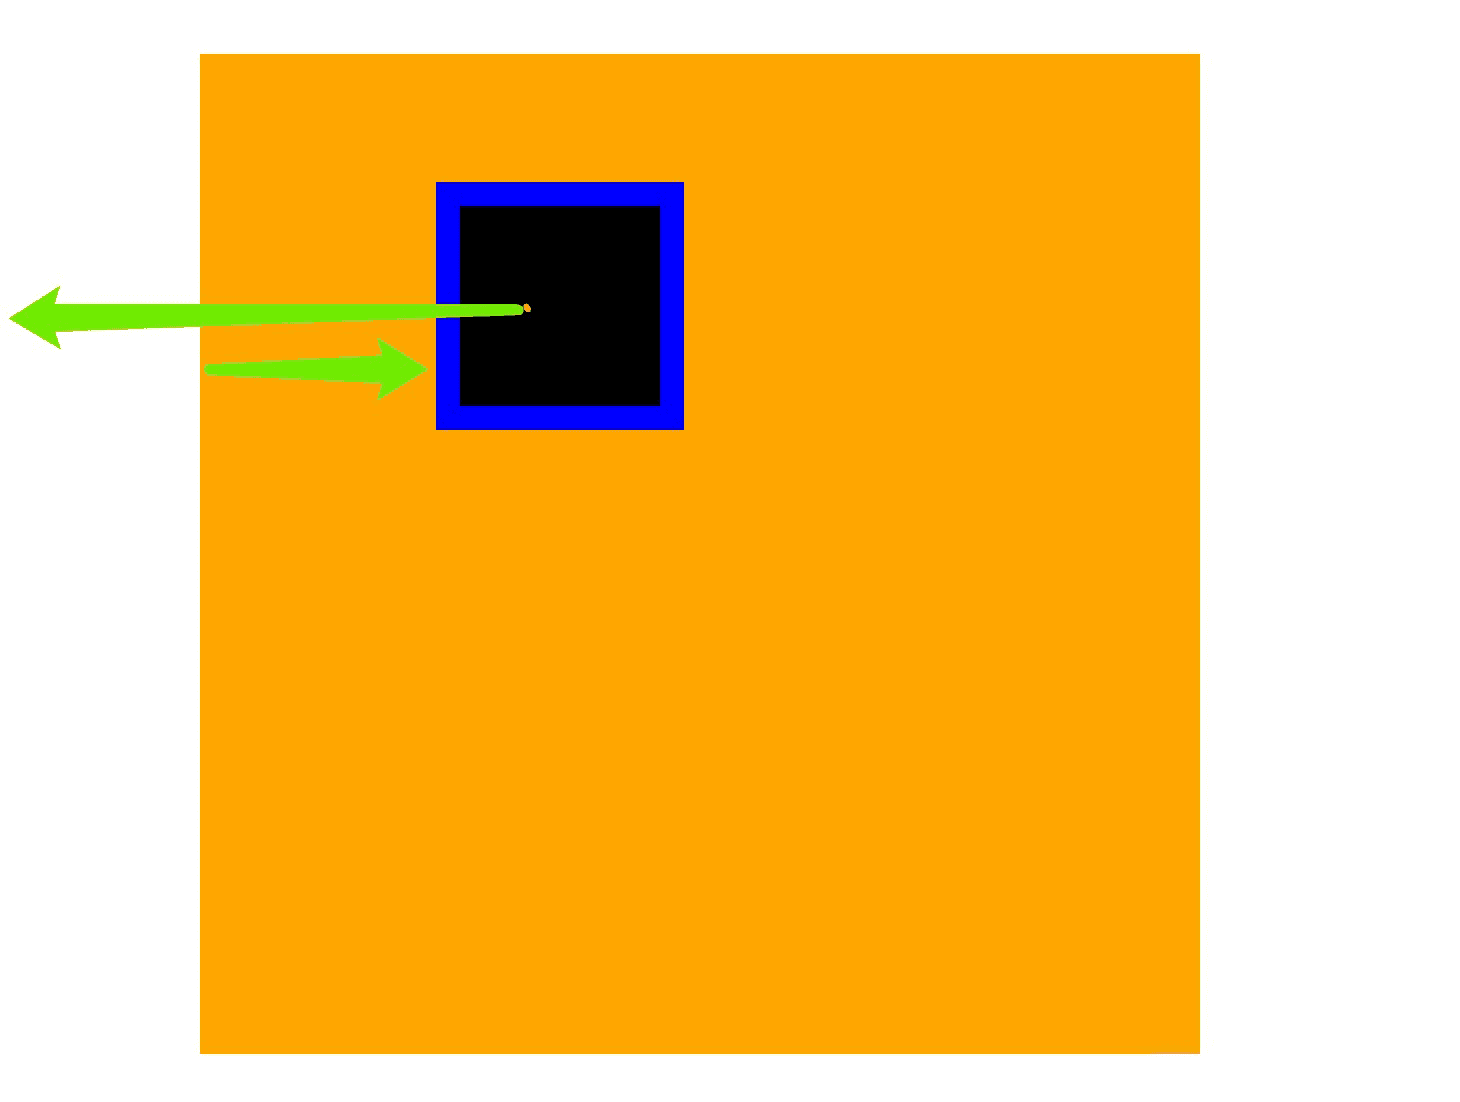
image.png
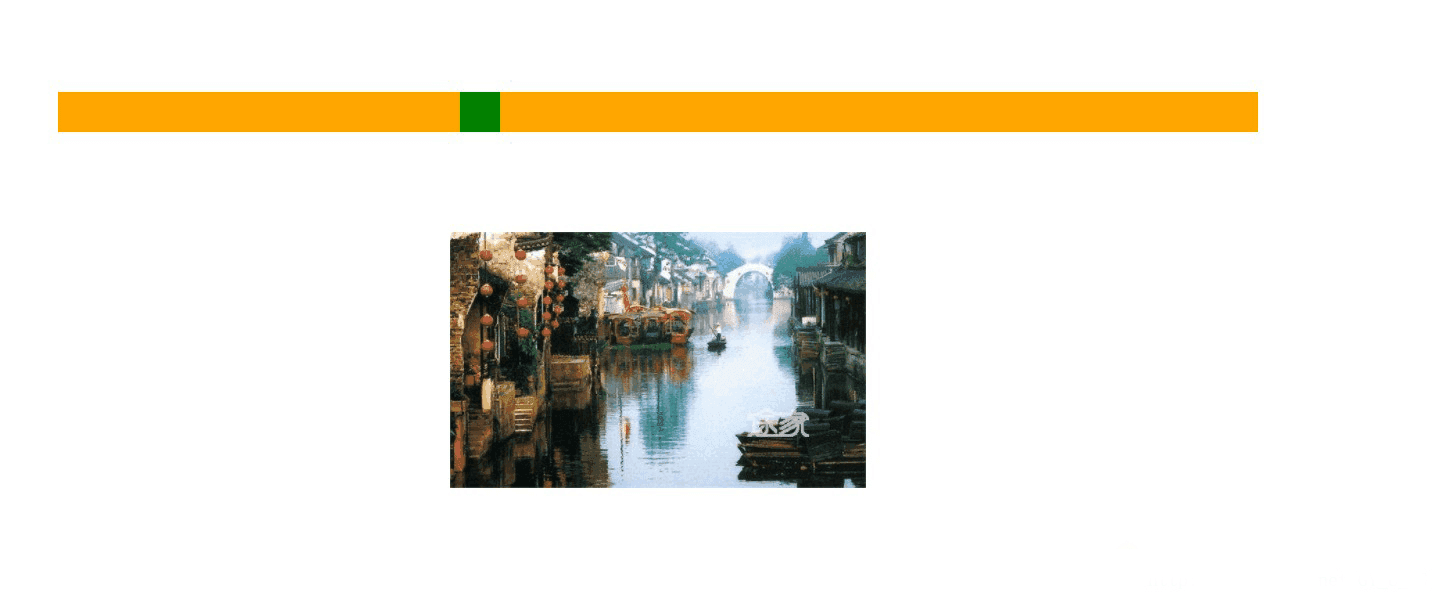
image.png

image.png
offsetTop、clientTop、scrollTop、offsetTop各属性介绍
js实时获取鼠标所在坐标
拖拽div要发生三个事件:
鼠标按下onmousedown;
鼠标移动onmousemove;
鼠标松开onmouseup;
注意事项:
(1)要防止div移出可视框,要限制div移动的横纵坐标;
(2)防止火狐的bug, 要在最后写上return false,阻止默认事件;
(3)防止鼠标运动时移出div,所以要用document.onmousemove和document.onmouseup,不能用oDiv.onmousemove;
1. 实例一
两个对象:div1 和 div2,其中div1是div2的父元素,div2只能在div1的范围内拖拽image.png
<!DOCTYPE html>
<html>
<head>
<meta charset="utf-8">
<title>客户区可见范围限制拖拽</title>
<style type="text/css">
* {
padding: 0;
margin: 0;
}
#div1 {
width: 500px;
height: 500px;
background: orange;
position: relative;
left: 100px;
top: 30px;
}
#div2 {
width: 100px;
height: 100px;
background: black;
position: absolute;
border: 1px solid blue;
}
</style>
</head>
<body>
<div id="div1">
<div id="div2"></div>
</div>

<script type="text/javascript">
var oDiv1 = document.getElementById('div1');
var oDiv2 = document.getElementById('div2');

function getStyle(obj, attr) {
if (obj.currentStyle) {
return obj.currentStyle[attr];
} else {
return getComputedStyle(obj, null)[attr];
}
}
oDiv2.onmousedown = function(ev) {
var oEvent = ev || event;
// var disX = oEvent.clientX - oDiv2.offsetLeft;
// var disY = oEvent.clientY - oDiv2.offsetTop;
var disX = oEvent.clientX - parseInt(getStyle(oDiv2, 'left'));
var disY = oEvent.clientY - parseInt(getStyle(oDiv2, 'top'));

document.onmousemove = function(ev) {
var oEvent = ev || event;
var l = oEvent.clientX - disX;
var t = oEvent.clientY - disY;

if (l < 0) {
l = 0;
} else if (l > oDiv1.offsetWidth - /*parseInt(getStyle(oDiv2,'width'))*/oDiv2.offsetWidth) {
l = oDiv1.offsetWidth - oDiv2.offsetWidth;
}
if (t < 0) {
t = 0;
} else if (t > oDiv1.offsetHeight - oDiv2.offsetHeight) {
t = oDiv1.offsetHeight - oDiv2.offsetHeight;
}
oDiv2.style.left = l + 'px';
oDiv2.style.top = t + 'px';
};

document.onmouseup = function() {
document.onmousemove = null;//如果不取消,鼠标弹起div依旧会随着鼠标移动
document.onmouseup = null;
};
};
</script>
</body>
</html>
2. 实例二
基于上述原理,我们来做一个自定义滚动条,通过拖拽滚动条的位置来控制另一个对象的大小,比如一幅图。image.png
image.png
<!DOCTYPE html>
<html>
<head>
<meta charset="utf-8">
<title>自定义滚动条</title>
<style type="text/css">
#div1 {
width: 600px;
height: 20px;
background: orange;
position: relative;
margin: 50px auto;
}
#div2 {
width: 20px;
height: 20px;
background: green;
position: absolute;
}
#div3 {
width: 0;
height: 0;
margin: 20px auto;
}
#div3 img {
width: 100%;
height: 100%;
}
</style>
</head>
<body>
<div id="div1">
<div id="div2"></div>
</div>
<div id="div3">

</div>
<script type="text/javascript">
var oDiv1 = document.getElementById('div1');
var oDiv2 = document.getElementById('div2');
var oDiv3 = document.getElementById('div3');
oDiv2.onmousedown = function(ev) {
var oEvent = ev || event;
var disX = oEvent.clientX - oDiv2.offsetLeft;
document.onmousemove = function(ev) {
var oEvent = ev || event;
var l = oEvent.clientX - disX;
if (l < 0) {
l = 0;
} else if (l > oDiv1.offsetWidth - oDiv2.offsetWidth) {
l = oDiv1.offsetWidth - oDiv2.offsetWidth;
}
oDiv2.style.left = l + 'px';//l范围:[0,580]
//document.title = l / 580; //范围:[0,1]
var ratio = oDiv1.offsetWidth - oDiv2.offsetWidth;
var scale = l / ratio;
var w = 600 * scale;
var h = 370 * scale;
console.log(w);
oDiv3.style.cssText = ';width:' + w + 'px;height:' + h +'px;';
};
document.onmouseup = function() {
document.onmousemove = null;
document.onmouseup = null;
};
};
</script>
</body>
</html>3. 更多相关文章
js中event对象详解offsetTop、clientTop、scrollTop、offsetTop各属性介绍
js实时获取鼠标所在坐标

相关文章推荐
- JavaScript限定范围拖拽及自定义滚动条应用(3)
- JavaScript拖拽(三):限定范围拖拽及应用自定义滚动条
- JavaScript计算水仙花数【可自定义范围】
- 一段datepickerdialog与自定义Timepickerdialog限定时间范围的逻辑
- jsPlumb 拖拽效果限定范围
- ArcGIS api for javascript——设置自定义范围和空间参考
- JavaScript自定义浏览器滚动条兼容IE、 火狐和chrome
- android 自定义文字跑马灯 支持拖拽,按住停止滚动,自定义速度
- android 自定义文字跑马灯 支持拖拽,按住停止滚动,自定义速度
- javascript之博客前端的自定义可以拖拽的弹出登陆框
- javascript某标签的鼠标滚动事件取消效果或实现其他自定义效果
- JavaScript自定义浏览器滚动条兼容IE、 火狐和chrome
- JavaScript自定义浏览器滚动条兼容IE、 火狐和chrome
- javascript——限制范围的拖拽
- JavaScript自定义浏览器滚动条兼容IE、 火狐和chrome
- android 自定义文字跑马灯 支持拖拽,按住停止滚动,自定义速度
- 156_限定拖拽范围
- javascript在限定范围内移动
- JavaScript限制在客户区可见范围的拖拽(解决scrollLeft和scrollTop的问题)(2)
- JavaScript 事件 -- 默认行为,限制范围拖拽