python借助腾讯云实现人脸识别的gui程序实例
2017-11-09 21:47
1136 查看
1.该程序的功能为借助腾讯云的接口,制作简单的gui操作,实现人脸识别功能。
2.我所用的系统为ubuntu14.04,使用的编程语言为python,版本为python3
3.首先需要注册腾讯云账号,然后安装腾讯云的 ‘Python-SDK-图像识别’ 集成文档,下载地址为 https://github.com/tencentyun/image-python-sdk-v2.0 4.利用 upload_photos.py 一张一张的上传本地图片,作为人脸库
5.编写 GetphotoPath.py 程序,以操作界面的形式选择要识别的人脸图片
6.利用python3 自带的 tkinter 库显示图片(注意这块在运行的时候可能报错,显示没有PIL库,此时只要安装PIL库就可以了,安装命令为 sudo pip3 install Pillow)
7.运行 recognition.sh 这个shell文件,就可以实现人脸识别的功能了。
8.接下来贴上我的程序,这个工程的结构如图所示:
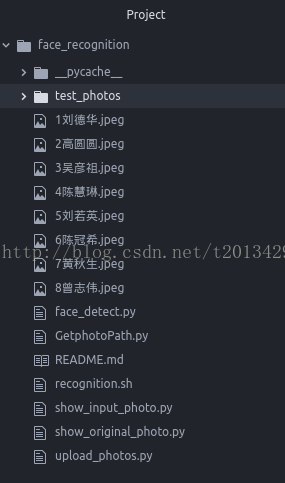
face_recognition 下的test_photos为我们后续测试用的图片集。带有标号的jpeg图片使我们即将上传的图片。
upload_photos.py为上传图片,并且为图片设置信息的程序:from qcloud_image import Client
from qcloud_image import CIUrl, CIFile, CIBuffer, CIUrls, CIFiles, CIBuffers
appid = '########' #这里面的###号代表自己的腾讯云中的具体情况填写
secret_id = '########'
secret_key = '#########'
bucket = '##########'
client = Client(appid, secret_id, secret_key, bucket)
client.use_http()
client.set_timeout(30)
print (client.face_newperson('1', ['group2',], CIFile('1刘德华.jpeg')))
print (client.face_setinfo('1', '刘德华'))
GetphotoPath.py为获得所要检测的图片的路径的gui程序
face_detect.py为识别人脸的主程序,通过这个程序可以得到待检测图片中人脸的信息,并且将信息以gui窗口的形式展示出来
show_input_photo.py为将输入待检测的图片以窗口界面的形式显示出来
show_original_photo.py为将上传到云上的原始图片显示出来的程序
recognition.sh为运行整个项目的脚本文件,只要在该文件目录下面运行 bash recognition.sh 就可以运行整个程序了
2.我所用的系统为ubuntu14.04,使用的编程语言为python,版本为python3
3.首先需要注册腾讯云账号,然后安装腾讯云的 ‘Python-SDK-图像识别’ 集成文档,下载地址为 https://github.com/tencentyun/image-python-sdk-v2.0 4.利用 upload_photos.py 一张一张的上传本地图片,作为人脸库
5.编写 GetphotoPath.py 程序,以操作界面的形式选择要识别的人脸图片
6.利用python3 自带的 tkinter 库显示图片(注意这块在运行的时候可能报错,显示没有PIL库,此时只要安装PIL库就可以了,安装命令为 sudo pip3 install Pillow)
7.运行 recognition.sh 这个shell文件,就可以实现人脸识别的功能了。
8.接下来贴上我的程序,这个工程的结构如图所示:
face_recognition 下的test_photos为我们后续测试用的图片集。带有标号的jpeg图片使我们即将上传的图片。
upload_photos.py为上传图片,并且为图片设置信息的程序:from qcloud_image import Client
from qcloud_image import CIUrl, CIFile, CIBuffer, CIUrls, CIFiles, CIBuffers
appid = '########' #这里面的###号代表自己的腾讯云中的具体情况填写
secret_id = '########'
secret_key = '#########'
bucket = '##########'
client = Client(appid, secret_id, secret_key, bucket)
client.use_http()
client.set_timeout(30)
print (client.face_newperson('1', ['group2',], CIFile('1刘德华.jpeg')))
print (client.face_setinfo('1', '刘德华'))
GetphotoPath.py为获得所要检测的图片的路径的gui程序
from tkinter import *
import tkinter.filedialog
root = Tk()
def xz():
filenames = tkinter.filedialog.askopenfilenames()
if len(filenames) != 0:
string_filename =""
for i in range(0,len(filenames)):
string_filename += str(filenames[i])
lb.config(text = "您选择的图片是:"+string_filename)
return string_filename
else:
lb.config(text = "您没有选择任何文件");

lb = Label(root,text = '')
lb.pack()
btn = Button(root,text="弹出选择文件对话框",command=xz)
face_detect.py为识别人脸的主程序,通过这个程序可以得到待检测图片中人脸的信息,并且将信息以gui窗口的形式展示出来
import os
from GetphotoPath import xz
from qcloud_image import Client
from qcloud_image import CIUrl, CIFile, CIBuffer, CIUrls, CIFiles, CIBuffers

appid = '#########'
secret_id = '#########'
secret_key = '##########'
bucket = '#######'

client = Client(appid, secret_id, secret_key, bucket)
client.use_http()
client.set_timeout(30)

input_photopath=xz()
result = client.face_identify('group2', CIFile(input_photopath))
value_no=80
value_yes=96
person=client.face_getinfo(result['data']['candidates'][0]['person_id'])
person_id=person['data']['person_id']
person_name = person['data']['person_name']
original_photo_name=person_id+person_name+'.jpeg'
this_path = os.getcwd()
original_photopath = this_path+'/'+original_photo_name
print (input_photopath,original_photopath,person_name)
show_input_photo.py为将输入待检测的图片以窗口界面的形式显示出来
from tkinter import *
from PIL import Image, ImageTk
impor
810a
t sys
input_photo = sys.argv[1]
def A():
root=Tk()
root.title("输入图片显示窗口")
textLabel=Label(root,text='您输入的图片为:')
textLabel.pack()
im=Image.open(input_photo)
tkimg=ImageTk.PhotoImage(im)
imgLabel=Label(root,imag=tkimg)
imgLabel.pack()
mainloop()
A()
show_original_photo.py为将上传到云上的原始图片显示出来的程序
from tkinter import *
from PIL import Image, ImageTk
import sys
original_photo = sys.argv[2]
name = sys.argv[3]
def A():
root=Tk()
root.title("原始图片显示窗口")
inf='系统检测到您待检测图片中的人物为:'+name
textLabel=Label(root,text=inf)
textLabel.pack()
im=Image.open(original_photo)
tkimg=ImageTk.PhotoImage(im)
imgLabel=Label(root,imag=tkimg)
imgLabel.pack()
mainloop()
A()
recognition.sh为运行整个项目的脚本文件,只要在该文件目录下面运行 bash recognition.sh 就可以运行整个程序了
inf=`python3 face_detect.py`
python3 show_input_photo.py $inf  &
python3 show_original_photo.py $inf &

相关文章推荐
- python 调用海康linux下demo的可执行程序,设置回调,实现人脸识别 以及实现抓拍功能
- python实现人脸实时监控识别程序 face_recognition
- python在windows下实现备份程序实例
- Python中使用Tkinter模块创建GUI程序实例
- python编写借助linux中的xinetd守护进程实现我们的网络程序(select、重定向标准输入输出)
- 使用Python开发windows GUI程序入门实例
- python在windows下实现备份程序实例
- python下实现人脸识别(opencv2)
- python核心编程-GUI程序之综合实例-简单文件浏览器
- [机器学习]kNN算法python实现(实例:数字识别)
- Windows下C#的GUI窗口程序中实现调用Google Map的实例
- Matlab实现简单的人脸识别程序
- 实例程序实现对CSDN验证码的识别
- 【人脸识别】人脸验证算法Joint Bayesian详解及实现(Python版)
- Python实现程序的单一实例用法分析
- Python实现简单的可逆加密程序实例
- Python基于OpnenCV实现人脸识别
- Python 实现程序的单一实例
- 使用Python开发windows GUI程序入门实例
- Python实现程序的单一实例用法分析