Azure云端部署Exchange 2016双数据中心—Part3(准备站点一)
2017-11-08 15:28
363 查看
5 准备站点Default-Site-Name
Add-WindowsFeature -Name ad-domain-services –IncludeManagementTools
Install-ADDSDomainController -DomainName itservice.vip -InstallDns -SafeModeAdministratorPassword (ConvertTo-SecureString -String "P@ssw0rd123!" -AsPlainText -Force) -DatabasePath c:\windows\NTDS -LogPath C:\WINDOWS\NTDS -NoRebootOnCompletion:$FALSE -Confirm:$FALSE
1、域功能扩展
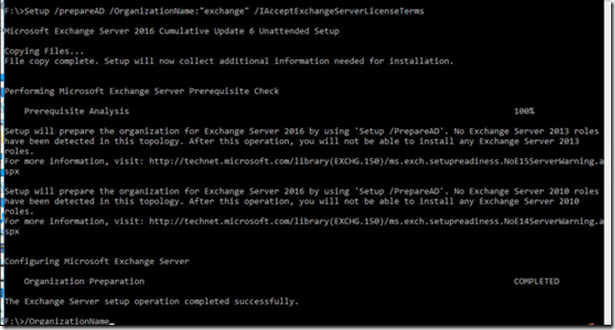
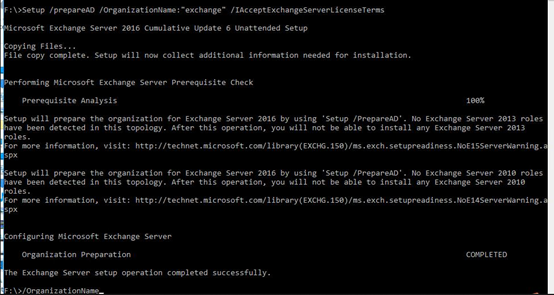
Setup /prepareAD /OrganizationName:"exchange" /IAcceptExchangeServerLicenseTerms
2、林功能扩展
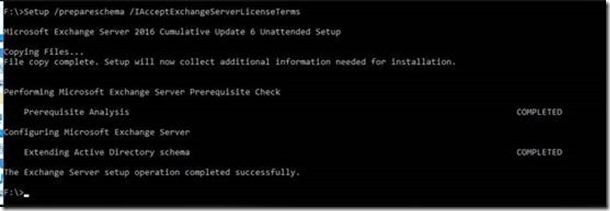
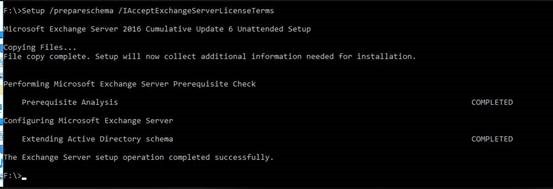
Setup /prepareschema /IAcceptExchangeServerLicenseTerms
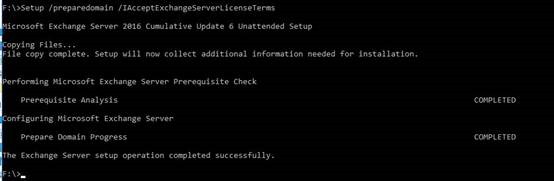
3、域扩展
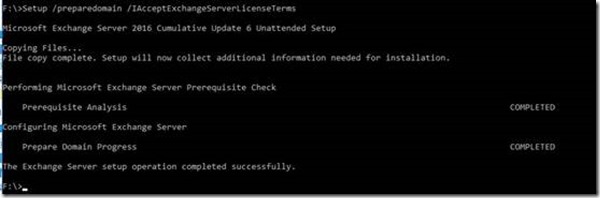
Setup /preparedomain /IAcceptExchangeServerLicenseTerms
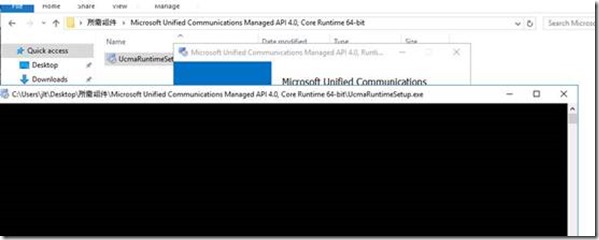
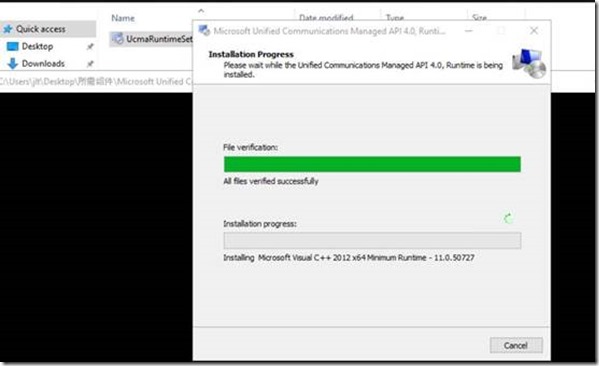
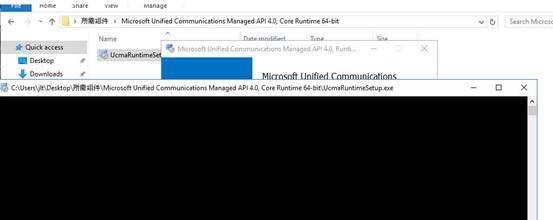
5.3.1 Exchange前提条件准备1、安装Microsoft Unified Communications Managed API 4.0, Core Runtime 64-bit
2、安装必要组件
Install-WindowsFeature AS-HTTP-Activation,Desktop-Experience,NET-Framework-45-Features,RPC-over-HTTP-proxy,RSAT-Clustering,RSAT-Clustering-CmdInterface,RSAT-Clustering-Mgmt,RSAT-Clustering-PowerShell,Web-Mgmt-Console,WAS-Process-Model,Web-Asp-Net45,Web-Basic-Auth,Web-Client-Auth,Web-Digest-Auth,Web-Dir-Browsing, Web-Dyn-Compression,Web-Http-Errors,Web-Http-Logging,Web-Http-Redirect,Web-Http-Tracing,Web-ISAPI-Ext,Web-ISAPI-Filter,Web-Lgcy-Mgmt-Console,Web-Metabase,Web-Mgmt-Console,Web-Mgmt-Service,Web-Net-Ext45,Web-Request-Monitor,Web-Server,Web-Stat-Compression,Web-Static-Content,Web-Windows-Auth,Web-WMI,Windows-Identity-Foundation

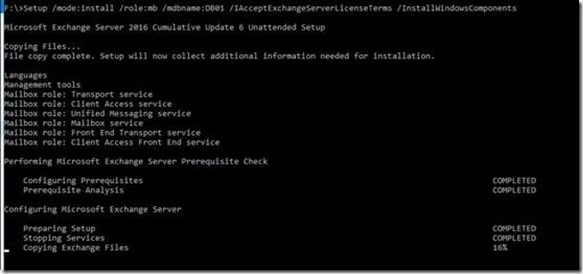
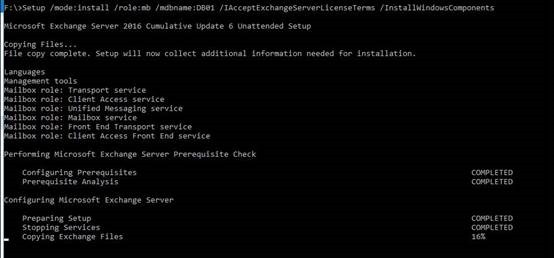
5.3.2 安装Exchange 2016服务器角色Setup /mode:install /role:mb /mdbname:DB01 /IAcceptExchangeServerLicenseTerms /InstallWindowsComponents
5.1 安装域控
域控IP地址通过虚拟网络自动获取。手动配置域控主机名后,使用如下命令安装主域控。Add-WindowsFeature -Name ad-domain-services –IncludeManagementTools
Install-ADDSDomainController -DomainName itservice.vip -InstallDns -SafeModeAdministratorPassword (ConvertTo-SecureString -String "P@ssw0rd123!" -AsPlainText -Force) -DatabasePath c:\windows\NTDS -LogPath C:\WINDOWS\NTDS -NoRebootOnCompletion:$FALSE -Confirm:$FALSE
5.2 林域架构扩展
需要将Exchange 2016 CU6安装介质1、域功能扩展
Setup /prepareAD /OrganizationName:"exchange" /IAcceptExchangeServerLicenseTerms
2、林功能扩展
Setup /prepareschema /IAcceptExchangeServerLicenseTerms
3、域扩展
Setup /preparedomain /IAcceptExchangeServerLicenseTerms
5.3 安装Exchange
手动将Exchange服务器重命名后加入域。使用如下命令安装。5.3.1 Exchange前提条件准备1、安装Microsoft Unified Communications Managed API 4.0, Core Runtime 64-bit

2、安装必要组件
Install-WindowsFeature AS-HTTP-Activation,Desktop-Experience,NET-Framework-45-Features,RPC-over-HTTP-proxy,RSAT-Clustering,RSAT-Clustering-CmdInterface,RSAT-Clustering-Mgmt,RSAT-Clustering-PowerShell,Web-Mgmt-Console,WAS-Process-Model,Web-Asp-Net45,Web-Basic-Auth,Web-Client-Auth,Web-Digest-Auth,Web-Dir-Browsing, Web-Dyn-Compression,Web-Http-Errors,Web-Http-Logging,Web-Http-Redirect,Web-Http-Tracing,Web-ISAPI-Ext,Web-ISAPI-Filter,Web-Lgcy-Mgmt-Console,Web-Metabase,Web-Mgmt-Console,Web-Mgmt-Service,Web-Net-Ext45,Web-Request-Monitor,Web-Server,Web-Stat-Compression,Web-Static-Content,Web-Windows-Auth,Web-WMI,Windows-Identity-Foundation

5.3.2 安装Exchange 2016服务器角色Setup /mode:install /role:mb /mdbname:DB01 /IAcceptExchangeServerLicenseTerms /InstallWindowsComponents

相关文章推荐
- Azure云端部署Exchange 2016双数据中心—Part6(DAG切换测试)
- Azure云端部署Exchange 2016双数据中心—Part2(Azure环境准备)
- Azure云端部署Exchange 2016双数据中心—Part4(准备站点二)
- Azure云端部署Exchange 2016双数据中心—Part1(架构介绍)
- Azure云端部署Exchange 2016双数据中心—Part5(配置DAG)
- 微软Azure云之企业Exchange 2016部署4—配置DC及AD站点
- Exchange 2010与Exchange Online混合部署PART 3:混合准备
- Exchange 2010与Exchange Online混合部署PART 4:混合部署
- 微软Azure云之企业Exchange 2016部署13—DNS配置
- Office 365 Exchange 2016 混合部署前准备
- 公司准备部署WindowsAD和exchange
- Exchange 2010部署(一)之准备 推荐
- 为UC做准备:Exchange 2010 SP1部署准备
- Exchange部署吐血故障连载一:手工添加活动目录站点复制,致不能满足Ex03部署的“先决条件”导致安装失败
- Exchange 2016 安装部署:前期准备
- SCCM 2012 Part 1 部署前环境准备