PullToRefresh使用详解(五)--下拉刷新的ScrollView
2017-10-24 16:50
375 查看
本篇效果图:
下拉前 下拉中 下拉后
效果讲解:
1、本例仅讲解上拉加载,对于其它加载内容,参考pullToRefresh源码,在PullToRefreshListActivity.java中写的很详细;
2、上拉加载前,有一个XML布局,下拉刷新后,添加一个与原有布局完全相同的动态布局,只是TextView的内容不一样了而已。
2、XML构建:
[html] view
plain copy
<LinearLayout xmlns:android="http://schemas.android.com/apk/res/android"
xmlns:tools="http://schemas.android.com/tools"
android:layout_width="match_parent"
android:layout_height="match_parent"
android:orientation="vertical"
tools:context=".MainActivity" >
<!-- The PullToRefreshScrollView replaces a standard PullToRefreshScrollView widget. -->
<com.handmark.pulltorefresh.library.PullToRefreshScrollView
xmlns:ptr="http://schemas.android.com/apk/res-auto"
android:id="@+id/pull_refresh_scrollview"
android:layout_width="fill_parent"
android:layout_height="fill_parent"
ptr:ptrAnimationStyle="flip"
ptr:ptrMode="both" >
<LinearLayout
android:id="@+id/sub_root_lin"
android:layout_width="fill_parent"
android:layout_height="wrap_content"
android:orientation="vertical" >
<!-- 动态创建布局开始 -->
<LinearLayout
android:layout_width="fill_parent"
android:layout_height="wrap_content"
android:orientation="vertical" >
<RelativeLayout
android:layout_width="fill_parent"
android:layout_height="wrap_content" >
<ImageView
android:layout_width="50dip"
android:layout_height="50dip"
android:layout_alignParentRight="true"
android:clickable="true"
android:padding="5dip"
android:src="@drawable/list_item_detail_part_navi_edit" />
<TextView
android:layout_width="fill_parent"
android:layout_height="50dip"
android:gravity="center_horizontal|center_vertical"
android:text="(二)"
android:textSize="20sp"
android:textStyle="bold" />
</RelativeLayout>
<TextView
android:layout_width="fill_parent"
android:layout_height="match_parent"
android:text="@string/changHenGe"
android:textSize="20sp" />
</LinearLayout>
<!-- 动态创建布局结束 -->
</LinearLayout>
</com.handmark.pulltorefresh.library.PullToRefreshScrollView>
</LinearLayout>
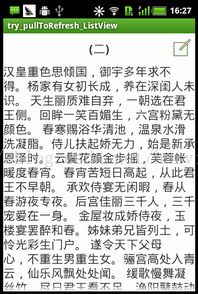
这段代码实现的效果就如“下拉前”这张图片显示的一样。
注意两点:
1、利用<com.handmark.pulltorefresh.library.PullToRefreshScrollView取代原有的ScrollView应在的位置即可,其它想怎么布局怎么布局。
2、在<!--动态创建布局-->标注起来的部分,这段代码要格外注意,因为我们在代码中,会创建一个完全相同的动态布局,插入到它上面。
[java] view
plain copy
package com.example.try_pulltorefresh_listview;
/**
* @author harvic
* @date 2014-4-29
* @address http://blog.csdn.net/harvic880925
*/
import com.handmark.pulltorefresh.library.PullToRefreshBase;
import com.handmark.pulltorefresh.library.PullToRefreshBase.Mode;
import com.handmark.pulltorefresh.library.PullToRefreshScrollView;
import com.handmark.pulltorefresh.library.PullToRefreshBase.OnRefreshListener;
import android.os.AsyncTask;
import android.os.Bundle;
import android.app.Activity;
import android.graphics.Typeface;
import android.util.Log;
import android.view.Gravity;
import android.widget.ImageView;
import android.widget.LinearLayout;
import android.widget.RelativeLayout;
import android.widget.ScrollView;
import android.widget.TextView;
public class MainActivity extends Activity {
PullToRefreshScrollView mPullRefreshScrollView;
ScrollView mScrollView;
@Override
protected void onCreate(Bundle savedInstanceState) {
super.onCreate(savedInstanceState);
setContentView(R.layout.activity_main);
//这几个刷新Label的设置
mPullRefreshScrollView = (PullToRefreshScrollView) findViewById(R.id.pull_refresh_scrollview);
mPullRefreshScrollView.getLoadingLayoutProxy().setLastUpdatedLabel("lastUpdateLabel");
mPullRefreshScrollView.getLoadingLayoutProxy().setPullLabel("PULLLABLE");
mPullRefreshScrollView.getLoadingLayoutProxy().setRefreshingLabel("refreshingLabel");
mPullRefreshScrollView.getLoadingLayoutProxy().setReleaseLabel("releaseLabel");
//上拉、下拉设定
mPullRefreshScrollView.setMode(Mode.PULL_FROM_START);
//上拉监听函数
mPullRefreshScrollView.setOnRefreshListener(new OnRefreshListener<ScrollView>() {
@Override
public void onRefresh(PullToRefreshBase<ScrollView> refreshView) {
//执行刷新函数
new GetDataTask().execute();
}
});
//获取ScrollView布局,此文中用不到
mScrollView = mPullRefreshScrollView.getRefreshableView();
}
private class GetDataTask extends AsyncTask<Void, Void, LinearLayout> {
@Override
protected LinearLayout doInBackground(Void... params) {
// Simulates a background job.
try {
Thread.sleep(4000);
LinearLayout lin=viewSingleItem();
return lin;
} catch (InterruptedException e) {
Log.e("msg","GetDataTask:" + e.getMessage());
}
return null;
}
@Override
protected void onPostExecute(LinearLayout result) {
// Do some stuff here
LinearLayout sub_root_lin=(LinearLayout) findViewById(R.id.sub_root_lin);
LinearLayout.LayoutParams LP_FW = new LinearLayout.LayoutParams(
LinearLayout.LayoutParams.FILL_PARENT, LinearLayout.LayoutParams.WRAP_CONTENT);
sub_root_lin.addView(result, 0, LP_FW);
mPullRefreshScrollView.setMode(Mode.DISABLED);
// Call onRefreshComplete when the list has been refreshed.
//在更新UI后,无需其它Refresh操作,系统会自己加载新的listView
mPullRefreshScrollView.onRefreshComplete();
super.onPostExecute(result);
}
}
/**
* 下拉刷新后,动态产生的一条布局
* @return
*/
private LinearLayout viewSingleItem()
{
LinearLayout layout_root_lin=new LinearLayout(this);
layout_root_lin.setOrientation(LinearLayout.VERTICAL);
//添加第一个子布局集
RelativeLayout layout_sub_relative=new RelativeLayout(this);
ImageView relative_sub_IV=new ImageView(this);
relative_sub_IV.setPadding(5, 5, 5, 5);
relative_sub_IV.setClickable(true);
relative_sub_IV.setImageResource(R.drawable.list_item_detail_part_navi_edit);
RelativeLayout.LayoutParams RL_IM = new RelativeLayout.LayoutParams(50,50);//尤其注意这个位置,用的是父容器的布局参数
RL_IM.addRule(RelativeLayout.ALIGN_PARENT_RIGHT);//这里要注意设置方法!!!---靠父容器右侧对齐
layout_sub_relative.addView(relative_sub_IV, RL_IM);
TextView relative_sub_TV=new TextView(this);
relative_sub_TV.setGravity(Gravity.CENTER_HORIZONTAL|Gravity.CENTER_VERTICAL);
relative_sub_TV.setText("(一)");
relative_sub_TV.setTypeface(Typeface.defaultFromStyle(Typeface.BOLD));
relative_sub_TV.setTextSize(20);
RelativeLayout.LayoutParams RL_TV = new RelativeLayout.LayoutParams(RelativeLayout.LayoutParams.FILL_PARENT,50);
layout_sub_relative.addView(relative_sub_TV, RL_TV);
LinearLayout.LayoutParams LP_FW = new LinearLayout.LayoutParams(
LinearLayout.LayoutParams.FILL_PARENT, LinearLayout.LayoutParams.WRAP_CONTENT);
layout_root_lin.addView(layout_sub_relative, LP_FW);
//添加第二个子布局
TextView lin_sub_TV=new TextView(this);
lin_sub_TV.setGravity(Gravity.CENTER_HORIZONTAL|Gravity.CENTER_VERTICAL);
lin_sub_TV.setText("四月十七,正是去年今日,别君时。忍泪佯低面,含羞半敛眉。" +
"不知魂已断,空有梦相随。除却天边月,没人知。");
lin_sub_TV.setTextSize(20);
layout_root_lin.addView(lin_sub_TV, LP_FW);
return layout_root_lin;
}
}
讲解:
1、最长的一个函数:viewSingleItem()
这个函数的功能,就是动态创建一个上面我们所讲的<!-- 动态创建布局 -->之间的布局,并返回根结点,对于动态布局的创建参考《动态添加综合布局---动态添加控件及将某XML动态加入到Activity显示(续)》和《动态添加控件及将某XML动态加入到Activity显示》。
2、然后从上往下看一:刷新标签设定
[java] view
plain copy
mPullRefreshScrollView = (PullToRefreshScrollView) findViewById(R.id.pull_refresh_scrollview);
mPullRefreshScrollView.getLoadingLayoutProxy().setLastUpdatedLabel("lastUpdateLabel");
mPullRefreshScrollView.getLoadingLayoutProxy().setPullLabel("PULLLABLE");
mPullRefreshScrollView.getLoadingLayoutProxy().setRefreshingLabel("refreshingLabel");
mPullRefreshScrollView.getLoadingLayoutProxy().setReleaseLabel("releaseLabel");
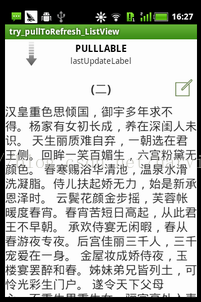
这几行代码就是设置下拉刷新时那些标签所显示的内容,自定义标签内容的方法,自己试试改几个,看看效果就知道哪个函数对应哪个标签了。我这里列出了所有的标签,供大家理解清楚各自功能。
3、设置下拉、上拉、上下拉刷新模式
这里是上拉刷新
[java] view
plain copy
mPullRefreshScrollView.setMode(Mode.PULL_FROM_START);
4、设置上拉刷新监听函数
[java] view
plain copy
mPullRefreshScrollView.setOnRefreshListener(new OnRefreshListener<ScrollView>() {
@Override
public void onRefresh(PullToRefreshBase<ScrollView> refreshView) {
//执行刷新函数
new GetDataTask().execute();
}
});
对于真正执行的部分在GetDataTask()函数,下面是它的实现源码:
[java] view
plain copy
private class GetDataTask extends AsyncTask<Void, Void, LinearLayout> {
@Override
protected LinearLayout doInBackground(Void... params) {
// Simulates a background job.
try {
Thread.sleep(4000);
LinearLayout lin=viewSingleItem();
return lin;
} catch (InterruptedException e) {
Log.e("msg","GetDataTask:" + e.getMessage());
}
return null;
}
@Override
protected void onPostExecute(LinearLayout result) {
// Do some stuff here
LinearLayout sub_root_lin=(LinearLayout) findViewById(R.id.sub_root_lin);
LinearLayout.LayoutParams LP_FW = new LinearLayout.LayoutParams(
LinearLayout.LayoutParams.FILL_PARENT, LinearLayout.LayoutParams.WRAP_CONTENT);
sub_root_lin.addView(result, 0, LP_FW);
mPullRefreshScrollView.setMode(Mode.DISABLED);
// Call onRefreshComplete when the list has been refreshed.
//在更新UI后,无需其它Refresh操作,系统会自己加载新的listView
mPullRefreshScrollView.onRefreshComplete();
super.onPostExecute(result);
}
}
首先为了实现异步加载,派生自AsyncTask,对于AsyncTask的具体解释,后面应该会再开篇具体讲述,这里先粗略的说下:
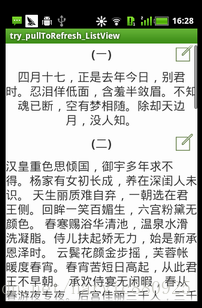
1、doInBackground()中产生一条动态布局,并作为最终结果返回;
2、onPostExecute()接收到这条动态布局结果,添加到XML中并显示,注意这里并没有更新XML view所使用的setContentView(),而是程序自动给加载了。最后利用SetMode取消下拉刷新。
下拉前 下拉中 下拉后
效果讲解:
1、本例仅讲解上拉加载,对于其它加载内容,参考pullToRefresh源码,在PullToRefreshListActivity.java中写的很详细;
2、上拉加载前,有一个XML布局,下拉刷新后,添加一个与原有布局完全相同的动态布局,只是TextView的内容不一样了而已。
一、下拉前
1、导入Library库,至于导入Library库的过程,参考《PullToRefresh使用详解(一)--构建下拉刷新的listView》。2、XML构建:
[html] view
plain copy
<LinearLayout xmlns:android="http://schemas.android.com/apk/res/android"
xmlns:tools="http://schemas.android.com/tools"
android:layout_width="match_parent"
android:layout_height="match_parent"
android:orientation="vertical"
tools:context=".MainActivity" >
<!-- The PullToRefreshScrollView replaces a standard PullToRefreshScrollView widget. -->
<com.handmark.pulltorefresh.library.PullToRefreshScrollView
xmlns:ptr="http://schemas.android.com/apk/res-auto"
android:id="@+id/pull_refresh_scrollview"
android:layout_width="fill_parent"
android:layout_height="fill_parent"
ptr:ptrAnimationStyle="flip"
ptr:ptrMode="both" >
<LinearLayout
android:id="@+id/sub_root_lin"
android:layout_width="fill_parent"
android:layout_height="wrap_content"
android:orientation="vertical" >
<!-- 动态创建布局开始 -->
<LinearLayout
android:layout_width="fill_parent"
android:layout_height="wrap_content"
android:orientation="vertical" >
<RelativeLayout
android:layout_width="fill_parent"
android:layout_height="wrap_content" >
<ImageView
android:layout_width="50dip"
android:layout_height="50dip"
android:layout_alignParentRight="true"
android:clickable="true"
android:padding="5dip"
android:src="@drawable/list_item_detail_part_navi_edit" />
<TextView
android:layout_width="fill_parent"
android:layout_height="50dip"
android:gravity="center_horizontal|center_vertical"
android:text="(二)"
android:textSize="20sp"
android:textStyle="bold" />
</RelativeLayout>
<TextView
android:layout_width="fill_parent"
android:layout_height="match_parent"
android:text="@string/changHenGe"
android:textSize="20sp" />
</LinearLayout>
<!-- 动态创建布局结束 -->
</LinearLayout>
</com.handmark.pulltorefresh.library.PullToRefreshScrollView>
</LinearLayout>
这段代码实现的效果就如“下拉前”这张图片显示的一样。
注意两点:
1、利用<com.handmark.pulltorefresh.library.PullToRefreshScrollView取代原有的ScrollView应在的位置即可,其它想怎么布局怎么布局。
2、在<!--动态创建布局-->标注起来的部分,这段代码要格外注意,因为我们在代码中,会创建一个完全相同的动态布局,插入到它上面。
2、JAVA代码
完整代码如下:[java] view
plain copy
package com.example.try_pulltorefresh_listview;
/**
* @author harvic
* @date 2014-4-29
* @address http://blog.csdn.net/harvic880925
*/
import com.handmark.pulltorefresh.library.PullToRefreshBase;
import com.handmark.pulltorefresh.library.PullToRefreshBase.Mode;
import com.handmark.pulltorefresh.library.PullToRefreshScrollView;
import com.handmark.pulltorefresh.library.PullToRefreshBase.OnRefreshListener;
import android.os.AsyncTask;
import android.os.Bundle;
import android.app.Activity;
import android.graphics.Typeface;
import android.util.Log;
import android.view.Gravity;
import android.widget.ImageView;
import android.widget.LinearLayout;
import android.widget.RelativeLayout;
import android.widget.ScrollView;
import android.widget.TextView;
public class MainActivity extends Activity {
PullToRefreshScrollView mPullRefreshScrollView;
ScrollView mScrollView;
@Override
protected void onCreate(Bundle savedInstanceState) {
super.onCreate(savedInstanceState);
setContentView(R.layout.activity_main);
//这几个刷新Label的设置
mPullRefreshScrollView = (PullToRefreshScrollView) findViewById(R.id.pull_refresh_scrollview);
mPullRefreshScrollView.getLoadingLayoutProxy().setLastUpdatedLabel("lastUpdateLabel");
mPullRefreshScrollView.getLoadingLayoutProxy().setPullLabel("PULLLABLE");
mPullRefreshScrollView.getLoadingLayoutProxy().setRefreshingLabel("refreshingLabel");
mPullRefreshScrollView.getLoadingLayoutProxy().setReleaseLabel("releaseLabel");
//上拉、下拉设定
mPullRefreshScrollView.setMode(Mode.PULL_FROM_START);
//上拉监听函数
mPullRefreshScrollView.setOnRefreshListener(new OnRefreshListener<ScrollView>() {
@Override
public void onRefresh(PullToRefreshBase<ScrollView> refreshView) {
//执行刷新函数
new GetDataTask().execute();
}
});
//获取ScrollView布局,此文中用不到
mScrollView = mPullRefreshScrollView.getRefreshableView();
}
private class GetDataTask extends AsyncTask<Void, Void, LinearLayout> {
@Override
protected LinearLayout doInBackground(Void... params) {
// Simulates a background job.
try {
Thread.sleep(4000);
LinearLayout lin=viewSingleItem();
return lin;
} catch (InterruptedException e) {
Log.e("msg","GetDataTask:" + e.getMessage());
}
return null;
}
@Override
protected void onPostExecute(LinearLayout result) {
// Do some stuff here
LinearLayout sub_root_lin=(LinearLayout) findViewById(R.id.sub_root_lin);
LinearLayout.LayoutParams LP_FW = new LinearLayout.LayoutParams(
LinearLayout.LayoutParams.FILL_PARENT, LinearLayout.LayoutParams.WRAP_CONTENT);
sub_root_lin.addView(result, 0, LP_FW);
mPullRefreshScrollView.setMode(Mode.DISABLED);
// Call onRefreshComplete when the list has been refreshed.
//在更新UI后,无需其它Refresh操作,系统会自己加载新的listView
mPullRefreshScrollView.onRefreshComplete();
super.onPostExecute(result);
}
}
/**
* 下拉刷新后,动态产生的一条布局
* @return
*/
private LinearLayout viewSingleItem()
{
LinearLayout layout_root_lin=new LinearLayout(this);
layout_root_lin.setOrientation(LinearLayout.VERTICAL);
//添加第一个子布局集
RelativeLayout layout_sub_relative=new RelativeLayout(this);
ImageView relative_sub_IV=new ImageView(this);
relative_sub_IV.setPadding(5, 5, 5, 5);
relative_sub_IV.setClickable(true);
relative_sub_IV.setImageResource(R.drawable.list_item_detail_part_navi_edit);
RelativeLayout.LayoutParams RL_IM = new RelativeLayout.LayoutParams(50,50);//尤其注意这个位置,用的是父容器的布局参数
RL_IM.addRule(RelativeLayout.ALIGN_PARENT_RIGHT);//这里要注意设置方法!!!---靠父容器右侧对齐
layout_sub_relative.addView(relative_sub_IV, RL_IM);
TextView relative_sub_TV=new TextView(this);
relative_sub_TV.setGravity(Gravity.CENTER_HORIZONTAL|Gravity.CENTER_VERTICAL);
relative_sub_TV.setText("(一)");
relative_sub_TV.setTypeface(Typeface.defaultFromStyle(Typeface.BOLD));
relative_sub_TV.setTextSize(20);
RelativeLayout.LayoutParams RL_TV = new RelativeLayout.LayoutParams(RelativeLayout.LayoutParams.FILL_PARENT,50);
layout_sub_relative.addView(relative_sub_TV, RL_TV);
LinearLayout.LayoutParams LP_FW = new LinearLayout.LayoutParams(
LinearLayout.LayoutParams.FILL_PARENT, LinearLayout.LayoutParams.WRAP_CONTENT);
layout_root_lin.addView(layout_sub_relative, LP_FW);
//添加第二个子布局
TextView lin_sub_TV=new TextView(this);
lin_sub_TV.setGravity(Gravity.CENTER_HORIZONTAL|Gravity.CENTER_VERTICAL);
lin_sub_TV.setText("四月十七,正是去年今日,别君时。忍泪佯低面,含羞半敛眉。" +
"不知魂已断,空有梦相随。除却天边月,没人知。");
lin_sub_TV.setTextSize(20);
layout_root_lin.addView(lin_sub_TV, LP_FW);
return layout_root_lin;
}
}
讲解:
1、最长的一个函数:viewSingleItem()
这个函数的功能,就是动态创建一个上面我们所讲的<!-- 动态创建布局 -->之间的布局,并返回根结点,对于动态布局的创建参考《动态添加综合布局---动态添加控件及将某XML动态加入到Activity显示(续)》和《动态添加控件及将某XML动态加入到Activity显示》。
2、然后从上往下看一:刷新标签设定
[java] view
plain copy
mPullRefreshScrollView = (PullToRefreshScrollView) findViewById(R.id.pull_refresh_scrollview);
mPullRefreshScrollView.getLoadingLayoutProxy().setLastUpdatedLabel("lastUpdateLabel");
mPullRefreshScrollView.getLoadingLayoutProxy().setPullLabel("PULLLABLE");
mPullRefreshScrollView.getLoadingLayoutProxy().setRefreshingLabel("refreshingLabel");
mPullRefreshScrollView.getLoadingLayoutProxy().setReleaseLabel("releaseLabel");
这几行代码就是设置下拉刷新时那些标签所显示的内容,自定义标签内容的方法,自己试试改几个,看看效果就知道哪个函数对应哪个标签了。我这里列出了所有的标签,供大家理解清楚各自功能。
3、设置下拉、上拉、上下拉刷新模式
这里是上拉刷新
[java] view
plain copy
mPullRefreshScrollView.setMode(Mode.PULL_FROM_START);
4、设置上拉刷新监听函数
[java] view
plain copy
mPullRefreshScrollView.setOnRefreshListener(new OnRefreshListener<ScrollView>() {
@Override
public void onRefresh(PullToRefreshBase<ScrollView> refreshView) {
//执行刷新函数
new GetDataTask().execute();
}
});
对于真正执行的部分在GetDataTask()函数,下面是它的实现源码:
[java] view
plain copy
private class GetDataTask extends AsyncTask<Void, Void, LinearLayout> {
@Override
protected LinearLayout doInBackground(Void... params) {
// Simulates a background job.
try {
Thread.sleep(4000);
LinearLayout lin=viewSingleItem();
return lin;
} catch (InterruptedException e) {
Log.e("msg","GetDataTask:" + e.getMessage());
}
return null;
}
@Override
protected void onPostExecute(LinearLayout result) {
// Do some stuff here
LinearLayout sub_root_lin=(LinearLayout) findViewById(R.id.sub_root_lin);
LinearLayout.LayoutParams LP_FW = new LinearLayout.LayoutParams(
LinearLayout.LayoutParams.FILL_PARENT, LinearLayout.LayoutParams.WRAP_CONTENT);
sub_root_lin.addView(result, 0, LP_FW);
mPullRefreshScrollView.setMode(Mode.DISABLED);
// Call onRefreshComplete when the list has been refreshed.
//在更新UI后,无需其它Refresh操作,系统会自己加载新的listView
mPullRefreshScrollView.onRefreshComplete();
super.onPostExecute(result);
}
}
首先为了实现异步加载,派生自AsyncTask,对于AsyncTask的具体解释,后面应该会再开篇具体讲述,这里先粗略的说下:
1、doInBackground()中产生一条动态布局,并作为最终结果返回;
2、onPostExecute()接收到这条动态布局结果,添加到XML中并显示,注意这里并没有更新XML view所使用的setContentView(),而是程序自动给加载了。最后利用SetMode取消下拉刷新。

相关文章推荐
- PullToRefresh使用详解(五)--下拉刷新的ScrollView
- Android PullToRefresh使用详解(五)--下拉刷新的ScrollView
- PullToRefresh使用详解(五)--下拉刷新的ScrollView
- Android PullToRefresh (ListView GridView 下拉刷新) 使用详解
- Android PullToRefresh (ListView GridView 下拉刷新) 使用详解
- PullToRefresh使用详解(一)--构建下拉刷新的listView
- Android PullToRefresh (ListView GridView 下拉刷新) 使用详解
- Android PullToRefresh (ListView GridView 下拉刷新) 使用详解
- Android PullToRefresh (ListView GridView 下拉刷新) 使用详解
- Android PullToRefresh (ListView GridView 下拉刷新) 使用详解
- 【PullToRefresh 系列一基本使用方法】 Android上拉加载下拉刷新控件详解
- PullToRefresh使用详解(二)---重写BaseAdapter实现复杂XML下拉刷新
- PullToRefresh使用详解(一)--构建下拉刷新的listView
- PullToRefresh使用详解(一)--构建下拉刷新的listView
- Android PullToRefresh (ListView GridView 下拉刷新) 使用详解
- Android PullToRefresh (ListView GridView 下拉刷新) 使用详解
- Android PullToRefresh (ListView GridView 下拉刷新) 使用详解
- Android PullToRefresh (ListView GridView 下拉刷新) 使用详解
- Android PullToRefresh (ListView GridView 下拉刷新) 使用详解
- Android PullToRefresh (ListView GridView 下拉刷新) 使用详解