Python 基于Tkinter的GUI图形界面学习
2017-09-16 11:42
801 查看
用Tkinter画图首先要创建一个根挂件,可以用Tk()产生
然后要产生不同类型的小挂件,有标签Label,按钮Button,接口Entry 之类的,具体的查看网上的详细文档。
比如说用widget = Label(None, text = 'hello')产生了一个内容为hello的标签之后还要确定把这个标签放在哪个位置,所以就要用到pack()
pack有很多选项,比如说要不要随着屏幕缩放expand,要不要填充fill,还可以设置位置anchor。
pack完了之后要维持这个窗口的运行,root.mainloop()或者是widget.mainloop()都行。
这样产生的窗口只能有一个挂件,如果要把多个挂件放在一个窗口就要用到容器Frame()
win = Frame(root) 产生一个叫作win的容器,下面要产生的挂件都是放在这个容器里面的。
widget1 = Label(win, text = 'widget1')
widget1.pack(side = TOP)
widget2 = Button(win, text = 'button')
widget2.pack(side = TOP)
就能产生类似下图的效果:
如果要分区,即安排窗口的布局的话还可以用grid()设置行列的位置。
具体的控件使用方式 文档地址:http://zetcode.com/gui/tkinter/
博客:http://www.cnblogs.com/kaituorensheng/p/3287652.html
常用颜色名称
19.3Tkinter举例
标签组件
[python] view
plain copy
#-*-coding: utf-8-*-
import Tkinter
top = Tkinter.Tk() # 创建顶层窗口
label = Tkinter.Label(top, text="Hello World!") # 创建标签组件
label.pack() # packer管理和显示组件
Tkinter.mainloop() # 进入主事件循环
按钮组件
[python] view
plain copy
#-*-coding: utf-8-*-
import Tkinter
top = Tkinter.Tk()
quit = Tkinter.Button(top, text="Hello World!", command=top.quit) # 创建按钮组件。第三个参数就是回调函数对象,按下按钮后,执行回调函数。
quit.pack()
Tkinter.mainloop()
标签和按钮组件
[python] view
plain copy
#-*-coding: utf-8-*-
import Tkinter
top = Tkinter.Tk()
hello = Tkinter.Label(top, text="Hello World!")
hello.pack()
quit = Tkinter.Button(top, text="QUIT", command=top.quit, bg="red", fg="white") # bg参数表示按钮组件用红色填充,而fg参数表示其中的文本用白色显示
quit.pack(fill=Tkinter.X, expand=1) # fill参数是让余空间QUIT按钮充满水平方向的剩,expand参数引导packer填充了水平方向的所有可视空间,并将按钮延伸到窗口的左右边界。
Tkinter.mainloop()
标签、按钮和进度条组件
[python] view
plain copy
#-*-coding: utf-8-*-
# 这一例子中增加了进度条组件,进度条与标签进行交互
from Tkinter import *
def resize(ev=None): # 回调函数,在滑块移动时,激活运行
label.config(font='Helvetica -%d bold' % scale.get())
top = Tk()
top.geometry('250x150') # 限定顶层窗口尺寸为250x150。
label = Label(top, text='Hello World!', font='Helvetica -12 bold')
###Label是偏函数,'Helvetica -12 bold'与偏函数处的变量一样
label.pack(fill=Y, expand=1) # 在竖直方向充满剩余空间,
scale = Scale(top, from_=10, to=40, orient=HORIZONTAL, command=resize) # from_和to两个参数表示进度条范围,orient参数表示进度条的取向,水平放置还是竖直放置,command就是回调函数
scale.set(12) # 设定进度条初始值在12
scale.pack(fill=X, expand=1) # 在水平方向充满剩余空间
quit = Button(top, text='QUIT', command=top.quit, activeforeground='white', activebackground='red') # activeforeground参数表示按钮被按下时,文本的颜色为白色;activebackground参数表示按钮被按下时,按钮背景色变为红色。
quit.pack()
mainloop()
偏函数应用举例
[python] view
plain copy
#-*-coding: utf-8-*-
from functools import partial as pto
from Tkinter import Tk, Button, X
from tkMessageBox import showinfo, showwarning, showerror # 这是什么模块?
WARN = 'warn'
CRIT = 'crit'
REGU = 'regu'
SIGNS = {
'do not enter': CRIT,
'railroad crossing': WARN,
'55\nspeed limit': REGU,
'wrong way': CRIT,
'merging traffic': WARN,
'one way': REGU,
}
# 定义危急、警告和通知三个回调函数对象
critCB = lambda: showerror('Error', 'Error Button Pressed!')
warnCB = lambda: showwarning('Warning', 'Warning Button Pressed!')
infoCB = lambda: showinfo('Info', 'Info Button Pressed!')
top = Tk()
top.title('Road Signs')
Button(top, text='QUIT', command=top.quit, bg='red', fg='white').pack()
# 偏函数应用,书上说是“创建按钮类”,这样text就作为参数传入,从而实例化相应的按钮
MyButton = pto(Button, top) # 危急、警告和通知三个回调函数的共同参数?书上是“模板化的按钮类及根窗口top”
# 书上说是再次模板化
CritButton = pto(MyButton, command=critCB, bg='white', fg='red') # 相当于CritButton = Button(top, command=critCB, bg='white', fg='red')?但是缺少text,应该理解为一个函数对象,以text为参数。
WarnButton = pto(MyButton, command=warnCB, bg='goldenrod1')
ReguButton = pto(MyButton, command=infoCB, bg='white')
for eachSign in SIGNS:
signType = SIGNS[eachSign]
cmd = '%sButton(text=%r%s).pack(fill=X, expand=True)' % (signType.title(), eachSign, '.upper()' if signType == CRIT else '.title()') # python求值字符串
eval(cmd)
top.mainloop()
利用grid() 函数确定位置
#-*-coding: utf-8-*-
#!/usr/bin/python
#-*- coding:utf-8 –*-
from Tkinter import *
win = Tk()
#win.title('google search engine optimal')
win.title('一个测试程序')
# the top level of the window
def report(text):
#print(v.get())
entry2 = Label(root, text = v.get())
entry2.grid(row = 1, column = 1)
root = Frame(win)
root.pack()
label1 = Label(root, text = 'd 取值手动滑动条', width = 25)
label1.pack(side = LEFT)
label1.grid(row = 0, column = 0)
v = StringVar()
scl = Scale(root, from_ = 0, to = 1, tickinterval = 0.5, resolution = 0.01, orient = 'horizontal', variable=v, sliderlength = 10, width = 40, length = 200, command=report)
scl.grid(row = 0, column = 1)
print (scl.get())
label2 = Label(root, text = 'd当前取值:', height = 10)
label2.grid(row = 1, column = 0)
label3 = Label(root, text = 'PR=d*GPR+10*(1-d)*FPR :d越大则排序考虑人气越多。', height = 10)
label3.grid(row = 2)
root.mainloop()
然后要产生不同类型的小挂件,有标签Label,按钮Button,接口Entry 之类的,具体的查看网上的详细文档。
比如说用widget = Label(None, text = 'hello')产生了一个内容为hello的标签之后还要确定把这个标签放在哪个位置,所以就要用到pack()
pack有很多选项,比如说要不要随着屏幕缩放expand,要不要填充fill,还可以设置位置anchor。
pack完了之后要维持这个窗口的运行,root.mainloop()或者是widget.mainloop()都行。
这样产生的窗口只能有一个挂件,如果要把多个挂件放在一个窗口就要用到容器Frame()
win = Frame(root) 产生一个叫作win的容器,下面要产生的挂件都是放在这个容器里面的。
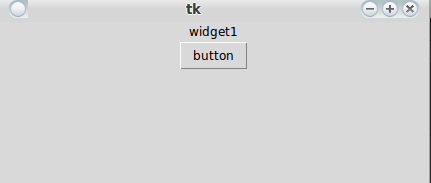
widget1 = Label(win, text = 'widget1')
widget1.pack(side = TOP)
widget2 = Button(win, text = 'button')
widget2.pack(side = TOP)
就能产生类似下图的效果:
如果要分区,即安排窗口的布局的话还可以用grid()设置行列的位置。
具体的控件使用方式 文档地址:http://zetcode.com/gui/tkinter/
博客:http://www.cnblogs.com/kaituorensheng/p/3287652.html
| 组件名 | 说明 | 用法 | 属性(参数) |
|---|---|---|---|
| label | 标签 | Label(根对象, [属性列表]) | text:要现实的文本bg:背景颜色font:字体(颜色, 大小)width:控件宽度height:控件高度 |
| Frame | 在屏幕上创建一块矩形区域,多作为容器来布局窗体 | Frame(根对象, [属性列表]) | 同上 |
| Entry | 创建单行文本框 | 创建:lb =Entry(根对象,[属性列表]) 绑定变量: var=StringVar() lb=Entry(根对象, textvariable = var) 获取文本框中的值:var.get()设置文本框中的值 var.set(item1) | 同上 |
| Text | 向该空间内输入文本 | t = Text(根对象)插入:t.insert(mark, 内容)删除:t.delete(mark1, mark2)其中,mark可以是行号,或者特殊标识,例如•INSERT:光标的插入点CURRENT:鼠标的当前位置所对应的字符位置 •END:这个Textbuffer的最后一个字符 •SEL_FIRST:选中文本域的第一个字符,如果没有选中区域则会引发异常 •SEL_LAST:选中文本域的最后一个字符,如果没有选中区域则会引发 异常 | 同上 |
| Button | 创建按钮 | Button(根对象, [属性列表]) | 同上 |
| Listbox | 列表控件,可以含有一个或多个文本想,可单选也可多选 | • 创建:lb = ListBox(根对象, [属性列表]) • 绑定变量 var=StringVar() lb=ListBox(根对象, listvariable = var)比如 • 得到列表中的所有值 var.get() • 设置列表中的所有值 var.set((item1, item2, …..)) • 添加:lb.insert(item) • 删除:lb.delete(item,…) • 绑定事件 lb.bind(‘<\ButtonRelease-1>’, 函数) • 获得所选中的选项 lbl.get(lb.curselection()) | 同上 |
| Scrollbar | 在屏幕上创建一块矩形区域,多作为容器来布局窗体 | Frame(根对象, [属性列表]), 最长用的用法是和别的控件一起使用. | 同上 |
| … … … | … … … | …. …. …. | ….. ….. ….. |
19.3Tkinter举例
标签组件
[python] view
plain copy
#-*-coding: utf-8-*-
import Tkinter
top = Tkinter.Tk() # 创建顶层窗口
label = Tkinter.Label(top, text="Hello World!") # 创建标签组件
label.pack() # packer管理和显示组件
Tkinter.mainloop() # 进入主事件循环
按钮组件
[python] view
plain copy
#-*-coding: utf-8-*-
import Tkinter
top = Tkinter.Tk()
quit = Tkinter.Button(top, text="Hello World!", command=top.quit) # 创建按钮组件。第三个参数就是回调函数对象,按下按钮后,执行回调函数。
quit.pack()
Tkinter.mainloop()
标签和按钮组件
[python] view
plain copy
#-*-coding: utf-8-*-
import Tkinter
top = Tkinter.Tk()
hello = Tkinter.Label(top, text="Hello World!")
hello.pack()
quit = Tkinter.Button(top, text="QUIT", command=top.quit, bg="red", fg="white") # bg参数表示按钮组件用红色填充,而fg参数表示其中的文本用白色显示
quit.pack(fill=Tkinter.X, expand=1) # fill参数是让余空间QUIT按钮充满水平方向的剩,expand参数引导packer填充了水平方向的所有可视空间,并将按钮延伸到窗口的左右边界。
Tkinter.mainloop()
标签、按钮和进度条组件
[python] view
plain copy
#-*-coding: utf-8-*-
# 这一例子中增加了进度条组件,进度条与标签进行交互
from Tkinter import *
def resize(ev=None): # 回调函数,在滑块移动时,激活运行
label.config(font='Helvetica -%d bold' % scale.get())
top = Tk()
top.geometry('250x150') # 限定顶层窗口尺寸为250x150。
label = Label(top, text='Hello World!', font='Helvetica -12 bold')
###Label是偏函数,'Helvetica -12 bold'与偏函数处的变量一样
label.pack(fill=Y, expand=1) # 在竖直方向充满剩余空间,
scale = Scale(top, from_=10, to=40, orient=HORIZONTAL, command=resize) # from_和to两个参数表示进度条范围,orient参数表示进度条的取向,水平放置还是竖直放置,command就是回调函数
scale.set(12) # 设定进度条初始值在12
scale.pack(fill=X, expand=1) # 在水平方向充满剩余空间
quit = Button(top, text='QUIT', command=top.quit, activeforeground='white', activebackground='red') # activeforeground参数表示按钮被按下时,文本的颜色为白色;activebackground参数表示按钮被按下时,按钮背景色变为红色。
quit.pack()
mainloop()
偏函数应用举例
[python] view
plain copy
#-*-coding: utf-8-*-
from functools import partial as pto
from Tkinter import Tk, Button, X
from tkMessageBox import showinfo, showwarning, showerror # 这是什么模块?
WARN = 'warn'
CRIT = 'crit'
REGU = 'regu'
SIGNS = {
'do not enter': CRIT,
'railroad crossing': WARN,
'55\nspeed limit': REGU,
'wrong way': CRIT,
'merging traffic': WARN,
'one way': REGU,
}
# 定义危急、警告和通知三个回调函数对象
critCB = lambda: showerror('Error', 'Error Button Pressed!')
warnCB = lambda: showwarning('Warning', 'Warning Button Pressed!')
infoCB = lambda: showinfo('Info', 'Info Button Pressed!')
top = Tk()
top.title('Road Signs')
Button(top, text='QUIT', command=top.quit, bg='red', fg='white').pack()
# 偏函数应用,书上说是“创建按钮类”,这样text就作为参数传入,从而实例化相应的按钮
MyButton = pto(Button, top) # 危急、警告和通知三个回调函数的共同参数?书上是“模板化的按钮类及根窗口top”
# 书上说是再次模板化
CritButton = pto(MyButton, command=critCB, bg='white', fg='red') # 相当于CritButton = Button(top, command=critCB, bg='white', fg='red')?但是缺少text,应该理解为一个函数对象,以text为参数。
WarnButton = pto(MyButton, command=warnCB, bg='goldenrod1')
ReguButton = pto(MyButton, command=infoCB, bg='white')
for eachSign in SIGNS:
signType = SIGNS[eachSign]
cmd = '%sButton(text=%r%s).pack(fill=X, expand=True)' % (signType.title(), eachSign, '.upper()' if signType == CRIT else '.title()') # python求值字符串
eval(cmd)
top.mainloop()
利用grid() 函数确定位置
#-*-coding: utf-8-*-
#!/usr/bin/python
#-*- coding:utf-8 –*-
from Tkinter import *
win = Tk()
#win.title('google search engine optimal')
win.title('一个测试程序')
# the top level of the window
def report(text):
#print(v.get())
entry2 = Label(root, text = v.get())
entry2.grid(row = 1, column = 1)
root = Frame(win)
root.pack()
label1 = Label(root, text = 'd 取值手动滑动条', width = 25)
label1.pack(side = LEFT)
label1.grid(row = 0, column = 0)
v = StringVar()
scl = Scale(root, from_ = 0, to = 1, tickinterval = 0.5, resolution = 0.01, orient = 'horizontal', variable=v, sliderlength = 10, width = 40, length = 200, command=report)
scl.grid(row = 0, column = 1)
print (scl.get())
label2 = Label(root, text = 'd当前取值:', height = 10)
label2.grid(row = 1, column = 0)
label3 = Label(root, text = 'PR=d*GPR+10*(1-d)*FPR :d越大则排序考虑人气越多。', height = 10)
label3.grid(row = 2)
root.mainloop()

相关文章推荐
- Python学习笔记 GUI-Tkinter
- python GUI学习——Tkinter
- Python:GUI之tkinter学习笔记3事件绑定
- 使用Tkinter设计基于python的GUI交互
- python 文件操作学习 Tkinter GUI
- Python Gui 学习 Tkinter
- python学习之GUI(Tkinter)
- Python:GUI之tkinter学习笔记1控件的介绍及使用
- 【pythonGUI专题】tkinter库的学习与使用(一)
- Python Gui 学习 Tkinter
- python学习笔记——Tkinter GUI编程——简介
- 基于Python的标准库tkinter创建面向对象的GUI应用程序
- python学习笔记——Tkinter GUI编程——简介
- Python 定时自动关机附带Tkinter图形界面GUI
- Python学习笔记 图形界面GUI
- Python学习笔记--Tkinter制作GUI
- Python:GUI之tkinter学习笔记之messagebox、filedialog
- Python:GUI之tkinter学习笔记2界面布局显示
- python图形界面GUI编程之tkinter布局
- python的自带GUI模块Tkinter学习