VS2017+python3.6+Tensorflow环境搭建
2017-09-10 21:58
274 查看
第一步:
安装VS2017(参考Opencv那一篇博客),勾选Python选项
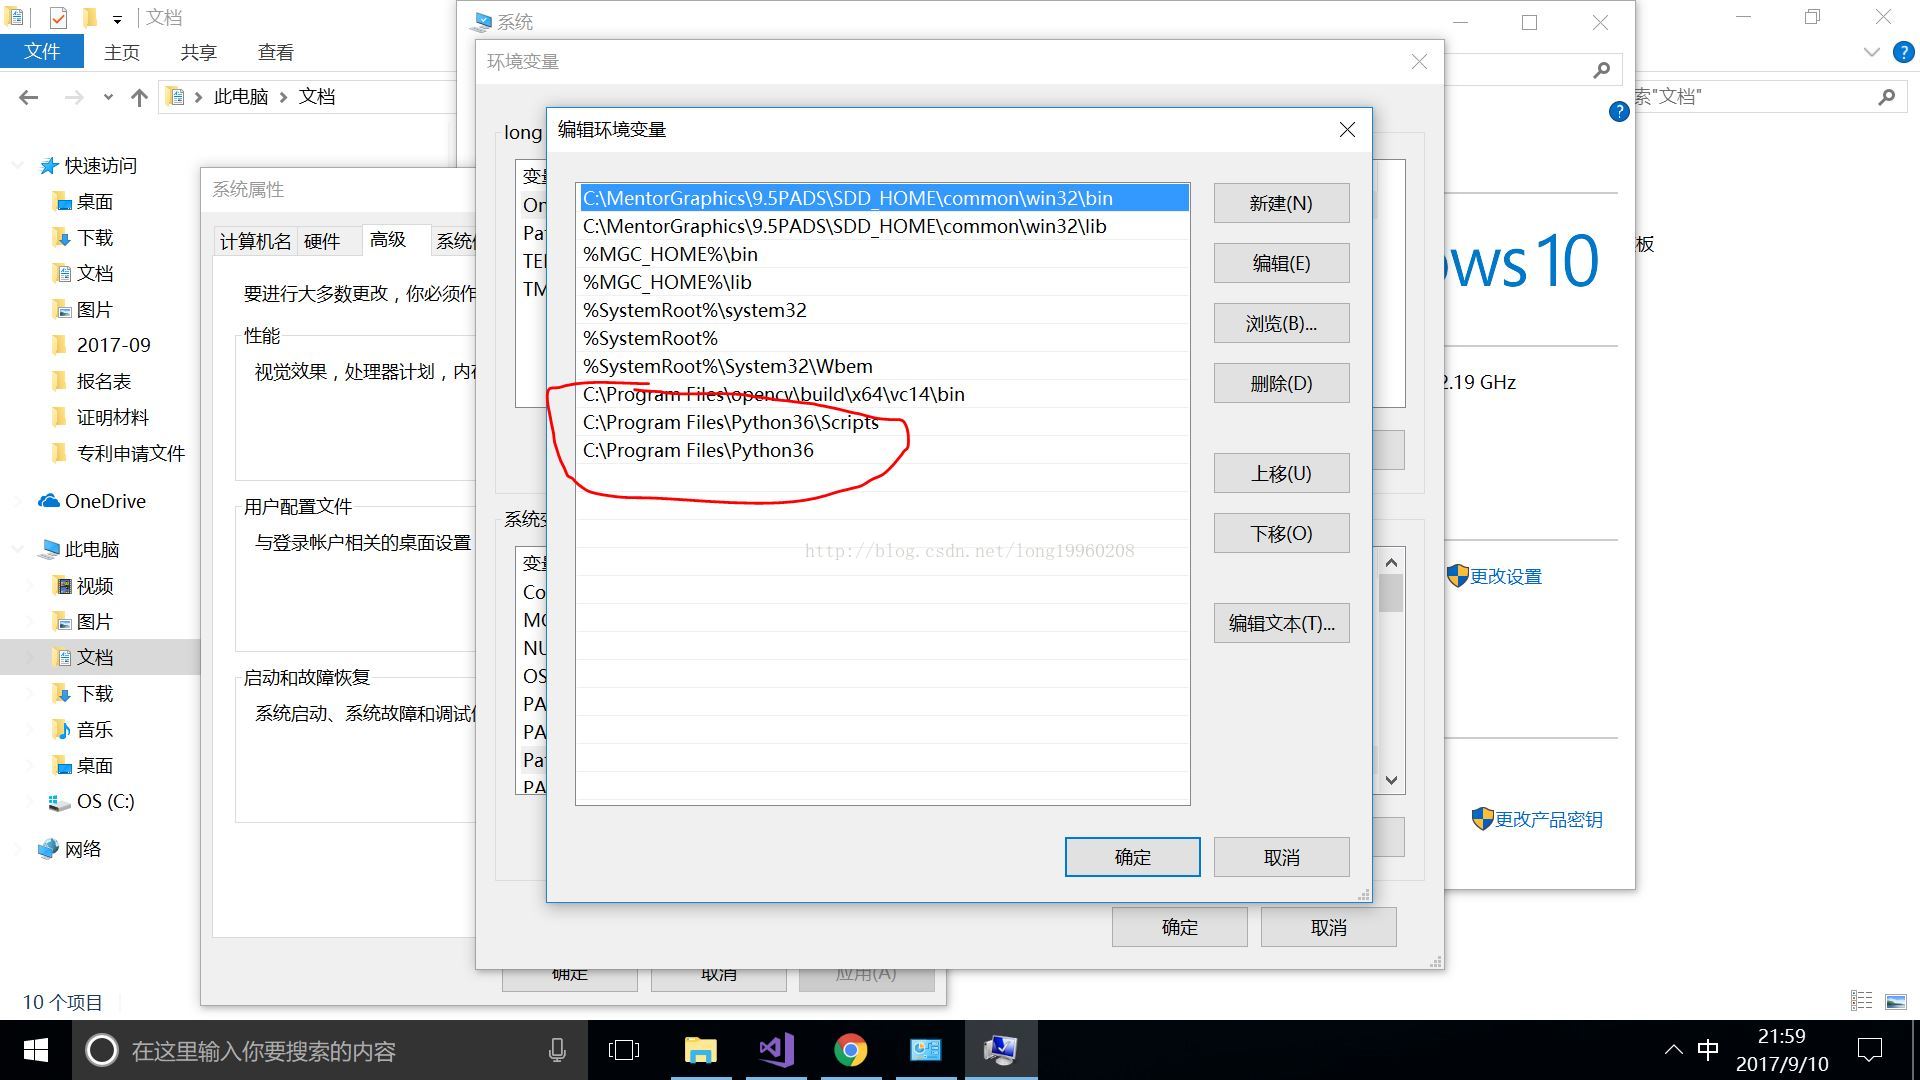
第二步:
配置环境变量
第三步:
用管理员打开Power shell
输入:pip3 install --upgrade tensorflow
第四步:
验证是否成功
新建python程序
输入代码:
#coding:utf-8
import tensorflow as tf
w1 = tf.Variable(tf.random_normal([2,3],stddev=1,seed=1))
w2 = tf.Variable(tf.random_normal([3,1],stddev=1,seed=1))
x = tf.constant([[0.7,0.9]])
a = tf.matmul(x,w1)
y = tf.matmul(a,w2)
sess = tf.Session()
init_op = tf.initialize_all_variables()
sess.run(init_op)
print(sess.run(y))
sess.close()
运行结果:
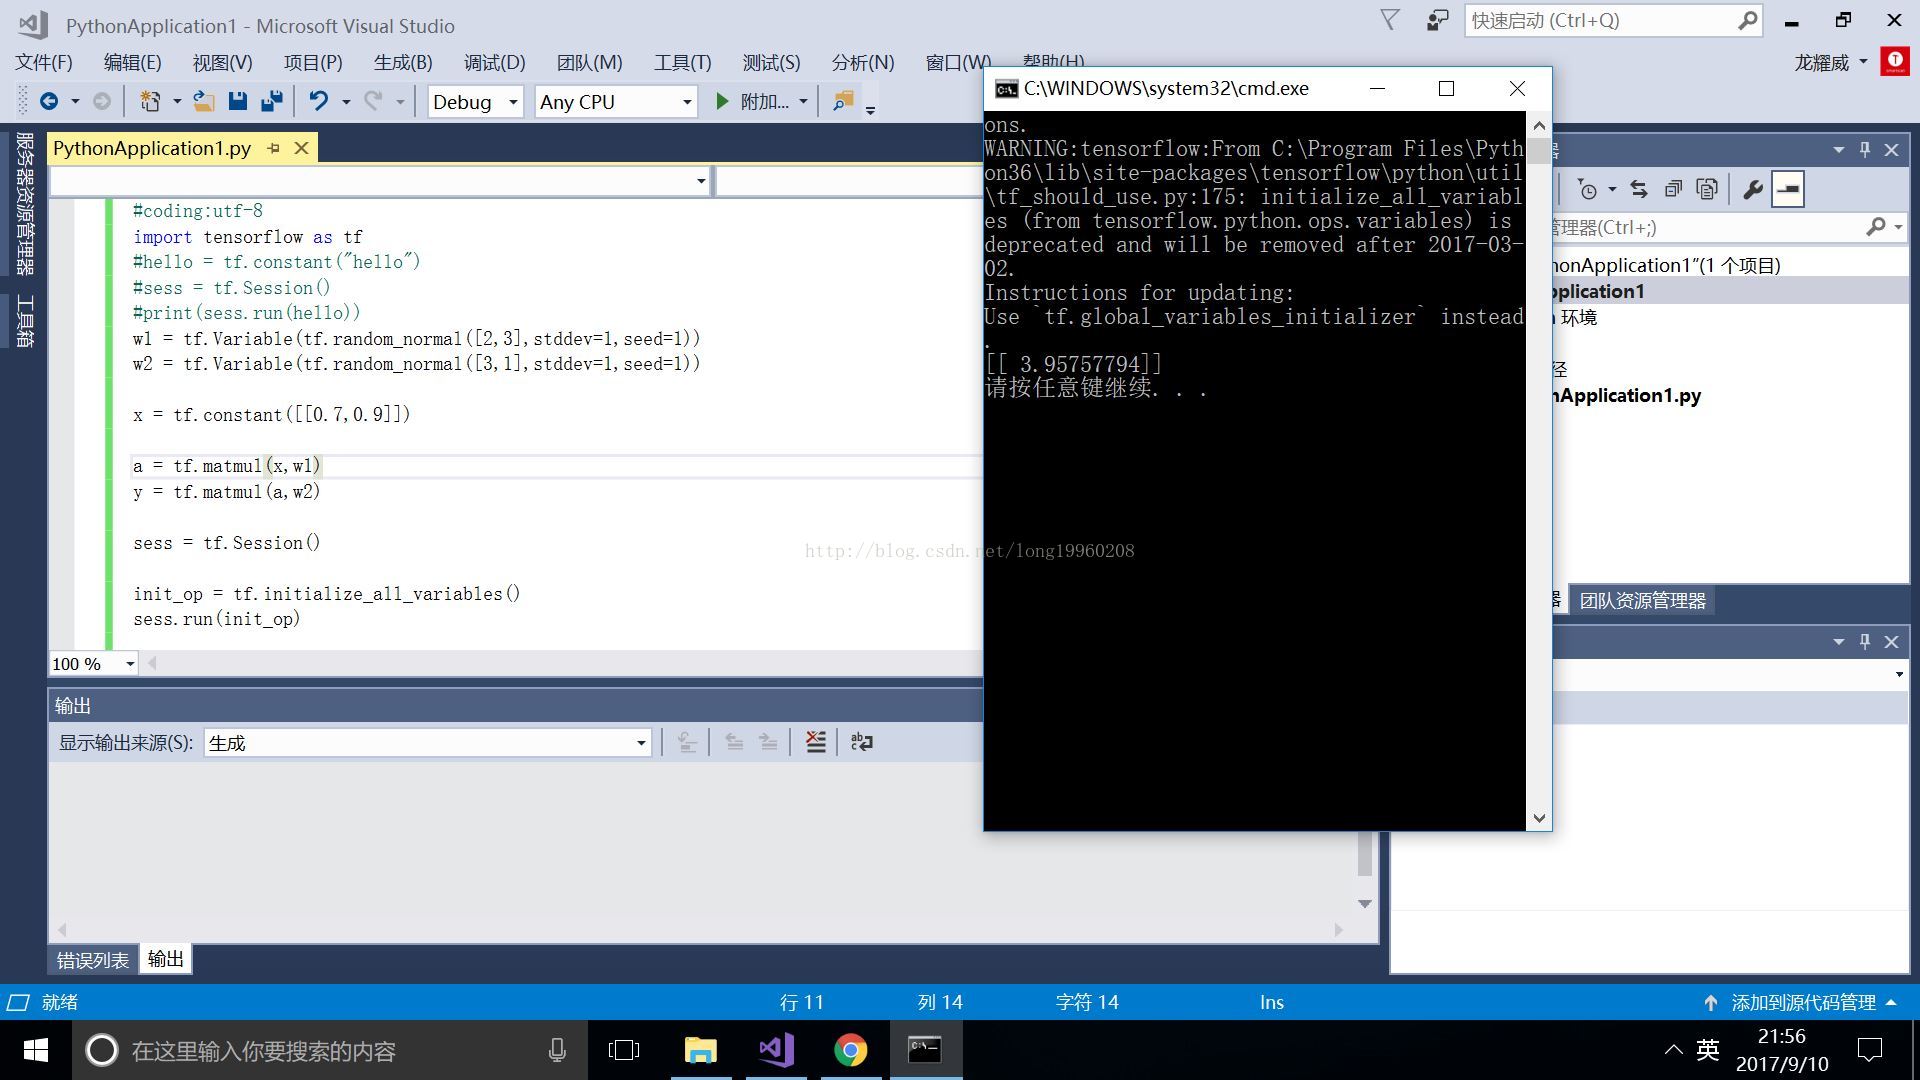
(其中的提示是因为没有正对CPU进行优化,需要编译tensorflow才可以,后期送上解决教程)
安装VS2017(参考Opencv那一篇博客),勾选Python选项
第二步:
配置环境变量
第三步:
用管理员打开Power shell
输入:pip3 install --upgrade tensorflow
第四步:
验证是否成功
新建python程序
输入代码:
#coding:utf-8
import tensorflow as tf
w1 = tf.Variable(tf.random_normal([2,3],stddev=1,seed=1))
w2 = tf.Variable(tf.random_normal([3,1],stddev=1,seed=1))
x = tf.constant([[0.7,0.9]])
a = tf.matmul(x,w1)
y = tf.matmul(a,w2)
sess = tf.Session()
init_op = tf.initialize_all_variables()
sess.run(init_op)
print(sess.run(y))
sess.close()
运行结果:
(其中的提示是因为没有正对CPU进行优化,需要编译tensorflow才可以,后期送上解决教程)

相关文章推荐
- WIN10深度学习环境搭建 Python3.6+Tensorflow+CUDA8.0+Anaconda3+keras
- MAC OS平台通过anaconda搭建tensorflow环境(Python 3.6版本)
- Python3.6+Selenium3.4.3UI自动化环境搭建
- Linux 学习一 搭建环境系列之二 安装 python3.6、setuptools、pip
- Win10下安装及运行tensorflow(CPU版)(三)——搭建python3.5环境
- (Windows下) Python3.6+OpenCV进行人脸识别的环境搭建
- ubuntu 16.04 python3.6 eclipse+pydev虚拟环境搭建
- Windows环境下(64bit,内存4G),安装虚拟机(VM12.5),Ubuntu(17.04),anaconda(Python3.6)和TensorFlow(1.3)
- selenium 3+python3.6+firefox的windows详细环境搭建以及小demo
- [python3.6 flask web学习]开发环境搭建
- python3.6+wampserver搭建简单CGI环境(Windows)
- 1.0 tensorflow-gpu版在win10+python3.6环境下的安装
- sublime text 3 python3.6编译环境搭建
- win10下python3.5.2和tensorflow安装环境搭建教程
- 腾讯云快速完成python3.6开发环境搭建与django应用部署
- (转载)Ubuntu16.04+CUDA8.0+cuDNN7+Anaconda4.4+Python3.6+TensorFlow1.3搭建
- 深度学习tensorflow-gpu环境搭建避坑指南-win10_anaconda_python3.5_cuda8.0
- Qt通过python脚本调用Tensorflow环境搭建
- 基于ubuntu16 Python3 tensorflow(TensorFlow环境搭建)