Qt Arducopter ArduPilot编译环境搭建
2017-09-06 17:12
591 查看
1.ArduPilot下载
windows下:Building ArduPilot for Pixhawk/PX4 on Windows with Make
git clone https://github.com/ArduPilot/ardupilot cd ardupilot
git submodule update --init --recursive
Linux下:
Building ArduPilot for Pixhawk/2/PX4 on Linux with Make
Install git:
sudo apt-get -qq -y install git
Clone the source:
git clone https://github.com/ArduPilot/ardupilot.git cd ardupilot
git submodule update --init --recursive
Run the install-prereqs-ubuntu.sh script:
Tools/scripts/install-prereqs-ubuntu.sh -y
Reload the path (log-out and log-in to make permanent):
. ~/.profile
2.Qt安装
下载:http://download.qt.io/official_releases/qt/
windows下安装,直接运行exe。
linux下安装:
ubuntu下安装QT5.7.1
3.QtCreator导入工程
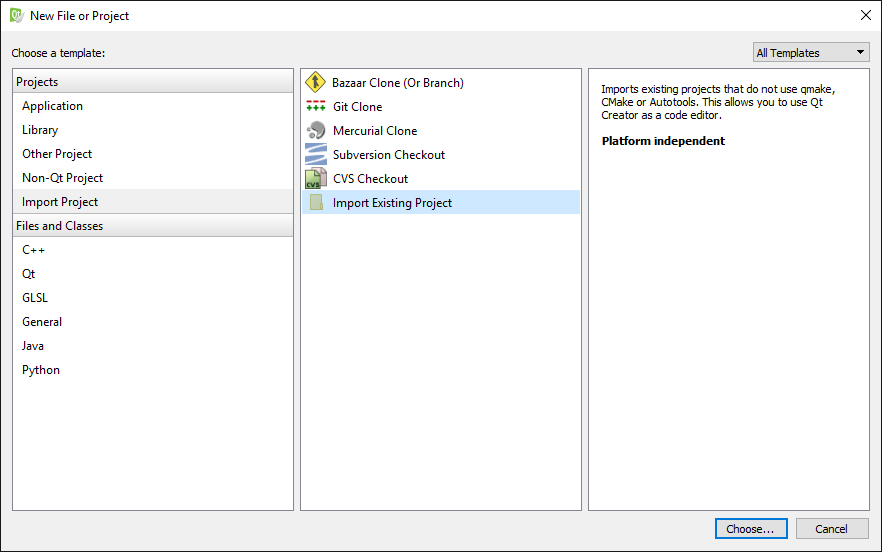
Building ArduPilot for Pixhawk/PX4 on Windows or Linux with QtCreator1)Select File -> New File or Project.
2)Choose the Import Project template and from these templates Import Existing Project. Then press Next.
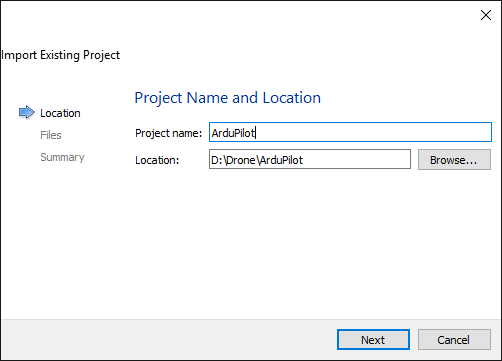
3)Enter a project name and choose the location of the ArduPilot Git repository. Then press Next.
4)Qt Creator shows you the files that will be imported into the project. Just press Next (we will worry about this a bit later).
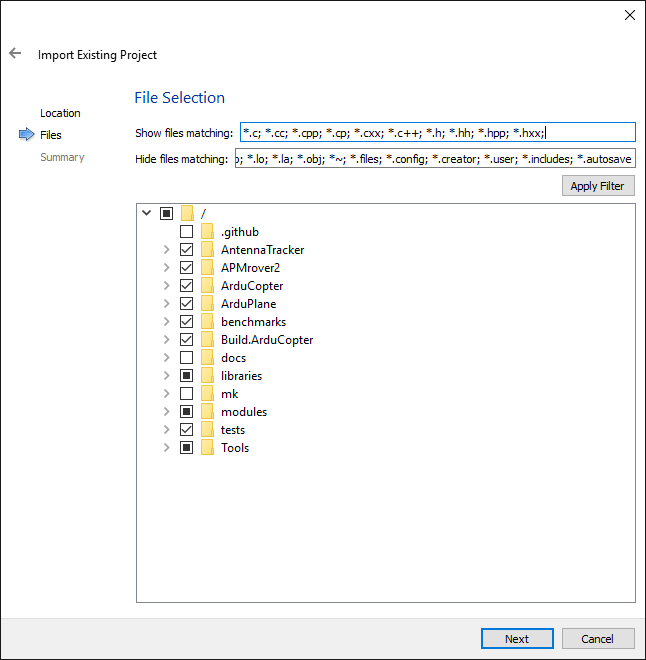
5)click finish.
4.编译环境设置
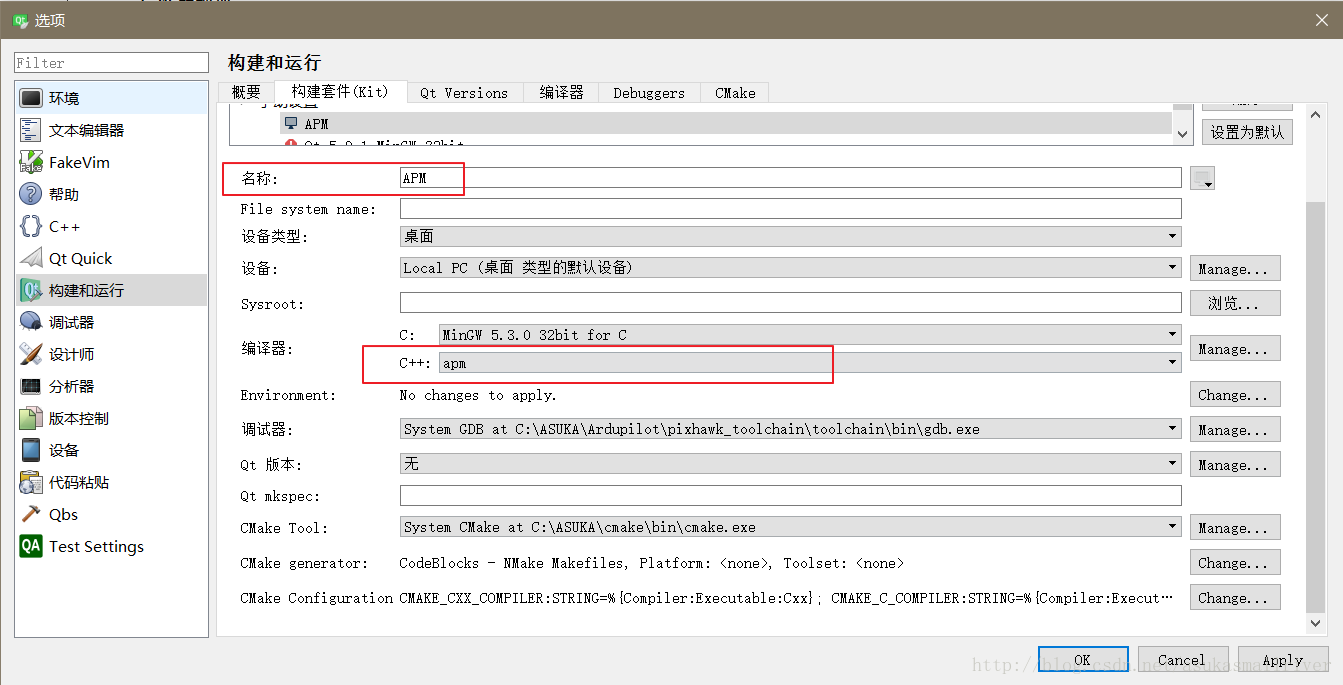
1)编译器设置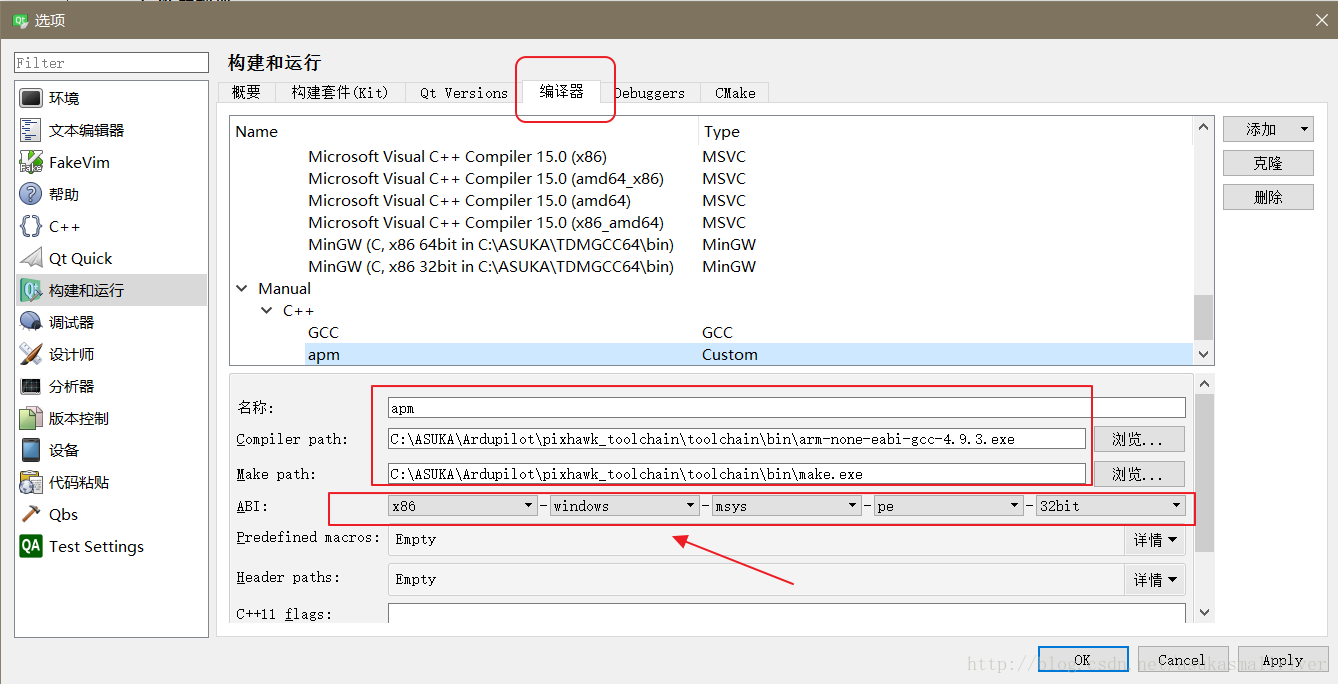
注意:箭头所指位置设置一定要与Qt默认ABI一致,否则无法通过,如下图

2)kit设置
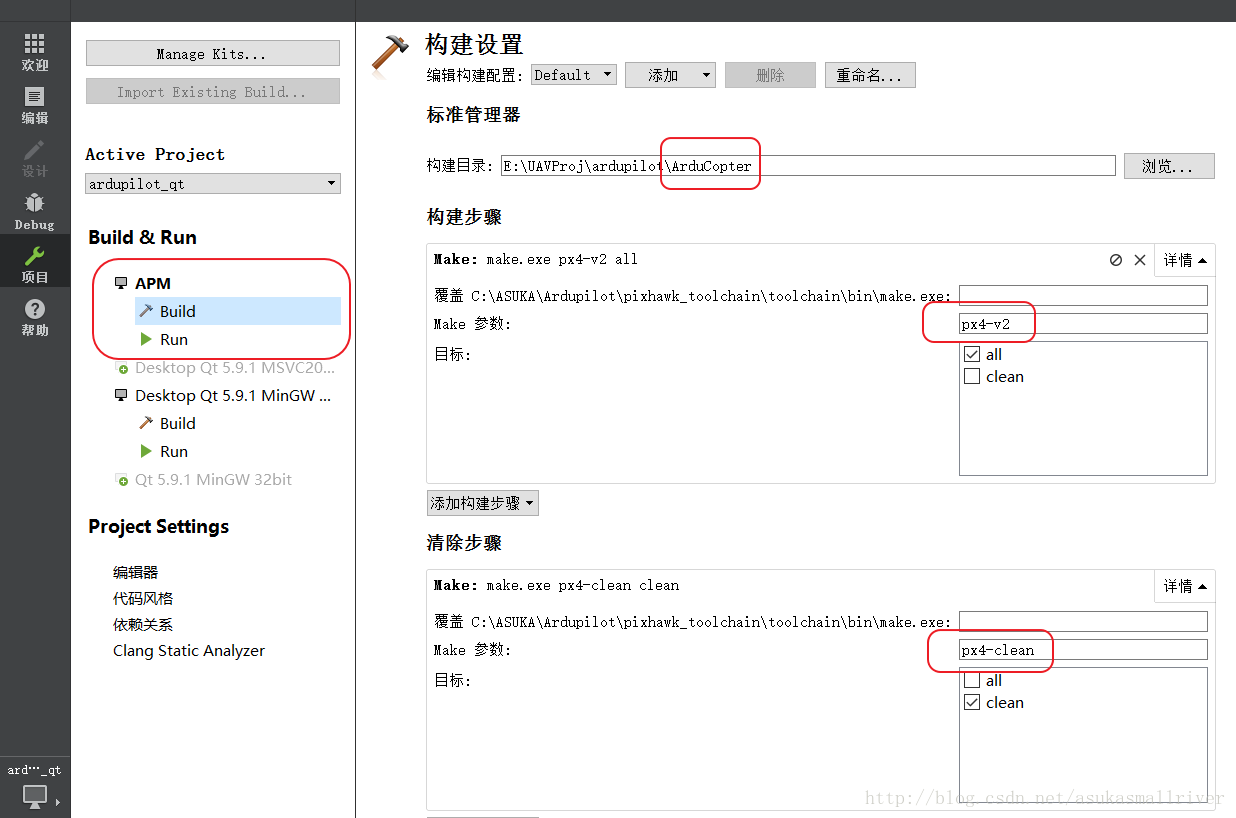
3)工程Build设置
4)编译
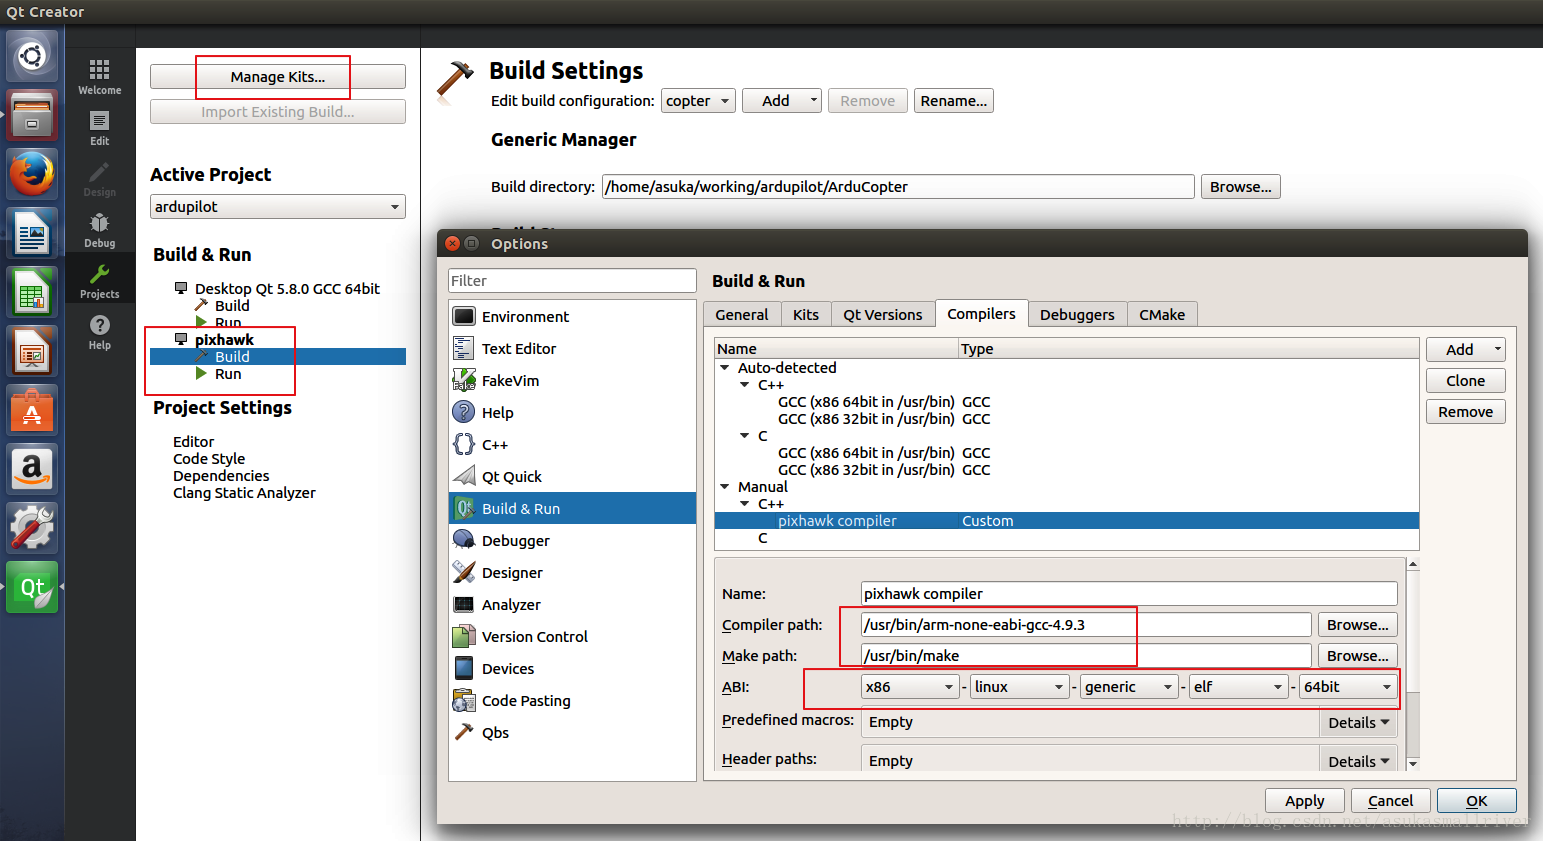
5)补充
Linux下设置基本相同,唯一在编译器选择时有差别,如下
参考文献:
Building ArduPilot for Pixhawk

相关文章推荐
- Win7下qt5.3.1+opencv2.4.9编译环境的搭建
- qt编译及qwt开发环境搭建笔记
- ubuntu 16.04 qt 5.5教程编译环境的搭建,ubuntu i.mx6 qt交叉编译环境搭建
- Ubuntu 14.04 LTS + Qt 5.2.1 源码编译搭建环境
- Ubuntu 16.04下Qt交叉编译开发环境搭建
- Fedora15下搭建QT开发环境及编译QT
- Qt 4.8.2 VS2008 集成环境搭建过程中编译错误的解决办法
- VS2008 环境中完美搭建 Qt 4.7.4 静态编译的调试与发布
- windows7_QtCreator2.4.1_Qt4.8.0_Qwt6.0.1_msvc2010 编译环境搭建的总结
- QT学习之路(二)————Linux下搭建qt程序编译环境、开发板上搭建qt程序运行环境
- qt交叉编译环境搭建方法
- 虚拟机中在Ubuntu14.04下搭建QT交叉编译环境--2014/8/14
- QT各版本环境搭建以及opencv编译配置
- Windows下Qt编译环境搭建及编译命令 (转)
- Ubuntu16.04下Qt交叉编译开发环境搭建
- QT交叉编译环境的搭建(一)
- Win7下Qt532+MinGW482+OpenCV249+Cmake302编译环境搭建
- Win10下QT5.9.3+OpenCV2.4.9编译环境的搭建
- VS2008 环境中完美搭建 Qt 4.7.4 静态编译的调试与发布(很不错,有六张插图说明,修改qmake.conf里的MD参数等)good