web项目整合Shiro框架
2017-08-11 12:03
417 查看
1、修改pom.xml文件
  <dependency>
<groupId>org.apache.shiro</groupId>
<artifactId>shiro-core</artifactId>
<version>1.3.2</version>
</dependency>
<dependency>
<groupId>org.apache.shiro</groupId>
<artifactId>shiro-web</artifactId>
<version>1.3.2</version>
</dependency>
2、在web中使用shiro时必须配置监听器,web.xml
参考地址:http://shiro.apache.org/webapp-tutorial.html
  <listener>
<listener-class>org.apache.shiro.web.env.EnvironmentLoaderListener</listener-class>
</listener>
3、在整个web开发中,用户的登录检测一定要有过滤器
  <filter>
<filter-name>ShiroFilter</filter-name>
<filter-class>org.apache.shiro.web.servlet.ShiroFilter</filter-class>
<!-- 指定配置文件的路径 -->
<init-param>
<param-name>configpath</param-name>
<param-value>classpath:shiro.ini</param-value>
</init-param>
</filter>

<filter-mapping>
<filter-name>ShiroFilter</filter-name>
<url-pattern>/*</url-pattern>
<dispatcher>REQUEST</dispatcher>
<dispatcher>FORWARD</dispatcher>
<dispatcher>INCLUDE</dispatcher>
<dispatcher>ERROR</dispatcher>
</filter-mapping>
此时web程序就与shiro集成好了
4、创建shiro.ini文件
[main]
#如果现在认证失败,应该跳转到loginUrl配置的路径
authc.loginUrl=/login.jsp

#需要配置上当角色认证失败后的跳转页面
roles.unauthorizedUrl=/role.jsp

#需要配置上当权限认证失败后的跳转页面
perms.unauthorizedUrl=/role.jsp

#定义本次要基于JDBC实现的Realm的认证的配置类
jdbcRealm=com.wyl.realm.MyRealm

#配置安全管理器所使用的Realm
securityManager.realms=$jdbcRealm

#配置所有需要进行路径检测的页面
[urls]
#登录的页面不需要检测
/shiroLogin=anon

#指定的页面需要检测,需要先进行身份认证,然后进行角色处理
#此时角色的关系是或的关系
/pages/welcom.jsp=authc,roles[member],roles[dept]
#登录之后对指定的权限处理
/pages/welcom.jsp=authc,perms[member:add],perms[dept:add]
5、创建MyRealm类,完成用户验证
package com.wyl.realm;

import org.apache.shiro.authc.AuthenticationException;
import org.apache.shiro.authc.AuthenticationInfo;
import org.apache.shiro.authc.AuthenticationToken;
import org.apache.shiro.authc.SimpleAuthenticationInfo;
import org.apache.shiro.authc.UnknownAccountException;
import org.apache.shiro.authz.AuthorizationInfo;
import org.apache.shiro.authz.SimpleAuthorizationInfo;
import org.apache.shiro.realm.AuthorizingRealm;
import org.apache.shiro.subject.PrincipalCollection;

import com.wyl.entity.Member;
import com.wyl.service.MemberLoginService;
/**
* 自定义用户认证
* @author wyl
*/
public class MyRealm extends AuthorizingRealm{

@Override
protected AuthenticationInfo doGetAuthenticationInfo(AuthenticationToken token) throws AuthenticationException {

System.out.println("1、**************用户登录验证:doGetAuthenticationInfo***************");
// 1、登录认证的方法需要先执行,用来判断登录的用户信息是否合法
String username = (String) token.getPrincipal();//取得用户名
MemberLoginService service = new MemberLoginService();
//通过用户名获得用户的完整信息
Member vo = service.get(username);//取得用户信息
service.close();
if(vo == null){
throw new UnknownAccountException("该用户名不存在!!!");
}else{ //进行密码验证处理
String password = new String((char[]) token.getCredentials());//取得登录密码
//将数据库密码与登录密码比较
if(!password.equals(vo.getPassword())){
throw new AuthenticationException("密码错误!!!");
}else{
AuthenticationInfo auth = new SimpleAuthenticationInfo(username, password, "memberRealm");
return auth;
}
}
}

@Override
protected AuthorizationInfo doGetAuthorizationInfo(PrincipalCollection principals) {
// TODO Auto-generated method stub
System.out.println("2、**************用户角色与权限:doGetAuthorizationInfo***************");
// 1、登录认证的方法需要先执行,用来判断登录的用户信息是否合法
String username = (String) principals.getPrimaryPrincipal();//取得用户名
SimpleAuthorizationInfo auth = new SimpleAuthorizationInfo();//定义授权信息的返回数据
MemberLoginService service = new MemberLoginService();
auth.setRoles(service.listRolesByMember(username)); //设置角色信息
auth.setStringPermissions(service.listJurisdictionsByMember(username)); //设置权限信息
service.close();
return auth;
}
}
6、创建LoginServlet类
package com.wyl.servlet;

import java.io.IOException;

import javax.servlet.ServletException;
import javax.servlet.annotation.WebServlet;
import javax.servlet.http.HttpServlet;
import javax.servlet.http.HttpServletRequest;
import javax.servlet.http.HttpServletResponse;

import org.apache.shiro.SecurityUtils;
import org.apache.shiro.authc.UsernamePasswordToken;
import org.apache.shiro.subject.Subject;

@WebServlet("/shiroLogin")
public class LoginServlet extends HttpServlet {

@Override
protected void doPost(HttpServletRequest req, HttpServletResponse resp) throws ServletException, IOException {
// TODO Auto-generated method stub
String mid = req.getParameter("mid");
String password = req.getParameter("password");

//获取进行用户名和密码验证的接口对象
Subject subject = SecurityUtils.getSubject();
//实现身份认证信息保存
UsernamePasswordToken token = new UsernamePasswordToken(mid,password);
subject.login(token);
req.setAttribute("mid", mid);
req.getRequestDispatcher("/pages/welcom.jsp").forward(req, resp);;
}

@Override
protected void doGet(HttpServletRequest req, HttpServletResponse resp) throws ServletException, IOException {
// TODO Auto-generated method stub
this.doPost(req, resp);
}
}
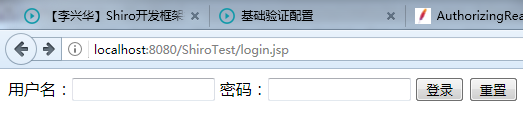
7、在根目录下创建login.jsp文件
<%@ page language="java" contentType="text/html; charset=utf-8"
pageEncoding="utf-8"%>
<!DOCTYPE html PUBLIC "-//W3C//DTD HTML 4.01 Transitional//EN" "http://www.w3.org/TR/html4/loose.dtd">
<%
String path = request.getContextPath();
String basePath = request.getScheme()+"://"
+request.getServerName()+":"
+request.getServerPort()+path+"/";
%>
<html>
<head>
<base href="<%=basePath%>">
<meta http-equiv="Content-Type" content="text/html; charset=utf-8">
<title>shiro登录</title>
</head>
<body>
<form action="shiroLogin" method="post">
用户名:<input type="text" name="mid" id="mid">
密码:<input type="password" name="password" id="password">
<input type="submit" value="登录">
<input type="reset" value="重置">
</form>
</body>
</html>
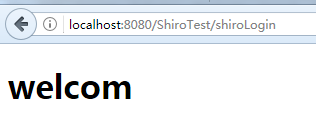
8、创建/pages/welcom.jsp文件
<%@ page language="java" contentType="text/html; charset=utf-8"
pageEncoding="utf-8"%>
<!DOCTYPE html PUBLIC "-//W3C//DTD HTML 4.01 Transitional//EN" "http://www.w3.org/TR/html4/loose.dtd">
<html>
<head>
<meta http-equiv="Content-Type" content="text/html; charset=utf-8">
<title>Insert title here</title>
</head>
<body>
<h1>welcom</h1>
</body>
</html>
9、结果显示

相关文章推荐
- (转) shiro权限框架详解06-shiro与web项目整合(上)
- (转)shiro权限框架详解06-shiro与web项目整合(下)
- shiro权限框架详解06-shiro与web项目整合(下)
- shiro权限框架详解06-shiro与web项目整合(上)
- Shiro权限控制框架入门2:如何将Shiro非入侵地整合到SpringMVC等Web项目中
- 03 整合IDEA+Maven+SSM框架的高并发的商品秒杀项目之web层
- 【SSM】Eclipse使用Maven创建Web项目+整合SSM框架
- Eclipse使用Maven创建Web项目+整合SSM框架
- 【SSM框架 SSM项目源码 SSM源码 下载】java框架整合Springmvc+mybatis+shiro+bootstrap
- JavaWeb框架-SSM-普通Web项目整合流程!
- 【SSM】Eclipse使用Maven创建Web项目+整合SSM框架(这个666)
- 【SSM】Eclipse使用Maven创建Web项目+整合SSM框架
- shiro与spring整合在web项目中的应用
- 【SSM】Eclipse使用Maven创建Web项目+整合SSM框架
- 007-shiro与spring web项目整合【一】基础搭建
- 千里之行系列(5)一 Web工程整合Shiro框架
- 【SSM】Eclipse使用Maven创建Web项目+整合SSM框架
- 010-shiro与spring web项目整合【四】缓存Ehcache
- JavaWeb项目:Shiro实现简单的权限控制(整合SSM)
- Shiro权限控制框架 ---SpringMVC+Spring+My batis+Mysql+Maven集成开发Web项目