使用virt-install手动创建qcow2镜像并安装ISO
2017-07-08 18:03
651 查看
virt-install是一个使用libvirt库构建新虚拟机的命令行工具,此工具使用串行控制台,SDL(Simple DirectMedia Layer)图形或者VNC客户端/服务器,来支持命令行和图形安装。
plain copy
# apt-get install virtinst
Reading package lists... Done
Building dependency tree
Reading state information... Done
The following extra packages will be installed:
adwaita-icon-theme at-spi2-core colord colord-data dconf-gsettings-backend dconf-service fontconfig fontconfig-config
fonts-dejavu-core glib-networking glib-networking-common glib-networking-services gsettings-desktop-schemas hicolor-icon-theme
...
libxinerama1 libxkbcommon0 libxpm4 libxrandr2 libxrender1 libxtst6 python-libxml2 python-pycurl python-urlgrabber ubuntu-mono
virt-viewer x11-common
Suggested packages:
colord-sensor-argyll cups-common libgd-tools gphoto2 gvfs liblcms2-utils librsvg2-bin avahi-daemon hplip libsane-extras
sane-utils python-pycurl-dbg python-pycurl-doc
...
-r --ram= 客户端虚拟机分配的内存
-u --uuid= 客户端UUID 默认不写时,系统会自动生成
--vcp
4000
us= 客户端的vcpu个数
-v --hvm 全虚拟化
-p --paravirt 半虚拟化
-l --location=localdir 安装源,有本地、nfs、http、ftp几种,多用于ks网络安装
--vnc 使用vnc ,另有--vnclient=监听的IP --vncport =VNC监听的端口
-c --cdrom= 光驱 安装途径
--disk= 使用不同选项作为磁盘使用安装介质
-w NETWORK, --network=NETWORK 连接客户机到主机网络
-s --file-size= 使用磁盘映像的大小 单位为GB
-f --file= 作为磁盘映像使用的文件
--cpuset=设置哪个物理CPU能够被虚拟机使用
--os-type=OS_TYPE 针对一类操作系统优化虚拟机配置(例如:‘linux’,‘windows’)
--os-variant=OS_VARIANT 针对特定操作系统变体(例如’rhel6’, ’winxp’,'win2k3')进一步优化虚拟机配置
--host-device=HOSTDEV 附加一个物理主机设备到客户机。HOSTDEV是随着libvirt使用的一个节点设备名(具体设备如’virsh nodedev-list’的显示的结果)
--accelerate KVM或KQEMU内核加速,这个选项是推荐最好加上。如果KVM和KQEMU都支持,KVM加速器优先使用。
-x EXTRA, --extra-args=EXTRA 当执行从"--location"选项指定位置的客户机安装时,附加内核命令行参数到安装程序
--nographics "virt-install" 将默认使用--vnc选项,使用nographics指定没有控制台被分配给客户机
plain copy
# virsh net-list
Name State Autostart Persistent
----------------------------------------------------------
default active yes yes
If the network is not active, start it by doing:
# virsh net-start default
Starting this network will create a Linux bridge (usually called virbr0), iptables rules, and a dnsmasq process that will serve as a DHCP server.
查看default网络的配置
[plain] view
plain copy
root@zhaicompute# brctl show
bridge name bridge id STP enabled interfaces
virbr0 8000.5254000f5c96 yes virbr0-nic
root@zhaicompute# ifconfig virbr0
virbr0 Link encap:Ethernet HWaddr 52:54:00:0f:5c:96
inet addr:192.168.22.1 Bcast:192.168.22.255 Mask:255.255.255.0
UP BROADCAST RUNNING MULTICAST MTU:1500 Metric:1
RX packets:0 errors:0 dropped:0 overruns:0 frame:0
TX packets:0 errors:0 dropped:0 overruns:0 carrier:0
collisions:0 txqueuelen:0
RX bytes:0 (0.0 B) TX bytes:0 (0.0 B)
root@zhaicompute# cat /etc/libvirt/qemu/networks/default.xml
<!--
WARNING: THIS IS AN AUTO-GENERATED FILE. CHANGES TO IT ARE LIKELY TO BE
OVERWRITTEN AND LOST. Changes to this xml configuration should be made using:
virsh net-edit default
or other application using the libvirt API.
-->
<network>
<name>default</name>
<uuid>6acb-ed0a-4ad1-b8dc-527168a2</uuid>
<forward mode='nat'/>
<bridge name='virbr0' stp='on' delay='0'/>
<mac address='52:33:00:0f:5c:96'/>
<ip address='192.168.22.1' netmask='255.255.255.0'>
<dhcp>
<range start='192.168.22.2' end='192.168.22.254'/>
</dhcp>
</ip>
</network>
default网络设置保存在/etc/libvirt/qemu/networks目录下,从配置中可看出具体的网桥virbr0.
[plain] view
plain copy
root@zhaicompute# qemu-img create -f qcow2 zhai-ubuntu14.04.4.qcow2 10G
Formatting 'zhai-ubuntu14.04.4.qcow2', fmt=qcow2 size=10737418240 encryption=off cluster_size=65536 lazy_refcounts=off refcount_bits=16
root@zhaicompute# ls
ubuntu-14.04.3-server-ppc64el.iso zhai-ubuntu14.04.4.qcow2
root@zhaicompute# qemu-img info zhai-ubuntu14.04.4.qcow2
image: zhai-ubuntu14.04.4.qcow2
file format: qcow2
virtual size: 10G (10737418240 bytes)
disk size: 196K
cluster_size: 65536
Format specific information:
compat: 1.1
lazy refcounts: false
refcount bits: 16
corrupt: false
virt-install command to start up a virtual machine using that image file.
命令行:
[plain] view
plain copy
virt-install --virt-type kvm --name zhai-ubuntu --ram 1024 \
> --cdrom=/var/lib/libvirt/images/zhaipool/ubuntu-14.04.4-server-ppc64el.iso \
> --disk /var/lib/libvirt/images/zhaipool/zhai-ubuntu14.04.4.qcow2,format=qcow2 \
> --network network=default \
> --graphics vnc,listen=0.0.0.0 --noautoconsole \
> --os-type=linux --os-variant=ubuntutrusty
其中,--os-variant后面的值使用virt-install --os-variant list查看
[plain] view
plain copy
root@zhaicompute# virt-install --os-variant list
win2k8 : Microsoft Windows Server 2008 (or later)
win2k3 : Microsoft Windows Server 2003
win7 : Microsoft Windows 7 (or later)
vista : Microsoft Windows Vista
winxp64 : Microsoft Windows XP (x86_64)
winxp : Microsoft Windows XP
win2k : Microsoft Windows 2000
openbsd4 : OpenBSD 4.x (or later)
freebsd9 : FreeBSD 9.x
freebsd8 : FreeBSD 8.x
freebsd7 : FreeBSD 7.x
freebsd6 : FreeBSD 6.x
freebsd10 : FreeBSD 10.x (or later)
solaris9 : Sun Solaris 9
solaris11 : Sun Solaris 11 (or later)
solaris10 : Sun Solaris 10
opensolaris : Sun OpenSolaris (or later)
netware6 : Novell Netware 6 (or later)
netware5 : Novell Netware 5
netware4 : Novell Netware 4
msdos : MS-DOS
generic : Generic
altlinux : ALT Linux (or later)
debianwheezy : Debian Wheezy (or later)
debiansqueeze : Debian Squeeze
debianlenny : Debian Lenny
debianetch : Debian Etch
fedora20 : Fedora 20 (or later)
fedora19 : Fedora 19
fedora18 : Fedora 18
fedora17 : Fedora 17
fedora16 : Fedora 16
fedora15 : Fedora 15
fedora14 : Fedora 14
fedora13 : Fedora 13
fedora12 : Fedora 12
fedora11 : Fedora 11
fedora10 : Fedora 10
fedora9 : Fedora 9
fedora8 : Fedora 8
fedora7 : Fedora 7
fedora6 : Fedora Core 6
fedora5 : Fedora Core 5
mes5.1 : Mandriva Enterprise Server 5.1 (or later)
mes5 : Mandriva Enterprise Server 5.0
mandriva2010 : Mandriva Linux 2010 (or later)
mandriva2009 : Mandriva Linux 2009 and earlier
mageia1 : Mageia 1 (or later)
rhel7 : Red Hat Enterprise Linux 7 (or later)
rhel6 : Red Hat Enterprise Linux 6
rhel5.4 : Red Hat Enterprise Linux 5.4 or later
rhel5 : Red Hat Enterprise Linux 5
rhel4 : Red Hat Enterprise Linux 4
rhel3 : Red Hat Enterprise Linux 3
rhel2.1 : Red Hat Enterprise Linux 2.1
sles11 : Suse Linux Enterprise Server 11 (or later)
sles10 : Suse Linux Enterprise Server
opensuse12 : openSuse 12 (or later)
opensuse11 : openSuse 11
ubuntuutopic : Ubuntu 14.10 (Utopic Unicorn) (or later)
ubuntutrusty : Ubuntu 14.04 LTS (Trusty Tahr)
ubuntusaucy : Ubuntu 13.10 (Saucy Salamander)
ubunturaring : Ubuntu 13.04 (Raring Ringtail)
ubuntuquantal : Ubuntu 12.10 (Quantal Quetzal)
ubuntuprecise : Ubuntu 12.04 LTS (Precise Pangolin)
ubuntuoneiric : Ubuntu 11.10 (Oneiric Ocelot)
ubuntunatty : Ubuntu 11.04 (Natty Narwhal)
ubuntumaverick : Ubuntu 10.10 (Maverick Meerkat)
ubuntulucid : Ubuntu 10.04 LTS (Lucid Lynx)
ubuntukarmic : Ubuntu 9.10 (Karmic Koala)
ubuntujaunty : Ubuntu 9.04 (Jaunty Jackalope)
ubuntuintrepid : Ubuntu 8.10 (Intrepid Ibex)
ubuntuhardy : Ubuntu 8.04 LTS (Hardy Heron)
mbs1 : Mandriva Business Server 1 (or later)
virtio26 : Generic 2.6.25 or later kernel with virtio
generic26 : Generic 2.6.x kernel
generic24 : Generic 2.4.x kernel
执行过程:
[plain] view
plain copy
root@zhaicompute# virt-install --virt-type kvm --name zhai-ubuntu --ram 1024 \
> --cdrom=/var/lib/libvirt/images/zhaipool/ubuntu-14.04.4-server-ppc64el.iso \
> --disk /var/lib/libvirt/images/zhaipool/zhai-ubuntu14.04.4.qcow2,format=qcow2 \
> --network network=default \
> --graphics vnc,listen=0.0.0.0 --noautoconsole \
> --os-type=linux --os-variant=ubuntutrusty
Starting install...
Creating domain... | 0 B 00:00
Domain installation still in progress. You can reconnect to
the console to complete the installation process.
root@zhaicompute# ps -ef | grep zhai
libvirt+ 27531 1 99 03:39 ? 00:00:22 qemu-system-ppc64 -enable-kvm -name zhai-ubuntu -S -machine pseries-2.3,accel=kvm,usb=off -m 1024 -realtime mlock=off -smp 1,sockets=1,cores=1,threads=1 -uuid de480a35-4ab5-42e5-b3b6-a47c8b05d9c8 -no-user-config -nodefaults -chardev socket,id=charmonitor,path=/var/lib/libvirt/qemu/zhai-ubuntu.monitor,server,nowait -mon chardev=charmonitor,id=monitor,mode=control -rtc base=utc -no-reboot -boot strict=on -device pci-ohci,id=usb,bus=pci.0,addr=0x2 -device spapr-vscsi,id=scsi0,reg=0x2000 -drive file=/var/lib/libvirt/images/zhaipool/zhai-ubuntu14.04.4.qcow2,if=none,id=drive-scsi0-0-0-0,format=qcow2 -device scsi-hd,bus=scsi0.0,channel=0,scsi-id=0,lun=0,drive=drive-scsi0-0-0-0,id=scsi0-0-0-0,bootindex=2 -drive file=/var/lib/libvirt/images/zhaipool/ubuntu-14.04.4-server-ppc64el.iso,if=none,id=drive-scsi0-0-0-1,readonly=on,format=raw -device scsi-cd,bus=scsi0.0,channel=0,scsi-id=0,lun=1,drive=drive-scsi0-0-0-1,id=scsi0-0-0-1,bootindex=1 -netdev tap,fd=29,id=hostnet0 -device rtl8139,netdev=hostnet0,id=net0,mac=52:54:00:cb:ad:fa,bus=pci.0,addr=0x1 -chardev pty,id=charserial0 -device spapr-vty,chardev=charserial0,reg=0x30000000 -device usb-kbd,id=input0 -device usb-mouse,id=input1 -vnc 0.0.0.0:2 -device VGA,id=video0,vgamem_mb=16,bus=pci.0,addr=0x4 -device virtio-balloon-pci,id=balloon0,bus=pci.0,addr=0x3 -msg timestamp=on
root 27540 23850 0 03:40 pts/8 00:00:00 grep --color=auto zhai
从上看出:virt-install执行后,最终调用的是qemu-system-ppc64命令来创建vm。
一个虚拟机占用一个进程,可以通过进程管理和控制虚拟机。
log日志:
[plain] view
plain copy
root@zhaicompute# ls /var/log/libvirt/qemu/
zhai-ubuntu.log
创建后,查看网络:
[plain] view
plain copy
root@zhaicompute# brctl show
bridge name bridge id STP enabled interfaces
virbr0 8000.5254000f5c96 yes virbr0-nic
vnet0
可看出virbr0上多了一下端口vnet0.
[plain] view
plain copy
virbr0 Link encap:Ethernet HWaddr 52:54:00:0f:5c:96
inet addr:192.168.122.1 Bcast:192.168.122.255 Mask:255.255.255.0
UP BROADCAST RUNNING MULTICAST MTU:1500 Metric:1
RX packets:10646 errors:0 dropped:0 overruns:0 frame:0
TX packets:14645 errors:0 dropped:0 overruns:0 carrier:0
collisions:0 txqueuelen:0
RX bytes:617571 (617.5 KB) TX bytes:20396983 (20.3 MB)
virbr0-nic Link encap:Ethernet HWaddr 52:54:00:0f:5c:96
BROADCAST MULTICAST MTU:1500 Metric:1
RX packets:0 errors:0 dropped:0 overruns:0 frame:0
TX packets:0 errors:0 dropped:0 overruns:0 carrier:0
collisions:0 txqueuelen:500
RX bytes:0 (0.0 B) TX bytes:0 (0.0 B)
vnet0 Link encap:Ethernet HWaddr fe:54:00:7e:60:d0
inet6 addr: fe80::fc54:ff:fe7e:60d0/64 Scope:Link
UP BROADCAST RUNNING MULTICAST MTU:1500 Metric:1
RX packets:10646 errors:0 dropped:0 overruns:0 frame:0
TX packets:17480 errors:0 dropped:0 overruns:0 carrier:0
collisions:0 txqueuelen:500
RX bytes:766615 (766.6 KB) TX bytes:20544635 (20.5 MB)
查看生成的xml配置文件 :
[plain] view
plain copy
# ls -lrt /etc/libvirt/qemu
-rw------- 1 root root 2511 Apr 15 11:25 zhai-ubuntu.xml
zhai-ubuntu.xml内容:
[plain] view
plain copy
# cat /etc/libvirt/qemu/zhai-ubuntu.xml
<!--
WARNING: THIS IS AN AUTO-GENERATED FILE. CHANGES TO IT ARE LIKELY TO BE
OVERWRITTEN AND LOST. Changes to this xml configuration should be made using:
virsh edit zhai-ubuntu
or other application using the libvirt API.
-->
<domain type='kvm'>
<name>zhai-ubuntu</name>
<uuid>0e5684f5-23aa-8568-ed10-52c844b4d85d</uuid>
<memory unit='KiB'>1048576</memory>
<currentMemory unit='KiB'>1048576</currentMemory>
<vcpu placement='static'>2</vcpu>
<os>
<type arch='ppc64le' machine='pseries-2.3'>hvm</type>
<boot dev='cdrom'/>
<boot dev='hd'/>
<bootmenu enable='yes'/>
</os>
<features>
<acpi/>
<apic/>
<pae/>
</features>
<clock offset='utc'/>
<on_poweroff>destroy</on_poweroff>
<on_reboot>restart</on_reboot>
<on_crash>restart</on_crash>
<devices>
<emulator>/usr/bin/kvm</emulator>
<disk type='file' device='disk'>
<driver name='qemu' type='qcow2' cache='none'/>
<source file='/var/lib/libvirt/images/zhaipool/zhai-ubuntu14.04.4.qcow2'/>
<target dev='vda' bus='virtio'/>
<address type='pci' domain='0x0000' bus='0x00' slot='0x03' function='0x0'/>
</disk>
<disk type='file' device='disk'>
<driver name='qemu' type='raw' cache='none'/>
<source file='/var/lib/libvirt/images/zhaipool/ubuntu-14.04.4-server-ppc64el.iso'/>
<target dev='sda' bus='usb'/>
</disk>
<controller type='usb' index='0'>
<address type='pci' domain='0x0000' bus='0x00' slot='0x02' function='0x0'/>
</controller>
<controller type='pci' index='0' model='pci-root'/>
<interface type='network'>
<mac address='52:54:00:7e:60:d0'/>
<source network='default'/>
<model type='virtio'/>
<address type='pci' domain='0x0000' bus='0x00' slot='0x01' function='0x0'/>
</interface>
<serial type='pty'>
<target port='0'/>
<address type='spapr-vio' reg='0x30000000'/>
</serial>
<console type='pty'>
<target type='serial' port='0'/>
<address type='spapr-vio' reg='0x30000000'/>
</console>
<input type='tablet' bus='usb'/>
<input type='keyboard' bus='usb'/>
<input type='mouse' bus='usb'/>
<graphics type='vnc' port='-1' autoport='yes'/>
<video>
<model type='vga' vram='16384' heads='1'/>
<address type='pci' domain='0x0000' bus='0x00' slot='0x05' function='0x0'/>
</video>
<memballoon model='virtio'>
<address type='pci' domain='0x0000' bus='0x00' slot='0x04' function='0x0'/>
</memballoon>
</devices>
</domain>
基于KVM建立的虚拟机相关文件默认存放位置
kvm虚拟机配置文件位置/etc/libvirt/qemu/ <---都是xml文件
kvm虚拟机文件位置:/var/lib/libvirt/images/ <---可以在建立虚拟机时指定
建立的虚拟机在运行时相关文件及存放位置
在虚拟机运行时,会在/var/run/libvirt/qemu目录下存放虚拟机的pid文件和配置文件,配置文件与/etc/libvirt/qemu目录下对应的虚拟机文件相同,pid文件保存有此虚拟机进程号。虚拟机的日志文件存放在/var/log/libvirt/qemu目录下,每个虚拟机一个,文件名称为:虚拟机名称(或UUID)+“.log”
virt-install在生产虚拟机的最后调用virt-viewer打开虚拟机图形界面,进行操作系统的安装,可以通过vnc或者virt-manager打开虚拟机图形界面,继续完成guest操作系统的安装即可。
[plain] view
plain copy
root@zhaicompute# virsh vncdisplay zhai-ubuntu
:2
root@zhaicompute# ps -ef | grep vnc
libvirt+ 27531 1 99 03:39 ? 00:09:35 qemu-system-ppc64 -enable-kvm -name zhai-ubuntu -S -machine pseries-2.3,accel=kvm,usb=off -m 1024 -realtime mlock=off -smp 1,sockets=1,cores=1,threads=1 -uuid de480a35-4ab5-42e5-b3b6-a47c8b05d9c8 -no-user-config -nodefaults -chardev socket,id=charmonitor,path=/var/lib/libvirt/qemu/zhai-ubuntu.monitor,server,nowait -mon chardev=charmonitor,id=monitor,mode=control -rtc base=utc -no-reboot -boot strict=on -device pci-ohci,id=usb,bus=pci.0,addr=0x2 -device spapr-vscsi,id=scsi0,reg=0x2000 -drive file=/var/lib/libvirt/images/zhaipool/zhai-ubuntu14.04.4.qcow2,if=none,id=drive-scsi0-0-0-0,format=qcow2 -device scsi-hd,bus=scsi0.0,channel=0,scsi-id=0,lun=0,drive=drive-scsi0-0-0-0,id=scsi0-0-0-0,bootindex=2 -drive file=/var/lib/libvirt/images/zhaipool/ubuntu-14.04.4-server-ppc64el.iso,if=none,id=drive-scsi0-0-0-1,readonly=on,format=raw -device scsi-cd,bus=scsi0.0,channel=0,scsi-id=0,lun=1,drive=drive-scsi0-0-0-1,id=scsi0-0-0-1,bootindex=1 -netdev tap,fd=29,id=hostnet0 -device rtl8139,netdev=hostnet0,id=net0,mac=52:54:00:cb:ad:fa,bus=pci.0,addr=0x1 -chardev pty,id=charserial0 -device spapr-vty,chardev=charserial0,reg=0x30000000 -device usb-kbd,id=input0 -device usb-mouse,id=input1 -vnc 0.0.0.0:2 -device VGA,id=video0,vgamem_mb=16,bus=pci.0,addr=0x4 -device virtio-balloon-pci,id=balloon0,bus=pci.0,addr=0x3 -msg timestamp=on
在win7下,打开vnc-viewer,输入virt-install命令所在的服务器IP与所安装的虚拟机据点用的vnc端口号0;
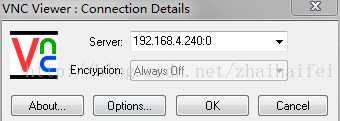
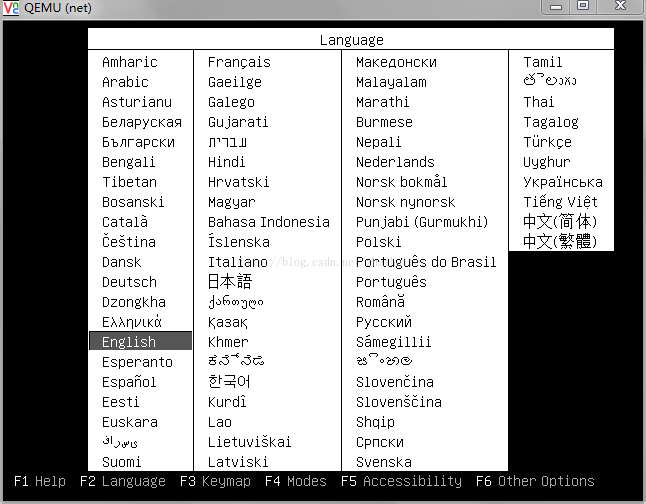
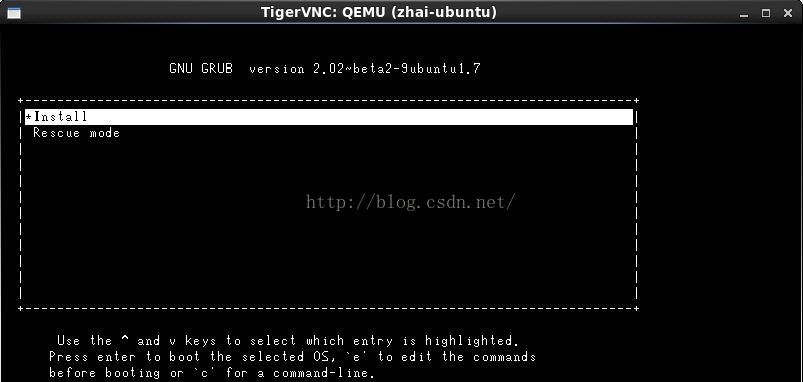
点击“OK”,进入安装界面
安装完成后,使用命令virsh start vm-name启动此虚拟机:
[html] view
plain copy
root@ctler:~# virsh list --all
Id Name State
----------------------------------------------------
- net shut off
root@ctler:~# virsh start net
Domain net started
root@ctler:~# virsh list --all
Id Name State
----------------------------------------------------
5 net running
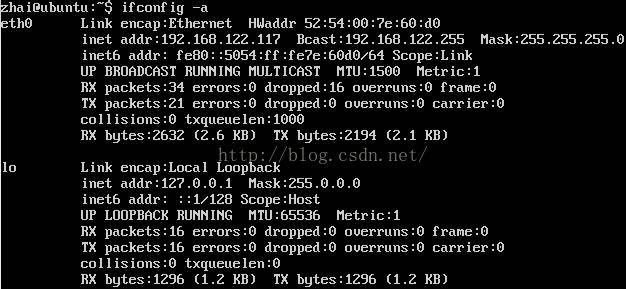
在linux下:
安装完成后,登录虚机,查看IP
lvcreate -L20G -n host.demo.com kvm-storage
下载镜像并loop到本地:
wget http://mirrors.manchester.icecolo.com/centos/5.5/isos/x86_64/CentOS-5.5-x86_64-bin-1of8.iso
mkdir /mnt/centos55
mount -o loop CentOS-5.5-x86_64-bin-1of8.iso /mnt/centos55/
通过location本地安装,并通过console管理:
virt-install
-n host.demo.com
-r 512
--vcpus=1
--os-variant=rhel5.4
--accelerate
--nographics
-v
-l /mnt/centos55/
-w bridge:br1
--disk path=/dev/kvm-storage/host.demo.com
-x "console=ttyS0"
管理时可以通过
#查看guest id、name 及状态
virsh list --all
#通过console连接查看
virsh console id或name
#连接完成后会要求输入用户名和密码
参考:
1 virt-install 使用说明: http://blog.csdn href="http://lib.csdn.net/base/dotnet" target=_blank>.NET /starshine/article/details/6998189
2 kvm, qemu-kvm以及libvirt之间的关系图:http://blog.csdn.net/zhaihaifei/article/details/51018113
3 kvm虚拟化之virt-install: http://www.361way.com/virt-install/2721.html
4 kvm显示VM的IP:http://www.chengxuyuans.com/Unix/83251.html
5 virbr0: http://blog.chinaunix.Net/uid-26000137-id-3723948.html
1 ubuntu下安装: apt-get install virtinst
[plain] viewplain copy
# apt-get install virtinst
Reading package lists... Done
Building dependency tree
Reading state information... Done
The following extra packages will be installed:
adwaita-icon-theme at-spi2-core colord colord-data dconf-gsettings-backend dconf-service fontconfig fontconfig-config
fonts-dejavu-core glib-networking glib-networking-common glib-networking-services gsettings-desktop-schemas hicolor-icon-theme
...
libxinerama1 libxkbcommon0 libxpm4 libxrandr2 libxrender1 libxtst6 python-libxml2 python-pycurl python-urlgrabber ubuntu-mono
virt-viewer x11-common
Suggested packages:
colord-sensor-argyll cups-common libgd-tools gphoto2 gvfs liblcms2-utils librsvg2-bin avahi-daemon hplip libsane-extras
sane-utils python-pycurl-dbg python-pycurl-doc
...
2 virt-install常用参数
-n --name= 客户端虚拟机名称-r --ram= 客户端虚拟机分配的内存
-u --uuid= 客户端UUID 默认不写时,系统会自动生成
--vcp
4000
us= 客户端的vcpu个数
-v --hvm 全虚拟化
-p --paravirt 半虚拟化
-l --location=localdir 安装源,有本地、nfs、http、ftp几种,多用于ks网络安装
--vnc 使用vnc ,另有--vnclient=监听的IP --vncport =VNC监听的端口
-c --cdrom= 光驱 安装途径
--disk= 使用不同选项作为磁盘使用安装介质
-w NETWORK, --network=NETWORK 连接客户机到主机网络
-s --file-size= 使用磁盘映像的大小 单位为GB
-f --file= 作为磁盘映像使用的文件
--cpuset=设置哪个物理CPU能够被虚拟机使用
--os-type=OS_TYPE 针对一类操作系统优化虚拟机配置(例如:‘linux’,‘windows’)
--os-variant=OS_VARIANT 针对特定操作系统变体(例如’rhel6’, ’winxp’,'win2k3')进一步优化虚拟机配置
--host-device=HOSTDEV 附加一个物理主机设备到客户机。HOSTDEV是随着libvirt使用的一个节点设备名(具体设备如’virsh nodedev-list’的显示的结果)
--accelerate KVM或KQEMU内核加速,这个选项是推荐最好加上。如果KVM和KQEMU都支持,KVM加速器优先使用。
-x EXTRA, --extra-args=EXTRA 当执行从"--location"选项指定位置的客户机安装时,附加内核命令行参数到安装程序
--nographics "virt-install" 将默认使用--vnc选项,使用nographics指定没有控制台被分配给客户机
3 安装
Use the virt-installtool to boot the virtual machine through libvirt and connect to the graphical console from a VNC client installed on your local machine.3.1 查看default网络
[plain] viewplain copy
# virsh net-list
Name State Autostart Persistent
----------------------------------------------------------
default active yes yes
If the network is not active, start it by doing:
# virsh net-start default
Starting this network will create a Linux bridge (usually called virbr0), iptables rules, and a dnsmasq process that will serve as a DHCP server.
查看default网络的配置
[plain] view
plain copy
root@zhaicompute# brctl show
bridge name bridge id STP enabled interfaces
virbr0 8000.5254000f5c96 yes virbr0-nic
root@zhaicompute# ifconfig virbr0
virbr0 Link encap:Ethernet HWaddr 52:54:00:0f:5c:96
inet addr:192.168.22.1 Bcast:192.168.22.255 Mask:255.255.255.0
UP BROADCAST RUNNING MULTICAST MTU:1500 Metric:1
RX packets:0 errors:0 dropped:0 overruns:0 frame:0
TX packets:0 errors:0 dropped:0 overruns:0 carrier:0
collisions:0 txqueuelen:0
RX bytes:0 (0.0 B) TX bytes:0 (0.0 B)
root@zhaicompute# cat /etc/libvirt/qemu/networks/default.xml
<!--
WARNING: THIS IS AN AUTO-GENERATED FILE. CHANGES TO IT ARE LIKELY TO BE
OVERWRITTEN AND LOST. Changes to this xml configuration should be made using:
virsh net-edit default
or other application using the libvirt API.
-->
<network>
<name>default</name>
<uuid>6acb-ed0a-4ad1-b8dc-527168a2</uuid>
<forward mode='nat'/>
<bridge name='virbr0' stp='on' delay='0'/>
<mac address='52:33:00:0f:5c:96'/>
<ip address='192.168.22.1' netmask='255.255.255.0'>
<dhcp>
<range start='192.168.22.2' end='192.168.22.254'/>
</dhcp>
</ip>
</network>
default网络设置保存在/etc/libvirt/qemu/networks目录下,从配置中可看出具体的网桥virbr0.
3.2 qemu-img和virt-install
qemu-img command to create an empty image file[plain] view
plain copy
root@zhaicompute# qemu-img create -f qcow2 zhai-ubuntu14.04.4.qcow2 10G
Formatting 'zhai-ubuntu14.04.4.qcow2', fmt=qcow2 size=10737418240 encryption=off cluster_size=65536 lazy_refcounts=off refcount_bits=16
root@zhaicompute# ls
ubuntu-14.04.3-server-ppc64el.iso zhai-ubuntu14.04.4.qcow2
root@zhaicompute# qemu-img info zhai-ubuntu14.04.4.qcow2
image: zhai-ubuntu14.04.4.qcow2
file format: qcow2
virtual size: 10G (10737418240 bytes)
disk size: 196K
cluster_size: 65536
Format specific information:
compat: 1.1
lazy refcounts: false
refcount bits: 16
corrupt: false
virt-install command to start up a virtual machine using that image file.
命令行:
[plain] view
plain copy
virt-install --virt-type kvm --name zhai-ubuntu --ram 1024 \
> --cdrom=/var/lib/libvirt/images/zhaipool/ubuntu-14.04.4-server-ppc64el.iso \
> --disk /var/lib/libvirt/images/zhaipool/zhai-ubuntu14.04.4.qcow2,format=qcow2 \
> --network network=default \
> --graphics vnc,listen=0.0.0.0 --noautoconsole \
> --os-type=linux --os-variant=ubuntutrusty
其中,--os-variant后面的值使用virt-install --os-variant list查看
[plain] view
plain copy
root@zhaicompute# virt-install --os-variant list
win2k8 : Microsoft Windows Server 2008 (or later)
win2k3 : Microsoft Windows Server 2003
win7 : Microsoft Windows 7 (or later)
vista : Microsoft Windows Vista
winxp64 : Microsoft Windows XP (x86_64)
winxp : Microsoft Windows XP
win2k : Microsoft Windows 2000
openbsd4 : OpenBSD 4.x (or later)
freebsd9 : FreeBSD 9.x
freebsd8 : FreeBSD 8.x
freebsd7 : FreeBSD 7.x
freebsd6 : FreeBSD 6.x
freebsd10 : FreeBSD 10.x (or later)
solaris9 : Sun Solaris 9
solaris11 : Sun Solaris 11 (or later)
solaris10 : Sun Solaris 10
opensolaris : Sun OpenSolaris (or later)
netware6 : Novell Netware 6 (or later)
netware5 : Novell Netware 5
netware4 : Novell Netware 4
msdos : MS-DOS
generic : Generic
altlinux : ALT Linux (or later)
debianwheezy : Debian Wheezy (or later)
debiansqueeze : Debian Squeeze
debianlenny : Debian Lenny
debianetch : Debian Etch
fedora20 : Fedora 20 (or later)
fedora19 : Fedora 19
fedora18 : Fedora 18
fedora17 : Fedora 17
fedora16 : Fedora 16
fedora15 : Fedora 15
fedora14 : Fedora 14
fedora13 : Fedora 13
fedora12 : Fedora 12
fedora11 : Fedora 11
fedora10 : Fedora 10
fedora9 : Fedora 9
fedora8 : Fedora 8
fedora7 : Fedora 7
fedora6 : Fedora Core 6
fedora5 : Fedora Core 5
mes5.1 : Mandriva Enterprise Server 5.1 (or later)
mes5 : Mandriva Enterprise Server 5.0
mandriva2010 : Mandriva Linux 2010 (or later)
mandriva2009 : Mandriva Linux 2009 and earlier
mageia1 : Mageia 1 (or later)
rhel7 : Red Hat Enterprise Linux 7 (or later)
rhel6 : Red Hat Enterprise Linux 6
rhel5.4 : Red Hat Enterprise Linux 5.4 or later
rhel5 : Red Hat Enterprise Linux 5
rhel4 : Red Hat Enterprise Linux 4
rhel3 : Red Hat Enterprise Linux 3
rhel2.1 : Red Hat Enterprise Linux 2.1
sles11 : Suse Linux Enterprise Server 11 (or later)
sles10 : Suse Linux Enterprise Server
opensuse12 : openSuse 12 (or later)
opensuse11 : openSuse 11
ubuntuutopic : Ubuntu 14.10 (Utopic Unicorn) (or later)
ubuntutrusty : Ubuntu 14.04 LTS (Trusty Tahr)
ubuntusaucy : Ubuntu 13.10 (Saucy Salamander)
ubunturaring : Ubuntu 13.04 (Raring Ringtail)
ubuntuquantal : Ubuntu 12.10 (Quantal Quetzal)
ubuntuprecise : Ubuntu 12.04 LTS (Precise Pangolin)
ubuntuoneiric : Ubuntu 11.10 (Oneiric Ocelot)
ubuntunatty : Ubuntu 11.04 (Natty Narwhal)
ubuntumaverick : Ubuntu 10.10 (Maverick Meerkat)
ubuntulucid : Ubuntu 10.04 LTS (Lucid Lynx)
ubuntukarmic : Ubuntu 9.10 (Karmic Koala)
ubuntujaunty : Ubuntu 9.04 (Jaunty Jackalope)
ubuntuintrepid : Ubuntu 8.10 (Intrepid Ibex)
ubuntuhardy : Ubuntu 8.04 LTS (Hardy Heron)
mbs1 : Mandriva Business Server 1 (or later)
virtio26 : Generic 2.6.25 or later kernel with virtio
generic26 : Generic 2.6.x kernel
generic24 : Generic 2.4.x kernel
执行过程:
[plain] view
plain copy
root@zhaicompute# virt-install --virt-type kvm --name zhai-ubuntu --ram 1024 \
> --cdrom=/var/lib/libvirt/images/zhaipool/ubuntu-14.04.4-server-ppc64el.iso \
> --disk /var/lib/libvirt/images/zhaipool/zhai-ubuntu14.04.4.qcow2,format=qcow2 \
> --network network=default \
> --graphics vnc,listen=0.0.0.0 --noautoconsole \
> --os-type=linux --os-variant=ubuntutrusty
Starting install...
Creating domain... | 0 B 00:00
Domain installation still in progress. You can reconnect to
the console to complete the installation process.
root@zhaicompute# ps -ef | grep zhai
libvirt+ 27531 1 99 03:39 ? 00:00:22 qemu-system-ppc64 -enable-kvm -name zhai-ubuntu -S -machine pseries-2.3,accel=kvm,usb=off -m 1024 -realtime mlock=off -smp 1,sockets=1,cores=1,threads=1 -uuid de480a35-4ab5-42e5-b3b6-a47c8b05d9c8 -no-user-config -nodefaults -chardev socket,id=charmonitor,path=/var/lib/libvirt/qemu/zhai-ubuntu.monitor,server,nowait -mon chardev=charmonitor,id=monitor,mode=control -rtc base=utc -no-reboot -boot strict=on -device pci-ohci,id=usb,bus=pci.0,addr=0x2 -device spapr-vscsi,id=scsi0,reg=0x2000 -drive file=/var/lib/libvirt/images/zhaipool/zhai-ubuntu14.04.4.qcow2,if=none,id=drive-scsi0-0-0-0,format=qcow2 -device scsi-hd,bus=scsi0.0,channel=0,scsi-id=0,lun=0,drive=drive-scsi0-0-0-0,id=scsi0-0-0-0,bootindex=2 -drive file=/var/lib/libvirt/images/zhaipool/ubuntu-14.04.4-server-ppc64el.iso,if=none,id=drive-scsi0-0-0-1,readonly=on,format=raw -device scsi-cd,bus=scsi0.0,channel=0,scsi-id=0,lun=1,drive=drive-scsi0-0-0-1,id=scsi0-0-0-1,bootindex=1 -netdev tap,fd=29,id=hostnet0 -device rtl8139,netdev=hostnet0,id=net0,mac=52:54:00:cb:ad:fa,bus=pci.0,addr=0x1 -chardev pty,id=charserial0 -device spapr-vty,chardev=charserial0,reg=0x30000000 -device usb-kbd,id=input0 -device usb-mouse,id=input1 -vnc 0.0.0.0:2 -device VGA,id=video0,vgamem_mb=16,bus=pci.0,addr=0x4 -device virtio-balloon-pci,id=balloon0,bus=pci.0,addr=0x3 -msg timestamp=on
root 27540 23850 0 03:40 pts/8 00:00:00 grep --color=auto zhai
从上看出:virt-install执行后,最终调用的是qemu-system-ppc64命令来创建vm。
一个虚拟机占用一个进程,可以通过进程管理和控制虚拟机。
log日志:
[plain] view
plain copy
root@zhaicompute# ls /var/log/libvirt/qemu/
zhai-ubuntu.log
创建后,查看网络:
[plain] view
plain copy
root@zhaicompute# brctl show
bridge name bridge id STP enabled interfaces
virbr0 8000.5254000f5c96 yes virbr0-nic
vnet0
可看出virbr0上多了一下端口vnet0.
[plain] view
plain copy
virbr0 Link encap:Ethernet HWaddr 52:54:00:0f:5c:96
inet addr:192.168.122.1 Bcast:192.168.122.255 Mask:255.255.255.0
UP BROADCAST RUNNING MULTICAST MTU:1500 Metric:1
RX packets:10646 errors:0 dropped:0 overruns:0 frame:0
TX packets:14645 errors:0 dropped:0 overruns:0 carrier:0
collisions:0 txqueuelen:0
RX bytes:617571 (617.5 KB) TX bytes:20396983 (20.3 MB)
virbr0-nic Link encap:Ethernet HWaddr 52:54:00:0f:5c:96
BROADCAST MULTICAST MTU:1500 Metric:1
RX packets:0 errors:0 dropped:0 overruns:0 frame:0
TX packets:0 errors:0 dropped:0 overruns:0 carrier:0
collisions:0 txqueuelen:500
RX bytes:0 (0.0 B) TX bytes:0 (0.0 B)
vnet0 Link encap:Ethernet HWaddr fe:54:00:7e:60:d0
inet6 addr: fe80::fc54:ff:fe7e:60d0/64 Scope:Link
UP BROADCAST RUNNING MULTICAST MTU:1500 Metric:1
RX packets:10646 errors:0 dropped:0 overruns:0 frame:0
TX packets:17480 errors:0 dropped:0 overruns:0 carrier:0
collisions:0 txqueuelen:500
RX bytes:766615 (766.6 KB) TX bytes:20544635 (20.5 MB)
查看生成的xml配置文件 :
[plain] view
plain copy
# ls -lrt /etc/libvirt/qemu
-rw------- 1 root root 2511 Apr 15 11:25 zhai-ubuntu.xml
zhai-ubuntu.xml内容:
[plain] view
plain copy
# cat /etc/libvirt/qemu/zhai-ubuntu.xml
<!--
WARNING: THIS IS AN AUTO-GENERATED FILE. CHANGES TO IT ARE LIKELY TO BE
OVERWRITTEN AND LOST. Changes to this xml configuration should be made using:
virsh edit zhai-ubuntu
or other application using the libvirt API.
-->
<domain type='kvm'>
<name>zhai-ubuntu</name>
<uuid>0e5684f5-23aa-8568-ed10-52c844b4d85d</uuid>
<memory unit='KiB'>1048576</memory>
<currentMemory unit='KiB'>1048576</currentMemory>
<vcpu placement='static'>2</vcpu>
<os>
<type arch='ppc64le' machine='pseries-2.3'>hvm</type>
<boot dev='cdrom'/>
<boot dev='hd'/>
<bootmenu enable='yes'/>
</os>
<features>
<acpi/>
<apic/>
<pae/>
</features>
<clock offset='utc'/>
<on_poweroff>destroy</on_poweroff>
<on_reboot>restart</on_reboot>
<on_crash>restart</on_crash>
<devices>
<emulator>/usr/bin/kvm</emulator>
<disk type='file' device='disk'>
<driver name='qemu' type='qcow2' cache='none'/>
<source file='/var/lib/libvirt/images/zhaipool/zhai-ubuntu14.04.4.qcow2'/>
<target dev='vda' bus='virtio'/>
<address type='pci' domain='0x0000' bus='0x00' slot='0x03' function='0x0'/>
</disk>
<disk type='file' device='disk'>
<driver name='qemu' type='raw' cache='none'/>
<source file='/var/lib/libvirt/images/zhaipool/ubuntu-14.04.4-server-ppc64el.iso'/>
<target dev='sda' bus='usb'/>
</disk>
<controller type='usb' index='0'>
<address type='pci' domain='0x0000' bus='0x00' slot='0x02' function='0x0'/>
</controller>
<controller type='pci' index='0' model='pci-root'/>
<interface type='network'>
<mac address='52:54:00:7e:60:d0'/>
<source network='default'/>
<model type='virtio'/>
<address type='pci' domain='0x0000' bus='0x00' slot='0x01' function='0x0'/>
</interface>
<serial type='pty'>
<target port='0'/>
<address type='spapr-vio' reg='0x30000000'/>
</serial>
<console type='pty'>
<target type='serial' port='0'/>
<address type='spapr-vio' reg='0x30000000'/>
</console>
<input type='tablet' bus='usb'/>
<input type='keyboard' bus='usb'/>
<input type='mouse' bus='usb'/>
<graphics type='vnc' port='-1' autoport='yes'/>
<video>
<model type='vga' vram='16384' heads='1'/>
<address type='pci' domain='0x0000' bus='0x00' slot='0x05' function='0x0'/>
</video>
<memballoon model='virtio'>
<address type='pci' domain='0x0000' bus='0x00' slot='0x04' function='0x0'/>
</memballoon>
</devices>
</domain>
基于KVM建立的虚拟机相关文件默认存放位置
kvm虚拟机配置文件位置/etc/libvirt/qemu/ <---都是xml文件
kvm虚拟机文件位置:/var/lib/libvirt/images/ <---可以在建立虚拟机时指定
建立的虚拟机在运行时相关文件及存放位置
在虚拟机运行时,会在/var/run/libvirt/qemu目录下存放虚拟机的pid文件和配置文件,配置文件与/etc/libvirt/qemu目录下对应的虚拟机文件相同,pid文件保存有此虚拟机进程号。虚拟机的日志文件存放在/var/log/libvirt/qemu目录下,每个虚拟机一个,文件名称为:虚拟机名称(或UUID)+“.log”
virt-install在生产虚拟机的最后调用virt-viewer打开虚拟机图形界面,进行操作系统的安装,可以通过vnc或者virt-manager打开虚拟机图形界面,继续完成guest操作系统的安装即可。
3.3 virsh vncdisplay命令
Use the virsh vncdisplay vm-name command to get the VNC port number.[plain] view
plain copy
root@zhaicompute# virsh vncdisplay zhai-ubuntu
:2
root@zhaicompute# ps -ef | grep vnc
libvirt+ 27531 1 99 03:39 ? 00:09:35 qemu-system-ppc64 -enable-kvm -name zhai-ubuntu -S -machine pseries-2.3,accel=kvm,usb=off -m 1024 -realtime mlock=off -smp 1,sockets=1,cores=1,threads=1 -uuid de480a35-4ab5-42e5-b3b6-a47c8b05d9c8 -no-user-config -nodefaults -chardev socket,id=charmonitor,path=/var/lib/libvirt/qemu/zhai-ubuntu.monitor,server,nowait -mon chardev=charmonitor,id=monitor,mode=control -rtc base=utc -no-reboot -boot strict=on -device pci-ohci,id=usb,bus=pci.0,addr=0x2 -device spapr-vscsi,id=scsi0,reg=0x2000 -drive file=/var/lib/libvirt/images/zhaipool/zhai-ubuntu14.04.4.qcow2,if=none,id=drive-scsi0-0-0-0,format=qcow2 -device scsi-hd,bus=scsi0.0,channel=0,scsi-id=0,lun=0,drive=drive-scsi0-0-0-0,id=scsi0-0-0-0,bootindex=2 -drive file=/var/lib/libvirt/images/zhaipool/ubuntu-14.04.4-server-ppc64el.iso,if=none,id=drive-scsi0-0-0-1,readonly=on,format=raw -device scsi-cd,bus=scsi0.0,channel=0,scsi-id=0,lun=1,drive=drive-scsi0-0-0-1,id=scsi0-0-0-1,bootindex=1 -netdev tap,fd=29,id=hostnet0 -device rtl8139,netdev=hostnet0,id=net0,mac=52:54:00:cb:ad:fa,bus=pci.0,addr=0x1 -chardev pty,id=charserial0 -device spapr-vty,chardev=charserial0,reg=0x30000000 -device usb-kbd,id=input0 -device usb-mouse,id=input1 -vnc 0.0.0.0:2 -device VGA,id=video0,vgamem_mb=16,bus=pci.0,addr=0x4 -device virtio-balloon-pci,id=balloon0,bus=pci.0,addr=0x3 -msg timestamp=on
3.4 在本机上使用vncviewer或tigervnc连接
qemu不使用Linux下的vncserver提供vnc服务,因此在此服务没有启动的情况下,也能通过vnc客户端连接到虚拟机。在win7下,打开vnc-viewer,输入virt-install命令所在的服务器IP与所安装的虚拟机据点用的vnc端口号0;
点击“OK”,进入安装界面
安装完成后,使用命令virsh start vm-name启动此虚拟机:
[html] view
plain copy
root@ctler:~# virsh list --all
Id Name State
----------------------------------------------------
- net shut off
root@ctler:~# virsh start net
Domain net started
root@ctler:~# virsh list --all
Id Name State
----------------------------------------------------
5 net running
在linux下:
安装完成后,登录虚机,查看IP
4 本地安装示例
给guest主机划分物理机分区lvcreate -L20G -n host.demo.com kvm-storage
下载镜像并loop到本地:
wget http://mirrors.manchester.icecolo.com/centos/5.5/isos/x86_64/CentOS-5.5-x86_64-bin-1of8.iso
mkdir /mnt/centos55
mount -o loop CentOS-5.5-x86_64-bin-1of8.iso /mnt/centos55/
通过location本地安装,并通过console管理:
virt-install
-n host.demo.com
-r 512
--vcpus=1
--os-variant=rhel5.4
--accelerate
--nographics
-v
-l /mnt/centos55/
-w bridge:br1
--disk path=/dev/kvm-storage/host.demo.com
-x "console=ttyS0"
管理时可以通过
#查看guest id、name 及状态
virsh list --all
#通过console连接查看
virsh console id或name
#连接完成后会要求输入用户名和密码
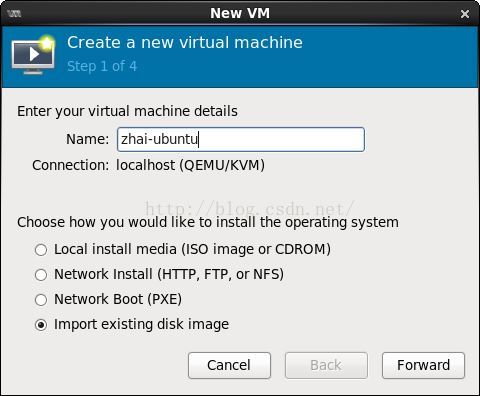
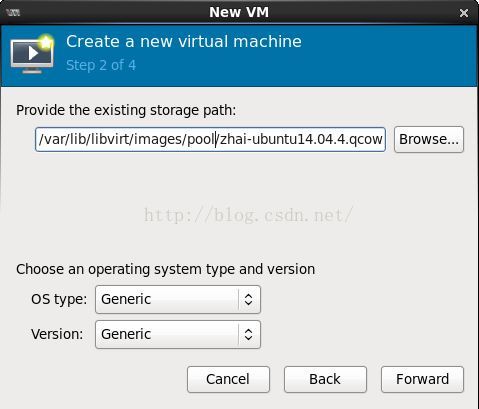
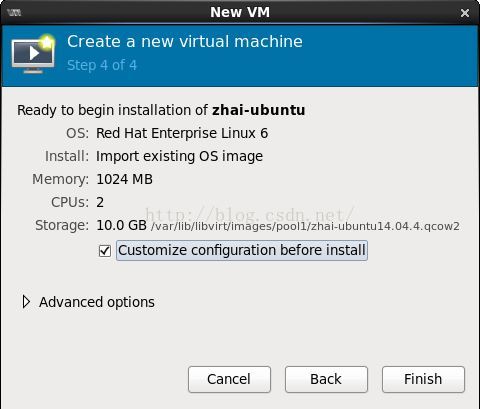
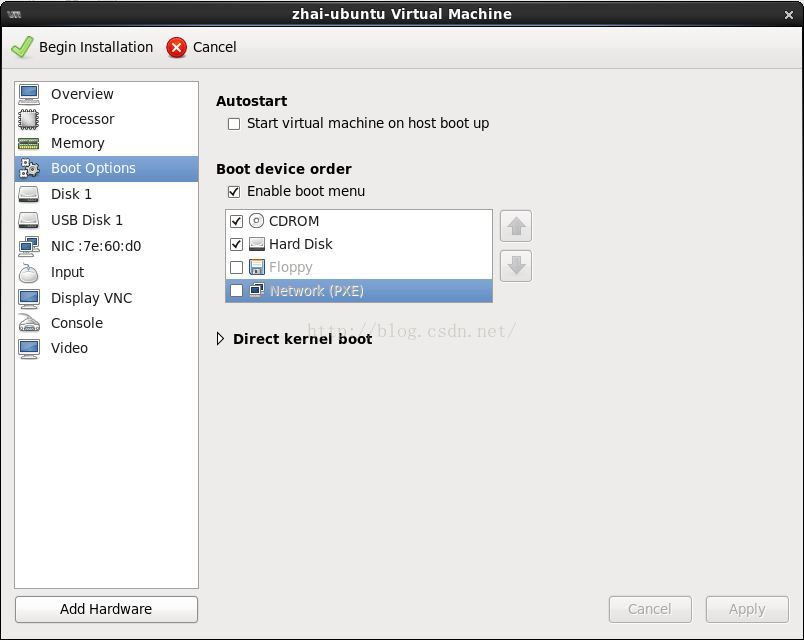
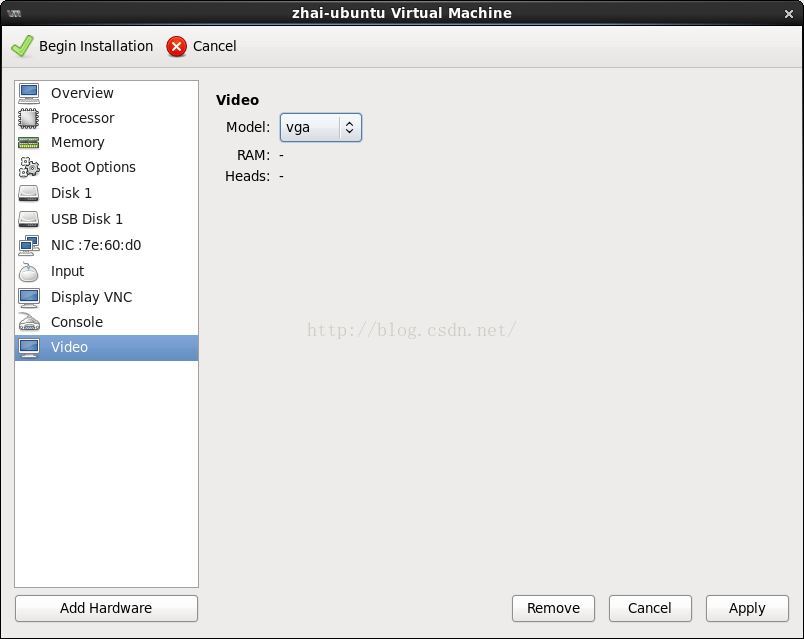
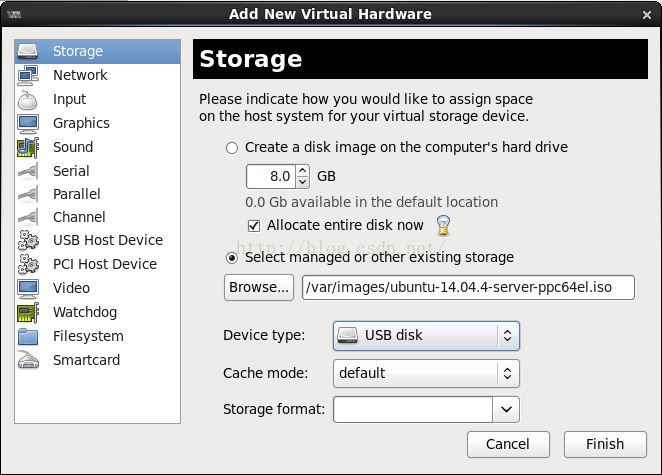
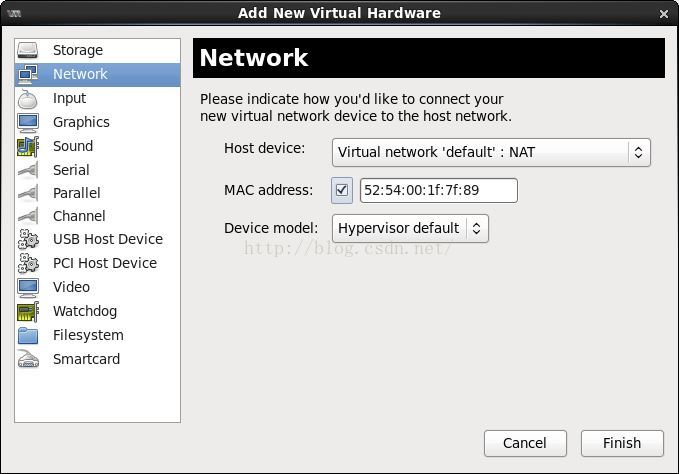
5 virt-manager图形安装
通过图形向导界面也可以完成安装,virt-manager可以通过在终端中输入virt-manager或者从菜单应用程序->系统工具中打开。参考:
1 virt-install 使用说明: http://blog.csdn
2 kvm, qemu-kvm以及libvirt之间的关系图:http://blog.csdn.net/zhaihaifei/article/details/51018113
3 kvm虚拟化之virt-install: http://www.361way.com/virt-install/2721.html
4 kvm显示VM的IP:http://www.chengxuyuans.com/Unix/83251.html
5 virbr0: http://blog.chinaunix.Net/uid-26000137-id-3723948.html

相关文章推荐
- 使用virt-install手动创建qcow2镜像并安装ISO
- 在xen上使用virt-install命令创建虚拟机并安装操作系统
- 使用本地Debian ISO镜像作为网络安装源
- 使用VIRT-MANAGER工具创建OPENSTACK使用的镜像
- Centos7手动部署Openstack Mitaka版安装配置--(八)命令创建并使用实例
- 使用virt-install创建虚拟机(已测OK)
- python 使用pip install 手动安装本地包的方法
- 使用virt-install 创建Xen虚拟机
- 使用virt-install安装kvm虚拟机时需要的问题
- 安装docker并使用默认镜像创建一个容器
- 使用virt-manager创建openstack qcow2镜像
- KVM存储池与存储卷,使用virt-install创建虚拟机
- 使用 CreateInstallMedia 创建 苹果系统安装U盘
- 使用virt-manager工具创建openstack使用的镜像
- 手动制作openstack、libvirt上的centos7镜像(存储使用qcow2)
- xen虚拟化使用virt-install命令安装虚拟机
- KVM存储池与存储卷,使用virt-install创建虚拟机
- Linux 应用札记【一】——使用ISO镜像创建USB引导盘
- Fedora20在神州战神K650D1安装过程,使用netinstall和Dvd.iso镜像安装。
- 使用CentOS7 ISO镜像作为yum安装源