自定义控件Camera+Matrix实现3D旋转及百叶窗效果(雷惊风)
2017-06-29 00:40
573 查看
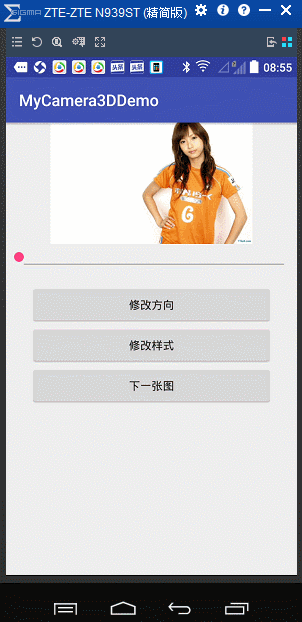
上篇文章说到了用ViewPager实现3D旋转效果,本篇文章说一下自定义View+Camera+Matrix来实现更炫酷一点的效果,3D及百叶窗效果,其实还可以实现许多其他的效果。最后会将实例代码附在文章最后。先看一下最终实现的一个效果:
这里说的Camera并不是相机,而是android.graphics.Camera类,它内部包含一个Matrix,它的源码很简单,也就不到200行,可以看一下:
可以看到在它的内部,有一些翻转平移的native方法,看名字就知道它的意思,我们就用这些方法来实现我们想要的效果。我们开始撸码吧。
首先我们先来实现我们的2D,3D效果,同样想来看一下效果:
创建一个类继承我们的View类,实现构造方法在构造方法中初始化数据,看一下我们要想实现我们的功能需要的成员变量:
上边每一个属性所代表的意思都已经添加了注释,这里滚动模式用到了enum类来表示。因为我们在绘制时会用到Paint、Matrix及Camera,所以我们需要在构造方法中初始化我们的工具类,看一下源码:
我们需要对外开放一些设置项以便可以从外部设置我们的View属性,比如我们添加要执行动画的Bitmap、动画执行的方向、在百叶窗动画中每张图片需要被分割的分数、动画执行样式(2D、3D及百叶窗),动画执行的程度(执行到什么程度了)等等信息,看一下源码对外提供的方法:
这里在设置百叶窗效果分割图片份数的时候有一个partitionBitmaps()方法,在这个方法中我们对所有添加进来的图片进行一个分隔操作,后面会分析,然后就是在设置动画转动程度的方法中我们通过不同方向计算了当前degreeValue值对比整个动画旋转角度的mAxisX及mAxisY,当是百叶窗效果的时候,我们整个动画是旋转了180度的,而3D效果则只需要旋转90度。我们这个degreeValue如果是百叶窗取值范围会是0-180度之间,3D取值范围会在0-90度之间。接下来看一下我们在onMeasure()方法中做了哪些操作:
我们调用super.onMeasure()方法来进行测量自身,获取测量的宽高,如果View的宽高都不等于0我们通过for循环去处理我们通过addBitmap()方法添加进来的图片进行缩放处理,看一下缩放代码:
就是根据当前View的宽高与我们设置进来的图片的宽高比通过matrix来缩放bitmap。替换掉原来的图片。然后设置我们的上一张图片与下一张图片,代码如下:
也很简单,就是当向前越界时置为最后一张,向后越界时置为第一张,实现循环动画效果。接下来判断是不是百叶窗效果,如果是,则需要对图片进行分割,之前在设置分割数量时也调用了这个方法,下边来看一下具体实现:
判断是否存在需要分割的图片并且当前View宽高都大于0,通过要分割的分数与当前View的宽高得到被分割的每一份图片宽高averageWidth、averageHeight
,然后创建我们的bitmaps二维数组存放我们每一个被分割的图片,二维数组的第一项表示被分割的是list中的第几张图片,二维数组的第二项表示当前图片被分割成的每一个小图片。这里为了条理更加清晰,分为了是百叶窗效果与不是百叶窗效果,对于我们的功能只需要看百叶窗逻辑就好。还处理了是横向滚动还是竖向滚动的分割。
图片已经准备好了,那么我们的重点就来了,看一下我们最终的onDraw()方法吧:
这里2D、3D效果统一实现了,因为他们两个其实是一样的,只不过一个有转动效果,一个没有。看一下我们的具体实现draw3D(canvas)吧:
我们首先获取了当前显示的图片与下一张将要显示的图片,判断方向,重点是根据不同方向通过Camera与Matrix实现旋转与平移,重点逻辑的代码已经加好注释,这里就不做过多解释,到这里我们实现2D、3D功能的主要工作就算基本完成了,接下来,我们在MainActivity的布局文件中定义我们的自定义View,代码如下:
然后在MainActivity中简单处理就可:
这样我们的2D、3D效果就完成了。接下来看一下百叶窗效果的实现,也就是在自定义View的onDraw(Canvas canvas)方法中调用的drawJalousie()方法,先看效果吧:
上实现逻辑吧:
这样便实现了上面的百叶窗效果,到这里,我们想要实现的所有主功能就都有了,那么大家看一开始的图片,有一个下一站图的按钮,点击会执行整个动画过程,而不需要滑动我们的Seekbar,这个功能也好实现,这里顺便说一下,在MainActivity中实现方法:
这里就用到了属性动画ValueAnimator,并添加了两个监听,看一下监听的实现:
其实就是一个动画执行过程中,不断的去更改我们的degreeValue值去调用重绘方法间接调用onDraw()方法进行不停的绘制,达到进行整个动画的目的,最后一个监听是监听动画结束后的初始化工作,也很简单。这样就完成了我们的功能,在运行看一下效果吧:
好了,我们所有的功能都完成了,点击下载源码。
这里说的Camera并不是相机,而是android.graphics.Camera类,它内部包含一个Matrix,它的源码很简单,也就不到200行,可以看一下:
/*
* Copyright (C) 2006 The Android Open Source Project
*
* Licensed under the Apache License, Version 2.0 (the "License");
* you may not use this file except in compliance with the License.
* You may obtain a copy of the License at
*
*      http://www.apache.org/licenses/LICENSE-2.0 *
* Unless required by applicable law or agreed to in writing, software
* distributed under the License is distributed on an "AS IS" BASIS,
* WITHOUT WARRANTIES OR CONDITIONS OF ANY KIND, either express or implied.
* See the License for the specific language governing permissions and
* limitations under the License.
*/

package android.graphics;

/**
* A camera instance can be used to compute 3D transformations and
* generate a matrix that can be applied, for instance, on a
* {@link Canvas}.
*/
public class Camera {
private Matrix mMatrix;

/**
* Creates a new camera, with empty transformations.
*/
public Camera() {
nativeConstructor();
}

/**
* Saves the camera state. Each save should be balanced
* with a call to {@link #restore()}.
*
* @see #save()
*/
public native void save();

/**
* Restores the saved state, if any.
*
* @see #restore()
*/
public native void restore();

/**
* Applies a translation transform on all three axis.
*
* @param x The distance to translate by on the X axis
* @param y The distance to translate by on the Y axis
* @param z The distance to translate by on the Z axis
*/
public native void translate(float x, float y, float z);

/**
* Applies a rotation transform around the X axis.
*
* @param deg The angle of rotation around the X axis, in degrees
*
* @see #rotateY(float)
* @see #rotateZ(float)
* @see #rotate(float, float, float)
*/
public native void rotateX(float deg);

/**
* Applies a rotation transform around the Y axis.
*
* @param deg The angle of rotation around the Y axis, in degrees
*
* @see #rotateX(float)
* @see #rotateZ(float)
* @see #rotate(float, float, float)
*/
public native void rotateY(float deg);

/**
* Applies a rotation transform around the Z axis.
*
* @param deg The angle of rotation around the Z axis, in degrees
*
* @see #rotateX(float)
* @see #rotateY(float)
* @see #rotate(float, float, float)
*/
public native void rotateZ(float deg);

/**
* Applies a rotation transform around all three axis.
*
* @param x The angle of rotation around the X axis, in degrees
* @param y The angle of rotation around the Y axis, in degrees
* @param z The angle of rotation around the Z axis, in degrees
*
* @see #rotateX(float)
* @see #rotateY(float)
* @see #rotateZ(float)
*/
public native void rotate(float x, float y, float z);

/**
* Gets the x location of the camera.
*
* @see #setLocation(float, float, float)
*/
public native float getLocationX();

/**
* Gets the y location of the camera.
*
* @see #setLocation(float, float, float)
*/
public native float getLocationY();

/**
* Gets the z location of the camera.
*
* @see #setLocation(float, float, float)
*/
public native float getLocationZ();

/**
* Sets the location of the camera. The default location is set at
* 0, 0, -8.
*
* @param x The x location of the camera
* @param y The y location of the camera
* @param z The z location of the camera
*/
public native void setLocation(float x, float y, float z);

/**
* Computes the matrix corresponding to the current transformation
* and copies it to the supplied matrix object.
*
* @param matrix The matrix to copy the current transforms into
*/
public void getMatrix(Matrix matrix) {
nativeGetMatrix(matrix.native_instance);
}

/**
* Computes the matrix corresponding to the current transformation
* and applies it to the specified Canvas.
*
* @param canvas The Canvas to set the transform matrix onto
*/
public void applyToCanvas(Canvas canvas) {
if (canvas.isHardwareAccelerated()) {
if (mMatrix == null) mMatrix = new Matrix();
getMatrix(mMatrix);
canvas.concat(mMatrix);
} else {
nativeApplyToCanvas(canvas.getNativeCanvasWrapper());
}
}

public native float dotWithNormal(float dx, float dy, float dz);

protected void finalize() throws Throwable {
try {
nativeDestructor();
native_instance = 0;
} finally {
super.finalize();
}
}

private native void nativeConstructor();
private native void nativeDestructor();
private native void nativeGetMatrix(long native_matrix);
private native void nativeApplyToCanvas(long native_canvas);

long native_instance;
}
可以看到在它的内部,有一些翻转平移的native方法,看名字就知道它的意思,我们就用这些方法来实现我们想要的效果。我们开始撸码吧。
首先我们先来实现我们的2D,3D效果,同样想来看一下效果:
创建一个类继承我们的View类,实现构造方法在构造方法中初始化数据,看一下我们要想实现我们的功能需要的成员变量:
private int mViewWidth, mViewHeight;//My3DView的宽高;
private Paint mPaint;//在Canvas上绘制图片时用到的画笔;
private Camera mCamera;//实现旋转的Camera;
private Matrix matrix;//实现移动的matrix;
private float mRotateDegree = 0;//当前动画旋转的程度值;
private float mAxisX = 0, mAxisY = 0;//X方向旋转轴   Y方向旋转轴
private int mPartNumber = 1;//在百叶窗中每张图片需要分成的份数;
private List<Bitmap> bitmapList;//存放所有要展示的图片的List;
private Bitmap[][] bitmaps;//百叶窗中每张图片被分成的小图片;
private int direction = 1;//滚动方向:1竖直方向 其他为水平方向
int averageWidth = 0, averageHeight = 0;//分成小图片的平均宽高;

private RollMode rollMode = RollMode.Jalousie;//默认滚动模式为百叶窗;
private int preIndex = 0, currIndex = 0, nextIndex = 0;//当前展示的图片下标及前一张后一张的下标;
private ValueAnimator valueAnimator;//属性动画;
private int rollDuration = 1 * 1000;//动画执行时间;
//正在翻转
private boolean rolling;//是否正在旋转中;

//滚动模式
public enum RollMode {
//  没有效果 3D整体滚动 百叶窗
Roll2D, Whole3D, Jalousie;
}
上边每一个属性所代表的意思都已经添加了注释,这里滚动模式用到了enum类来表示。因为我们在绘制时会用到Paint、Matrix及Camera,所以我们需要在构造方法中初始化我们的工具类,看一下源码:
public My3DView(Context context) {
this(context, null);
}

public My3DView(Context context, @Nullable AttributeSet attrs) {
this(context, attrs, 0);
}

public My3DView(Context context, @Nullable AttributeSet attrs, int defStyleAttr) {
super(context, attrs, defStyleAttr);
init();
}

/**
* 初始化工作;
*/
private void init() {
bitmapList = new ArrayList<>();
matrix = new Matrix();
mCamera = new Camera();
mPaint = new Paint(Paint.ANTI_ALIAS_FLAG);
}
我们需要对外开放一些设置项以便可以从外部设置我们的View属性,比如我们添加要执行动画的Bitmap、动画执行的方向、在百叶窗动画中每张图片需要被分割的分数、动画执行样式(2D、3D及百叶窗),动画执行的程度(执行到什么程度了)等等信息,看一下源码对外提供的方法:
/**
* 设置滚动方向;
*/
public void setDirection(int directionType) {
direction = directionType;
}

/**
* 添加图片;
*
* @param bitmap
*/
public void addBitmap(Bitmap bitmap) {
bitmapList.add(bitmap);
}

/**
* 设置分割成的分数;
*
* @param num
*/
public void setPartitionNums(int num) {
mPartNumber = num;
partitionBitmaps();
}

/**
* 设置滚动样式;
*
* @param type
*/
public void set3DType(RollMode type) {
rollMode = type;
}

/**
* 设置当前旋转程度;
*
* @param degreeValue
*/
public void setDegreeValue(float degreeValue) {
this.mRotateDegree = degreeValue;
if (direction != 1)
mAxisX = degreeValue / (float) (rollMode == RollMode.Jalousie ? 180 : 90) * mViewWidth;
else
mAxisY = degreeValue / (float) (rollMode == RollMode.Jalousie ? 180 : 90) * mViewHeight;
invalidate();
}
这里在设置百叶窗效果分割图片份数的时候有一个partitionBitmaps()方法,在这个方法中我们对所有添加进来的图片进行一个分隔操作,后面会分析,然后就是在设置动画转动程度的方法中我们通过不同方向计算了当前degreeValue值对比整个动画旋转角度的mAxisX及mAxisY,当是百叶窗效果的时候,我们整个动画是旋转了180度的,而3D效果则只需要旋转90度。我们这个degreeValue如果是百叶窗取值范围会是0-180度之间,3D取值范围会在0-90度之间。接下来看一下我们在onMeasure()方法中做了哪些操作:
//获取当前View宽高,根据宽高缩放图片;
@Override
protected void onMeasure(int widthMeasureSpec, int heightMeasureSpec) {
super.onMeasure(widthMeasureSpec, heightMeasureSpec);
mViewWidth = getMeasuredWidth();
mViewHeight = getMeasuredHeight();
if (mViewWidth != 0 && mViewHeight != 0) {
for (int i = 0; i < bitmapList.size(); i++) {
bitmapList.set(i, zoomBitmap(bitmapList.get(i)));
}
}
//设置当前图片的上一张与下一张;
setBitmapIndex();
//需要分割;
if (rollMode == Jalousie)
partitionBitmaps();
}
我们调用super.onMeasure()方法来进行测量自身,获取测量的宽高,如果View的宽高都不等于0我们通过for循环去处理我们通过addBitmap()方法添加进来的图片进行缩放处理,看一下缩放代码:
/**
* 缩放图片;
*
* @param bit
* @return
*/
private Bitmap zoomBitmap(Bitmap bit) {
if (bit == null)
return null;
int bitmapW = bit.getWidth();
int bitmapH = bit.getHeight();
float scaleW = (float) mViewWidth / bitmapW;
float scaleH = (float) mViewHeight / bitmapH;
Matrix matrix = new Matrix();
matrix.postScale(scaleW, scaleH);
return Bitmap.createBitmap(bit, 0, 0, bitmapW, bitmapH, matrix, false);
}
就是根据当前View的宽高与我们设置进来的图片的宽高比通过matrix来缩放bitmap。替换掉原来的图片。然后设置我们的上一张图片与下一张图片,代码如下:
private void setBitmapIndex() {
preIndex = currIndex - 1;
if (preIndex < 0) {
preIndex = bitmapList.size() - 1;
}
nextIndex = currIndex + 1;
if (nextIndex > bitmapList.size() - 1)
nextIndex = 0;
}
也很简单,就是当向前越界时置为最后一张,向后越界时置为第一张,实现循环动画效果。接下来判断是不是百叶窗效果,如果是,则需要对图片进行分割,之前在设置分割数量时也调用了这个方法,下边来看一下具体实现:
/**
* 处理分割bitmap;
*/
private void partitionBitmaps() {
if (bitmapList == null || bitmapList.size() == 0) return;
//下边在分割时会用到viewWidth与viewHeigth,所以需要在这里进行判断;
if (mViewWidth == 0 || mViewHeight == 0) return;
averageHeight = mViewHeight / mPartNumber;
averageWidth = mViewWidth / mPartNumber;
bitmaps = new Bitmap[bitmapList.size()][mPartNumber];
for (int i = 0; i < bitmapList.size(); i++) {
Bitmap bit = bitmapList.get(i);
for (int j = 0; j < mPartNumber; j++) {
Bitmap bitDebris;
//百叶窗;
if (rollMode == RollMode.Jalousie) {
//如果是竖向的百叶窗,需要竖向分割,最终绕Y轴转动;
if (direction == 1) {
bitDebris = Bitmap.createBitmap(bit, j * averageWidth, 0, averageWidth, mViewHeight);
} else
bitDebris = Bitmap.createBitmap(bit, 0, j * averageHeight, mViewWidth, averageHeight);
} else {
if (direction == 1)
bitDebris = Bitmap.createBitmap(bit, j * averageWidth, 0, averageWidth, mViewHeight);
else
bitDebris = Bitmap.createBitmap(bit, 0, j * averageHeight, mViewWidth, averageHeight);
}
bitmaps[i][j] = bitDebris;
}
}
setBitmapIndex();

}
判断是否存在需要分割的图片并且当前View宽高都大于0,通过要分割的分数与当前View的宽高得到被分割的每一份图片宽高averageWidth、averageHeight
,然后创建我们的bitmaps二维数组存放我们每一个被分割的图片,二维数组的第一项表示被分割的是list中的第几张图片,二维数组的第二项表示当前图片被分割成的每一个小图片。这里为了条理更加清晰,分为了是百叶窗效果与不是百叶窗效果,对于我们的功能只需要看百叶窗逻辑就好。还处理了是横向滚动还是竖向滚动的分割。
图片已经准备好了,那么我们的重点就来了,看一下我们最终的onDraw()方法吧:
@Override
public void draw(Canvas canvas) {
super.draw(canvas);
switch (rollMode) {
case Whole3D:
case Roll2D:
draw3D(canvas);
break;
case Jalousie:
drawJalousie(canvas);
break;
}
}
这里2D、3D效果统一实现了,因为他们两个其实是一样的,只不过一个有转动效果,一个没有。看一下我们的具体实现draw3D(canvas)吧:
/**
* 绘制3D效果;
*
* @param canvas
*/
private void draw3D(Canvas canvas) {
//初始
Bitmap currBitmap = bitmapList.get(currIndex);
Bitmap nextBitmap = bitmapList.get(nextIndex);
canvas.save();
//竖向转动
if (direction == 1) {
mCamera.save();
//我们首先设置当前正在显示的图片的转动动画效果,如果是3D效果,设置旋转角度,
//因为竖向转动,我们需要绕X轴旋转,rotateX(float deg)中deg参数为正时,会向屏幕外转动,
// 当前需要向屏幕内测转动当前显示的图片,所以设置为-mRotateDegree;2D效果没有转动效果,所以设置转动效果为0;
if (rollMode == Whole3D)
mCamera.rotateX(-mRotateDegree);
else
mCamera.rotateX(0);
//获取camera中的matrix;
mCamera.getMatrix(matrix);
//不在使用camera需要复原;
mCamera.restore();
//使用matrix前乘移动,也就是在Camera转动前移动matrix,因为Camera转动是以View左上角为原点转动的,
// 我们旋转时是以当前图片的上边缘为旋转轴来向屏幕内正着转动,所以在转动前我们需要先将矩阵向左移动View的1/2宽度,
// 因为是以上边缘为轴,所以高度不用动;当旋转完后,我们需要将camera所在矩阵还原到原来位置,
// 所以我们需要向右移动1/2View宽度;因为在旋转的过程中我们当前的View需要有一下向下移动的程度,因为之前我们已经计算好,
// 这个度会随着我们的滚动而逐渐变大,也就是我们之前算好的mAxisY,最后在我们的canvas上边绘制我们当前图片就好。
matrix.preTranslate(-mViewWidth / 2, 0);
matrix.postTranslate(mViewWidth / 2, mAxisY);
canvas.drawBitmap(currBitmap, matrix, mPaint);

matrix.reset();
mCamera.save();
//如果是3D效果,因为竖向滚动,下一张图片,是从90度开始一直旋转到0度的一个过程,所以这里需要90-mRotateDegree;
if (rollMode == Whole3D)
mCamera.rotateX(90 - mRotateDegree);
else
mCamera.rotateX(0);
mCamera.getMatrix(matrix);
mCamera.restore();
//View宽度针对X轴的移动与上边是一样的,看一下高度,因为我们将要出现的这张图片是从当前View的上部分出来的,
// 所以我们需要现将即将显示的图片移动到-mViewHeight的高度,然后在一点一点向下移动,最终到达当前View的高度;
//最后绘制我们即将显示的图片;
matrix.preTranslate(-mViewWidth / 2, -mViewHeight);//0
matrix.postTranslate(mViewWidth / 2, mAxisY);//mViewHeight / 2 + mAxisY
canvas.drawBitmap(nextBitmap, matrix, mPaint);
} else {
//以下为横向滚动的2D、3D效果实现,与竖向滚动原理一样;
mCamera.save();
if (rollMode == Whole3D)
mCamera.rotateY(mRotateDegree);
else
mCamera.rotateY(0);
mCamera.getMatrix(matrix);
mCamera.restore();

matrix.preTranslate(0, -mViewHeight / 2);
matrix.postTranslate(mAxisX, mViewHeight / 2);
canvas.drawBitmap(currBitmap, matrix, mPaint);

mCamera.save();
if (rollMode == Whole3D)
mCamera.rotateY(-(90 - mRotateDegree));
else
mCamera.rotateY(0);
mCamera.getMatrix(matrix);
mCamera.restore();

matrix.preTranslate(-mViewWidth, -mViewHeight / 2);
matrix.postTranslate(mAxisX, mViewHeight / 2);
canvas.drawBitmap(nextBitmap, matrix, mPaint);

}

canvas.restore();
}
我们首先获取了当前显示的图片与下一张将要显示的图片,判断方向,重点是根据不同方向通过Camera与Matrix实现旋转与平移,重点逻辑的代码已经加好注释,这里就不做过多解释,到这里我们实现2D、3D功能的主要工作就算基本完成了,接下来,我们在MainActivity的布局文件中定义我们的自定义View,代码如下:
<?xml version="1.0" encoding="utf-8"?>
<LinearLayout xmlns:android="http://schemas.android.com/apk/res/android"
android:layout_width="match_parent"
android:layout_height="match_parent"
android:orientation="vertical"
android:gravity="center_horizontal">

<com.jason.mycamera3ddemo.My3DView
android:id="@+id/my3dView"
android:layout_width="250dp"
android:layout_height="150dp"
/>

<SeekBar
android:id="@+id/seekbar"
android:layout_width="match_parent"
android:layout_height="50dp"
/>
<Button
android:layout_width="300dp"
android:layout_height="50dp"
android:onClick="changeDirection"
android:text="修改方向" />
<Button
android:layout_width="300dp"
android:layout_height="50dp"
android:onClick="changeType"
android:text="修改样式" />
<Button
android:layout_width="300dp"
android:layout_height="50dp"
android:onClick="toNext"
android:text="下一张图"/>

</LinearLayout>
然后在MainActivity中简单处理就可:
public class MainActivity extends AppCompatActivity {
My3DView my3dView;
SeekBar seekbar;
List<My3DView.RollMode> modeList = new ArrayList<>();
int modeCount = 0;

@Override
protected void onCreate(Bundle savedInstanceState) {
super.onCreate(savedInstanceState);
setContentView(R.layout.activity_main);
saveMode();
my3dView = (My3DView) findViewById(R.id.my3dView);
seekbar = (SeekBar) findViewById(R.id.seekbar);
Bitmap bitmap1 = BitmapFactory.decodeResource(getResources(), R.drawable.a);
Bitmap bitmap2 = BitmapFactory.decodeResource(getResources(), R.drawable.b);
Bitmap bitmap3 = BitmapFactory.decodeResource(getResources(), R.drawable.c);
Bitmap bitmap4 = BitmapFactory.decodeResource(getResources(), R.drawable.d);
Bitmap bitmap5 = BitmapFactory.decodeResource(getResources(), R.drawable.e);
my3dView.addBitmap(bitmap1);
my3dView.addBitmap(bitmap2);
my3dView.addBitmap(bitmap3);
my3dView.addBitmap(bitmap4);
my3dView.addBitmap(bitmap5);
my3dView.setDirection(0);
my3dView.setPartitionNums(5);
//        my3dView.set3DType(My3DView.RollMode.Jalousie);
//        seekbar.setMax(180);
//        my3dView.set3DType(My3DView.RollMode.Whole3D);
//        seekbar.setMax(90);
my3dView.set3DType(My3DView.RollMode.Roll2D);
seekbar.setMax(90);
seekbar.setOnSeekBarChangeListener(new SeekBar.OnSeekBarChangeListener() {
@Override
public void onProgressChanged(SeekBar seekBar, int progress, boolean fromUser) {
my3dView.setDegreeValue(progress);
}

@Override
public void onStartTrackingTouch(SeekBar seekBar) {

}

@Override
public void onStopTrackingTouch(SeekBar seekBar) {

}
});

}

private void saveMode() {
modeList.add(My3DView.RollMode.Roll2D);
modeList.add(My3DView.RollMode.Whole3D);
modeList.add(My3DView.RollMode.Jalousie);
//        modeList.add(My3DView.RollMode.Jalousie);
//        modeList.add(My3DView.RollMode.Jalousie);
}

public void toNext(View view) {
}

public void changeDirection(View view) {
my3dView.changeDirection();
}

public void changeType(View view) {
my3dView.changeModeType(modeList.get(modeCount));
modeCount+=1;
if (modeCount > modeList.size()-1)
modeCount = 0;
}
}
这样我们的2D、3D效果就完成了。接下来看一下百叶窗效果的实现,也就是在自定义View的onDraw(Canvas canvas)方法中调用的drawJalousie()方法,先看效果吧:
上实现逻辑吧:
/**
* 绘制百叶窗效果;
*
* @param canvas
*/
private void drawJalousie(Canvas canvas) {
canvas.save();
for (int i = 0; i < mPartNumber; i++) {
//获取当前显示与即将显示的图片的每一部分图片
Bitmap currBitmap = bitmaps[currIndex][i];
Bitmap nextBitmap = bitmaps[nextIndex][i];

//小于90度只操作当前显示的图片;
if (mRotateDegree < 90) {
//纵向小于90度,因为没有显示出即将显示的图片,所以只需旋转第一张图片;
if (direction == 1) {
mCamera.save();
//竖向的时候,为竖向分割,绕Y轴旋转;
mCamera.rotateY(mRotateDegree);
mCamera.getMatrix(matrix);
mCamera.restore();
//matrix向左向上是负的;因为旋转是按自身的中轴转动,所以首先移动自己的中心点到Camera原点,
//最后移动恢复原位置,为了并排显示,需要加上每一份的宽度;最终绘制当前显示图片的每一小部分图片;
matrix.preTranslate(-currBitmap.getWidth() / 2, -currBitmap.getHeight() / 2);
matrix.postTranslate(currBitmap.getWidth() / 2 + i * averageWidth, currBitmap.getHeight() / 2);
canvas.drawBitmap(currBitmap, matrix, mPaint);
} else {
mCamera.save();
mCamera.rotateX(mRotateDegree);
mCamera.getMatrix(matrix);
mCamera.restore();
//matrix向左向上是负的;
matrix.preTranslate(-currBitmap.getWidth() / 2, -currBitmap.getHeight() / 2);
matrix.postTranslate(currBitmap.getWidth() / 2, currBitmap.getHeight() / 2 + i * averageHeight);
canvas.drawBitmap(currBitmap, matrix, mPaint);
}

} else {
//当大于90度时,因为第一张图片已经不在显示,所以不用再管,只需旋转将要显示的图片就好;
if (direction == 1) {
mCamera.save();
//从180最终旋转到0度;
mCamera.rotateY(180 - mRotateDegree);
mCamera.getMatrix(matrix);
mCamera.restore();
//matrix向左向上是负的;
matrix.preTranslate(-nextBitmap.getWidth() / 2, -nextBitmap.getHeight() / 2);
matrix.postTranslate(nextBitmap.getWidth() / 2 + i * averageWidth, nextBitmap.getHeight() / 2);
canvas.drawBitmap(nextBitmap, matrix, mPaint);
} else {
mCamera.save();
mCamera.rotateX(180 - mRotateDegree);
mCamera.getMatrix(matrix);
mCamera.restore();
//matrix向左向上是负的;
matrix.preTranslate(-nextBitmap.getWidth() / 2, -nextBitmap.getHeight() / 2);
matrix.postTranslate(nextBitmap.getWidth() / 2, nextBitmap.getHeight() / 2 + i * averageHeight);
canvas.drawBitmap(nextBitmap, matrix, mPaint);
}
}

}
canvas.restore();

}
这样便实现了上面的百叶窗效果,到这里,我们想要实现的所有主功能就都有了,那么大家看一开始的图片,有一个下一站图的按钮,点击会执行整个动画过程,而不需要滑动我们的Seekbar,这个功能也好实现,这里顺便说一下,在MainActivity中实现方法:
public void toNext(View view) {
my3dView.toNext();
seekbar.setProgress(0);
}
在自定义View中添加新的方法toNext():
public void toNext() {
if (rolling) return;
if (rollMode == Jalousie) {
valueAnimator = ValueAnimator.ofFloat(0, 180);
} else if (rollMode == Whole3D || rollMode == Roll2D) {
valueAnimator = ValueAnimator.ofFloat(0, 90);
}
rolling = true;
valueAnimator.setDuration(rollDuration);
valueAnimator.addUpdateListener(aniUpdateListener);
valueAnimator.addListener(aniEndListener);
valueAnimator.start();

}
这里就用到了属性动画ValueAnimator,并添加了两个监听,看一下监听的实现:
private ValueAnimator.AnimatorUpdateListener aniUpdateListener = new ValueAnimator.AnimatorUpdateListener() {
@Override
public void onAnimationUpdate(ValueAnimator animation) {
setDegreeValue((Float) animation.getAnimatedValue());
}
};
private AnimatorListenerAdapter aniEndListener = new AnimatorListenerAdapter() {
@Override
public void onAnimationEnd(Animator animation) {
super.onAnimationEnd(animation);
currIndex++;
if (currIndex > bitmapList.size() - 1)
currIndex = 0;
setBitmapIndex();
setDegreeValue(0);
rolling = false;
}
};其实就是一个动画执行过程中,不断的去更改我们的degreeValue值去调用重绘方法间接调用onDraw()方法进行不停的绘制,达到进行整个动画的目的,最后一个监听是监听动画结束后的初始化工作,也很简单。这样就完成了我们的功能,在运行看一下效果吧:
好了,我们所有的功能都完成了,点击下载源码。

相关文章推荐
- matrix 实现动画3D旋转效果
- 高仿小米时钟 - 使用Camera和Matrix实现3D效果
- Android中利用Camera与Matrix实现3D效果详解
- android高仿小米时钟(使用Camera和Matrix实现3D效果)
- 60.自定义View练习(五)高仿小米时钟 - 使用Camera和Matrix实现3D效果
- Android中利用Camera与Matrix实现3D效果详解
- 关于实现3D立体旋转效果的轮播视图
- Android自定义控件----3D旋转效果
- Android自定义组件系列【11】——实现3D立体旋转效果
- android 用camera实现3D效果
- JS实现3D图片旋转展示效果代码
- css3-transform-matrix 即矩阵实现物体旋转、缩放、移动效果
- Android自己定义组件系列【11】——实现3D立体旋转效果
- 安卓学习笔记之-camera实现图片的3D旋转
- Android自定义组件系列【11】——实现3D立体旋转效果
- JavaScrip实现3D旋转动态效果
- JS实现3D图片旋转展示效果代码
- android.graphics.Camera实现图像的旋转、缩放,配合Matrix...
- js 实现一个非常漂亮的3D立体旋转效果h5
- [Android]android.graphics.Camera实现图像的旋转、缩放,配合Matrix实现图像的倾斜