android集成热更新就是这么简单!
2017-06-26 18:46
549 查看
项目1.0开始发布,到项目稳定。这期间会有多次版本的迭代。如果每次都是发布版本,会耗费大量的时间成本,因为在版本迭代的过程中,旧的bug解决了,新的bug也可能会出现。即使是最牛逼的程序猿也不敢说自己的项目没有bug。还有就是有的时候项目中虽然存在bug,但是bug级别很低,也没有必要去发布版本。此时,为了满足这种需求。android的热更新就起了大作用了。
热更新原理:
android程序在打包之后,会将class文件打包成dex字节码文件,每个类都对应有自己的字节码文件,手机按照程序流程来读取字节码,这样程序响应的界面就展示在用户眼前了。微信的tinker实际上就是基于这个原理,将修改后的类生成对应的字节码文件,把修改的字节码文件放到服务器,app在运行中请求到服务器的数据(其实就是个文件下载)之后,替换掉原有的字节码文件,这样,程序就实现了bug的修改,也就是热更新。阿里的andfix核心技术是用c++实现的,它的本质上是方法的替换,这个更偏向底层一些。这里简单的介绍一下,java中方法的运行涉及到方法区、java堆、java栈这几个内存区域。堆用来存放对象实例,栈存放的是引用,方法区里面存放了类的字节码,每个类的字节码文件都对应一个方法表,这个方法表中对应的就是类中的方法,类中的方法压栈之后就是栈中的一个栈帧,这样一帧一帧的执行完毕之后,方法也就执行完了。andfix就是基于这个原理,替换方法表中的方法,从而完成更新。而java无法做到方法的替换,所以andfix是用c++来实现的。
热更新使用:
第一步:compile ‘com.alipay.euler:andfix:0.5.0@aar’ 添加aar依赖之后,不用在添加so等文件,因为本省aar中包含资源文件。
第二步:初始化PatchManager
第三步:生成apatch文件,使用阿里提供的工具
解压后在当前目录下执行以下命令apkpatch.bat -f 新apk -t 旧apk -o output -k 签名文件 -p 密码 -a 别名 -e 别名密码
第四部步:将apatch部署到服务器,app下载,这里我就直接放到sd卡下模拟一下,
调用addpatch方法就可以替换我们想要改变的方法了。这样bug就解决了,是不是很easy,确实很easy。andfix还没有很好的支持7.0的手机,亲测华为荣耀8运行失败。解决办法:可以把targetSdk版本改到22,不去兼容6.0以上的特性,这样热更新使用是没问题的。andfix也有一些不足,就是无法增加类和变量,部分方法无法替换(自己试试)。但是即使这样对与一般app的迭代作用也很大了。
Tinker的集成与常见问题的解决
第一步:
第二步:
添加ApplicationLike的子类,这个类在作用就是绑定application的生命周期,看名字就能知道,是像application的一个类,但是真正的application在哪里呢?看@DefaultLifeCycle(…),通过注解生成了我们的application,这个application的名称叫SimpleTinkerInApplication,所以在xml文件就要相应的改变。
第三步:
生成patch文件,patch.apk是新的apk和旧的apk做diff运算生成的,官方提供了命令行工具
java -jar tinker-patch-cli-1.7.11.jar -old 1.0.apk -new 1.0(新).apk -config tinker_config.xml -out output
tinker-patch-cli-1.7.11.jar的生成也很简单,在官方的demo里面找到一下gradle,然后运行即可。

运行命令行生成如下:
第四步:加载patch文件,和andfix文件是一样的,这个应该在服务器端下载到手机本地,然后在手机本地读取。
这样我们就可以很愉快玩耍了。但是运行之后会发现app加载完patch文件后会重启,这个可定时不爽的吗,总不能用户在使用着app的时候突然就重启了吧,鬼知道是那里出了问题。好在官方也给出了解决方法,就是自定义SampleResultService。然后在SimpleTinkerInApplicationLike的onBaseContextAttached()方法中添加如下代码:
TinkerManager是官方demo中提供的一个tinker管理类,可以直接在拿出来用主要看
实际上我们使用了TinkerInstaller中install的多个参数的方法,这个方法就是微信提供给我们自定义的。这个方法传入了ApplicationLike,那么ApplicationLike 是如何起作用的呢? 我们简单看一下源码。
通过注解会生成
进入TinkerApplication,其继承了Application。
最终通过createDelegate() ,反射出SimpleTinkerInApplicationLike这个类,这正是TinkerApplication构造函数的第二个参数。在TinkerApplication的oncreate方法中也调用了SimpleTinkerInApplicationLike的oncrate方法。明白其中的逻辑之后,我们就可以自定义自己的SampleResultService了,官方给出的是判断了只用手机在锁屏和后台运行的时候合并patch文件,重启app使增加的patch生效。这样还不错,代码可以自己去demo中抠出来。最后别忘了在xml文件中注册你的servise!!!
热更新原理:
android程序在打包之后,会将class文件打包成dex字节码文件,每个类都对应有自己的字节码文件,手机按照程序流程来读取字节码,这样程序响应的界面就展示在用户眼前了。微信的tinker实际上就是基于这个原理,将修改后的类生成对应的字节码文件,把修改的字节码文件放到服务器,app在运行中请求到服务器的数据(其实就是个文件下载)之后,替换掉原有的字节码文件,这样,程序就实现了bug的修改,也就是热更新。阿里的andfix核心技术是用c++实现的,它的本质上是方法的替换,这个更偏向底层一些。这里简单的介绍一下,java中方法的运行涉及到方法区、java堆、java栈这几个内存区域。堆用来存放对象实例,栈存放的是引用,方法区里面存放了类的字节码,每个类的字节码文件都对应一个方法表,这个方法表中对应的就是类中的方法,类中的方法压栈之后就是栈中的一个栈帧,这样一帧一帧的执行完毕之后,方法也就执行完了。andfix就是基于这个原理,替换方法表中的方法,从而完成更新。而java无法做到方法的替换,所以andfix是用c++来实现的。
热更新使用:
第一步:compile ‘com.alipay.euler:andfix:0.5.0@aar’ 添加aar依赖之后,不用在添加so等文件,因为本省aar中包含资源文件。
第二步:初始化PatchManager
public class App extends Application {

public static PatchManager mPatchManager;

@Override
public void onCreate() {
super.onCreate();
mPatchManager = new PatchManager(this);
mPatchManager.init(AppUtils.getVersionName(this));
mPatchManager.loadPatch();
}
}第三步:生成apatch文件,使用阿里提供的工具
解压后在当前目录下执行以下命令apkpatch.bat -f 新apk -t 旧apk -o output -k 签名文件 -p 密码 -a 别名 -e 别名密码
第四部步:将apatch部署到服务器,app下载,这里我就直接放到sd卡下模拟一下,
private void update() {
String patchFileStr = Environment.getExternalStorageDirectory().getAbsolutePath() +"/fix.apatch" ;
try {
mPatchManager.addPatch(patchFileStr);
T.showShort(this,"修复成功!!!");

} catch (IOException e) {
e.printStackTrace();
}
}
调用addpatch方法就可以替换我们想要改变的方法了。这样bug就解决了,是不是很easy,确实很easy。andfix还没有很好的支持7.0的手机,亲测华为荣耀8运行失败。解决办法:可以把targetSdk版本改到22,不去兼容6.0以上的特性,这样热更新使用是没问题的。andfix也有一些不足,就是无法增加类和变量,部分方法无法替换(自己试试)。但是即使这样对与一般app的迭代作用也很大了。
Tinker的集成与常见问题的解决
第一步:
//可选,生成application
provided 'com.tencent.tinker:tinker-android-anno:1.7.11'
//核心jar包
compile 'com.tencent.tinker:tinker-android-lib:1.7.11'
第二步:
@DefaultLifeCycle(application = ".SimpleTinkerInApplication",
flags = ShareConstants.TINKER_ENABLE_ALL,
loadVerifyFlag = false)

public class SimpleTinkerInApplicationLike extends ApplicationLike {

public SimpleTinkerInApplicationLike(Application application, int tinkerFlags, boolean tinkerLoadVerifyFlag, long applicationStartElapsedTime, long applicationStartMillisTime, Intent tinkerResultIntent) {
super(application, tinkerFlags, tinkerLoadVerifyFlag, applicationStartElapsedTime, applicationStartMillisTime, tinkerResultIntent);
}

@Override
public void onBaseContextAttached(Context base) {
super.onBaseContextAttached(base);

}

/**
* 绑定了application的生命周期,
* 在application中的操作移植到此方法
*/
@Override
public void onCreate() {
super.onCreate();
}

}
添加ApplicationLike的子类,这个类在作用就是绑定application的生命周期,看名字就能知道,是像application的一个类,但是真正的application在哪里呢?看@DefaultLifeCycle(…),通过注解生成了我们的application,这个application的名称叫SimpleTinkerInApplication,所以在xml文件就要相应的改变。
<application
android:name=".SimpleTinkerInApplication"
android:allowBackup="true"
android:icon="@mipmap/ic_launcher"
android:label="@string/app_name"
android:supportsRtl="true"
android:theme="@style/AppTheme">
<!-- 别忘了配置一下tinkerId-->
<meta-data
android:name="TINKER_ID"
android:value="100" />
</application>
第三步:
生成patch文件,patch.apk是新的apk和旧的apk做diff运算生成的,官方提供了命令行工具
java -jar tinker-patch-cli-1.7.11.jar -old 1.0.apk -new 1.0(新).apk -config tinker_config.xml -out output
tinker-patch-cli-1.7.11.jar的生成也很简单,在官方的demo里面找到一下gradle,然后运行即可。
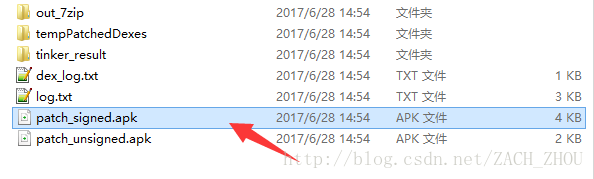
运行命令行生成如下:
第四步:加载patch文件,和andfix文件是一样的,这个应该在服务器端下载到手机本地,然后在手机本地读取。
TinkerInstaller.onReceiveUpgradePatch(getApplicationContext(),
Environment.getExternalStorageDirectory().getAbsolutePath() + "/patch_signed.apk");
这样我们就可以很愉快玩耍了。但是运行之后会发现app加载完patch文件后会重启,这个可定时不爽的吗,总不能用户在使用着app的时候突然就重启了吧,鬼知道是那里出了问题。好在官方也给出了解决方法,就是自定义SampleResultService。然后在SimpleTinkerInApplicationLike的onBaseContextAttached()方法中添加如下代码:
@Override
public void onBaseContextAttached(Context base) {

super.onBaseContextAttached(base);
TinkerManager.setTinkerApplicationLike(this);
//should set before tinker is installed
TinkerManager.setUpgradeRetryEnable(true);
TinkerManager.installTinker(this);

}
TinkerManager是官方demo中提供的一个tinker管理类,可以直接在拿出来用主要看
/**
* you can specify all class you want.
* sometimes, you can only install tinker in some process you want!
*
* @param appLike
*/
public static void installTinker(ApplicationLike appLike) {
if (isInstalled) {
TinkerLog.w(TAG, "install tinker, but has installed, ignore");
return;
}
//you can set your own upgrade patch if you need
AbstractPatch upgradePatchProcessor = new UpgradePatch();
TinkerInstaller.install(appLike,new DefaultLoadReporter(appLike.getApplication()),new DefaultPatchReporter(appLike.getApplication())
,new DefaultPatchListener(appLike.getApplication()),SampleResultService.class,upgradePatchProcessor);

isInstalled = true;
}
实际上我们使用了TinkerInstaller中install的多个参数的方法,这个方法就是微信提供给我们自定义的。这个方法传入了ApplicationLike,那么ApplicationLike 是如何起作用的呢? 我们简单看一下源码。
通过注解会生成
/**
*
* Generated application for tinker life cycle
*
*/
public class SimpleTinkerInApplication extends TinkerApplication {

public SimpleTinkerInApplication() {
super(7, "com.iwintrue.todoapplication.SimpleTinkerInApplicationLike", "com.tencent.tinker.loader.TinkerLoader", false);
}

}
进入TinkerApplication,其继承了Application。
/**
* Created by zhangshaowen on 16/3/8.
* <p/>
* A base class for implementing an Application that delegates to an {@link ApplicationLifeCycle}
* instance. This is used in conjunction with secondary dex files so that the logic that would
* normally live in the Application class is loaded after the secondary dexes are loaded.
*/
public abstract class TinkerApplication extends Application {

//oh, we can use ShareConstants, because they are loader class and static final!
private static final int    TINKER_DISABLE         = ShareConstants.TINKER_DISABLE;
private static final String INTENT_PATCH_EXCEPTION = ShareIntentUtil.INTENT_PATCH_EXCEPTION;
private static final String TINKER_LOADER_METHOD   = "tryLoad";
/**
* tinkerFlags, which types is supported
* dex only, library only, all support
* default: TINKER_ENABLE_ALL
*/
private final int     tinkerFlags;
/**
* whether verify md5 when we load dex or lib
* they store at data/data/package, and we had verity them at the :patch process.
* so we don't have to verity them every time for quicker!
* default:false
*/
private final boolean tinkerLoadVerifyFlag;
private final String  delegateClassName;
private final String  loaderClassName;

/**
* if we have load patch, we should use safe mode
*/
private       boolean useSafeMode;
private       Intent  tinkerResultIntent;

private ApplicationLike applicationLike = null;

private long applicationStartElapsedTime;
private long applicationStartMillisTime;

/**
* current build.
*/
protected TinkerApplication(int tinkerFlags) {
this(tinkerFlags, "com.tencent.tinker.loader.app.DefaultApplicationLike", TinkerLoader.class.getName(), false);
}

/**
* @param delegateClassName The fully-qualified name of the {@link ApplicationLifeCycle} class
*                          that will act as the delegate for application lifecycle callbacks.
*/
protected TinkerApplication(int tinkerFlags, String delegateClassName,
String loaderClassName, boolean tinkerLoadVerifyFlag) {
this.tinkerFlags = tinkerFlags;
this.delegateClassName = delegateClassName;
this.loaderClassName = loaderClassName;
this.tinkerLoadVerifyFlag = tinkerLoadVerifyFlag;
}

protected TinkerApplication(int tinkerFlags, String delegateClassName) {
this(tinkerFlags, delegateClassName, TinkerLoader.class.getName(), false);
}

private ApplicationLike createDelegate() {
try {
// Use reflection to create the delegate so it doesn't need to go into the primary dex.
// And we can also patch it
Class<?> delegateClass = Class.forName(delegateClassName, false, getClassLoader());
Constructor<?> constructor = delegateClass.getConstructor(Application.class, int.class, boolean.class,
long.class, long.class, Intent.class);
return (ApplicationLike) constructor.newInstance(this, tinkerFlags, tinkerLoadVerifyFlag,
applicationStartElapsedTime, applicationStartMillisTime, tinkerResultIntent);
} catch (Throwable e) {
throw new TinkerRuntimeException("createDelegate failed", e);
}
}

private synchronized void ensureDelegate() {
if (applicationLike == null) {
applicationLike = createDelegate();
}
}

/**
* Hook for sub-classes to run logic after the {@link Application#attachBaseContext} has been
* called but before the delegate is created. Implementors should be very careful what they do
* here since {@link android.app.Application#onCreate} will not have yet been called.
*/
private void onBaseContextAttached(Context base) {
applicationStartElapsedTime = SystemClock.elapsedRealtime();
applicationStartMillisTime = System.currentTimeMillis();
loadTinker();
ensureDelegate();
applicationLike.onBaseContextAttached(base);
//reset save mode
if (useSafeMode) {
String processName = ShareTinkerInternals.getProcessName(this);
String preferName = ShareConstants.TINKER_OWN_PREFERENCE_CONFIG + processName;
SharedPreferences sp = getSharedPreferences(preferName, Context.MODE_PRIVATE);
sp.edit().putInt(ShareConstants.TINKER_SAFE_MODE_COUNT, 0).commit();
}
}

@Override
protected void attachBaseContext(Context base) {
super.attachBaseContext(base);
Thread.setDefaultUncaughtExceptionHandler(new TinkerUncaughtHandler(this));
onBaseContextAttached(base);
}

private void loadTinker() {
//disable tinker, not need to install
if (tinkerFlags == TINKER_DISABLE) {
return;
}
tinkerResultIntent = new Intent();
try {
//reflect tinker loader, because loaderClass may be define by user!
Class<?> tinkerLoadClass = Class.forName(loaderClassName, false, getClassLoader());

Method loadMethod = tinkerLoadClass.getMethod(TINKER_LOADER_METHOD, TinkerApplication.class);
Constructor<?> constructor = tinkerLoadClass.getConstructor();
tinkerResultIntent = (Intent) loadMethod.invoke(constructor.newInstance(), this);
} catch (Throwable e) {
//has exception, put exception error code
ShareIntentUtil.setIntentReturnCode(tinkerResultIntent, ShareConstants.ERROR_LOAD_PATCH_UNKNOWN_EXCEPTION);
tinkerResultIntent.putExtra(INTENT_PATCH_EXCEPTION, e);
}
}

@Override
public void onCreate() {
super.onCreate();
ensureDelegate();
applicationLike.onCreate();
}

@Override
public void onTerminate() {
super.onTerminate();
if (applicationLike != null) {
applicationLike.onTerminate();
}
}

@Override
public void onLowMemory() {
super.onLowMemory();
if (applicationLike != null) {
applicationLike.onLowMemory();
}
}

@TargetApi(14)
@Override
public void onTrimMemory(int level) {
super.onTrimMemory(level);
if (applicationLike != null) {
applicationLike.onTrimMemory(level);
}
}

@Override
public void onConfigurationChanged(Configuration newConfig) {
super.onConfigurationChanged(newConfig);
if (applicationLike != null) {
applicationLike.onConfigurationChanged(newConfig);
}
}

@Override
public Resources getResources() {
Resources resources = super.getResources();
if (applicationLike != null) {
return applicationLike.getResources(resources);
}
return resources;
}

@Override
public ClassLoader getClassLoader() {
ClassLoader classLoader = super.getClassLoader();
if (applicationLike != null) {
return applicationLike.getClassLoader(classLoader);
}
return classLoader;
}

@Override
public AssetManager getAssets() {
AssetManager assetManager = super.getAssets();
if (applicationLike != null) {
return applicationLike.getAssets(assetManager);
}
return assetManager;
}

@Override
public Object getSystemService(String name) {
Object service = super.getSystemService(name);
if (applicationLike != null) {
return applicationLike.getSystemService(name, service);
}
return service;
}

@Override
public Context getBaseContext() {
Context base = super.getBaseContext();
if (applicationLike != null) {
return applicationLike.getBaseContext(base);
}
return base;
}

public void setUseSafeMode(boolean useSafeMode) {
this.useSafeMode = useSafeMode;
}

public boolean isTinkerLoadVerifyFlag() {
return tinkerLoadVerifyFlag;
}

public int getTinkerFlags() {
return tinkerFlags;
}
}
最终通过createDelegate() ,反射出SimpleTinkerInApplicationLike这个类,这正是TinkerApplication构造函数的第二个参数。在TinkerApplication的oncreate方法中也调用了SimpleTinkerInApplicationLike的oncrate方法。明白其中的逻辑之后,我们就可以自定义自己的SampleResultService了,官方给出的是判断了只用手机在锁屏和后台运行的时候合并patch文件,重启app使增加的patch生效。这样还不错,代码可以自己去demo中抠出来。最后别忘了在xml文件中注册你的servise!!!

相关文章推荐
- 小心,Android木马工具SpyNote免费啦!远程监听就是这么简单
- 树莓派Android Things物联网开发:树莓派3上手就是这么简单
- 安卓开发——Android反编译就是这么简单 过程详解
- Android 热修复,微信开源框架tinker的接入,就是这么简单
- Android列表侧滑删除就是这么简单
- android 反编译 就是这么简单
- Android Things:树莓派3上手就是这么简单
- Android 混淆就是这么简单
- 就是这么简单!轻松搞定win10自动更新
- Android 语言切换实现(就是这么简单)
- android应用 小试牛刀 开发自己的应用程序就是这么简单
- TFS 2010 的安装和配置就是这么简单!
- Next、Next、Next - TFS 2010 的安装和配置就是这么简单!
- HTML5边玩边学(9):俄罗斯方块就是这么简单 之 数据模型篇
- 飞信,原来就是这么简单
- 无刷新翻页就是这么简单
- 听听音乐,上上网,生活就是这么简单
- C#调用MD5算法就是这么简单!
- C#调用MD5算法就是这么简单!
- Java多线程,就是这么简单