iview2.0中动态生成Menu时,设置activeName不生效的解决办法
2017-06-21 00:00
561 查看
摘要: 本文撰写时,最新的iView版本为2.0.0-rc.17。
此时,类似的问题解决方案,网络上极少。
本文描...
最初的核心代码,最终代码将在本文最后贴出。
iView2.0 动态生成Menu时,通过
设置后,始终无效果,而拷贝官网提供的案例,却是没有问题。
于是,将activeName写死,发现无果。
Google了一番,网上只有三条记录相符,查看其中有一条记录,
有人提议,将动态获取的数据放在created中,这个主要是vue强调生命周期。vue的生命周期如下图:

于是,我将动态获取菜单列表的方法放在created中,设置选中菜单的代码放在mounted中,
现在的js部分代码如下:
发现还是不对,不能选中,实在没有办法了,就想到应该是设置初始选中的菜单,应该是数据加载完成之后才能进行的,而此时数据应该是未加载完成的,
就修改代码为如下情况:
等了5s后发现,出现了自己想要的结果。我大概明白什么原因了,但是让等待5s并不是最佳答案。
于是就想到axios加载完成之后会有一个加载完成的事件。
就继续Google一番,
发现了finally;加入之后,核心代码如下:
如果console报错了,
那么就是你的finally模块未正确引入。下面的方法是引入axios finally的方法,如果已经引入,可以不管。
第一步:
此时,你将会发现:

第二步,在需要使用finally的Axios前增加一行引入
再次刷新,发现大功告成。
完整的代码如下:
行文仓促,如果有问题,欢迎交流。
此时,类似的问题解决方案,网络上极少。
本文描...
最初的核心代码,最终代码将在本文最后贴出。
<template>
<Menu theme="light" :activeName="activeKey" @on-select="select">
<Menu-group v-for="sy_menu in menus" :title="sy_menu.name">
<Menu-item v-for="sy_it in sy_menu.children" :name="sy_it.opname">
<Icon :type="sy_it.icon"></Icon> {{sy_it.name}}
</Menu-item>
</Menu-group>
</Menu>
</template>
<script>
export default {
data(){
return {
activeKey    : '',
menus        : []
};
},
mounted() {
// 获取菜单
let that = this;

axios.post("/admin/menu/menus.html").then(function (res) {
that.menus = res.data;
});
that.activeKey = that.$route.name;
},
methods: {
handleStart () {
this.$Modal.info({
title: '温馨提示',
content: '功能待完善,敬请期待!'
});
},
select(n){
this.$router.push({name:n});
}
}
}
</script>
iView2.0 动态生成Menu时,通过
<Menu theme="light" :activeName="activeKey" @on-select="select"></Menu>
设置后,始终无效果,而拷贝官网提供的案例,却是没有问题。
于是,将activeName写死,发现无果。
Google了一番,网上只有三条记录相符,查看其中有一条记录,
有人提议,将动态获取的数据放在created中,这个主要是vue强调生命周期。vue的生命周期如下图:
于是,我将动态获取菜单列表的方法放在created中,设置选中菜单的代码放在mounted中,
现在的js部分代码如下:
created() {
// 获取菜单
let that = this;

axios.post("/admin/menu/menus.html").then(function (res) {
that.menus = res.data;
});
},
mounted(){
let that = this;
that.activeKey = that.$route.name;
}
发现还是不对,不能选中,实在没有办法了,就想到应该是设置初始选中的菜单,应该是数据加载完成之后才能进行的,而此时数据应该是未加载完成的,
就修改代码为如下情况:
created() {
// 获取菜单
let that = this;

axios.post("/admin/menu/menus.html").then(function (res) {
that.menus = res.data;
});
},
mounted(){
let that = this;
setTimeout(function(){
that.activeKey = that.$route.name;
},5000);
}
等了5s后发现,出现了自己想要的结果。我大概明白什么原因了,但是让等待5s并不是最佳答案。
于是就想到axios加载完成之后会有一个加载完成的事件。
就继续Google一番,
发现了finally;加入之后,核心代码如下:
created() {
// 获取菜单
let that = this;
axios.post("/admin/menu/menus.html").then(function (res) {
that.menus = res.data;
}).finally(function (w) {
that.activeKey = that.$route.name;
});
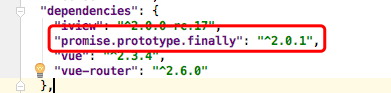
},如果console报错了,
那么就是你的finally模块未正确引入。下面的方法是引入axios finally的方法,如果已经引入,可以不管。
第一步:
npm install axios promise.prototype.finally --save
此时,你将会发现:
第二步,在需要使用finally的Axios前增加一行引入
require('promise.prototype.finally').shim();再次刷新,发现大功告成。
完整的代码如下:
<style scoped>
.layout{
border: 1px solid #d7dde4;
background: #f5f7f9;
position: relative;
border-radius: 4px;
overflow: hidden;
}
.wrapper-container{
min-height: 200px;
background: white;
width: 90%;
margin: 30px auto 5px;
border-radius: 6px;
}
.left-menu{
padding: 6px 0;
}
</style>
<template>
<div class="layout">
<div class="wrapper-container">
<Row>
<Col span="4" class="left-menu">
<Menu theme="light" :activeName="activeKey" @on-select="select">
<Menu-group v-for="sy_menu in menus" :title="sy_menu.name">
<Menu-item v-for="sy_it in sy_menu.children" :name="sy_it.opname">
<Icon :type="sy_it.icon"></Icon> {{sy_it.name}}
</Menu-item>
</Menu-group>
</Menu>
</Col>
<Col span="20">
<router-view></router-view>
</Col>
</Row>
</div>
</div>
</template>
<script>
export default {
data(){
return {
activeKey    : '',
menus        : []
};
},created() {
// 获取菜单
let that = this;

axios.post("/admin/menu/menus.html").then(function (res) {
that.menus = res.data;
}).finally(function (w) {
that.activeKey = that.$route.name;
});
},
methods: {
handleStart () {
this.$Modal.info({
title: '温馨提示',
content: '功能待完善,敬请期待!'
});
},
select(n){
this.$router.push({name:n});
}
}
}
</script>
行文仓促,如果有问题,欢迎交流。

相关文章推荐
- 动态生成一个textview,设置padding不起作用的解决办法。
- 动态生成HTML事件不生效解决办法
- QT Creator 2.0编译会将可执行文件生成到一个类似projectname_build-desktop的目录中,解决办法
- ”对于不返回任何键列信息的 SelectCommand,不支持 UpdateCommand 的动态 SQL 生成“解决办法
- 转:Selenium2.0 click()不生效的解决办法
- cocos2dx 2.0运行HelloWorld在glGenVertexArrays(1, &m_uVAOname)时候报0×00000000错误解决办法:
- discuz论坛后台部分设置更改之后,清除了缓存网站前台不更新不生效的解决办法
- 关于调用Spring设置Quartz中动态执行时间解决办法
- Data too long for column 'name' at row 1 mysql的抛出异常的解决办法--之前方法不管用-要设置数据库编码
- WARN com.opensymphony.xwork2.ognl.OgnlValueStack异常的解决办法[提交按钮使用了图片并设置name属性,对应action无gettersetter]
- xampp配置多域名泛域名虚拟主机For linux xampp wampp 多域名设置只有第一个生效的解决办法
- [EXTJs]TabPanel动态生成,加载组件时,组件不能正常显示的解决办法
- 使用<jsp:include>,不想写死URL,动态生成URL的解决办法
- 解决dede生成静态页和动态页转换的一些问题,及火车采集入库生成动态的办法
- jquery的选择器$('')在IE6下对JS动态生成(比如ajax生成的)的元素失效的解决办法
- java.lang.IllegalArgumentException: 请设置InstanceName的解决办法
- 动态生成有多个SpeedButton的窗体使用VclSkin退出时报错的解决办法
- tablesorter对于动态生成的table无法使用解决办法
- 解决dede生成静态页和动态页转换的一些问题,及火车采集入库生成动态的办法
- “espcms开启静态化,get name=list的第一条数据静态地址的生成不完整”解决办法