ssm(springmvc4+spring4+mybatis3)整合实战-个人博客系统-整合各大框架
2017-06-17 22:21
761 查看
ssm(springmvc4+spring4+mybatis3)整合实战-个人博客系统-整合各大框架
ssm框架整合开发实战,这一篇我将介绍如何实现各大框架的整合。
上一篇博客,我介绍了web.xml配置文件,那个文件是项目的核心配置文件,其中其实就包括了整合spring springmvc框架的配置。当然啦,该配置文件还有权限认证安全框架shiro的过滤器配置以及编码过滤器的配置。言归正传,下面就将各大框架的整合配置文件共享出来。
首先是spring、springmvc的配置,spring框架的强大之处在此我就不多说了,起到的作用我就简单说几点吧。
1、其核心部分是IOC与AOP,前者即为所谓的控制反转,用于解决各大组件的依赖问题,也就是解耦的作用;AOP起到监视的作用,俗称面向切面,可以在事务开始前结束后做一层监视;
2、整合hibernate或者mybatis持久层框架,配置事务传播属性,在进行事务操作时起到很好的控制作用(commit,rollback等)。
3、springmvc是spring的一部分,提供的mvc编程模式大大提高了j2EE应用开发的高效性。。。
下面介绍spring的配置applicationContext-spring.xml:
<?xml version="1.0" encoding="UTF-8"?>
<beans xmlns="http://www.springframework.org/schema/beans"
xmlns:xsi="http://www.w3.org/2001/XMLSchema-instance"
xmlns:p="http://www.springframework.org/schema/p"
xmlns:aop="http://www.springframework.org/schema/aop"
xmlns:context="http://www.springframework.org/schema/context"
xmlns:jee="http://www.springframework.org/schema/jee"
xmlns:tx="http://www.springframework.org/schema/tx"
xsi:schemaLocation=" http://www.springframework.org/schema/aop http://www.springframework.org/schema/aop/spring-aop-4.0.xsd http://www.springframework.org/schema/beans http://www.springframework.org/schema/beans/spring-beans-4.0.xsd http://www.springframework.org/schema/context http://www.springframework.org/schema/context/spring-context-4.0.xsd http://www.springframework.org/schema/jee http://www.springframework.org/schema/jee/spring-jee-4.0.xsd http://www.springframework.org/schema/tx http://www.springframework.org/schema/tx/spring-tx-4.0.xsd">
<!-- 数据库连接池 -->
<!-- 加载配置文件 -->
<context:property-placeholder location="classpath:jdbc.properties"/>
<!-- 数据库连接池:阿里的德鲁伊数据库连接池 -->
<bean id="dataSource" class="com.alibaba.druid.pool.DruidDataSource" destroy-method="close">
<property name="url" value="${jdbc.jdbcUrl}"/>
<property name="username" value="${jdbc.username}"/>
<property name="password" value="${jdbc.password}"/>
<property name="driverClassName" value="${jdbc.driverClass}"/>
<property name="maxActive" value="${maxActive}"/>
<property name="minIdle" value="${minIdle}"/>
</bean>
<!-- 配置mybatis的sqlSessionFactory -->
<bean id="sqlSessionFactory" class="org.mybatis.spring.SqlSessionFactoryBean">
<property name="dataSource" ref="dataSource" />
<!-- 自动扫描mappers.xml文件 -->
<property name="mapperLocations" value="classpath:com/steadyjack/mappers/*.xml"></property>
<!-- mybatis配置文件 -->
<property name="configLocation" value="classpath:mybatis-config.xml"></property>
</bean>
<!-- DAO接口所在包名,Spring会自动查找其下的类 -->
<bean class="org.mybatis.spring.mapper.MapperScannerConfigurer">
<property name="basePackage" value="com.steadyjack.dao" />
<property name="sqlSessionFactoryBeanName" value="sqlSessionFactory"></property>
</bean>
<!-- (事务管理)transaction manager, use JtaTransactionManager for global tx -->
<bean id="transactionManager" class="org.springframework.jdbc.datasource.DataSourceTransactionManager">
<property name="dataSource" ref="dataSource" />
</bean>
<!-- 自定义Realm -->
<bean id="myRealm" class="com.steadyjack.realm.MyRealm"/>
<!-- 安全管理器 -->
<bean id="securityManager" class="org.apache.shiro.web.mgt.DefaultWebSecurityManager">
<property name="realm" ref="myRealm"/>
</bean>
<!-- Shiro过滤器 -->
<bean id="shiroFilter" class="org.apache.shiro.spring.web.ShiroFilterFactoryBean">
<!-- Shiro的核心安全接口,这个属性是必须的 -->
<property name="securityManager" ref="securityManager"/>
<!-- 身份认证失败,则跳转到登录页面的配置 -->
<property name="loginUrl" value="/login.jsp"/>
<!-- Shiro连接约束配置,即过滤链的定义 -->
<property name="filterChainDefinitions">
<value>
/login=anon
/admin/**=authc
</value>
</property>
</bean>
<!-- 保证实现了Shiro内部lifecycle函数的bean执行 -->
<bean id="lifecycleBeanPostProcessor" class="org.apache.shiro.spring.LifecycleBeanPostProcessor"/>
<!-- 开启Shiro注解 -->
<bean class="org.springframework.aop.framework.autoproxy.DefaultAdvisorAutoProxyCreator" depends-on="lifecycleBeanPostProcessor"/>
<bean class="org.apache.shiro.spring.security.interceptor.AuthorizationAttributeSourceAdvisor">
<property name="securityManager" ref="securityManager"/>
</bean>
<!-- 配置事务通知属性 -->
<tx:advice id="txAdvice" transaction-manager="transactionManager">
<!-- 定义事务传播属性 -->
<tx:attributes>
<tx:method name="insert*" propagation="REQUIRED" />
<tx:method name="update*" propagation="REQUIRED" />
<tx:method name="edit*" propagation="REQUIRED" />
<tx:method name="save*" propagation="REQUIRED" />
<tx:method name="add*" propagation="REQUIRED" />
<tx:method name="new*" propagation="REQUIRED" />
<tx:method name="set*" propagation="REQUIRED" />
<tx:method name="remove*" propagation="REQUIRED" />
<tx:method name="delete*" propagation="REQUIRED" />
<tx:method name="change*" propagation="REQUIRED" />
<tx:method name="check*" propagation="REQUIRED" />
<tx:method name="get*" propagation="REQUIRED" read-only="true" />
<tx:method name="find*" propagation="REQUIRED" read-only="true" />
<tx:method name="load*" propagation="REQUIRED" read-only="true" />
<tx:method name="*" propagation="REQUIRED" read-only="true" />
</tx:attributes>
</tx:advice>
<!-- 配置事务切面 -->
<aop:config>
<aop:pointcut id="serviceOperation" expression="execution(* com.steadyjack.service.*.*(..))" />
<aop:advisor advice-ref="txAdvice" pointcut-ref="serviceOperation" />
</aop:config>
<!-- 自动扫描 -->
<context:component-scan base-package="com.steadyjack.service" />
</beans>
加入jdbc配置jdbc.properties:
jdbc.driverClass=com.mysql.jdbc.Driver
jdbc.jdbcUrl=jdbc:mysql://localhost:3306/db_blog?useUnicode=true&characterEncoding=UTF-8
jdbc.username=root
jdbc.password=123456
#最大连接池数量
maxActive=10
#最小连接池数量
minIdle=2
日志配置log4j.properties:
log4j.rootLogger=DEBUG, Console
#Console
log4j.appender.Console=org.apache.log4j.ConsoleAppender
log4j.appender.Console.layout=org.apache.log4j.PatternLayout
log4j.appender.Console.layout.ConversionPattern=%d [%t] %-5p [%c] - %m%n
log4j.logger.java.sql.ResultSet=INFO
log4j.logger.org.apache=INFO
log4j.logger.java.sql.Connection=DEBUG
log4j.logger.java.sql.Statement=DEBUG
log4j.logger.java.sql.PreparedStatement=DEBUG
mybatis配置文件mybatis-config.xml:
<?xml version="1.0" encoding="UTF-8" ?>
<!DOCTYPE configuration
PUBLIC "-//mybatis.org//DTD Config 3.0//EN"
"http://mybatis.org/dtd/mybatis-3-config.dtd">
<configuration> spring-mvc.xml
<!-- 别名 -->
<typeAliases>
<package name="com.steadyjack.entity"/>
</typeAliases>
</configuration>
最后是springmvc的配置文件:
<?xml version="1.0" encoding="UTF-8"?>
<beans xmlns="http://www.springframework.org/schema/beans"
xmlns:xsi="http://www.w3.org/2001/XMLSchema-instance"
xmlns:p="http://www.springframework.org/schema/p"
xmlns:aop="http://www.springframework.org/schema/aop"
xmlns:context="http://www.springframework.org/schema/context"
xmlns:jee="http://www.springframework.org/schema/jee"
xmlns:tx="http://www.springframework.org/schema/tx"
xmlns:mvc="http://www.springframework.org/schema/mvc"
xsi:schemaLocation=" http://www.springframework.org/schema/aop http://www.springframework.org/schema/aop/spring-aop-4.0.xsd http://www.springframework.org/schema/beans http://www.springframework.org/schema/beans/spring-beans-4.0.xsd http://www.springframework.org/schema/mvc http://www.springframework.org/schema/mvc/spring-mvc.xsd http://www.springframework.org/schema/context http://www.springframework.org/schema/context/spring-context-4.0.xsd http://www.springframework.org/schema/jee http://www.springframework.org/schema/jee/spring-jee-4.0.xsd http://www.springframework.org/schema/tx http://www.springframework.org/schema/tx/spring-tx-4.0.xsd">
<mvc:annotation-driven/>
<!-- 静态资源配置 -->
<mvc:resources mapping="/static/**" location="/static/"/>
<!-- 视图解析器 -->
<bean id="viewResolver" class="org.springframework.web.servlet.view.InternalResourceViewResolver">
<property name="prefix" value="/" />
<property name="suffix" value=".jsp"></property>
</bean>
<!-- 多文件上传处理器 -->
<bean id="multipartResolver" class="org.springframework.web.multipart.commons.CommonsMultipartResolver">
<property name="defaultEncoding" value="UTF-8"/>
<!-- 即1024*1024*10字节 = 10m -->
<property name="maxUploadSize" value="10485760"/>
</bean>
<!-- 使用注解的包,包括子集 -->
<context:component-scan base-package="com.steadyjack.controller" />
</beans>
上面介绍的配置文件中:其实shiro的配置可以单独拿出来的(在这里我就偷懒了)。上面配置文件的内容我已经做了注释了,已看便可知。如果有问题,可以加入后面提供的群讨论。
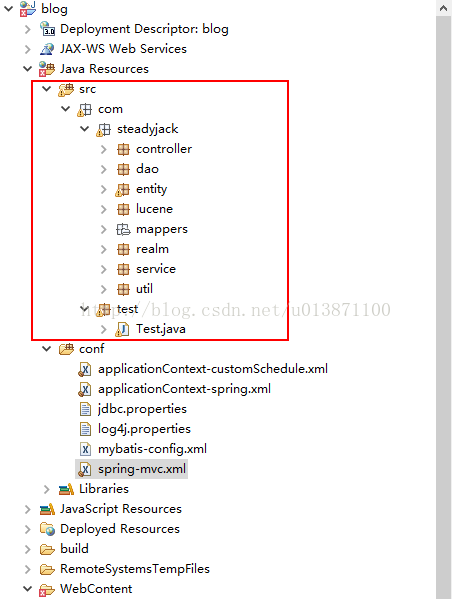
最后,当然是建立包结构,如下图,大伙就自己建 了:
最后,我就把本系统涉及的各个实体类的代码贴出来吧(其实就是JavaBean了,可以自己建表然后mybatis逆向工程自己生成--至于如何生成,可以看我的博客:mybatis逆向工程)
首先是Blog.java:
package com.steadyjack.entity;
import java.io.Serializable;
import java.util.Date;
import java.util.LinkedList;
import java.util.List;
/**
* title:Blog.java
* description:博客实体
* time:2017年1月15日 下午9:22:23
* author:debug-steadyjack
*/
public class Blog implements Serializable {
private static final long serialVersionUID = 1L;
private Integer id; // 编号
private String title; // 博客标题
private String summary; // 摘要
private Date releaseDate; // 发布日期
private Integer clickHit; // 查看次数
private Integer replyHit; // 回复次数
private String content; // 博客内容
private String keyWord; // 关键字 空格隔开
private String contentNoTag; // 博客内容 无网页标签 (Lucene分词用)
private BlogType blogType; // 博客类型
private Integer blogCount; // 博客数量 非博客实际属性,主要是 根据发布日期归档查询博客数量用
private String releaseDateStr; // 发布日期字符串 只取年和月
private List<String> imagesList=new LinkedList<String>(); // 博客里存在的图片 主要用于前端列表展示显示缩略图
public Integer getId() {
return id;
}
public void setId(Integer id) {
this.id = id;
}
public String getTitle() {
return title;
}
public void setTitle(String title) {
this.title = title;
}
public String getSummary() {
return summary;
}
public void setSummary(String summary) {
this.summary = summary;
}
public Date getReleaseDate() {
return releaseDate;
}
public void setReleaseDate(Date releaseDate) {
this.releaseDate = releaseDate;
}
public Integer getClickHit() {
return clickHit;
}
public void setClickHit(Integer clickHit) {
this.clickHit = clickHit;
}
public Integer getReplyHit() {
return replyHit;
}
public void setReplyHit(Integer replyHit) {
this.replyHit = replyHit;
}
public String getContent() {
return content;
}
public void setContent(String content) {
this.content = content;
}
public String getContentNoTag() {
return contentNoTag;
}
public void setContentNoTag(String contentNoTag) {
this.contentNoTag = contentNoTag;
}
public BlogType getBlogType() {
return blogType;
}
public void setBlogType(BlogType blogType) {
this.blogType = blogType;
}
public Integer getBlogCount() {
return blogCount;
}
public void setBlogCount(Integer blogCount) {
this.blogCount = blogCount;
}
public String getReleaseDateStr() {
return releaseDateStr;
}
public void setReleaseDateStr(String releaseDateStr) {
this.releaseDateStr = releaseDateStr;
}
public String getKeyWord() {
return keyWord;
}
public void setKeyWord(String keyWord) {
this.keyWord = keyWord;
}
public List<String> getImagesList() {
return imagesList;
}
public void setImagesList(List<String> imagesList) {
this.imagesList = imagesList;
}
}
然后是Blogger.java:
package com.steadyjack.entity;
/**
* title:Blogger.java
* description:博主实体
* time:2017年1月15日 下午9:25:23
* author:debug-steadyjack
*/
public class Blogger {
private Integer id; // 编号
private String userName; // 用户名
private String password; // 密码
private String nickName; // 昵称
private String sign; // 个性签名
private String proFile; // 个人简介
private String imageName; // 博主头像
public Integer getId() {
return id;
}
public void setId(Integer id) {
this.id = id;
}
public String getUserName() {
return userName;
}
public void setUserName(String userName) {
this.userName = userName;
}
public String getPassword() {
return password;
}
public void setPassword(String password) {
this.password = password;
}
public String getNickName() {
return nickName;
}
public void setNickName(String nickName) {
this.nickName = nickName;
}
public String getSign() {
return sign;
}
public void setSign(String sign) {
this.sign = sign;
}
public String getProFile() {
return proFile;
}
public void setProFile(String proFile) {
this.proFile = proFile;
}
public String getImageName() {
return imageName;
}
public void setImageName(String imageName) {
this.imageName = imageName;
}
}
接着是BlogType.java:
package com.steadyjack.entity;
import java.io.Serializable;
/**
* title:BlogType.java
* description: 博客类型实体
* time:2017年1月15日 下午9:25:32
* author:debug-steadyjack
*/
public class BlogType implements Serializable{
/**
*
*/
private static final long serialVersionUID = 1L;
private Integer id; // 编号
private String typeName; // 博客类型名称
private Integer blogCount; // 数量
private Integer orderNo; // 排序 从小到大排序显示
public Integer getId() {
return id;
}
public void setId(Integer id) {
this.id = id;
}
public String getTypeName() {
return typeName;
}
public void setTypeName(String typeName) {
this.typeName = typeName;
}
public Integer getBlogCount() {
return blogCount;
}
public void setBlogCount(Integer blogCount) {
this.blogCount = blogCount;
}
public Integer getOrderNo() {
return orderNo;
}
public void setOrderNo(Integer orderNo) {
this.orderNo = orderNo;
}
}
然后是Comment.java:
package com.steadyjack.entity;
import java.util.Date;
/**
* title:Comment.java
* description: 评论实体
* time:2017年1月15日 下午9:25:41
* author:debug-steadyjack
*/
public class Comment {
private Integer id; // 编号
private String userIp; // 用户IP
private String content; // 评论内容
private Blog blog; // 被评论的博客
private Date commentDate; // 评论日期
private Integer state; // 审核状态 0 待审核 1 审核通过 2 审核未通过
public Integer getId() {
return id;
}
public void setId(Integer id) {
this.id = id;
}
public String getUserIp() {
return userIp;
}
public void setUserIp(String userIp) {
this.userIp = userIp;
}
public String getContent() {
return content;
}
public void setContent(String content) {
this.content = content;
}
public Blog getBlog() {
return blog;
}
public void setBlog(Blog blog) {
this.blog = blog;
}
public Date getCommentDate() {
return commentDate;
}
public void setCommentDate(Date commentDate) {
this.commentDate = commentDate;
}
public Integer getState() {
return state;
}
public void setState(Integer state) {
this.state = state;
}
}
接着是Link.java:
package com.steadyjack.entity;
/**
* title:Link.java
* description:友情链接实体
* time:2017年1月15日 下午9:25:58
* author:debug-steadyjack
*/
public class Link {
private Integer id; // 编号
private String linkName; // 链接名称
private String linkUrl; // 链接地址
private Integer orderNo; // 排序序号 从小到大排序
public Integer getId() {
return id;
}
public void setId(Integer id) {
this.id = id;
}
public String getLinkName() {
return linkName;
}
public void setLinkName(String linkName) {
this.linkName = linkName;
}
public String getLinkUrl() {
return linkUrl;
}
public void setLinkUrl(String linkUrl) {
this.linkUrl = linkUrl;
}
public Integer getOrderNo() {
return orderNo;
}
public void setOrderNo(Integer orderNo) {
this.orderNo = orderNo;
}
}
最后是PageBean.java:
package com.steadyjack.entity;
/**
* title:PageBean.java
* description:分页Model类
* time:2017年1月15日 下午9:26:23
* author:debug-steadyjack
*/
public class PageBean {
private int page; // 第几页
private int pageSize; // 每页记录数
private int start; // 起始页
public PageBean(int page, int pageSize) {
super();
this.page = page;
this.pageSize = pageSize;
}
public int getPage() {
return page;
}
public void setPage(int page) {
this.page = page;
}
public int getPageSize() {
return pageSize;
}
public void setPageSize(int pageSize) {
this.pageSize = pageSize;
}
public int getStart() {
return (page-1)*pageSize;
}
}
具体各个实体的属性以及作用我都已经说清楚了!
如果有相关问题:如想找我付费开发其他功能,讨论其中相关问题等等,可以来以下两群找我,我叫debug!
Java开源技术交流:583522159 鏖战八方群:391619659
ssm框架整合开发实战,这一篇我将介绍如何实现各大框架的整合。
上一篇博客,我介绍了web.xml配置文件,那个文件是项目的核心配置文件,其中其实就包括了整合spring springmvc框架的配置。当然啦,该配置文件还有权限认证安全框架shiro的过滤器配置以及编码过滤器的配置。言归正传,下面就将各大框架的整合配置文件共享出来。
首先是spring、springmvc的配置,spring框架的强大之处在此我就不多说了,起到的作用我就简单说几点吧。
1、其核心部分是IOC与AOP,前者即为所谓的控制反转,用于解决各大组件的依赖问题,也就是解耦的作用;AOP起到监视的作用,俗称面向切面,可以在事务开始前结束后做一层监视;
2、整合hibernate或者mybatis持久层框架,配置事务传播属性,在进行事务操作时起到很好的控制作用(commit,rollback等)。
3、springmvc是spring的一部分,提供的mvc编程模式大大提高了j2EE应用开发的高效性。。。
下面介绍spring的配置applicationContext-spring.xml:
<?xml version="1.0" encoding="UTF-8"?>
<beans xmlns="http://www.springframework.org/schema/beans"
xmlns:xsi="http://www.w3.org/2001/XMLSchema-instance"
xmlns:p="http://www.springframework.org/schema/p"
xmlns:aop="http://www.springframework.org/schema/aop"
xmlns:context="http://www.springframework.org/schema/context"
xmlns:jee="http://www.springframework.org/schema/jee"
xmlns:tx="http://www.springframework.org/schema/tx"
xsi:schemaLocation=" http://www.springframework.org/schema/aop http://www.springframework.org/schema/aop/spring-aop-4.0.xsd http://www.springframework.org/schema/beans http://www.springframework.org/schema/beans/spring-beans-4.0.xsd http://www.springframework.org/schema/context http://www.springframework.org/schema/context/spring-context-4.0.xsd http://www.springframework.org/schema/jee http://www.springframework.org/schema/jee/spring-jee-4.0.xsd http://www.springframework.org/schema/tx http://www.springframework.org/schema/tx/spring-tx-4.0.xsd">
<!-- 数据库连接池 -->
<!-- 加载配置文件 -->
<context:property-placeholder location="classpath:jdbc.properties"/>
<!-- 数据库连接池:阿里的德鲁伊数据库连接池 -->
<bean id="dataSource" class="com.alibaba.druid.pool.DruidDataSource" destroy-method="close">
<property name="url" value="${jdbc.jdbcUrl}"/>
<property name="username" value="${jdbc.username}"/>
<property name="password" value="${jdbc.password}"/>
<property name="driverClassName" value="${jdbc.driverClass}"/>
<property name="maxActive" value="${maxActive}"/>
<property name="minIdle" value="${minIdle}"/>
</bean>
<!-- 配置mybatis的sqlSessionFactory -->
<bean id="sqlSessionFactory" class="org.mybatis.spring.SqlSessionFactoryBean">
<property name="dataSource" ref="dataSource" />
<!-- 自动扫描mappers.xml文件 -->
<property name="mapperLocations" value="classpath:com/steadyjack/mappers/*.xml"></property>
<!-- mybatis配置文件 -->
<property name="configLocation" value="classpath:mybatis-config.xml"></property>
</bean>
<!-- DAO接口所在包名,Spring会自动查找其下的类 -->
<bean class="org.mybatis.spring.mapper.MapperScannerConfigurer">
<property name="basePackage" value="com.steadyjack.dao" />
<property name="sqlSessionFactoryBeanName" value="sqlSessionFactory"></property>
</bean>
<!-- (事务管理)transaction manager, use JtaTransactionManager for global tx -->
<bean id="transactionManager" class="org.springframework.jdbc.datasource.DataSourceTransactionManager">
<property name="dataSource" ref="dataSource" />
</bean>
<!-- 自定义Realm -->
<bean id="myRealm" class="com.steadyjack.realm.MyRealm"/>
<!-- 安全管理器 -->
<bean id="securityManager" class="org.apache.shiro.web.mgt.DefaultWebSecurityManager">
<property name="realm" ref="myRealm"/>
</bean>
<!-- Shiro过滤器 -->
<bean id="shiroFilter" class="org.apache.shiro.spring.web.ShiroFilterFactoryBean">
<!-- Shiro的核心安全接口,这个属性是必须的 -->
<property name="securityManager" ref="securityManager"/>
<!-- 身份认证失败,则跳转到登录页面的配置 -->
<property name="loginUrl" value="/login.jsp"/>
<!-- Shiro连接约束配置,即过滤链的定义 -->
<property name="filterChainDefinitions">
<value>
/login=anon
/admin/**=authc
</value>
</property>
</bean>
<!-- 保证实现了Shiro内部lifecycle函数的bean执行 -->
<bean id="lifecycleBeanPostProcessor" class="org.apache.shiro.spring.LifecycleBeanPostProcessor"/>
<!-- 开启Shiro注解 -->
<bean class="org.springframework.aop.framework.autoproxy.DefaultAdvisorAutoProxyCreator" depends-on="lifecycleBeanPostProcessor"/>
<bean class="org.apache.shiro.spring.security.interceptor.AuthorizationAttributeSourceAdvisor">
<property name="securityManager" ref="securityManager"/>
</bean>
<!-- 配置事务通知属性 -->
<tx:advice id="txAdvice" transaction-manager="transactionManager">
<!-- 定义事务传播属性 -->
<tx:attributes>
<tx:method name="insert*" propagation="REQUIRED" />
<tx:method name="update*" propagation="REQUIRED" />
<tx:method name="edit*" propagation="REQUIRED" />
<tx:method name="save*" propagation="REQUIRED" />
<tx:method name="add*" propagation="REQUIRED" />
<tx:method name="new*" propagation="REQUIRED" />
<tx:method name="set*" propagation="REQUIRED" />
<tx:method name="remove*" propagation="REQUIRED" />
<tx:method name="delete*" propagation="REQUIRED" />
<tx:method name="change*" propagation="REQUIRED" />
<tx:method name="check*" propagation="REQUIRED" />
<tx:method name="get*" propagation="REQUIRED" read-only="true" />
<tx:method name="find*" propagation="REQUIRED" read-only="true" />
<tx:method name="load*" propagation="REQUIRED" read-only="true" />
<tx:method name="*" propagation="REQUIRED" read-only="true" />
</tx:attributes>
</tx:advice>
<!-- 配置事务切面 -->
<aop:config>
<aop:pointcut id="serviceOperation" expression="execution(* com.steadyjack.service.*.*(..))" />
<aop:advisor advice-ref="txAdvice" pointcut-ref="serviceOperation" />
</aop:config>
<!-- 自动扫描 -->
<context:component-scan base-package="com.steadyjack.service" />
</beans>
加入jdbc配置jdbc.properties:
jdbc.driverClass=com.mysql.jdbc.Driver
jdbc.jdbcUrl=jdbc:mysql://localhost:3306/db_blog?useUnicode=true&characterEncoding=UTF-8
jdbc.username=root
jdbc.password=123456
#最大连接池数量
maxActive=10
#最小连接池数量
minIdle=2
日志配置log4j.properties:
log4j.rootLogger=DEBUG, Console
#Console
log4j.appender.Console=org.apache.log4j.ConsoleAppender
log4j.appender.Console.layout=org.apache.log4j.PatternLayout
log4j.appender.Console.layout.ConversionPattern=%d [%t] %-5p [%c] - %m%n
log4j.logger.java.sql.ResultSet=INFO
log4j.logger.org.apache=INFO
log4j.logger.java.sql.Connection=DEBUG
log4j.logger.java.sql.Statement=DEBUG
log4j.logger.java.sql.PreparedStatement=DEBUG
mybatis配置文件mybatis-config.xml:
<?xml version="1.0" encoding="UTF-8" ?>
<!DOCTYPE configuration
PUBLIC "-//mybatis.org//DTD Config 3.0//EN"
"http://mybatis.org/dtd/mybatis-3-config.dtd">
<configuration> spring-mvc.xml
<!-- 别名 -->
<typeAliases>
<package name="com.steadyjack.entity"/>
</typeAliases>
</configuration>
最后是springmvc的配置文件:
<?xml version="1.0" encoding="UTF-8"?>
<beans xmlns="http://www.springframework.org/schema/beans"
xmlns:xsi="http://www.w3.org/2001/XMLSchema-instance"
xmlns:p="http://www.springframework.org/schema/p"
xmlns:aop="http://www.springframework.org/schema/aop"
xmlns:context="http://www.springframework.org/schema/context"
xmlns:jee="http://www.springframework.org/schema/jee"
xmlns:tx="http://www.springframework.org/schema/tx"
xmlns:mvc="http://www.springframework.org/schema/mvc"
xsi:schemaLocation=" http://www.springframework.org/schema/aop http://www.springframework.org/schema/aop/spring-aop-4.0.xsd http://www.springframework.org/schema/beans http://www.springframework.org/schema/beans/spring-beans-4.0.xsd http://www.springframework.org/schema/mvc http://www.springframework.org/schema/mvc/spring-mvc.xsd http://www.springframework.org/schema/context http://www.springframework.org/schema/context/spring-context-4.0.xsd http://www.springframework.org/schema/jee http://www.springframework.org/schema/jee/spring-jee-4.0.xsd http://www.springframework.org/schema/tx http://www.springframework.org/schema/tx/spring-tx-4.0.xsd">
<mvc:annotation-driven/>
<!-- 静态资源配置 -->
<mvc:resources mapping="/static/**" location="/static/"/>
<!-- 视图解析器 -->
<bean id="viewResolver" class="org.springframework.web.servlet.view.InternalResourceViewResolver">
<property name="prefix" value="/" />
<property name="suffix" value=".jsp"></property>
</bean>
<!-- 多文件上传处理器 -->
<bean id="multipartResolver" class="org.springframework.web.multipart.commons.CommonsMultipartResolver">
<property name="defaultEncoding" value="UTF-8"/>
<!-- 即1024*1024*10字节 = 10m -->
<property name="maxUploadSize" value="10485760"/>
</bean>
<!-- 使用注解的包,包括子集 -->
<context:component-scan base-package="com.steadyjack.controller" />
</beans>
上面介绍的配置文件中:其实shiro的配置可以单独拿出来的(在这里我就偷懒了)。上面配置文件的内容我已经做了注释了,已看便可知。如果有问题,可以加入后面提供的群讨论。
最后,当然是建立包结构,如下图,大伙就自己建 了:
最后,我就把本系统涉及的各个实体类的代码贴出来吧(其实就是JavaBean了,可以自己建表然后mybatis逆向工程自己生成--至于如何生成,可以看我的博客:mybatis逆向工程)
首先是Blog.java:
package com.steadyjack.entity;
import java.io.Serializable;
import java.util.Date;
import java.util.LinkedList;
import java.util.List;
/**
* title:Blog.java
* description:博客实体
* time:2017年1月15日 下午9:22:23
* author:debug-steadyjack
*/
public class Blog implements Serializable {
private static final long serialVersionUID = 1L;
private Integer id; // 编号
private String title; // 博客标题
private String summary; // 摘要
private Date releaseDate; // 发布日期
private Integer clickHit; // 查看次数
private Integer replyHit; // 回复次数
private String content; // 博客内容
private String keyWord; // 关键字 空格隔开
private String contentNoTag; // 博客内容 无网页标签 (Lucene分词用)
private BlogType blogType; // 博客类型
private Integer blogCount; // 博客数量 非博客实际属性,主要是 根据发布日期归档查询博客数量用
private String releaseDateStr; // 发布日期字符串 只取年和月
private List<String> imagesList=new LinkedList<String>(); // 博客里存在的图片 主要用于前端列表展示显示缩略图
public Integer getId() {
return id;
}
public void setId(Integer id) {
this.id = id;
}
public String getTitle() {
return title;
}
public void setTitle(String title) {
this.title = title;
}
public String getSummary() {
return summary;
}
public void setSummary(String summary) {
this.summary = summary;
}
public Date getReleaseDate() {
return releaseDate;
}
public void setReleaseDate(Date releaseDate) {
this.releaseDate = releaseDate;
}
public Integer getClickHit() {
return clickHit;
}
public void setClickHit(Integer clickHit) {
this.clickHit = clickHit;
}
public Integer getReplyHit() {
return replyHit;
}
public void setReplyHit(Integer replyHit) {
this.replyHit = replyHit;
}
public String getContent() {
return content;
}
public void setContent(String content) {
this.content = content;
}
public String getContentNoTag() {
return contentNoTag;
}
public void setContentNoTag(String contentNoTag) {
this.contentNoTag = contentNoTag;
}
public BlogType getBlogType() {
return blogType;
}
public void setBlogType(BlogType blogType) {
this.blogType = blogType;
}
public Integer getBlogCount() {
return blogCount;
}
public void setBlogCount(Integer blogCount) {
this.blogCount = blogCount;
}
public String getReleaseDateStr() {
return releaseDateStr;
}
public void setReleaseDateStr(String releaseDateStr) {
this.releaseDateStr = releaseDateStr;
}
public String getKeyWord() {
return keyWord;
}
public void setKeyWord(String keyWord) {
this.keyWord = keyWord;
}
public List<String> getImagesList() {
return imagesList;
}
public void setImagesList(List<String> imagesList) {
this.imagesList = imagesList;
}
}
然后是Blogger.java:
package com.steadyjack.entity;
/**
* title:Blogger.java
* description:博主实体
* time:2017年1月15日 下午9:25:23
* author:debug-steadyjack
*/
public class Blogger {
private Integer id; // 编号
private String userName; // 用户名
private String password; // 密码
private String nickName; // 昵称
private String sign; // 个性签名
private String proFile; // 个人简介
private String imageName; // 博主头像
public Integer getId() {
return id;
}
public void setId(Integer id) {
this.id = id;
}
public String getUserName() {
return userName;
}
public void setUserName(String userName) {
this.userName = userName;
}
public String getPassword() {
return password;
}
public void setPassword(String password) {
this.password = password;
}
public String getNickName() {
return nickName;
}
public void setNickName(String nickName) {
this.nickName = nickName;
}
public String getSign() {
return sign;
}
public void setSign(String sign) {
this.sign = sign;
}
public String getProFile() {
return proFile;
}
public void setProFile(String proFile) {
this.proFile = proFile;
}
public String getImageName() {
return imageName;
}
public void setImageName(String imageName) {
this.imageName = imageName;
}
}
接着是BlogType.java:
package com.steadyjack.entity;
import java.io.Serializable;
/**
* title:BlogType.java
* description: 博客类型实体
* time:2017年1月15日 下午9:25:32
* author:debug-steadyjack
*/
public class BlogType implements Serializable{
/**
*
*/
private static final long serialVersionUID = 1L;
private Integer id; // 编号
private String typeName; // 博客类型名称
private Integer blogCount; // 数量
private Integer orderNo; // 排序 从小到大排序显示
public Integer getId() {
return id;
}
public void setId(Integer id) {
this.id = id;
}
public String getTypeName() {
return typeName;
}
public void setTypeName(String typeName) {
this.typeName = typeName;
}
public Integer getBlogCount() {
return blogCount;
}
public void setBlogCount(Integer blogCount) {
this.blogCount = blogCount;
}
public Integer getOrderNo() {
return orderNo;
}
public void setOrderNo(Integer orderNo) {
this.orderNo = orderNo;
}
}
然后是Comment.java:
package com.steadyjack.entity;
import java.util.Date;
/**
* title:Comment.java
* description: 评论实体
* time:2017年1月15日 下午9:25:41
* author:debug-steadyjack
*/
public class Comment {
private Integer id; // 编号
private String userIp; // 用户IP
private String content; // 评论内容
private Blog blog; // 被评论的博客
private Date commentDate; // 评论日期
private Integer state; // 审核状态 0 待审核 1 审核通过 2 审核未通过
public Integer getId() {
return id;
}
public void setId(Integer id) {
this.id = id;
}
public String getUserIp() {
return userIp;
}
public void setUserIp(String userIp) {
this.userIp = userIp;
}
public String getContent() {
return content;
}
public void setContent(String content) {
this.content = content;
}
public Blog getBlog() {
return blog;
}
public void setBlog(Blog blog) {
this.blog = blog;
}
public Date getCommentDate() {
return commentDate;
}
public void setCommentDate(Date commentDate) {
this.commentDate = commentDate;
}
public Integer getState() {
return state;
}
public void setState(Integer state) {
this.state = state;
}
}
接着是Link.java:
package com.steadyjack.entity;
/**
* title:Link.java
* description:友情链接实体
* time:2017年1月15日 下午9:25:58
* author:debug-steadyjack
*/
public class Link {
private Integer id; // 编号
private String linkName; // 链接名称
private String linkUrl; // 链接地址
private Integer orderNo; // 排序序号 从小到大排序
public Integer getId() {
return id;
}
public void setId(Integer id) {
this.id = id;
}
public String getLinkName() {
return linkName;
}
public void setLinkName(String linkName) {
this.linkName = linkName;
}
public String getLinkUrl() {
return linkUrl;
}
public void setLinkUrl(String linkUrl) {
this.linkUrl = linkUrl;
}
public Integer getOrderNo() {
return orderNo;
}
public void setOrderNo(Integer orderNo) {
this.orderNo = orderNo;
}
}
最后是PageBean.java:
package com.steadyjack.entity;
/**
* title:PageBean.java
* description:分页Model类
* time:2017年1月15日 下午9:26:23
* author:debug-steadyjack
*/
public class PageBean {
private int page; // 第几页
private int pageSize; // 每页记录数
private int start; // 起始页
public PageBean(int page, int pageSize) {
super();
this.page = page;
this.pageSize = pageSize;
}
public int getPage() {
return page;
}
public void setPage(int page) {
this.page = page;
}
public int getPageSize() {
return pageSize;
}
public void setPageSize(int pageSize) {
this.pageSize = pageSize;
}
public int getStart() {
return (page-1)*pageSize;
}
}
具体各个实体的属性以及作用我都已经说清楚了!
如果有相关问题:如想找我付费开发其他功能,讨论其中相关问题等等,可以来以下两群找我,我叫debug!
Java开源技术交流:583522159 鏖战八方群:391619659

相关文章推荐
- ssm(springmvc4+spring4+mybatis3)整合实战-个人博客系统-dao与service层等组件整合
- ssm(springmvc4+spring4+mybatis3)整合实战-个人博客系统-后端功能开发
- ssm(springmvc4+spring4+mybatis3)整合实战-个人博客系统-前端页面的开发
- ssm(springmvc4+spring4+mybatis3)整合实战-个人博客系统
- ssm(springmvc4+spring4+mybatis3)整合实战-个人博客系统-util介绍与开发首页
- SSM实战——秒杀系统之Web层Restful url设计、SpringMVC整合、页面设计
- 基于ssm框架的个人博客系统(11)--后台开发及前后端数据交互
- 基于ssm框架的个人博客系统(10)--编写博客页面开发
- 基于ssm框架的个人博客(2)--基于maven的ssm框架的整合
- SSM框架——详细整合教程(Spring 4.0.2+SpringMVC 4.0.2+MyBatis3.2.6)
- maven整合:最新ssm框架实现spring4.2,springmvc4.2,mybatis3.2
- springmvc整合mybatis框架源码 bootstrap html5 mysql oracle maven SSM
- springmvc整合mybatis框架源码 bootstrap html5 mysql oracle maven SSM
- 个人学习传智博客新巴巴运动网系列---ssm框架
- SpringMVC4+Spring4+Hibernate4框架整合
- 【框架整合】Maven-SpringMVC3.X+Spring3.X+MyBatis3-日志、JSON解析、表关联查询等均已配置好
- springmvc4 mybatis 整合 框架源码 bootstrap html5 mysql oracle sqlsever spring SSM
- Mybatis3+Spring4+SpringMVC4 框架整合环境搭建
- SSM框架搭建详细过程,springmvc、spring、mybatis整合