SYSTECH USB-CAN总线分析仪Linux驱动安装篇(树莓派)
2017-06-02 11:22
826 查看
入手了一个德国SYSTECH的USB-CAN分析仪,鉴于没有Linux下的详细安装步骤,这里写一篇文章介绍下在树莓派上的安装步骤。
原厂的介绍见:http://www.systec-electronic.com/en/products/industrial-communication/interfaces-and-gateways/can-usb-adapter-usb-canmodul1
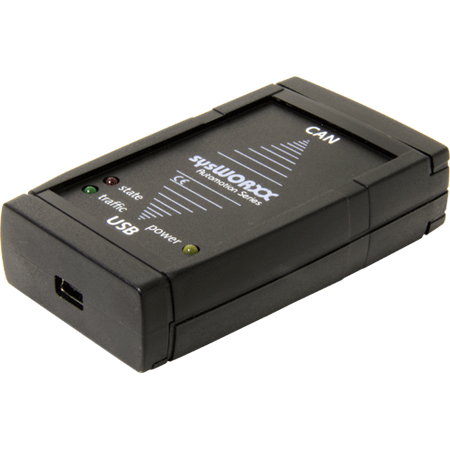
硬件图片如下:
> lsusb
...
Bus 001 Device 005: ID 0878:1101 # <-- 看到多了一个设备
...
> lsusb -v # <-- 设备详细信息,估计采购买的是盗版,啥信息都没有。
Bus 001 Device 005: ID 0878:1101
Couldn't open device, some information will be missing
Device Descriptor:
bLength 18
bDescriptorType 1
bcdUSB 1.10
bDeviceClass 255 Vendor Specific Class
bDeviceSubClass 255 Vendor Specific Subclass
bDeviceProtocol 255 Vendor Specific Protocol
bMaxPacketSize0 64
idVendor 0x0878
idProduct 0x1101
bcdDevice 3.05
iManufacturer 1
iProduct 2
iSerial 3
bNumConfigurations 1
驱动包官网下载地址:SYSTEC Linux驱动。
$ sudo apt-get update
$ sudo apt-get install rpi-update
CONFIG_CAN=m
CONFIG_CAN_RAW=m
CONFIG_CAN_BCM=m
CONFIG_CAN_DEV=m
CONFIG_CAN_CALC_BITTIMING=y
这里默认已经打开,不放心可以确认下:
$ cd /lib/modules/4.9.30+/build/
$ make menuconfig <-- 从菜单里选择Save导出配置项到文件.config里
$ less .config | grep CONFIG_CAN
$ make
Load the driver from the local source directory
------------------------------------------------
1. Load basic CAN drivers
$ sudo modprobe can_raw
$ sudo modprobe can_dev
2. Install firmware
$ sudo make firmware_install
3. Load USB-CANmodul driver
$ sudo insmod systec_can.ko
$ ip link set can0 up
用下面这个工具:
$ git clone git://github.com/linux-can/can-utils/
$ cd can-utils
$ make
$ ./candump can0
然后开始开发,如果你用的是python,推荐一个python-can,地址:https://github.com/hardbyte/python-can,可以使用examples/send_one.py来测试,同时观察candump窗口。我这里扩展了下测试代码,发完一帧后开始接收,供参考(有问题可加QQ群204148284一起讨论):
1. 购买SYSTECH的USB-CAN硬件。
可以在taobao上搜下,我就不列了。原厂的介绍见:http://www.systec-electronic.com/en/products/industrial-communication/interfaces-and-gateways/can-usb-adapter-usb-canmodul1
硬件图片如下:
2. USB连接
将设备插入树莓派的USB口,> lsusb
...
Bus 001 Device 005: ID 0878:1101 # <-- 看到多了一个设备
...
> lsusb -v # <-- 设备详细信息,估计采购买的是盗版,啥信息都没有。
Bus 001 Device 005: ID 0878:1101
Couldn't open device, some information will be missing
Device Descriptor:
bLength 18
bDescriptorType 1
bcdUSB 1.10
bDeviceClass 255 Vendor Specific Class
bDeviceSubClass 255 Vendor Specific Subclass
bDeviceProtocol 255 Vendor Specific Protocol
bMaxPacketSize0 64
idVendor 0x0878
idProduct 0x1101
bcdDevice 3.05
iManufacturer 1
iProduct 2
iSerial 3
bNumConfigurations 1
3. 编译驱动。
这里以驱动包里的readme.txt为索引,列出安装驱动的主要步骤及注意事项。驱动包官网下载地址:SYSTEC Linux驱动。
第1步:升级你的树莓派到最新(建议)
* Linux Kernel version >= 2.6.32$ sudo apt-get update
$ sudo apt-get install rpi-update
第2步:安装编译时需要的kernel文件
$ sudo wget https://raw.githubusercontent.com/notro/rpi-source/master/rpi-source -O /usr/bin/rpi-source && sudo chmod +x /usr/bin/rpi-source && /usr/bin/rpi-source -q --tag-update第3步:检查kernel里CAN相关的配置是否打开(默认已打开)
* Following kernel options have to be set:CONFIG_CAN=m
CONFIG_CAN_RAW=m
CONFIG_CAN_BCM=m
CONFIG_CAN_DEV=m
CONFIG_CAN_CALC_BITTIMING=y
这里默认已经打开,不放心可以确认下:
$ cd /lib/modules/4.9.30+/build/
$ make menuconfig <-- 从菜单里选择Save导出配置项到文件.config里
$ less .config | grep CONFIG_CAN
第4步:编译Linux驱动
$ cd systec_can$ make
Load the driver from the local source directory
------------------------------------------------
1. Load basic CAN drivers
$ sudo modprobe can_raw
$ sudo modprobe can_dev
2. Install firmware
$ sudo make firmware_install
3. Load USB-CANmodul driver
$ sudo insmod systec_can.ko
5. 启动can网络。
$ sudo ip link set can0 type can bitrate 125000$ ip link set can0 up
6. 开始can开发。
首先监测can总线上的数据:用下面这个工具:
$ git clone git://github.com/linux-can/can-utils/
$ cd can-utils
$ make
$ ./candump can0
然后开始开发,如果你用的是python,推荐一个python-can,地址:https://github.com/hardbyte/python-can,可以使用examples/send_one.py来测试,同时观察candump窗口。我这里扩展了下测试代码,发完一帧后开始接收,供参考(有问题可加QQ群204148284一起讨论):
'''
Test CAN bus.

Notes: Before test, start CAN network first by:
ip link set can0 type can bitrate 125000
ifconfig can0 up
ip -details -statistics link show can0
'''
from __future__ import print_function
import can

def send_one():
bus = can.interface.Bus('can0', bustype='socketcan_ctypes')
msg = can.Message(arbitration_id=0xc0ffee,
data=[0, 25, 0, 1, 3, 1, 4],
extended_id=True)
print("payload len:{}".format(msg.dlc))
try:
bus.send(msg)
print("Message sent on {}".format(bus.channel_info))
except can.CanError:
print("Message NOT sent")

def recv_line(sec=2):
bus = can.interface.Bus('can0', bustype='socketcan_ctypes')
pkt = bytearray()
while True:
msg = bus.recv(sec)
if msg != None:
pkt.extend(msg.data)
print('received:{} type:{}'.format(msg, type(msg)))
else:
break

print('rcv data:{}'.format([str(hex(x)) for x in pkt]))

相关文章推荐
- linux IDE驱动分析之IDE总线、驱动注册(五)
- 基于uclinux 的CAN 总线嵌入式驱动编程
- linux IDE驱动分析之IDE总线、驱动注册(二)
- linux总线,设备,驱动注册
- Linux中I2C总线驱动体系结构
- LINUX设备驱动之serio总线(一)
- I2C总线在Linux系统中的驱动设计
- I2C总线在Linux系统中的驱动设计
- Linux I2C核心、总线与设备驱动
- 基于uclinux 的CAN 总线嵌入式驱动编程
- Linux下IIC总线驱动 备忘
- Linux设备模型(总线、设备、驱动程序和类)之三:device_driver && 多厂家驱动自动识别
- Linux I2C核心、总线与设备驱动
- 【转】Linux那些事儿之我是U盘(9)总线,设备,和驱动(下)
- Linux I2C核心、总线与设备驱动
- Linux I2C核心、总线与设备驱动
- Linux I2C核心、总线与设备驱动
- linux IDE驱动分析之IDE总线、驱动注册(四)
- Linux总线驱动
- Linux那些事儿之我是U盘(8)总线,设备,和驱动(上)