清除浮动的四种方法(详解)
2017-05-30 17:07
781 查看
以下全部操作是在 Webstorm中进行的,个人认为webstorm比dreamweaver好用。
操作例子
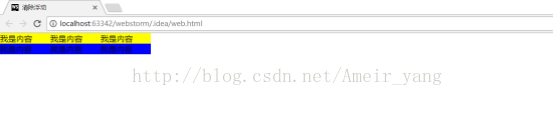
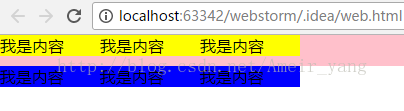
样图:

代码:
<!DOCTYPE html>
<html>
<head>
<meta charset="utf-8">
<title>清除浮动</title>
<base target="_self">
<style type="text/css">
*{
padding: 0;
margin: 0;
}
.box1{
background-color: pink;
}
.box1 p{
width: 100px;
background-color: yellow;
}
.box2{
background-color: skyblue;
}
.box2 p{
width: 100px;
background-color: blue;
}
</style>
</head>
<body>
<div class="box1">
<p>我是内容</p>
<p>我是内容</p>
<p>我是内容</p>
</div>
<div class="box2">
<p>我是内容</p>
<p>我是内容</p>
<p>我是内容</p>
</div>
</body>
</html>
全部左浮动后:

<!DOCTYPE html>
<html>
<head>
<meta charset="utf-8">
<title>清除浮动</title>
<base target="_self">
<style type="text/css">
*{
padding: 0;
margin: 0;
}
.box1{
background-color: pink;
}
.box1 p{
width: 100px;
background-color: yellow;
float: left;
}
.box2{
background-color: skyblue;
}
.box2 p{
width: 100px;
background-color: blue;
float: left;
}
</style>
</head>
<body>
<div class="box1">
<p>我是内容</p>
<p>我是内容</p>
<p>我是内容</p>
</div>
<div class="box2">
<p>我是内容</p>
<p>我是内容</p>
<p>我是内容</p>
</div>
</body>
</html>
---------------------------------------------------------------------------------------------------
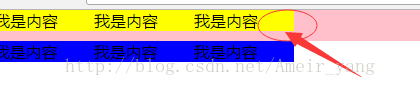
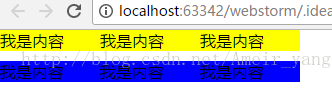
清除浮动后的效果是:让黄色部分与蓝色部分分行。
因为没有设置 box1
和 box2的宽和高,所以box1
和 box2
的形状 随着 浮动状态的变化而变化。
---------------------------------------------------------------------------------------------------
方法一:clear:both;
这是最基本的方法
代码:
<!DOCTYPE html>
<html>
<head>
<meta charset="utf-8">
<title>清除浮动</title>
<base target="_self">
<style type="text/css">
*{
padding: 0;
margin: 0;
}
.box1{
background-color: pink;
}
.box1 p{
width: 100px;
background-color: yellow;
float: left;
}
.box2{
background-color: skyblue;
clear: both;
}
.box2 p{
width: 100px;
background-color: blue;
float: left;
}
</style>
</head>
<body>
<div class="box1">
<p>我是内容</p>
<p>我是内容</p>
<p>我是内容</p>
</div>
<div class="box2">
<p>我是内容</p>
<p>我是内容</p>
<p>我是内容</p>
</div>
</body>
</html>
出现问题:不能直接用margin-top和margin-bottom设置两个兄弟盒子之间的距离。
解决方法:给这两个的盒子的父元素盒子添加一个边框。
<!DOCTYPE html>
<html>
<head>
<meta charset="utf-8">
<title>清除浮动</title>
<base target="_self">
<style type="text/css">
*{
padding: 0;
margin: 0;
}
.box1{
background-color: pink;
}
.box1 p{
width: 100px;
background-color: yellow;
float: left;
}
.box2{
background-color: skyblue;
clear: both;
}
.box2 p{
width: 100px;
background-color: blue;
float: left;
}
body{
border: 1px solid #000000;
}
</style>
</head>
<body>
<div class="box1">
<p>我是内容</p>
<p>我是内容</p>
<p>我是内容</p>
</div>
<div class="box2">
<p>我是内容</p>
<p>我是内容</p>
<p>我是内容</p>
</div>
</body>
</html>
这样就能设置margin-top和margin-bottom属性,但是如果当这两个属性的值设置的太小,box1与box2之间依然没有空隙分开。
设置 box2
的 margin-top: 10px;时:
设置 box2
的 margin-top: 20px;时

设置 box2
的 margin-top: 30px;时
当值为30的时候才会出现空隙。
Margin-bottom:;与margin-top
相同。
改变box1和box2两个盒子之间的距离:
先给 box1和box2的父元素加一个边框,然后再给box2添加margin-top属性或者给box1添加margin-bottom属性,添加的属性赋予适当的
数值 ,因为数值太小没有任何效果,box1和box2不会有空隙。
原因如图:
Margin-top的数值是大于所看到的距离的。所以margin-top数值在设置的时候要设置的大一些,大于所看到的分开距离。
方法二:
隔墙法
1.外墙法
方法:
在两个盒子(box1 , box2)之间添加一个额外的块级元素。
给这个额外添加的块级元素设置clear:both;属性。
代码:
<!DOCTYPE html>
<html>
<head>
<meta charset="utf-8">
<title>清除浮动</title>
<base target="_self">
<style type="text/css">
*{
padding: 0;
margin: 0;
}
.box1{
background-color: pink;
}
.box1 p{
width: 100px;
background-color: yellow;
float: left;
}
.box2{
background-color: skyblue;
}
.box2 p{
width: 100px;
background-color: blue;
float: left;
}
.qiang{
clear: both;
}
</style>
</head>
<body>
<div class="box1">
<p>我是内容</p>
<p>我是内容</p>
<p>我是内容</p>
</div>
<div class="qiang"></div>
<div class="box2">
<p>我是内容</p>
<p>我是内容</p>
<p>我是内容</p>
</div>
</body>
</html>
(1)可以给box2盒子添加
margin-top属性,让box1与box2分开。
(2)不可以给box1盒子添加margin-bottom属性:
解决方法给box1盒子的父元素(body)添加一个边框。
给父元素添加完边框后的情况:
给box2添加 Margin-top: 10px; box1
与 box2分开10px。
给 box1
添加 margin-bottom: 30px; box1 与
box2 分开
10px。
其原因
与 直接添加 clear: both;
一样,解决方法也一样。
(3)使 box1
与 box2 分开有空隙的方法:
1. 给box1
添加 margin-bottom属性,但是这种方法要给body设置边框,而且margin-bottom属性的值要设置的大一些。
2. 给box2
添加 margin-top属性。
3.给<div class=”qiang”></div>这个盒子设置高度。也就是给额外添加的块级元素添加高度这一属性,高度的值与所想要的box1,box2之间的距离相同。
方法代码:
<!DOCTYPE html>
<html>
<head>
<meta charset="utf-8">
<title>清除浮动</title>
<base target="_self">
<style type="text/css">
*{
padding: 0;
margin: 0;
}
.box1{
background-color: pink;
}
.box1 p{
width: 100px;
background-color: yellow;
float: left;
}
.box2{
background-color: skyblue;
}
.box2 p{
width: 100px;
background-color: blue;
float: left;
}
.qiang{
height: 10px;
clear: both;
}
</style>
</head>
<body>
<div class="box1">
<p>我是内容</p>
<p>我是内容</p>
<p>我是内容</p>
</div>
<div class="qiang"></div>
<div class="box2">
<p>我是内容</p>
<p>我是内容</p>
<p>我是内容</p>
</div>
</body>
</html>
2.内墙法
方法:(1) 在第一个盒子(box1)中所有的子元素最后添加一个额外的块级元素。
(2) 给这个额外添加的块级元素设置clear:both;属性。
代码:

<!DOCTYPE html>
<html>
<head>
<meta charset="utf-8">
<title>清除浮动</title>
<base target="_self">
<style type="text/css">
*{
padding: 0;
margin: 0;
}
.box1{
background-color: pink;
}
.box1 p{
width: 100px;
background-color: yellow;
float: left;
}
.box2{
background-color: skyblue;
}
.box2 p{
width: 100px;
background-color: blue;
float: left;
}
.qiang{
clear: both;
}
</style>
</head>
<body>
<div class="box1">
<p>我是内容</p>
<p>我是内容</p>
<p>我是内容</p>
<div class="qiang"></div>
</div>
<div class="box2">
<p>我是内容</p>
<p>我是内容</p>
<p>我是内容</p>
</div>
</body>
</html>
(1)可以给box2盒子添加
margin-top属性,让box1与box2分开。
(2)可以给box1盒子添加margin-bottom属性,让box1与box2分开。
使 box1
与 box2 分开有空隙的方法:
1. 给box1
添加 margin-bottom属性。
2. 给box2
添加 margin-top属性。
3 给<div class=”qiang”></div>这个盒子设置高度。也就是给额外添加的块级元素添加高度这一属性,高度的值与所想要的box1,box2之间的距离相同。
总结:
*比较这两种方法,说出外墙法和内墙法的不同之处?
(1)内墙法直接就可以用margin-bottom设置box1与box2之间的距离,但是外墙法要经过处理(给父元素添加边框),才能用margin-bottom设置距离。
(2)外墙法不能撑起第一个盒子的高度,而内墙法可以撑起第一个盒子的高度。
方法:
在额外增加的块级元素中添加高度这个属性,用块级元素的高度来改变两个盒子之间的上下距离。
内墙法:
外墙法:
内墙法和外墙法在企业开发中都不推荐使用,很少进行使用。因为添加了很多额外的块级元素,影响了代码的可读性。在前端开发中推崇的是:结构和样式分离。
方法三:
伪元素法
在讲伪元素法之前先要了解伪元素选择器
伪元素选择器的作用:给指定标签的内容前面添加一个子元素或者给指定标签的内容后面添加一个子元素。
效果图:
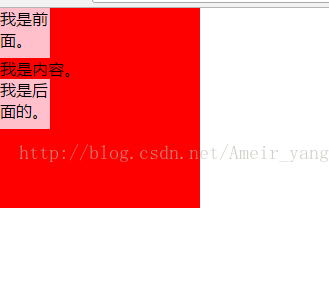
不用伪元素选择器给内容
添加 前后子元素:
代码:
<!DOCTYPE html>
<html>
<head>
<meta charset="utf-8">
<title>清除浮动</title>
<base target="_self">
<style type="text/css">
*{
padding: 0;
margin: 0;
}
.box1{
width: 200px;
height: 200px;
background-color: red;
}
.box1 p{
display: block;
width: 50px;
height: 50px;
background-color: pink;
}
</style>
</head>
<body>
<div class="box1">
<p>我是前面。</p>
我是内容。
<p>我是后面。</p>
</div>
</body>
</html>
使用伪元素选择器进行添加内容的前后子元素:
代码:
<!DOCTYPE html>
<html>
<head>
<meta charset="utf-8">
<title>清除浮动</title>
<base target="_self">
<style type="text/css">
*{
padding: 0;
margin: 0;
}
.box1{
width: 200px;
height: 200px;
background-color: red;
}
.box1::before{
content: "我是前面。";
display: block;
width: 50px;
height: 50px;
visibility: visible;
background-color: pink;
}
.box1:after{
content: "我是后面的。";
display: block;
width: 50px;
height: 50px;
visibility: visible;
background-color: pink;
}
</style>
</head>
<body>
<div class="box1">
我是内容。
</div>
</body>
</html>
隐藏内容前面或者内容后面的子元素的方法:
以隐藏内容后面的子元素为例子
方法:
height: 0px;
visibility: hidden; 将.box1::after{}中的height属性的值改为0,visibility属性的值改为hidden。
(1)height: 0px; 的意思是:将盒子或块级元素的高度变为零,隐藏显示后面子元素的区域。
(2)visibility: hidden;
的意思是:将盒子或块级元素中的文字部分隐藏起来。
综上所述,显示区域和内容区域都被隐藏起来了,所以整个子元素也被隐藏起来了。
代码:
<!DOCTYPE html>
<html>
<head>
<meta charset="utf-8">
<title>清除浮动</title>
<base target="_self">
<style type="text/css">
*{
padding: 0;
margin: 0;
}
.box1{
width: 200px;
height: 200px;
background-color: red;
}
.box1::before{
content: "我是前面。";
display: block;
width: 50px;
height: 50px;
visibility: visible;
background-color: pink;
}
.box1:after{
content: "我是后面的。";
display: block;
width: 50px;
height: 0px;
visibility: hidden;
background-color: pink;
}
</style>
</head>
<body>
<div class="box1">
我是内容。
</div>
</body>
</html>
利用
伪元素选择器 清除浮动:
方法:在第一个盒子(box1)中内容的最后 添加一个 伪元素选择器。在伪元素选择器中添加
content: ""; height: 0px; visibility: hidden; display: block; clear: both;这些属性。
content: "" 不写入任何的内容。
height: 0px; 显示区域没有高度。
visibility: hidden; 隐藏内容区域的内容部分。
display: block; 设置成块级元素。
clear: both; 清除所有浮动
代码:
<!DOCTYPE html>
<html>
<head>
<meta charset="utf-8">
<title>清除浮动</title>
<base target="_self">
<style type="text/css">
*{
padding: 0;
margin: 0;
}
.box1{
background-color: pink;
*zoom: 1;
}
.box1 p{
width: 100px;
background-color: yellow;
float: left;
}
.box2{
background-color: skyblue;
}
.box2 p{
width: 100px;
background-color: blue;
float: left;
}
.box1::after{
content: "";
height: 0px;
visibility: hidden;
display: block;
clear: both;
}
</style>
</head>
<body>
<div class="box1">
<p>我是内容</p>
<p>我是内容</p>
<p>我是内容</p>
</div>
<div class="box2">
<p>我是内容</p>
<p>我是内容</p>
<p>我是内容</p>
</div>
</body>
</html>
注意:在box1中添加*zoom: 1;的原因是: 兼容IE6
, 提高兼容性。
(1)可以给box2盒子添加
margin-top属性,让box1与box2分开。
(2)可以给box1盒子添加margin-bottom属性,让box1与box2分开。
使 box1
与 box2 分开有空隙的方法:
1. 给box1
添加 margin-bottom属性。
2. 给box2
添加 margin-top属性。
3 给伪元素选择器设置高度,高度的值与所想要的box1,box2之间的距离相同。
注意:
伪元素法可以撑起第一个盒子(box1)的高度,与内墙法效果一样。
当给伪元素选择器添加一个高度属性的时候,第一个盒子就会被撑起来。
方法四: overflow: hidden;
Overflow
的几个作用:
作用一:
清除浮动
方法:在第一个盒子中添加overflow: hidden;属性。
代码:
<!DOCTYPE html>
<html>
<head>
<meta charset="utf-8">
<title>清除浮动</title>
<base target="_self">
<style type="text/css">
*{
padding: 0;
margin: 0;
}
.box1{
background-color: pink;
overflow: hidden;
*zoom: 1;/*兼容IE6*/
}
.box1 p{
width: 100px;
background-color: yellow;
float: left;
}
.box2{
background-color: skyblue;
}
.box2 p{
width: 100px;
background-color: blue;
float: left;
}
</style>
</head>
<body>
<div class="box1">
<p>我是内容</p>
<p>我是内容</p>
<p>我是内容</p>
</div>
<div class="box2">
<p>我是内容</p>
<p>我是内容</p>
<p>我是内容</p>
</div>
</body>
</html>
注意: 在box1中添加*zoom: 1;的原因是: 兼容IE6
, 提高兼容性。
(1)可以给box2盒子添加
margin-top属性,让box1与box2分开。
(2)可以给box1盒子添加margin-bottom属性,让box1与box2分开。
使 box1
与 box2 分开有空隙的方法:
1. 给box1
添加 margin-bottom属性。
2. 给box2
添加 margin-top属性。
作用二:
切除(删除)超出的内容部分:
没切除之前:
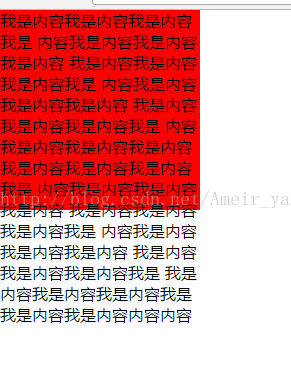
代码:
<!DOCTYPE html>
<html>
<head>
<meta charset="utf-8">
<title>清除浮动</title>
<base target="_self">
<style type="text/css">
*{
padding: 0;
margin: 0;
}
.box1{
width: 200px;
height: 200px;
background-color: red;
}
</style>
</head>
<body>
<div class="box1">
<p>我是内容我是内容我是内容我是
内容我是内容我是内容我是内容
我是内容我是内容我是内容我是
内容我是内容我是内容我是内容
我是内容我是内容我是内容我是
内容我是内容我是内容我是内容
我是内容我是内容我是内容我是
内容我是内容我是内容我是内容
我是内容我是内容我是内容我是
内容我是内容我是内容我是内容
我是内容我是内容我是内容我是
我是内容我是内容我是内容我是
我是内容我是内容内容内容</p>
</div>
</body>
</html>
切除超出内容之后:
在.box1中添加overflow: hidden;属性即可。
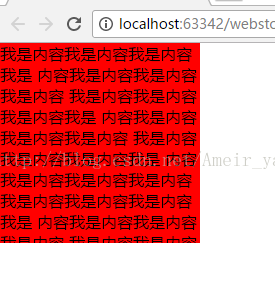
代码:
<!DOCTYPE html>
<html>
<head>
<meta charset="utf-8">
<title>清除浮动</title>
<base target="_self">
<style type="text/css">
*{
padding: 0;
margin: 0;
}
.box1{
width: 200px;
height: 200px;
background-color: red;
overflow: hidden;
}
</style>
</head>
<body>
<div class="box1">
<p>我是内容我是内容我是内容我是
内容我是内容我是内容我是内容
我是内容我是内容我是内容我是
内容我是内容我是内容我是内容
我是内容我是内容我是内容我是
内容我是内容我是内容我是内容
我是内容我是内容我是内容我是
内容我是内容我是内容我是内容
我是内容我是内容我是内容我是
内容我是内容我是内容我是内容
我是内容我是内容我是内容我是
我是内容我是内容我是内容我是
我是内容我是内容内容内容</p>
</div>
</body>
</html>
作用三
: 防止外面的盒子因为里面的盒子使用margin-top的时候被顶下来。
两个属于嵌套关系的盒子,当设置里面盒子的margin-top的同时,外面盒子也会被顶下来。
属于嵌套关系的两个盒子:
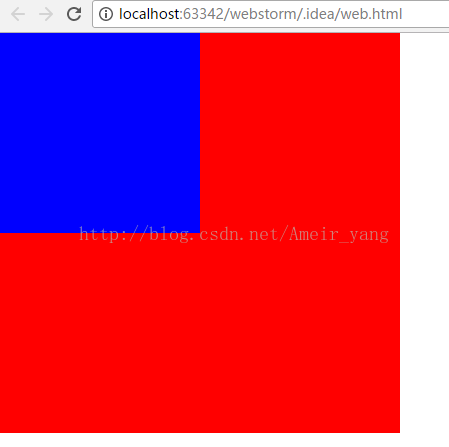
当给里面的蓝色盒子使用margin-top: 20px;的时候:
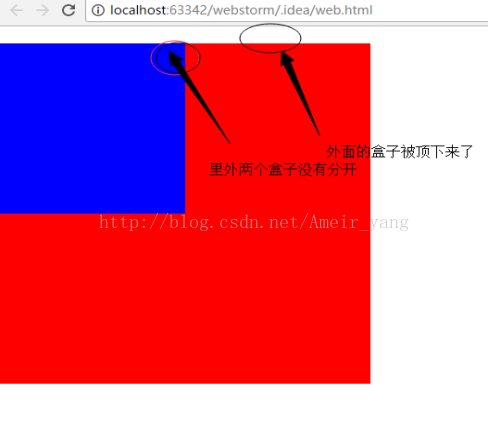
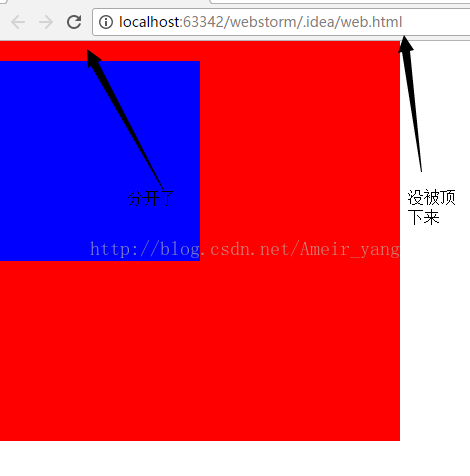
当给box1(外面的盒子)添加一个overflow: hidden;属性的时候:
代码:
<!DOCTYPE html>
<html>
<head>
<meta charset="utf-8">
<title>清除浮动</title>
<base target="_self">
<style type="text/css">
*{
padding: 0;
margin: 0;
}
.box1{
width: 400px;
height: 400px;
background-color: red;
overflow: hidden;
}
.box1 .box2{
width: 200px;
height: 200px;
background-color: blue;
margin-top: 20px;
}
</style>
</head>
<body>
<div class="box1">
<div class="box2"></div>
</div>
</body>
</html>
总结:
两个具有嵌套关系的盒子,当给里面的盒子设置margin-top属性的时候,外面的盒子也会受到影响被顶下来,解决方法有两个:1.
给外面盒子设置边框 ,2.给外面盒子添加overflow: hidden;属性。第一种方法不推荐使用,因为如果外面的盒子是最大的body,虽然可以设置边框,但是在企业开发中是不允许的,在企业开发中我们不会给body设置一个边框的。所以遇到这样的问题就用第二种方法。
操作例子
样图:
代码:
<!DOCTYPE html>
<html>
<head>
<meta charset="utf-8">
<title>清除浮动</title>
<base target="_self">
<style type="text/css">
*{
padding: 0;
margin: 0;
}
.box1{
background-color: pink;
}
.box1 p{
width: 100px;
background-color: yellow;
}
.box2{
background-color: skyblue;
}
.box2 p{
width: 100px;
background-color: blue;
}
</style>
</head>
<body>
<div class="box1">
<p>我是内容</p>
<p>我是内容</p>
<p>我是内容</p>
</div>
<div class="box2">
<p>我是内容</p>
<p>我是内容</p>
<p>我是内容</p>
</div>
</body>
</html>
全部左浮动后:
<!DOCTYPE html>
<html>
<head>
<meta charset="utf-8">
<title>清除浮动</title>
<base target="_self">
<style type="text/css">
*{
padding: 0;
margin: 0;
}
.box1{
background-color: pink;
}
.box1 p{
width: 100px;
background-color: yellow;
float: left;
}
.box2{
background-color: skyblue;
}
.box2 p{
width: 100px;
background-color: blue;
float: left;
}
</style>
</head>
<body>
<div class="box1">
<p>我是内容</p>
<p>我是内容</p>
<p>我是内容</p>
</div>
<div class="box2">
<p>我是内容</p>
<p>我是内容</p>
<p>我是内容</p>
</div>
</body>
</html>
---------------------------------------------------------------------------------------------------
清除浮动后的效果是:让黄色部分与蓝色部分分行。
因为没有设置 box1
和 box2的宽和高,所以box1
和 box2
的形状 随着 浮动状态的变化而变化。
---------------------------------------------------------------------------------------------------
方法一:clear:both;
这是最基本的方法
代码:
<!DOCTYPE html>
<html>
<head>
<meta charset="utf-8">
<title>清除浮动</title>
<base target="_self">
<style type="text/css">
*{
padding: 0;
margin: 0;
}
.box1{
background-color: pink;
}
.box1 p{
width: 100px;
background-color: yellow;
float: left;
}
.box2{
background-color: skyblue;
clear: both;
}
.box2 p{
width: 100px;
background-color: blue;
float: left;
}
</style>
</head>
<body>
<div class="box1">
<p>我是内容</p>
<p>我是内容</p>
<p>我是内容</p>
</div>
<div class="box2">
<p>我是内容</p>
<p>我是内容</p>
<p>我是内容</p>
</div>
</body>
</html>
出现问题:不能直接用margin-top和margin-bottom设置两个兄弟盒子之间的距离。
解决方法:给这两个的盒子的父元素盒子添加一个边框。
<!DOCTYPE html>
<html>
<head>
<meta charset="utf-8">
<title>清除浮动</title>
<base target="_self">
<style type="text/css">
*{
padding: 0;
margin: 0;
}
.box1{
background-color: pink;
}
.box1 p{
width: 100px;
background-color: yellow;
float: left;
}
.box2{
background-color: skyblue;
clear: both;
}
.box2 p{
width: 100px;
background-color: blue;
float: left;
}
body{
border: 1px solid #000000;
}
</style>
</head>
<body>
<div class="box1">
<p>我是内容</p>
<p>我是内容</p>
<p>我是内容</p>
</div>
<div class="box2">
<p>我是内容</p>
<p>我是内容</p>
<p>我是内容</p>
</div>
</body>
</html>
这样就能设置margin-top和margin-bottom属性,但是如果当这两个属性的值设置的太小,box1与box2之间依然没有空隙分开。
设置 box2
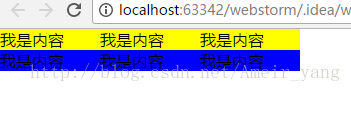
的 margin-top: 10px;时:
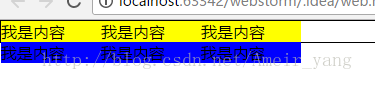
设置 box2
的 margin-top: 20px;时
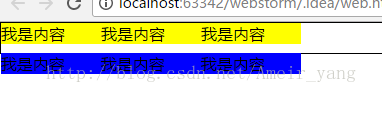
设置 box2
的 margin-top: 30px;时
当值为30的时候才会出现空隙。
Margin-bottom:;与margin-top
相同。
改变box1和box2两个盒子之间的距离:
先给 box1和box2的父元素加一个边框,然后再给box2添加margin-top属性或者给box1添加margin-bottom属性,添加的属性赋予适当的
数值 ,因为数值太小没有任何效果,box1和box2不会有空隙。
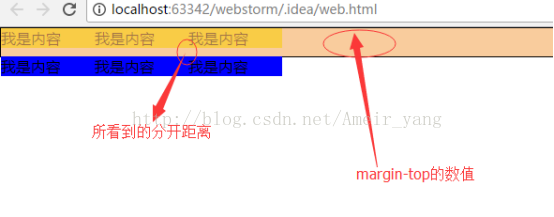
原因如图:
Margin-top的数值是大于所看到的距离的。所以margin-top数值在设置的时候要设置的大一些,大于所看到的分开距离。
方法二:
隔墙法
1.外墙法
方法:
在两个盒子(box1 , box2)之间添加一个额外的块级元素。
给这个额外添加的块级元素设置clear:both;属性。
代码:
<!DOCTYPE html>
<html>
<head>
<meta charset="utf-8">
<title>清除浮动</title>
<base target="_self">
<style type="text/css">
*{
padding: 0;
margin: 0;
}
.box1{
background-color: pink;
}
.box1 p{
width: 100px;
background-color: yellow;
float: left;
}
.box2{
background-color: skyblue;
}
.box2 p{
width: 100px;
background-color: blue;
float: left;
}
.qiang{
clear: both;
}
</style>
</head>
<body>
<div class="box1">
<p>我是内容</p>
<p>我是内容</p>
<p>我是内容</p>
</div>
<div class="qiang"></div>
<div class="box2">
<p>我是内容</p>
<p>我是内容</p>
<p>我是内容</p>
</div>
</body>
</html>
(1)可以给box2盒子添加
margin-top属性,让box1与box2分开。
(2)不可以给box1盒子添加margin-bottom属性:
解决方法给box1盒子的父元素(body)添加一个边框。
给父元素添加完边框后的情况:
给box2添加 Margin-top: 10px; box1
与 box2分开10px。
给 box1
添加 margin-bottom: 30px; box1 与
box2 分开
10px。
其原因
与 直接添加 clear: both;
一样,解决方法也一样。
(3)使 box1
与 box2 分开有空隙的方法:
1. 给box1
添加 margin-bottom属性,但是这种方法要给body设置边框,而且margin-bottom属性的值要设置的大一些。
2. 给box2
添加 margin-top属性。
3.给<div class=”qiang”></div>这个盒子设置高度。也就是给额外添加的块级元素添加高度这一属性,高度的值与所想要的box1,box2之间的距离相同。
方法代码:
<!DOCTYPE html>
<html>
<head>
<meta charset="utf-8">
<title>清除浮动</title>
<base target="_self">
<style type="text/css">
*{
padding: 0;
margin: 0;
}
.box1{
background-color: pink;
}
.box1 p{
width: 100px;
background-color: yellow;
float: left;
}
.box2{
background-color: skyblue;
}
.box2 p{
width: 100px;
background-color: blue;
float: left;
}
.qiang{
height: 10px;
clear: both;
}
</style>
</head>
<body>
<div class="box1">
<p>我是内容</p>
<p>我是内容</p>
<p>我是内容</p>
</div>
<div class="qiang"></div>
<div class="box2">
<p>我是内容</p>
<p>我是内容</p>
<p>我是内容</p>
</div>
</body>
</html>
2.内墙法
方法:(1) 在第一个盒子(box1)中所有的子元素最后添加一个额外的块级元素。
(2) 给这个额外添加的块级元素设置clear:both;属性。
代码:
<!DOCTYPE html>
<html>
<head>
<meta charset="utf-8">
<title>清除浮动</title>
<base target="_self">
<style type="text/css">
*{
padding: 0;
margin: 0;
}
.box1{
background-color: pink;
}
.box1 p{
width: 100px;
background-color: yellow;
float: left;
}
.box2{
background-color: skyblue;
}
.box2 p{
width: 100px;
background-color: blue;
float: left;
}
.qiang{
clear: both;
}
</style>
</head>
<body>
<div class="box1">
<p>我是内容</p>
<p>我是内容</p>
<p>我是内容</p>
<div class="qiang"></div>
</div>
<div class="box2">
<p>我是内容</p>
<p>我是内容</p>
<p>我是内容</p>
</div>
</body>
</html>
(1)可以给box2盒子添加
margin-top属性,让box1与box2分开。
(2)可以给box1盒子添加margin-bottom属性,让box1与box2分开。
使 box1
与 box2 分开有空隙的方法:
1. 给box1
添加 margin-bottom属性。
2. 给box2
添加 margin-top属性。
3 给<div class=”qiang”></div>这个盒子设置高度。也就是给额外添加的块级元素添加高度这一属性,高度的值与所想要的box1,box2之间的距离相同。
总结:
*比较这两种方法,说出外墙法和内墙法的不同之处?
(1)内墙法直接就可以用margin-bottom设置box1与box2之间的距离,但是外墙法要经过处理(给父元素添加边框),才能用margin-bottom设置距离。
(2)外墙法不能撑起第一个盒子的高度,而内墙法可以撑起第一个盒子的高度。
方法:
在额外增加的块级元素中添加高度这个属性,用块级元素的高度来改变两个盒子之间的上下距离。
内墙法:
外墙法:
内墙法和外墙法在企业开发中都不推荐使用,很少进行使用。因为添加了很多额外的块级元素,影响了代码的可读性。在前端开发中推崇的是:结构和样式分离。
方法三:
伪元素法
在讲伪元素法之前先要了解伪元素选择器
伪元素选择器的作用:给指定标签的内容前面添加一个子元素或者给指定标签的内容后面添加一个子元素。
效果图:
不用伪元素选择器给内容
添加 前后子元素:
代码:
<!DOCTYPE html>
<html>
<head>
<meta charset="utf-8">
<title>清除浮动</title>
<base target="_self">
<style type="text/css">
*{
padding: 0;
margin: 0;
}
.box1{
width: 200px;
height: 200px;
background-color: red;
}
.box1 p{
display: block;
width: 50px;
height: 50px;
background-color: pink;
}
</style>
</head>
<body>
<div class="box1">
<p>我是前面。</p>
我是内容。
<p>我是后面。</p>
</div>
</body>
</html>
使用伪元素选择器进行添加内容的前后子元素:
代码:
<!DOCTYPE html>
<html>
<head>
<meta charset="utf-8">
<title>清除浮动</title>
<base target="_self">
<style type="text/css">
*{
padding: 0;
margin: 0;
}
.box1{
width: 200px;
height: 200px;
background-color: red;
}
.box1::before{
content: "我是前面。";
display: block;
width: 50px;
height: 50px;
visibility: visible;
background-color: pink;
}
.box1:after{
content: "我是后面的。";
display: block;
width: 50px;
height: 50px;
visibility: visible;
background-color: pink;
}
</style>
</head>
<body>
<div class="box1">
我是内容。
</div>
</body>
</html>
隐藏内容前面或者内容后面的子元素的方法:
以隐藏内容后面的子元素为例子
方法:
height: 0px;
visibility: hidden; 将.box1::after{}中的height属性的值改为0,visibility属性的值改为hidden。
(1)height: 0px; 的意思是:将盒子或块级元素的高度变为零,隐藏显示后面子元素的区域。
(2)visibility: hidden;
的意思是:将盒子或块级元素中的文字部分隐藏起来。
综上所述,显示区域和内容区域都被隐藏起来了,所以整个子元素也被隐藏起来了。
代码:
<!DOCTYPE html>
<html>
<head>
<meta charset="utf-8">
<title>清除浮动</title>
<base target="_self">
<style type="text/css">
*{
padding: 0;
margin: 0;
}
.box1{
width: 200px;
height: 200px;
background-color: red;
}
.box1::before{
content: "我是前面。";
display: block;
width: 50px;
height: 50px;
visibility: visible;
background-color: pink;
}
.box1:after{
content: "我是后面的。";
display: block;
width: 50px;
height: 0px;
visibility: hidden;
background-color: pink;
}
</style>
</head>
<body>
<div class="box1">
我是内容。
</div>
</body>
</html>
利用
伪元素选择器 清除浮动:
方法:在第一个盒子(box1)中内容的最后 添加一个 伪元素选择器。在伪元素选择器中添加
content: ""; height: 0px; visibility: hidden; display: block; clear: both;这些属性。
content: "" 不写入任何的内容。
height: 0px; 显示区域没有高度。
visibility: hidden; 隐藏内容区域的内容部分。
display: block; 设置成块级元素。
clear: both; 清除所有浮动
代码:
<!DOCTYPE html>
<html>
<head>
<meta charset="utf-8">
<title>清除浮动</title>
<base target="_self">
<style type="text/css">
*{
padding: 0;
margin: 0;
}
.box1{
background-color: pink;
*zoom: 1;
}
.box1 p{
width: 100px;
background-color: yellow;
float: left;
}
.box2{
background-color: skyblue;
}
.box2 p{
width: 100px;
background-color: blue;
float: left;
}
.box1::after{
content: "";
height: 0px;
visibility: hidden;
display: block;
clear: both;
}
</style>
</head>
<body>
<div class="box1">
<p>我是内容</p>
<p>我是内容</p>
<p>我是内容</p>
</div>
<div class="box2">
<p>我是内容</p>
<p>我是内容</p>
<p>我是内容</p>
</div>
</body>
</html>
注意:在box1中添加*zoom: 1;的原因是: 兼容IE6
, 提高兼容性。
(1)可以给box2盒子添加
margin-top属性,让box1与box2分开。
(2)可以给box1盒子添加margin-bottom属性,让box1与box2分开。
使 box1
与 box2 分开有空隙的方法:
1. 给box1
添加 margin-bottom属性。
2. 给box2
添加 margin-top属性。
3 给伪元素选择器设置高度,高度的值与所想要的box1,box2之间的距离相同。
注意:
伪元素法可以撑起第一个盒子(box1)的高度,与内墙法效果一样。
当给伪元素选择器添加一个高度属性的时候,第一个盒子就会被撑起来。
方法四: overflow: hidden;
Overflow
的几个作用:
作用一:
清除浮动
方法:在第一个盒子中添加overflow: hidden;属性。
代码:
<!DOCTYPE html>
<html>
<head>
<meta charset="utf-8">
<title>清除浮动</title>
<base target="_self">
<style type="text/css">
*{
padding: 0;
margin: 0;
}
.box1{
background-color: pink;
overflow: hidden;
*zoom: 1;/*兼容IE6*/
}
.box1 p{
width: 100px;
background-color: yellow;
float: left;
}
.box2{
background-color: skyblue;
}
.box2 p{
width: 100px;
background-color: blue;
float: left;
}
</style>
</head>
<body>
<div class="box1">
<p>我是内容</p>
<p>我是内容</p>
<p>我是内容</p>
</div>
<div class="box2">
<p>我是内容</p>
<p>我是内容</p>
<p>我是内容</p>
</div>
</body>
</html>
注意: 在box1中添加*zoom: 1;的原因是: 兼容IE6
, 提高兼容性。
(1)可以给box2盒子添加
margin-top属性,让box1与box2分开。
(2)可以给box1盒子添加margin-bottom属性,让box1与box2分开。
使 box1
与 box2 分开有空隙的方法:
1. 给box1
添加 margin-bottom属性。
2. 给box2
添加 margin-top属性。
作用二:
切除(删除)超出的内容部分:
没切除之前:
代码:
<!DOCTYPE html>
<html>
<head>
<meta charset="utf-8">
<title>清除浮动</title>
<base target="_self">
<style type="text/css">
*{
padding: 0;
margin: 0;
}
.box1{
width: 200px;
height: 200px;
background-color: red;
}
</style>
</head>
<body>
<div class="box1">
<p>我是内容我是内容我是内容我是
内容我是内容我是内容我是内容
我是内容我是内容我是内容我是
内容我是内容我是内容我是内容
我是内容我是内容我是内容我是
内容我是内容我是内容我是内容
我是内容我是内容我是内容我是
内容我是内容我是内容我是内容
我是内容我是内容我是内容我是
内容我是内容我是内容我是内容
我是内容我是内容我是内容我是
我是内容我是内容我是内容我是
我是内容我是内容内容内容</p>
</div>
</body>
</html>
切除超出内容之后:
在.box1中添加overflow: hidden;属性即可。
代码:
<!DOCTYPE html>
<html>
<head>
<meta charset="utf-8">
<title>清除浮动</title>
<base target="_self">
<style type="text/css">
*{
padding: 0;
margin: 0;
}
.box1{
width: 200px;
height: 200px;
background-color: red;
overflow: hidden;
}
</style>
</head>
<body>
<div class="box1">
<p>我是内容我是内容我是内容我是
内容我是内容我是内容我是内容
我是内容我是内容我是内容我是
内容我是内容我是内容我是内容
我是内容我是内容我是内容我是
内容我是内容我是内容我是内容
我是内容我是内容我是内容我是
内容我是内容我是内容我是内容
我是内容我是内容我是内容我是
内容我是内容我是内容我是内容
我是内容我是内容我是内容我是
我是内容我是内容我是内容我是
我是内容我是内容内容内容</p>
</div>
</body>
</html>
作用三
: 防止外面的盒子因为里面的盒子使用margin-top的时候被顶下来。
两个属于嵌套关系的盒子,当设置里面盒子的margin-top的同时,外面盒子也会被顶下来。
属于嵌套关系的两个盒子:
当给里面的蓝色盒子使用margin-top: 20px;的时候:
当给box1(外面的盒子)添加一个overflow: hidden;属性的时候:
代码:
<!DOCTYPE html>
<html>
<head>
<meta charset="utf-8">
<title>清除浮动</title>
<base target="_self">
<style type="text/css">
*{
padding: 0;
margin: 0;
}
.box1{
width: 400px;
height: 400px;
background-color: red;
overflow: hidden;
}
.box1 .box2{
width: 200px;
height: 200px;
background-color: blue;
margin-top: 20px;
}
</style>
</head>
<body>
<div class="box1">
<div class="box2"></div>
</div>
</body>
</html>
总结:
两个具有嵌套关系的盒子,当给里面的盒子设置margin-top属性的时候,外面的盒子也会受到影响被顶下来,解决方法有两个:1.
给外面盒子设置边框 ,2.给外面盒子添加overflow: hidden;属性。第一种方法不推荐使用,因为如果外面的盒子是最大的body,虽然可以设置边框,但是在企业开发中是不允许的,在企业开发中我们不会给body设置一个边框的。所以遇到这样的问题就用第二种方法。

相关文章推荐
- 彻底理解浮动float CSS浮动详解 清除浮动的方法
- CSS清除浮动的方法详解
- 浮动的清除 -- 四种方法
- 清除浮动四种方法
- css中关于clearfix清除浮动方法详解
- 清除浮动的四种方法
- 前端修炼手札:清除浮动的四种方法
- 关于清除浮动的四种方法
- 清除浮动的几种方法以及详解
- 关于清除浮动的四种方法
- 清除浮动——让包围元素包含浮动元素的四种方法
- 彻底理解浮动float CSS浮动详解 清除浮动的方法
- CSS 清除浮动的四种方法
- 详解清除浮动的多种方法
- 菜鸟备忘录[CSS3]——清除浮动的四种方法
- 关于清除浮动的四种方法
- CSS四种清除浮动的方法
- css清除浮动的方法总结
- 【Web】网页清除浮动的方法
- Java解析XML的四种方法详解