2016-2017-2 20155322 实验四 Android 开发基础
2017-05-20 22:57
453 查看
2016-2017-2 20155322 实验四 Android 开发基础
实验内容
下载和安装Android Studio学会使用Android Studio进行简单的Android开发
实验知识点
Android 开发因为涉及到代码编辑、UI 布局、打包等工序,有一款好用的IDE非常重要。Google 最早提供了基于 Eclipse 的 ADT 作为开发工具,后来在2013年 Google I/O 大会发布基于 IntelliJ IDEA 开发工具Android Studio。宣布不再持续支持 ADT。目前, Android Studio已经逐渐取代Eclipse成为主流的Android开发环境。由于Google无法进入中国,Android开发者下载开发工具都十分不方便,以前可以在Android Studio中文社区下载Android Studio,现在好了,2016年12月,Google 开通了Google Developers 中国网站。
实验步骤
实践一:Android Studio的安装测试
参考《Java和Android开发学习指南(第二版)(EPUBIT,Java for Android 2nd)》第二十四章:安装 Android Studio
完成Hello World, 要求修改res目录中的内容,Hello World后要显示自己的学号,提交代码运行截图和码云Git链接,截图没有学号要扣分
学习Android Studio调试应用程序
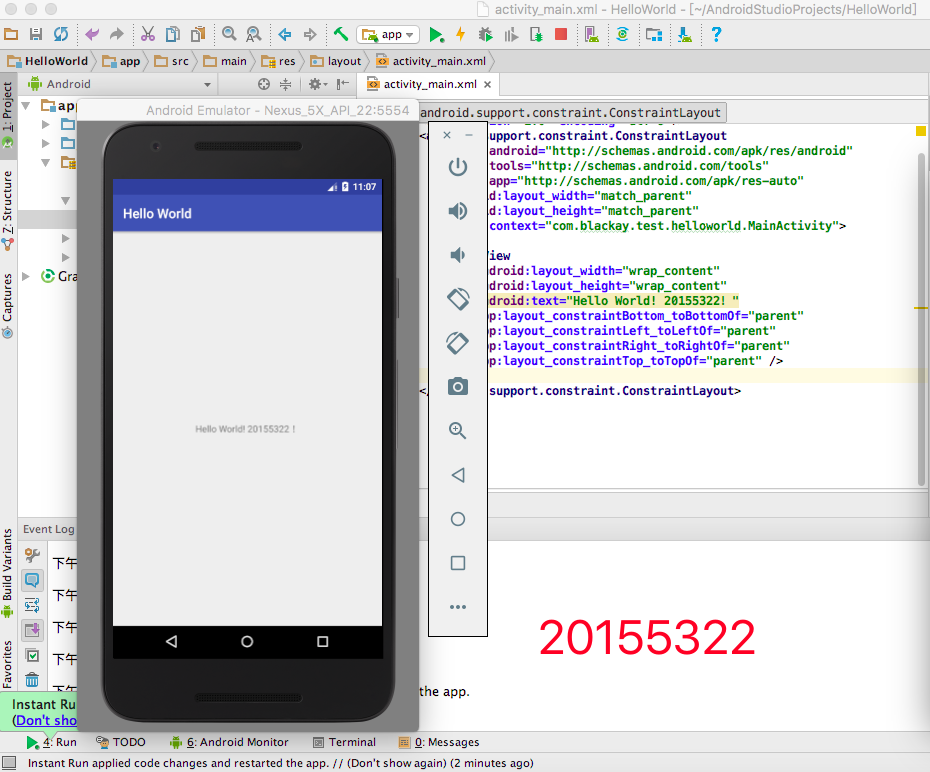
在这个实践中,我大致了解到Android程序主要的两个部分,一个是layout中的
.xml文件,一个是Java中的
.java文件,所以为了在文本中添加自己的学号信息,我在
activity_main.xml文件中的
android:text代码段添加了我的学号信息,故而其
TextView标签中的代码如下:
<TextView
android:id="@+id/textView1"
android:layout_width="wrap_content"
android:layout_height="wrap_content"
android:text="Hello World! \n 20155322!"
app:layout_constraintBottom_toBottomOf="parent"
app:layout_constraintLeft_toLeftOf="parent"
app:layout_constraintRight_toRightOf="parent"
app:layout_constraintTop_toTopOf="parent" />
结果截图:
实践二:Activity测试
参考《Java和Android开发学习指南(第二版)(EPUBIT,Java for Android 2nd)》第二十五章:构建项目,运行教材相关代码
创建 ThirdActivity, 在ThirdActivity中显示自己的学号,修改代码让MainActivity启动ThirdActivity
提交代码运行截图和码云Git链接,截图要有学号水印,否则会扣分
在这个部分中,需要在
ThirdActivity中显示自己的学号,并且激发这个学号的条件是点击
MainActivity的文本。我是在上一个实践
HelloWorld.Project的基础上进行修改的,实现这样一个需求需要经过以下四个步骤:
复制粘贴
activity_main.xml文件并将其命名为
activity_third.xml,将其
TextView标签中的代码改为:
<TextView
android:layout_width="wrap_content"
android:layout_height="wrap_content"
android:id="@+id/textView1"
/>
复制粘贴
MainActivity.java文件并将其命名为
ThirdActivity.java,将其
setContentView方法中的输入改为
R.layout.activity_third,添加:
Intent intent = getIntent();
String message = intent.getStringExtra("message");
((TextView) findViewById(R.id.textView1)).setText(message);
添加方法:
@Override
public boolean onCreateOptionsMenu(Menu menu) {
getMenuInflater().inflate(R.menu.menu_main, menu);
return true;
修改
MainActivity.java文件,增加
onCreateOptionsMenu(),
onTouch()方法:
public class MainActivity extends Activity implements View.OnTouchListener {

@Override
protected void onCreate(Bundle savedInstanceState) {
super.onCreate(savedInstanceState);
setContentView(R.layout.activity_main);
TextView tv = (TextView) findViewById(R.id.textView1);
tv.setOnTouchListener(this);
}

@Override
public boolean onCreateOptionsMenu(Menu menu) {
getMenuInflater().inflate(R.menu.menu_main, menu);
return true;
}

@Override
public boolean onTouch(View v, MotionEvent event) {
Intent intent = new Intent(this, ThirdActivity.class);
intent.putExtra("message", "ThirdActivity!  20155322!");
startActivity(intent);
return true;
}

}
修改
AndroidManifest.xml文件,往里面增加一个事件标签
Activity:
<activity

android:name=".ThirdActivity"

android:label="Third Activity">

<intent-filter>

<action android:name="com.blackay.test.helloworld.ThirdActivity" />

<category android:name="android.intent.category.DEFAULT" />

</intent-filter>

</activity>
在
layout文件夹中添加
menu文件夹,并在其中新建
menu_main.xml文件:
<menu xmlns:android="http://schemas.android.com/apk/res/android">
xmlns:tools="http://schemas.android.com/tools"
tools:context="com.example.testmenu_xml.MainActivity" >

<group android:id="@+id/menuGroup_main">
<item android:id="@+id/menuItem_1"
android:icon="@android:drawable/ic_menu_day"
android:title="menu_1"/>

<item android:id="@+id/menuItem_2"
android:icon="@android:drawable/ic_menu_day"
android:title="menu_2"/>

</group>
</menu>
结果截图:

实践三:UI测试
参考《Java和Android开发学习指南(第二版)(EPUBIT,Java for Android 2nd)》第二十六章:构建项目,运行教材相关代码
修改代码让Toast消息中显示自己的学号信息
提交代码运行截图和码云Git链接,截图要有学号水印,否则会扣分
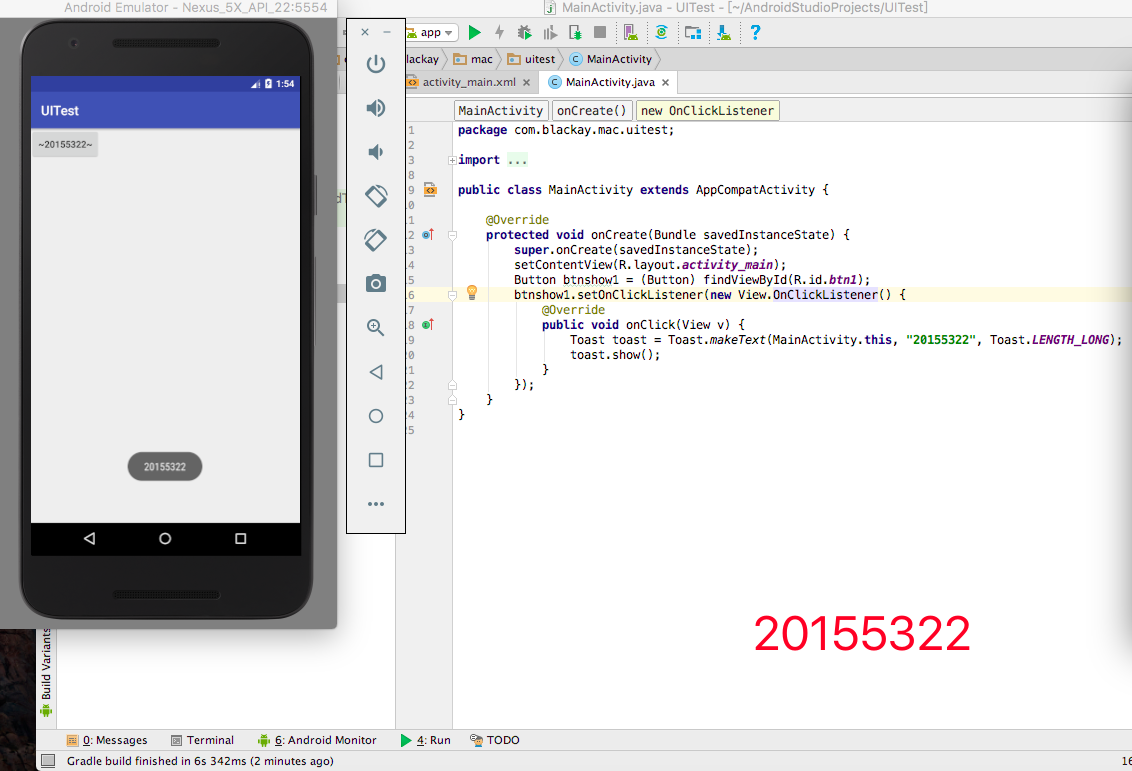
我实现这一功能主要分为两个步骤,一个是在
activity_main中添加一个
Button,在
MainActivity中添加
setOnClickListener方法。
在
activity_main中添加一个
Button标签:
<Button
android:layout_width="wrap_content"
android:layout_height="wrap_content"
android:text="20155322"
android:id="@+id/btn1"
android:layout_alignParentTop="true"
android:layout_alignParentRight="true"
android:layout_alignParentEnd="true"
android:layout_alignParentLeft="true"
android:layout_alignParentStart="true"
tools:layout_editor_absoluteY="7dp"
tools:layout_editor_absoluteX="16dp" />
在
MainActivity中添加
setOnClickListener方法:
Button btnshow1 = (Button) findViewById(R.id.btn1);
btnshow1.setOnClickListener(new View.OnClickListener() {
@Override
public void onClick(View v) {
Toast toast = Toast.makeText(MainActivity.this, "20155322", Toast.LENGTH_LONG);
toast.show();
}
});
实践结果:
实践四:布局测试
参考《Java和Android开发学习指南(第二版)(EPUBIT,Java for Android 2nd)》第二十七章:构建项目,运行教材相关代码
修改布局让P290页的界面与教材不同
提交代码运行截图和码云Git链接,截图要有学号水印,否则会扣分
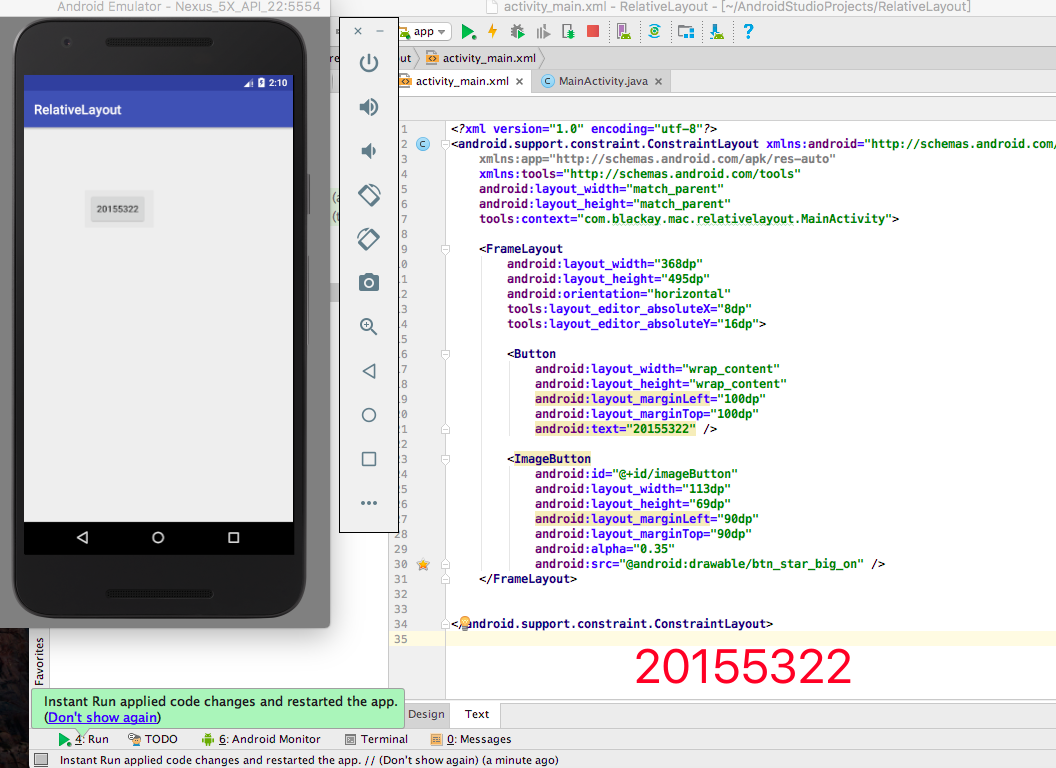
这个功能的实现就是通过增加了一个
Button和一个
ImageButton。
在
activity_main.xml中增加
FrameLayout标签:
<FrameLayout
android:layout_width="368dp"
android:layout_height="495dp"
android:orientation="horizontal"
tools:layout_editor_absoluteX="8dp"
tools:layout_editor_absoluteY="16dp">

<Button
android:layout_width="wrap_content"
android:layout_height="wrap_content"
android:layout_marginLeft="100dp"
android:layout_marginTop="100dp"
android:text="20155322" />

<ImageButton
android:id="@+id/imageButton"
android:layout_width="113dp"
android:layout_height="69dp"
android:layout_marginLeft="90dp"
android:layout_marginTop="90dp"
android:alpha="0.35"
android:src="@android:drawable/btn_star_big_on" />
</FrameLayout>
实践结果:
实践五:事件处理测试
参考《Java和Android开发学习指南(第二版)(EPUBIT,Java for Android 2nd)》第二十八章:构建项目,运行教材相关代码
提交代码运行截图和码云Git链接,截图要有学号水印,否则会扣分
这个功能的实现是通过在
activity_main.xml增加一个
AnalogClock,在
MainActivity中通过
changeColor()方法,根据数组
int[] color的索引进行变换。
在
activity_main.xml增加
AnalogClock:
<RelativeLayout
xmlns:android="http://schemas.android.com/apk/res/android"
xmlns:tools="http://schemas.android.com/tools"
android:layout_width="368dp"
android:layout_height="495dp"
android:paddingBottom="10dp"
android:paddingLeft="10dp"
android:paddingRight="10dp"
android:paddingTop="10dp"
tools:context=".MainActivity"
tools:layout_editor_absoluteY="8dp"
tools:layout_editor_absoluteX="8dp">
<AnalogClock
android:id="@+id/analogClock1"
android:layout_width="wrap_content"
android:layout_height="wrap_content"
android:layout_alignParentTop="true"
android:layout_centerHorizontal="true"
android:layout_marginTop="90dp"
android:onClick="changeColor"
/>
</RelativeLayout>
在
MainActivity中通过
changeColor()方法,根据数组
int[] color的索引进行变换:
首先是计数变量和数组:
int counter = 0;
int[] colors = { Color.BLACK, Color.BLUE, Color.CYAN,
Color.DKGRAY, Color.GRAY, Color.GREEN, Color.LTGRAY,
其次是
changeColor()方法:
public void changeColor(View view) {
if (counter == colors.length) {
counter = 0;
}
view.setBackgroundColor(colors[counter++]);
}
实践结果:

实验心得与体会:
本次实验老师给我们体验了一把Android 开发,结合之前学过的Java知识和老师提供的教材,还是有一些困难之处:首先是对Android Studio这个软件还有诸多不熟练的地方。
对于一款Android程序的框架结构不是很理解,就算书上有代码,还是感觉有些似懂非懂。
书上部分知识讲解的不是很详细,需要根据网上的一些教程辅助理解。
PSP(Personal Software Process)时间
| 步骤 | 耗时(min) | 百分比(%) |
|---|---|---|
| 需求分析 | 60 | 23 |
| 设计 | 50 | 19 |
| 代码实现 | 120 | 46 |
| 测试 | 0 | 0 |
| 分析总结 | 30 | 12 |
参考资料
《Java语言调试技术》《软件调试的艺术》
构建之法
Android Stdio中文社区
Android开发简易教程

相关文章推荐
- 2016-2017-2 20155302 实验四 Android 开发基础
- 20155305 2016-2017-2 《Java程序设计》实验四 Android开发基础设计实验报告
- 20155305 2016-2017-2 《Java程序设计》实验四 Android程序开发基础
- 2016-2017-2 20155322 实验三 敏捷开发与XP实践
- # 2016-2017-2 20155319 《Java程序设计》实验四Android程序开发实验报告
- 20155338 2016-2017-2《Java程序设计》实验四Android程序开发实验报告
- 2016-2017-2 20155329 实验四 Android 开发
- 20155322 2016-2017-2 《Java程序设计》实验一 Java开发环境的熟悉(macOS + Eclipse)
- #实验四 Android开发基础
- 20145337实验四Android开发基础
- 20155304 2016-2017-2 《Java程序设计》实验三 敏捷开发与XP实践
- 学号20155308 2016-2017-2 《Java程序设计》实验一(Java开发环境的熟悉)实验报告
- 20155305 2016-2017-2 《Java程序设计》实验一 Java开发环境的熟悉(macOS + IDEA)
- 2016-2017第2学期课表 19周周一下午56节 APP开发基础 卷试
- 20145219 《Java程序设计》实验四 Android开发基础设计实验报告
- 2016-2017-2 20155339 《Java面向对象程序设计》实验三敏捷开发与XP实践实验报告
- 20155228 实验四 Android开发基础
- 20155317 2016-2017-2 《Java程序设计》实验一 Java开发环境的熟悉
- 20145331实验四 "Android开发基础"
- 20155332 2016-2017-2 《Java程序设计》实验一 Java开发环境的熟悉