iOS开发系列----UI(简单TableView的使用)
2017-04-17 14:48
435 查看
关于TableView将分三个部分讲解:简单TableView的使用、TableView的编辑和删除操作、MVC自定义TableView的使用。
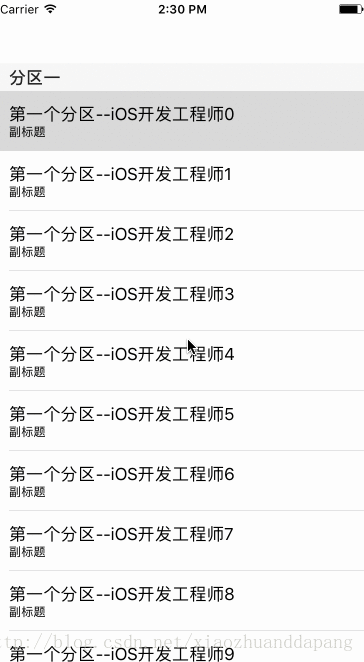
本章完成效果图:
demo下载
本章完成效果图:
#import "ViewController.h"

@interface ViewController ()<
UITableViewDataSource,
UITableViewDelegate>

@property (nonatomic, strong) NSMutableArray *arrayDS;
@property (nonatomic, strong) UITableView *tableView;

@end

@implementation ViewController

- (void)viewDidLoad {
[super viewDidLoad];

[self setupDatas];
[self setupSubviews];
}

- (void)setupDatas {
self.arrayDS = [[NSMutableArray alloc] init];
for (int i = 0; i < 10; i++) {
NSString * str = [NSString stringWithFormat:@"iOS开发工程师%d",i];
[self.arrayDS addObject:str];
}
}

- (void)setupSubviews {
self.automaticallyAdjustsScrollViewInsets = NO;

/**
*  表格视图样式
*  UITableViewStylePlain //无分区样式
UITableViewStyleGrouped //分区样式
*/
self.tableView = [[UITableView alloc] initWithFrame:CGRectMake(0, 64, [UIScreen mainScreen].bounds.size.width, [UIScreen mainScreen].bounds.size.height-64) style:UITableViewStylePlain];
/**
*  设置代理
*/
self.tableView.delegate = self;
self.tableView.dataSource = self;

[self.view addSubview:self.tableView];
}

/**
*  UITableViewDataSource协议中的所有方法,用来对表格视图的样式进行设置(比如说显示的分区个数、每个分区中单元格个数、单元格中显示内容、分区头标题、分区未标题、分区的View)
*/
#pragma mark - UITableViewDataSource
- (NSInteger)numberOfSectionsInTableView:(UITableView *)tableView {
return 2;
}

/**
*  设置每个分区显示的行数
*/
- (NSInteger)tableView:(UITableView *)tableView numberOfRowsInSection:(NSInteger)section {
if (section == 0) {
return [self.arrayDS count];
} else {
return [self.arrayDS count];
}
}

- (UITableViewCell *)tableView:(UITableView *)tableView cellForRowAtIndexPath:(NSIndexPath *)indexPath {
///<1.>设置标识符
static NSString * str = @"cellStr";
///<2.>复用机制:如果一个页面显示7个cell,系统则会创建8个cell,当用户向下滑动到第8个cell时,第一个cell进入复用池等待复用。
UITableViewCell * cell = [tableView dequeueReusableCellWithIdentifier:str];
///<3.>新建cell
if (cell == nil) {
//副标题样式
cell = [[UITableViewCell alloc] initWithStyle:UITableViewCellStyleSubtitle reuseIdentifier:str];
}
///<4.>设置单元格上显示的文字信息
if (indexPath.section == 0) {
cell.textLabel.text = [NSString stringWithFormat:@"第一个分区--%@",[self.arrayDS objectAtIndex:indexPath.row]];
} else {
cell.textLabel.text = [NSString stringWithFormat:@"第二个分区--%@",[self.arrayDS objectAtIndex:indexPath.row]];
}

cell.detailTextLabel.text = @"副标题";

return cell;
}

/**
*  由于表格的样式设置成plain样式,但是不能说明当前的表格不显示分区
*/
- (NSString *)tableView:(UITableView *)tableView titleForHeaderInSection:(NSInteger)section {

if (section == 0) {
return @"分区一";
}else {
return @"分区二";
}
}

/**
*  设置单元格的高度
*  单元格默认高度44像素
*/
- (CGFloat)tableView:(UITableView *)tableView heightForRowAtIndexPath:(NSIndexPath *)indexPath {
return 60.0f;
}

/**
*  UITableViewDelegate协议中所有方法,用来对单元格自身进行操作(比如单元格的删除、添加、移动...)
*/
#pragma UITableViewDelegate

/**
*  点击单元格触发该方法
*/
- (void)tableView:(UITableView *)tableView didSelectRowAtIndexPath:(NSIndexPath *)indexPath {
UITableViewCell *cell = [tableView cellForRowAtIndexPath:indexPath];
NSString *selectCellStr = cell.textLabel.text;
UIAlertController *alertController = [UIAlertController alertControllerWithTitle:nil message:selectCellStr preferredStyle:UIAlertControllerStyleAlert];
UIAlertAction *action = [UIAlertAction actionWithTitle:@"确定" style:UIAlertActionStyleDefault handler:nil];
[alertController addAction:action];
[self presentViewController:alertController animated:YES completion:nil];
}

@end
demo下载

相关文章推荐
- iOS开发UI系列之UIImageView的基本使用
- iOS开发UI基础—27使用UItableview完成一个简单的QQ好友列表(一)
- iOS开发UI基础—28使用UItableview完成一个简单的QQ好友列表(二)
- iOS开发系列 ---- UI (自定义TableView)
- iOS开发-UI控件:使用TableView实现多级树型menu
- iOS开发系列 ---- UI (TableView的编辑和多项删除操作)
- ios开发入门- tableview 简单使用(一)
- iOS开发入门之UIPickerView控件的简单使用
- ios开发中最简单的tableview使用一
- iOS开发系列 ---- UI(UICollectionView的使用)
- iOS开发UI篇章使用UItableview完成一个简单的QQ好友列表(一)
- iOS学习之Table View的简单使用
- iOS学习之Table View的简单使用
- iOS开发 UIPickerView的使用
- iOS开发UI篇—使用UItableview完成一个简单的QQ好友列表(二)
- iOS学习之UIPickerView控件的简单使用
- iOS学习之UIPickerView控件的简单使用
- 学习IOS开发UI篇--UICollectionViewController的基本使用
- iOS学习之Table View的简单使用
- iOS学习之UIPickerView控件的简单使用