[置顶] 自定义View之Layout方法详解
2017-04-01 12:02
281 查看
如果你喜欢讨论源码,一起加入群:524727903
在ViewGroup中会调用onLayout方法(在ViewGroup类中是抽象的,在子元素中实现,一会会用LinearLayout进行举例子)去遍历所有的子元素,并调用其layout方法,在layout方法中又会调用子元素的onLayout方法。
可以看到与onMeasure方法类似,分为水平方向和垂直方向,我们只分析一下垂直方向的源码:
大家可以看到在此方法中遍历所有的子View,并对其进行测量
这也正好符合我们LinearLayout的垂直方向的布局。最后调用
到这里我们就明白了整个View的onLayout过程,接着会调用子类的layout方法:
这句话主要是判断LayoutMode的模式是不是为LAYOUT_MODE_OPTICAL_BOUNDS,如果为真就会运行setOpticalFrame(l, t, r, b)否则就会运行setFrame(l, t, r, b)
首先我们要知道
mLayoutMode的值默认是LAYOUT_MODE_UNDEFINED
也就是说:”mLayoutMode == LAYOUT_MODE_OPTICAL_BOUNDS”默认是返回false
This constant is a layoutMode. Optical bounds describe where a widget appears to be. They sit inside the clip bounds which need to cover a larger area to allow other effects, such as shadows and glows, to be drawn.
这里有注释,大致意思是说,设置完这个属性之后,在布局的时候,View需要放在一个较大区域的布局内,以便留出来阴影之类位置(在后面代码的部分会有讲解)。
可以通过setLayoutMode方法,手动设置成ViewGroup.LAYOUT_MODE_OPTICAL_BOUNDS
另外
这两个方法的源码在后面讲解
先看看整个项目代码:
==MainActivity==
==布局文件==
当isLayoutModeOptical返回true的时候,会运行setOpticalFrame
在这里很容易发现,setOpticalFrame最后还是调用了setFrame方法,只不过对左上右下的值进行了重新的设置。
这里要将一下Insets类
这个类很简单,主要是通单例模式得到Insets
An Insets instance holds four integer offsets which describe changes to the four edges of a Rectangle. By convention, positive values move edges towards the centre of the rectangle.
Insets are immutable so may be treated as values.
通过这段注释大致了解到Insets其实就是封装了四个参数的偏移量,只不过这个类是hide(隐藏),所以上面的代码通过反射得到Insets,之后看效果图,就能明白这个类的大致含义了。
同样在View类中setOpticalInsets也是hide模式的,所以我们要转换成View对象,然后接着用反射,去setOpticalInsets(代码参上)。
接着
这时,如果布局改变之后changed为true,还会回调
这里面是一个空实现,我们可以根据逻辑进行添加,最后方法返回changed的值。
紧接着
当布局改变changd为true。mPrivateFlags 这个属性之后讲。
会调用
方法,主要是用于布局所用,你可以自定义ViewGroup,在这里根据逻辑设置你想要的布局。
最后:
上图:
==可以看到上下左右都空出了些距离,这就是通过Insets的构造函数产生的!==
如果你的View对象添加了
然后逻辑就很简单了,用过ArrayList把回调的复制一份,然后遍历,最后调用onLayoutChange方法,里面传的当前View和现在的左上右下和之前的左上右下。
在ViewGroup中会调用onLayout方法(在ViewGroup类中是抽象的,在子元素中实现,一会会用LinearLayout进行举例子)去遍历所有的子元素,并调用其layout方法,在layout方法中又会调用子元素的onLayout方法。
LinearLayout的onLayout方法
@Override
protected void onLayout(boolean changed, int l, int t, int r, int b) {
if (mOrientation == VERTICAL) {
layoutVertical(l, t, r, b);
} else {
layoutHorizontal(l, t, r, b);
}
}
可以看到与onMeasure方法类似,分为水平方向和垂直方向,我们只分析一下垂直方向的源码:
void layoutVertical(int left, int top, int right, int bottom) {
final int paddingLeft = mPaddingLeft;

int childTop;
int childLeft;

// Where right end of child should go
final int width = right - left;
int childRight = width - mPaddingRight;

// Space available for child
int childSpace = width - paddingLeft - mPaddingRight;

final int count = getVirtualChildCount();

final int majorGravity = mGravity & Gravity.VERTICAL_GRAVITY_MASK;
final int minorGravity = mGravity & Gravity.RELATIVE_HORIZONTAL_GRAVITY_MASK;

switch (majorGravity) {
case Gravity.BOTTOM:
// mTotalLength contains the padding already
childTop = mPaddingTop + bottom - top - mTotalLength;
break;

// mTotalLength contains the padding already
case Gravity.CENTER_VERTICAL:
childTop = mPaddingTop + (bottom - top - mTotalLength) / 2;
break;

case Gravity.TOP:
default:
childTop = mPaddingTop;
break;
}

for (int i = 0; i < count; i++) {
final View child = getVirtualChildAt(i);
if (child == null) {
childTop += measureNullChild(i);
} else if (child.getVisibility() != GONE) {
final int childWidth = child.getMeasuredWidth();
final int childHeight = child.getMeasuredHeight();

final LinearLayout.LayoutParams lp =
(LinearLayout.LayoutParams) child.getLayoutParams();

int gravity = lp.gravity;
if (gravity < 0) {
gravity = minorGravity;
}
final int layoutDirection = getLayoutDirection();
final int absoluteGravity = Gravity.getAbsoluteGravity(gravity, layoutDirection);
switch (absoluteGravity & Gravity.HORIZONTAL_GRAVITY_MASK) {
case Gravity.CENTER_HORIZONTAL:
childLeft = paddingLeft + ((childSpace - childWidth) / 2)
+ lp.leftMargin - lp.rightMargin;
break;

case Gravity.RIGHT:
childLeft = childRight - childWidth - lp.rightMargin;
break;

case Gravity.LEFT:
default:
childLeft = paddingLeft + lp.leftMargin;
break;
}

if (hasDividerBeforeChildAt(i)) {
childTop += mDividerHeight;
}

childTop += lp.topMargin;
setChildFrame(child, childLeft, childTop + getLocationOffset(child),
childWidth, childHeight);
childTop += childHeight + lp.bottomMargin + getNextLocationOffset(child);

i += getChildrenSkipCount(child, i);
}
}
}
大家可以看到在此方法中遍历所有的子View,并对其进行测量
final int childHeight = child.getMeasuredHeight();最后有一个childTop变量每次都进行累加
childTop += childHeight + lp.bottomMargin + getNextLocationOffset(child);
这也正好符合我们LinearLayout的垂直方向的布局。最后调用
setChildFrame(child, childLeft, childTop + getLocationOffset(child),childWidth, childHeight);
private void setChildFrame(View child, int left, int top, int width, int height) {
child.layout(left, top, left + width, top + height);
}
到这里我们就明白了整个View的onLayout过程,接着会调用子类的layout方法:
public void layout(int l, int t, int r, int b) {
if ((mPrivateFlags3 & PFLAG3_MEASURE_NEEDED_BEFORE_LAYOUT) != 0) {
onMeasure(mOldWidthMeasureSpec, mOldHeightMeasureSpec);
mPrivateFlags3 &= ~PFLAG3_MEASURE_NEEDED_BEFORE_LAYOUT;
}

int oldL = mLeft;
int oldT = mTop;
int oldB = mBottom;
int oldR = mRight;

boolean changed = isLayoutModeOptical(mParent) ?
setOpticalFrame(l, t, r, b) : setFrame(l, t, r, b);

if (changed || (mPrivateFlags & PFLAG_LAYOUT_REQUIRED) == PFLAG_LAYOUT_REQUIRED) {
onLayout(changed, l, t, r, b);
mPrivateFlags &= ~PFLAG_LAYOUT_REQUIRED;

ListenerInfo li = mListenerInfo;
if (li != null && li.mOnLayoutChangeListeners != null) {
ArrayList<OnLayoutChangeListener> listenersCopy =
(ArrayList<OnLayoutChangeListener>)li.mOnLayoutChangeListeners.clone();
int numListeners = listenersCopy.size();
for (int i = 0; i < numListeners; ++i) {
listenersCopy.get(i).onLayoutChange(this, l, t, r, b, oldL, oldT, oldR, oldB);
}
}
}

mPrivateFlags &= ~PFLAG_FORCE_LAYOUT;
mPrivateFlags3 |= PFLAG3_IS_LAID_OUT;
}
主要说一下这段代码
boolean changed = isLayoutModeOptical(mParent) ?
setOpticalFrame(l, t, r, b) : setFrame(l, t, r, b);
isLayoutModeOptical
Return true if o is a ViewGroup that is laying out using optical bounds.public static boolean isLayoutModeOptical(Object o) {
return o instanceof ViewGroup && ((ViewGroup) o).isLayoutModeOptical();
}boolean isLayoutModeOptical() {
return mLayoutMode == LAYOUT_MODE_OPTICAL_BOUNDS;
}这句话主要是判断LayoutMode的模式是不是为LAYOUT_MODE_OPTICAL_BOUNDS,如果为真就会运行setOpticalFrame(l, t, r, b)否则就会运行setFrame(l, t, r, b)
首先我们要知道
private int mLayoutMode = LAYOUT_MODE_UNDEFINED;
mLayoutMode的值默认是LAYOUT_MODE_UNDEFINED
也就是说:”mLayoutMode == LAYOUT_MODE_OPTICAL_BOUNDS”默认是返回false
This constant is a layoutMode. Optical bounds describe where a widget appears to be. They sit inside the clip bounds which need to cover a larger area to allow other effects, such as shadows and glows, to be drawn.
这里有注释,大致意思是说,设置完这个属性之后,在布局的时候,View需要放在一个较大区域的布局内,以便留出来阴影之类位置(在后面代码的部分会有讲解)。
可以通过setLayoutMode方法,手动设置成ViewGroup.LAYOUT_MODE_OPTICAL_BOUNDS
另外
setOpticalFrame(l, t, r, b)
setFrame(l, t, r, b);
这两个方法的源码在后面讲解
先看看整个项目代码:
==MainActivity==
public class MainActivity extends AppCompatActivity{

private ViewPager mViewPager;
private MyFragmentPagerAdapter myFragmentPagerAdapter;
@Override
protected void onCreate(Bundle savedInstanceState) {
super.onCreate(savedInstanceState);
setContentView(R.layout.activity_main);

LinearLayout root = (LinearLayout) findViewById(R.id.root);

ViewGroup parent = (ViewGroup) root.getParent();

parent.setLayoutMode(ViewGroup.LAYOUT_MODE_OPTICAL_BOUNDS);
try {
//通过反射,拿到私有的Insets类。
Class classz = Class.forName("android.graphics.Insets");
/*以下调用带参的、私有构造函数*/
Constructor c1=classz.getDeclaredConstructor(new Class[]{int.class,int.class,int.class,int.class});
c1.setAccessible(true);
//初始化4个int型参数
Object o = c1.newInstance(new Object[]{50,50,50,50});
View view=parent;
Class<? extends View> viewClassz = view.getClass();
//得到Insets的setOpticalInsets方法
Method setOpticalInsets = viewClassz.getMethod("setOpticalInsets", o.getClass());
setOpticalInsets.invoke(view,o);
} catch (Exception e) {
e.printStackTrace();
}
}
==布局文件==
<?xml version="1.0" encoding="utf-8"?>
<LinearLayout xmlns:android="http://schemas.android.com/apk/res/android"
xmlns:tools="http://schemas.android.com/tools"
android:id="@+id/root"
android:elevation="10dp"
android:background="#fff"
android:layout_width="match_parent"
android:layout_height="match_parent"
android:orientation="vertical"
tools:context=".MainActivity">

<Button
android:layout_width="match_parent"
android:layout_height="10dp"
>

</LinearLayout>
当isLayoutModeOptical返回true的时候,会运行setOpticalFrame
private boolean setOpticalFrame(int left, int top, int right, int bottom) {
Insets parentInsets = mParent instanceof View ?
((View) mParent).getOpticalInsets() : Insets.NONE;
Insets childInsets = getOpticalInsets();
return setFrame(
left   + parentInsets.left - childInsets.left,
top    + parentInsets.top  - childInsets.top,
right  + parentInsets.left + childInsets.right,
bottom + parentInsets.top  + childInsets.bottom);
}
在这里很容易发现,setOpticalFrame最后还是调用了setFrame方法,只不过对左上右下的值进行了重新的设置。
这里要将一下Insets类
/*
* Copyright (C) 2006 The Android Open Source Project
*
* Licensed under the Apache License, Version 2.0 (the "License");
* you may not use this file except in compliance with the License.
* You may obtain a copy of the License at
*
*      http://www.apache.org/licenses/LICENSE-2.0 *
* Unless required by applicable law or agreed to in writing, software
* distributed under the License is distributed on an "AS IS" BASIS,
* WITHOUT WARRANTIES OR CONDITIONS OF ANY KIND, either express or implied.
* See the License for the specific language governing permissions and
* limitations under the License.
*/

package android.graphics;

/**
* An Insets instance holds four integer offsets which describe changes to the four
* edges of a Rectangle. By convention, positive values move edges towards the
* centre of the rectangle.
* <p>
* Insets are immutable so may be treated as values.
*
* @hide
*/
public class Insets {
public static final Insets NONE = new Insets(0, 0, 0, 0);

public final int left;
public final int top;
public final int right;
public final int bottom;

private Insets(int left, int top, int right, int bottom) {
this.left = left;
this.top = top;
this.right = right;
this.bottom = bottom;
}

// Factory methods

/**
* Return an Insets instance with the appropriate values.
*
* @param left the left inset
* @param top the top inset
* @param right the right inset
* @param bottom the bottom inset
*
* @return Insets instance with the appropriate values
*/
public static Insets of(int left, int top, int right, int bottom) {
if (left == 0 && top == 0 && right == 0 && bottom == 0) {
return NONE;
}
return new Insets(left, top, right, bottom);
}

/**
* Return an Insets instance with the appropriate values.
*
* @param r the rectangle from which to take the values
*
* @return an Insets instance with the appropriate values
*/
public static Insets of(Rect r) {
return (r == null) ? NONE : of(r.left, r.top, r.right, r.bottom);
}

/**
* Two Insets instances are equal iff they belong to the same class and their fields are
* pairwise equal.
*
* @param o the object to compare this instance with.
*
* @return true iff this object is equal {@code o}
*/
@Override
public boolean equals(Object o) {
if (this == o) return true;
if (o == null || getClass() != o.getClass()) return false;

Insets insets = (Insets) o;

if (bottom != insets.bottom) return false;
if (left != insets.left) return false;
if (right != insets.right) return false;
if (top != insets.top) return false;

return true;
}

@Override
public int hashCode() {
int result = left;
result = 31 * result + top;
result = 31 * result + right;
result = 31 * result + bottom;
return result;
}

@Override
public String toString() {
return "Insets{" +
"left=" + left +
", top=" + top +
", right=" + right +
", bottom=" + bottom +
'}';
}
}
这个类很简单,主要是通单例模式得到Insets
An Insets instance holds four integer offsets which describe changes to the four edges of a Rectangle. By convention, positive values move edges towards the centre of the rectangle.
Insets are immutable so may be treated as values.
通过这段注释大致了解到Insets其实就是封装了四个参数的偏移量,只不过这个类是hide(隐藏),所以上面的代码通过反射得到Insets,之后看效果图,就能明白这个类的大致含义了。
同样在View类中setOpticalInsets也是hide模式的,所以我们要转换成View对象,然后接着用反射,去setOpticalInsets(代码参上)。
接着
protected boolean setFrame(int left, int top, int right, int bottom) {
boolean changed = false;

if (DBG) {
Log.d("View", this + " View.setFrame(" + left + "," + top + ","
+ right + "," + bottom + ")");
}

if (mLeft != left || mRight != right || mTop != top || mBottom != bottom) {
changed = true;

// Remember our drawn bit
int drawn = mPrivateFlags & PFLAG_DRAWN;

int oldWidth = mRight - mLeft;
int oldHeight = mBottom - mTop;
int newWidth = right - left;
int newHeight = bottom - top;
boolean sizeChanged = (newWidth != oldWidth) || (newHeight != oldHeight);

// Invalidate our old position
invalidate(sizeChanged);

mLeft = left;
mTop = top;
mRight = right;
mBottom = bottom;
mRenderNode.setLeftTopRightBottom(mLeft, mTop, mRight, mBottom);

mPrivateFlags |= PFLAG_HAS_BOUNDS;

if (sizeChanged) {
sizeChange(newWidth, newHeight, oldWidth, oldHeight);
}

if ((mViewFlags & VISIBILITY_MASK) == VISIBLE || mGhostView != null) {
// If we are visible, force the DRAWN bit to on so that
// this invalidate will go through (at least to our parent).
// This is because someone may have invalidated this view
// before this call to setFrame came in, thereby clearing
// the DRAWN bit.
mPrivateFlags |= PFLAG_DRAWN;
invalidate(sizeChanged);
// parent display list may need to be recreated based on a change in the bounds
// of any child
invalidateParentCaches();
}

// Reset drawn bit to original value (invalidate turns it off)
mPrivateFlags |= drawn;

mBackgroundSizeChanged = true;
if (mForegroundInfo != null) {
mForegroundInfo.mBoundsChanged = true;
}

notifySubtreeAccessibilityStateChangedIfNeeded();
}
return changed;
}
这时,如果布局改变之后changed为true,还会回调
sizeChange(newWidth, newHeight, oldWidth, oldHeight);
这里面是一个空实现,我们可以根据逻辑进行添加,最后方法返回changed的值。
紧接着
if (changed || (mPrivateFlags & PFLAG_LAYOUT_REQUIRED) == PFLAG_LAYOUT_REQUIRED) {
onLayout(changed, l, t, r, b);
mPrivateFlags &= ~PFLAG_LAYOUT_REQUIRED;

ListenerInfo li = mListenerInfo;
if (li != null && li.mOnLayoutChangeListeners != null) {
ArrayList<OnLayoutChangeListener> listenersCopy =
(ArrayList<OnLayoutChangeListener>)li.mOnLayoutChangeListeners.clone();
int numListeners = listenersCopy.size();
for (int i = 0; i < numListeners; ++i) {
listenersCopy.get(i).onLayoutChange(this, l, t, r, b, oldL, oldT, oldR, oldB);
}
}
}
当布局改变changd为true。mPrivateFlags 这个属性之后讲。
会调用
onLayout(changed, l, t, r, b)
方法,主要是用于布局所用,你可以自定义ViewGroup,在这里根据逻辑设置你想要的布局。
最后:
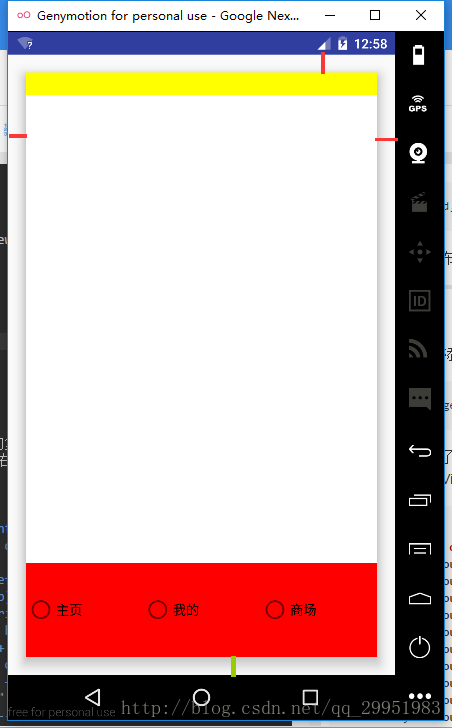
上图:
==可以看到上下左右都空出了些距离,这就是通过Insets的构造函数产生的!==
如果你的View对象添加了
addOnLayoutChangeListener(this);
然后逻辑就很简单了,用过ArrayList把回调的复制一份,然后遍历,最后调用onLayoutChange方法,里面传的当前View和现在的左上右下和之前的左上右下。
@Override
public void onLayoutChange(View v, int left, int top, int right, int bottom, int oldLeft, int oldTop, int oldRight, int oldBottom) {
System.out.println("v = " + v);
System.out.println("left = " + left);
System.out.println("top = " + top);
System.out.println("right = " + right);
System.out.println("bottom = " + bottom);
System.out.println("oldLeft = " + oldLeft);
System.out.println("oldTop = " + oldTop);
System.out.println("oldRight = " + oldRight);
System.out.println("oldBottom = " + oldBottom);
System.out.println("\"----------------------------\" = " + "----------------------------");
}

相关文章推荐
- [Android]inflate方法与 findViewById 方法区别 | LayoutInflater的inflate函数用法详解
- 自定义UICollectionViewLayout(能滚动)需要实现的方法
- Android-详解RecyclerView+BGARefreshLayout实现自定义下拉刷新、上拉加载和侧滑删除效果
- 安卓自定义View基础06-View的onMeasure(),onDraw()方法详解以及Padding的处理
- Android自定义view中必不可少的哪些方法和参数详解
- 关于LayoutInflater.from().inflate()方法不能加载自定义view的解决办法
- Android自定义View开篇之(LayoutInflater.inflate()详解)
- LayoutInflater和inflate()方法的用法 (自定义View中加载xml布局)
- 自定义View之onLayout方法学习
- 自定义View控件之onMeasure方法详解
- 详解RecyclerView+BGARefreshLayout实现自定义下拉刷新、上拉加载和侧滑删除效果
- [置顶] Android自定义View出现android.view.InflateException的一种解决方法
- [Android]inflate方法与 findViewById 方法区别 | LayoutInflater的inflate函数用法详解
- Android自定义View实现绘制虚线的方法详解
- android自定义View构造方法以及获取自定义属性详解
- View (一)LayoutInflater()方法详解
- Android -- 自定义布局View之 onMesasure() 方法详解
- 自定义View控件详解(一) :Android LayoutInflater原理分析,带你一步步深入了解View
- 自定义view中onMeasure、onLayout、onDraw、onFinishInflate、onSizeChanged方法调用时机
- 自定义View(三)之View类的onMeasure方法详解