【Android】“存储”之SharedPreferences(自己程序)
2017-03-04 14:13
218 查看
SharedPreferences是一个轻量级的存储类,可以用来保存用户设置的软件参数设置,这样用户下次使用不用重复设置。比如说:是否保存账户密码;音效是否开启等等。
sharedPreferences接口可以快速而高效地以键值对的形式保存数据,非常类似Bundle。信息以XML文件的形式存储。
写入功能: SharedPreferences的内部接口Editor来实现,SharedPreferences
调用edit()方法即可获取它对应的Editor对象。
获取功能: SharedPreferences接口本身只提供读取数据的功能,因此不能实例化。只能通过Context提供的getSharedPreferences(String name,int mode)方法获取SharedPreferences实例。name:文件名,不需要后缀;mode:SharedPreferences的访问权限。
**
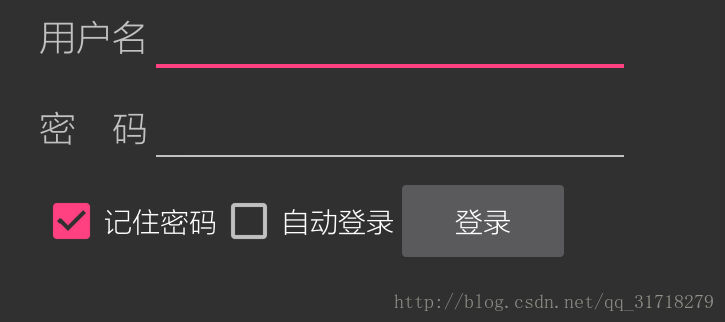
1.登录界面布局(activity_main.xml)
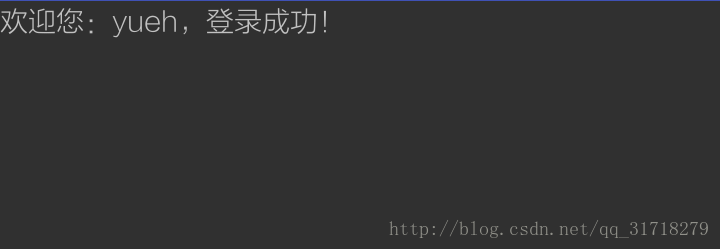
2.欢迎界面布局(activity_welcome.xml)
3.实现代码(MainActivity.java)
sharedPreferences接口可以快速而高效地以键值对的形式保存数据,非常类似Bundle。信息以XML文件的形式存储。
写入功能: SharedPreferences的内部接口Editor来实现,SharedPreferences
调用edit()方法即可获取它对应的Editor对象。
获取功能: SharedPreferences接口本身只提供读取数据的功能,因此不能实例化。只能通过Context提供的getSharedPreferences(String name,int mode)方法获取SharedPreferences实例。name:文件名,不需要后缀;mode:SharedPreferences的访问权限。
**
SharedPreferences实例
**1.登录界面布局(activity_main.xml)
<?xml version="1.0" encoding="utf-8"?>
<LinearLayout xmlns:android="http://schemas.android.com/apk/res/android"
android:layout_width="match_parent"
android:layout_height="match_parent"
android:orientation="vertical">
<TableLayout
android:layout_width="match_parent"
android:layout_height="wrap_content"
android:layout_marginLeft="20dp">
<TableRow>
<TextView
android:layout_width="wrap_content"
android:layout_height="wrap_content"
android:text="用户名"
android:textSize="18sp"/>
<EditText
android:id="@+id/name"
android:layout_width="240dp"
android:layout_height="wrap_content"/>
</TableRow>
<TableRow>
<TextView
android:layout_width="wrap_content"
android:layout_height="wrap_content"
android:text="密    码"
android:textSize="18sp"/>
<EditText
android:id="@+id/psd"
android:layout_width="240dp"
android:layout_height="wrap_content"/>
</TableRow>
</TableLayout>
<LinearLayout
android:layout_width="match_parent"
android:layout_height="wrap_content"
android:orientation="horizontal"
android:layout_marginLeft="20dp">
<CheckBox
android:id="@+id/remenberPsd"
android:layout_width="wrap_content"
android:layout_height="wrap_content"
android:text="记住密码"/>
<CheckBox
android:id="@+id/autoLogin"
android:layout_width="wrap_content"
android:layout_height="wrap_content"
android:text="自动登录"/>
<Button
android:id="@+id/login"
android:layout_width="wrap_content"
android:layout_height="wrap_content"
android:layout_marginLeft="20dp"
android:text="登录"/>
</LinearLayout>
</LinearLayout>
2.欢迎界面布局(activity_welcome.xml)
<?xml version="1.0" encoding="utf-8"?>
<LinearLayout xmlns:android="http://schemas.android.com/apk/res/android"
android:orientation="vertical" android:layout_width="match_parent"
android:layout_height="match_parent">
<TextView
android:id="@+id/tv_welcome"
android:layout_width="match_parent"
android:layout_height="wrap_content" />

</LinearLayout>
3.实现代码(MainActivity.java)
package com.file.file;

import android.content.Context;
import android.content.SharedPreferences;
import android.support.v7.app.AppCompatActivity;
import android.os.Bundle;
import android.view.View;
import android.widget.Bu
c045
tton;
import android.widget.CheckBox;
import android.widget.EditText;
import android.widget.TextView;
import android.widget.Toast;

public class MainActivity extends AppCompatActivity {

SharedPreferences loginPreferences,accessPreferences;
SharedPreferences.Editor LoginEditor,accessEditor;
String userName,userPsd;
boolean isSavePsd,isAutoLogin;
TextView userInfo;
Button login;
CheckBox remberPsdBox,autoLoginBox;
EditText name,psd;
@Override
protected void onCreate(Bundle savedInstanceState) {
super.onCreate(savedInstanceState);
loginPreferences = getSharedPreferences("login", Context.MODE_PRIVATE);
accessPreferences = getSharedPreferences("access",Context.MODE_WORLD_READABLE);
int count = accessPreferences.getInt("count",1);
//        获取访问次数,默认为1
Toast.makeText(MainActivity.this,"欢迎您,这是您第"+count+"次访问!",Toast.LENGTH_LONG).show();
LoginEditor = loginPreferences.edit();
//        获取写入登录信息的Editor对象
accessEditor = accessPreferences.edit();
//        获取写入访问信息的Editor对象
accessEditor.putInt("count",++count);
accessEditor.commit();
//        提交写入数据

userName = loginPreferences.getString("name",null);
userPsd = loginPreferences.getString("psd",null);
isSavePsd = loginPreferences.getBoolean("isSavePsd",false);
isAutoLogin = loginPreferences.getBoolean("isAutoLogin",false);

if (isAutoLogin){
//            是否自动登录
this.setContentView(R.layout.activity_welcome);
//            动态显示布局,而不是采用界面跳转的方式
userInfo = (TextView)findViewById(R.id.tv_welcome);
userInfo.setText("欢迎您:"+userName+",登录成功!");
}else {
loadActivity();
}

}

private void loadActivity() {
this.setContentView(R.layout.activity_main);
login = (Button)findViewById(R.id.login);
remberPsdBox = (CheckBox)findViewById(R.id.remenberPsd);
autoLoginBox = (CheckBox)findViewById(R.id.autoLogin);
name = (EditText)findViewById(R.id.name);
psd = (EditText)findViewById(R.id.psd);
if (isSavePsd){
//            保存密码
name.setText(userName);
psd.setText(userPsd);
remberPsdBox.setChecked(true);
}
login.setOnClickListener(new View.OnClickListener() {
@Override
public void onClick(View view) {
LoginEditor.putString("name",name.getText().toString());
LoginEditor.putString("psd",psd.getText().toString());
LoginEditor.putBoolean("isSavePsd",remberPsdBox.isChecked());
LoginEditor.putBoolean("autoLogin",autoLoginBox.isChecked());
LoginEditor.commit();
//                提交要保存的数据
MainActivity.this.setContentView(R.layout.activity_welcome);
userInfo = (TextView)findViewById(R.id.tv_welcome);
userInfo.setText("欢迎您:"+name.getText().toString()+",登录成功!");
}
});
}
}

相关文章推荐
- 怎样在android系统启动时自动运行自己的程序
- Android是怎么给你自己的程序选择语言的
- 将自己的程序永久写入Android的/system/bin的方法
- android 将自己的程序加入到系统调用列表
- 使用Vitamio打造自己的Android万能播放器(4)——本地播放(快捷搜索、数据存储)
- Android在自己的程序中调用外部程序
- 自己写的一个Android小程序
- 平板电脑、手机 连接Eclipse 测试自己的 Android 程序
- 使用Vitamio打造自己的Android万能播放器(4)——本地播放(快捷搜索、数据存储)
- Android多媒体学习十:利用AudioRecord类实现自己的音频录制程序
- 将自己的程序永久写入Android的/system/bin的方法
- Android 获取自己程序APK包的MD5指纹
- 自己动手写一个android手机上的一键锁屏程序
- 使用Vitamio打造自己的Android万能播放器(4)——本地播放(快捷搜索、数据存储)
- android 如何调用talk程序,集成到自己写的应用中
- Android在自己的程序中调用外部程序
- Android 获取自己程序APK包的MD5指纹
- Android修改自己程序字体
- Android修改自己程序字体
- 使用Vitamio打造自己的Android万能播放器(4)——本地播放(快捷搜索、数据存储)