学习 webpack+vue.js (2、.vue文件的使用)
2017-02-22 18:04
1146 查看
1、前言
在开始时,vue的组件是这么用的
这样可以在其他地方使用my-component标签来显示一个组件内容,如果组件复杂,这样的方式就不是太好了。
.vue文件其实是用来替代vue组件component的。因为这样单文件会比较清晰明了,比较独立。
vue文件作为一个模块,js里面都默认包含一个module.export,可以存放数据,方法。也可以用export default来表示,至于这两者的区别,我也还不太清楚,建议写成 export default
2、创建几个组件来看看
简单的组件
header.vue

可以边做边尝试
父子组件
1、创建一个ul
news_list.vue
2、创建一个资讯xxx,不知道叫什么
news_container.vue
3、稍微修改下home.js 和template.html
引用了一个base.css
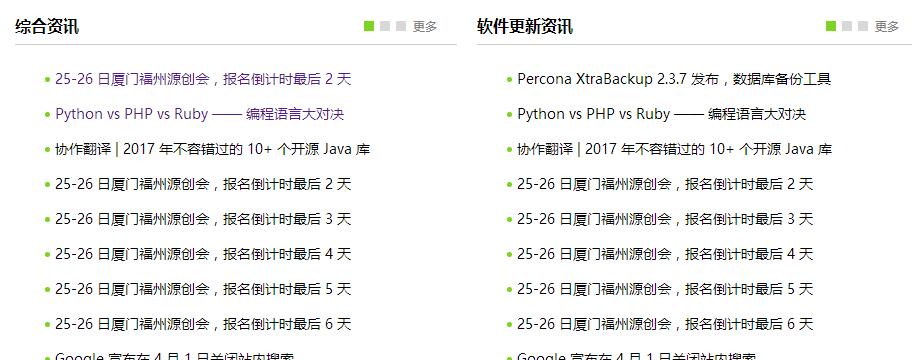
到这里就可以了,跑起来看看效果
在开始时,vue的组件是这么用的
// 注册
Vue.component('my-component', {
template: '<div>A custom component!</div>'
})
// 创建根实例
new Vue({
el: '#example'
})
这样可以在其他地方使用my-component标签来显示一个组件内容,如果组件复杂,这样的方式就不是太好了。
.vue文件其实是用来替代vue组件component的。因为这样单文件会比较清晰明了,比较独立。
vue文件作为一个模块,js里面都默认包含一个module.export,可以存放数据,方法。也可以用export default来表示,至于这两者的区别,我也还不太清楚,建议写成 export default
2、创建几个组件来看看
简单的组件
header.vue
<template>
<div>

<ul class='header-navbar'>
<li>
<a href='https://www.oschina.net/' target="_blank" class="logo"></a>
</li>
<li v-for="menu in menus" >
<a class="menu-item" v-bind:href='menu.href'>{{menu.text}}</a>
</li>

</ul>
</div>
</template>
<script>
/**
* vue文件必须有template标签,用来包裹组件内容
*
* 每个组件都有几个默认的属性。现在需要用的有
* name:组件的名字,如果不被其他vue文件引用的话,也可以不要
* data:是个function.返回一个对象
* 在最新的语法中也可以写成
* data(){
* return {
* };
* }
* 也就是说 xx()  ==  xx:function()
*
* methods:里面包含一些方法,可以用来给按钮绑定点击事件或者其他用途
*
*
* */

export default{
name:'header',
data:function(){
return {
menus:[//menu数组,需要注意的是只有对象才能监听属性的改变,如果是纯字符串,
//那么改了也没用。现在.href 都是假的
{text:'首页',href:"/"},
{text:'开源项目',href:"/open"},
{text:'问答',href:"/open"},
{text:'动弹',href:"/open"},
{text:'博客',href:"/blog"},
{text:'翻译',href:"/open"},
{text:'资讯',href:"/open"},
]
}
},
created:function(){//组件创建完成时可触发。应该会比较常用

},
methods:{

}
}
</script>

<!-- scoped 表示这些样式只作用于这个组件中的元素,不会影响其他组件 -->
<style scoped>
.header-navbar {
min-height: 40px;
background: -webkit-gradient(linear, left top, right top, from(rgba(78,170,76,0.5)), to(rgba(0,202,133,0.5))),#4eaa4c;
background: -webkit-linear-gradient(left, rgba(78,170,76,0.5), rgba(0,202,133,0.5)),#4eaa4c;
background: linear-gradient(to right, rgba(78,170,76,0.5), rgba(0,202,133,0.5)),#4eaa4c;
}
li{
float: left;
line-height:40px;
list-style: none;
}

.header-navbar  .menu-item {
display: inline-block;
margin-right: 12px;
color:white;
font-family: 微软雅黑;
text-decoration: none;
outline: none;
}
.logo{
display: inline-block;
width: 24px;
height: 30px;
margin-right: 20px;
vertical-align: middle;
background:url('https://www.oschina.net/build/oschina/components/imgs/logo-osc.svg') no-repeat;
}
</style>
可以边做边尝试
父子组件
1、创建一个ul
news_list.vue
<template>
<div>

<ul class='news_ul'>

<li class="news_li" v-for="news in news_list" >

<a class="news_a "   v-bind:class="{active:isActive}" v-bind:href='news.href'>{{news.text}}</a>
</li>

</ul>
</div>
</template>
<script>
/**
* vue文件必须有template标签,用来包裹组件内容
*
* 这个组件是会被其他组件引用的,可能是综合资讯或者软件更新资讯,所以资讯内容是不固定的。
* 不能写死,而需要根据父组件来定。所以需要用到props属性
*
*
* */

export default{
name:'newsList',
data:function(){
return {
isActive:this.index==0//是否是今天的新闻,前面会有绿点
}
},
computes:{

},

props:[
'news_list',"index"//两个需要从父组件那里获取的属性
],
created:function(){//组件创建完成时可触发。应该会比较常用

},
methods:{

}
}
</script>

<!-- scoped 表示这些样式只作用于这个组件中的元素,不会影响其他组件 -->
<!--父dom设置为relative,子设置为absolute,子元素可以根据父元素来定位 -->
<style scoped>
.news_a::before{
position: absolute;
display: block;
content: '';
left: -10px;
top: 50%;
margin-top: -2px;
width: 5px;
height: 5px;
border-radius: 50%;
background: #CFCFCF;
}
.active.news_a::before{
background: #7ED321;
}
.news_li{
font-size: 14px;
position: relative;
}
a {
cursor:pointer;
text-decoration: initial;
}
</style>
2、创建一个资讯xxx,不知道叫什么
news_container.vue
<template>
<div>
<div class='news_container' v-for="news_div in news_divs">
<div class="title">
<a class='title_a'>
{{news_div.title}}
</a>
<div class="span_box_div">
<!-- 绑定下hover事件,js原生事件么有这个,用mouseover来替代,需要两个参数 -->
<span v-for="day in news_div.days" v-on:mouseover="day_hover(news_div.days,day)" class="span_box" v-bind:class='{active:day.isActive}'>
</span>
<a>更多</a>
</div>
</div>
<div class="content " v-for="day in news_div.days" v-bind:class='{active:day.isActive}' >
<newsList :news_list="day.news_list" :index="day.index"></newsList>
</div>

</div>
</div>
</template>
<script>
import newsList from  './news_list.vue';
export default {
components:{
newsList//等同于 "news_list":news_list.这是最新语法
},
data() {
return {news_divs: [
{
title: '综合资讯',
days: [
{
index: 0, isActive: true,
news_list: [
{ text: '25-26 日厦门福州源创会,报名倒计时最后 2 天', time: '02/23',
href:'http://www.oschina.net/' },
{ text: 'Python vs PHP vs Ruby —— 编程语言大对决', time: '02/23',href:'http://www.oschina.net/' },
{ text: '协作翻译 | 2017 年不容错过的 10+ 个开源 Java 库', time: '02/23' },
{ text: '25-26 日厦门福州源创会,报名倒计时最后 2 天', time: '02/23' },
{ text: '25-26 日厦门福州源创会,报名倒计时最后 3 天', time: '02/23' },
{ text: '25-26 日厦门福州源创会,报名倒计时最后 4 天', time: '02/20' },
{ text: '25-26 日厦门福州源创会,报名倒计时最后 5 天', time: '02/23' },
{ text: '25-26 日厦门福州源创会,报名倒计时最后 6 天', time: '02/23' },
{ text: 'Google 宣布在 4 月 1 日关闭站内搜索', time: '02/23' },
{ text: 'Google 宣布在 4 月 1 日关闭站内搜索1', time: '02/23' },
],
},
{
index: 1, isActive: false,
news_list: [
{ text: '2 秒传完一部蓝光电影,IEEE 802.11ay 标准崭露头角', time: '02/23' ,href:'http://www.oschina.net/'},
{ text: 'Python vs PHP vs Ruby —— 编程语言大对决', time: '02/23' },
{ text: '协作翻译 | 2017 年不容错过的 10+ 个开源 Java 库', time: '02/23' },
{ text: '25-26 日厦门福州源创会,报名倒计时最后 1 天', time: '02/23' },
{ text: '25-26 日厦门福州源创会,报名倒计时最后 2 天', time: '02/23' },
{ text: '25-26 日厦门福州源创会,报名倒计时最后 e 天', time: '02/20' },
{ text: '25-26 日厦门福州源创会,报名倒计时最后 r 天', time: '02/23' },
{ text: '25-26 日厦门福州源创会,报名倒计时最后 t 天', time: '02/23' },
{ text: 'Google 宣布在 4 月 1 日关闭站内搜索', time: '02/23' },
{ text: 'Google 宣布在 4 月 1 日关闭站内搜索1', time: '02/23' },
],
},
{
index: 2, isActive: false,
news_list: [
{ text: 'NTP 世界的一条裂缝:NTP Classic vs NTPsec', time: '02/22' ,href:'http://www.oschina.net/'},
{ text: 'Python vs PHP vs Ruby —— 编程语言大对决', time: '02/22' },
{ text: '协作翻译 | 2017 年不容错过的 10+ 个开源 Java 库', time: '02/22' },
{ text: '25-26 日厦门福州源创会,报名倒计时最后 2 天', time: '02/23' },
{ text: '25-26 日厦门福州源创会,报名倒计时最后 3 天', time: '02/23' },
{ text: '25-26 日厦门福州源创会,报名倒计时最后 4 天', time: '02/20' },
{ text: '25-26 日厦门福州源创会,报名倒计时最后 5 天', time: '02/23' },
{ text: '25-26 日厦门福州源创会,报名倒计时最后 6 天', time: '02/23' },
{ text: 'Google 宣布在 4 月 1 日关闭站内搜索', time: '02/23' },
{ text: 'Google 宣布在 4 月 1 日关闭站内搜索1', time: '02/23' },
],
},

]
},
{
title: '软件更新资讯',
days: [
{
index: 0, isActive: true,
news_list: [
{ text: 'Percona XtraBackup 2.3.7 发布,数据库备份工具', time: '02/23' },
{ text: 'Python vs PHP vs Ruby —— 编程语言大对决', time: '02/23' },
{ text: '协作翻译 | 2017 年不容错过的 10+ 个开源 Java 库', time: '02/23' },
{ text: '25-26 日厦门福州源创会,报名倒计时最后 2 天', time: '02/23' },
{ text: '25-26 日厦门福州源创会,报名倒计时最后 3 天', time: '02/23' },
{ text: '25-26 日厦门福州源创会,报名倒计时最后 4 天', time: '02/20' },
{ text: '25-26 日厦门福州源创会,报名倒计时最后 5 天', time: '02/23' },
{ text: '25-26 日厦门福州源创会,报名倒计时最后 6 天', time: '02/23' },
{ text: 'Google 宣布在 4 月 1 日关闭站内搜索', time: '02/23' },
{ text: 'Google 宣布在 4 月 1 日关闭站内搜索1', time: '02/23' },
],
},
{
index: 1, isActive: false,
news_list: [
{ text: 'Apache Kafka 0.10.1.1 发布,分布式消息发布订阅系统', time: '02/23' },
{ text: 'Python vs PHP vs Ruby —— 编程语言大对决', time: '02/23' },
{ text: '协作翻译 | 2017 年不容错过的 10+ 个开源 Java 库', time: '02/23' },
{ text: '25-26 日厦门福州源创会,报名倒计时最后 2 天', time: '02/23' },
{ text: '25-26 日厦门福州源创会,报名倒计时最后 3 天', time: '02/23' },
{ text: '25-26 日厦门福州源创会,报名倒计时最后 4 天', time: '02/20' },
{ text: '25-26 日厦门福州源创会,报名倒计时最后 5 天', time: '02/23' },
{ text: '25-26 日厦门福州源创会,报名倒计时最后 6 天', time: '02/23' },
{ text: 'Google 宣布在 4 月 1 日关闭站内搜索', time: '02/23' },
{ text: 'Google 宣布在 4 月 1 日关闭站内搜索1', time: '02/23' },
],
},
{
index: 2, isActive: false,
news_list: [
{ text: 'JGroups 组播框架发布 4.0.0.Final 版本', time: '02/22' },
{ text: 'Python vs PHP vs Ruby —— 编程语言大对决', time: '02/23' },
{ text: '协作翻译 | 2017 年不容错过的 10+ 个开源 Java 库', time: '02/23' },
{ text: '25-26 日厦门福州源创会,报名倒计时最后 2 天', time: '02/23' },
{ text: '25-26 日厦门福州源创会,报名倒计时最后 3 天', time: '02/23' },
{ text: '25-26 日厦门福州源创会,报名倒计时最后 4 天', time: '02/20' },
{ text: '25-26 日厦门福州源创会,报名倒计时最后 5 天', time: '02/23' },
{ text: '25-26 日厦门福州源创会,报名倒计时最后 6 天', time: '02/23' },
{ text: 'Google 宣布在 4 月 1 日关闭站内搜索', time: '02/23' },
{ text: 'Google 宣布在 4 月 1 日关闭站内搜索1', time: '02/23' },
],
},

]
}
],

}
},
methods:{
day_hover:function(days,day){
//重置所有的都为false
for(var d of days){
d.isActive = false;
}
//设置当前的为true
day.isActive = true;
}
}
}

</script>
<style>
.news_container{
width: 442px;
float: left;

margin-right: 20px;
line-height: 35px;
}
.span_box.active{
background: #7ED321;
}
.title_a{
font-weight: bold;
font-size: 16px;
}
.span_box_div{
float: right;
margin-right: 20px;
color: gray;
font-size: 12px;
}
.span_box{
width: 10px;
height: 10px;
background: #D8D8D8;
transition: background .2s;
margin: 0 3px;
display: inline-block;
cursor: pointer;
}
.content{
display: none;
}
.content.active{
display: block;
}
.title{
border-bottom: 1px solid #CECCCC;
}

</style>
3、稍微修改下home.js 和template.html
template.html

<html>
<head>
<meta charset="utf-8">
<meta name="viewport" content="width=device-width, initial-scale=1.0, user-scalable=0, minimum-scale=1.0, maximum-scale=1.0">
<title>vue-webpack</title>
</head>
<body>

<div id='header'>
</div>
<div class="container">
<div id='new_container'>
</div>
</div>
</body>
</html>
home.js

//这个js作为首页的打包入口
import Vue from 'vue';//npm 安装过vue.可以直接import

import header from '../../home/vue/header.vue';
import '../../base.css';//自己想放哪里就放哪里,这里只定义了几个基础样式
import new_container from '../../home/vue/news_container.vue';

// 创建根实例
new Vue({
el:'#header',//这个是在模板文件中需要替换的div ID.
//这个div将本vue进行重新渲染
// render:function(createElement){
//    return createElement(header);
// }
render:x=>x(header)
})
new Vue({
el:'#new_container',//这个是在模板文件中需要替换的div ID.
//这个div将本vue进行重新渲染
// render:function(createElement){
//    return createElement(header);
// }
render:x=>x(new_container)
})
引用了一个base.css
body{
margin: 0px;
padding: 0px;
font-family:微软雅黑;

}
.container{
padding: 0px 20px;
}
li{
list-style: none;
}
到这里就可以了,跑起来看看效果

相关文章推荐
- Vue.js学习之使用Webpack加速应用的方式详解
- vue.js使用webpack发布,部署到服务器上之后在浏览器中可以查看到vue文件源码
- 不使用webpack如何合并多个js文件,合并多个css文件
- vue-cli脚手架build目录中的webpack.dev.conf.js配置文件
- 使用Webpack提高Vue.js应用的方式汇总(四种)
- 基于vue.js 2.0,不使用webpack的nodejs服务,只在浏览器上单独使用在Element UI的Tree树形控件
- vue-cli创建的项目不需要再创建webpack-config.js文件,因为已经配置过了
- 学习使用webpack+vue搭建项目
- 如何降低Vue.js项目中Webpack打包文件的大小?
- vuejs electron webpack集成使用
- 结合nodejs+webpack+vuejs开启时尚学习套路
- 基于webpack和vue.js搭建的H5端框架(其实主要用于Hybrid开发H5端框架,但是依然能够作为纯web端使用)
- 使用webpack合并js文件
- Vue.js 在 webpack 脚手架中使用 cssnext
- 学习 webpack+vue.js (1、先随便创建一个工程)
- vue-cli脚手架build目录中的webpack.base.conf.js配置文件
- vue-cli脚手架build目录中的webpack.prod.conf.js配置文件
- 基于vue.js 2.0,不使用webpack,只在浏览器上单独使用Element UI的Table表格控件完成增删改查页面
- webpack vuejs 和 vue-router 如何使用?
- vue-cli的webpack模版,相关配置文件dev-server.js与webpack.config.js配置解析