Android之利用EventBus发送消息传递示例
一、概述
EventBus是一款针对Android优化的发布/订阅事件总线。主要功能是替代Intent,Handler,BroadCast在Fragment,Activity,Service,线程之间传递消息.优点是开销小,代码更优雅。以及将发送者和接收者解耦。
1、下载EventBus的类库
2、基本使用
(1)自定义一个类,可以是空类,比如:
public class AnyEventType {
public AnyEventType(){}
}
(2)在要接收消息的页面注册:
eventBus.register(this);
(3)发送消息
eventBus.post(new AnyEventType event);
(4)接受消息的页面实现(共有四个函数,各功能不同,这是其中之一,可以选择性的实现,这里先实现一个):
public void onEvent(AnyEventType event) {}
(5)解除注册
eventBus.unregister(this);
顺序就是这么个顺序,可真正让自己写,估计还是云里雾里的,下面举个例子来说明下。
首先,在EventBus中,获取实例的方法一般是采用EventBus.getInstance()来获取默认的EventBus实例,当然你也可以new一个又一个,个人感觉还是用默认的比较好,以防出错。
二、实战
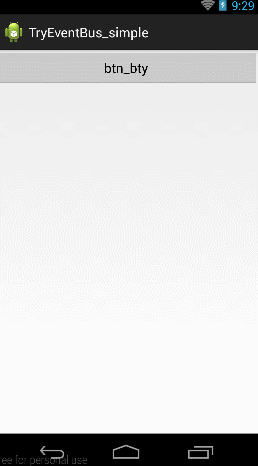
先给大家看个例子:
当击btn_try按钮的时候,跳到第二个Activity,当点击第二个activity上面的First Event按钮的时候向第一个Activity发送消息,当第一个Activity收到消息后,一方面将消息Toast显示,一方面放入textView中显示。
按照下面的步骤,下面来建这个工程:
1、基本框架搭建
想必大家从一个Activity跳转到第二个Activity的程序应该都会写,这里先稍稍把两个Activity跳转的代码建起来。后面再添加EventBus相关的玩意。
MainActivity布局(activity_main.xml)
<LinearLayout xmlns:android="http://schemas.android.com/apk/res/android"
xmlns:tools="http://schemas.android.com/tools"
android:layout_width="match_parent"
android:layout_height="match_parent"
android:orientation="vertical">
<Button
android:id="@+id/btn_try"
android:layout_width="match_parent"
android:layout_height="wrap_content"
android:text="btn_bty"/>
<TextView
android:id="@+id/tv"
android:layout_width="wrap_content"
android:layout_height="match_parent"/>
</LinearLayout>
新建一个Activity,SecondActivity布局(activity_second.xml)
<LinearLayout xmlns:android="http://schemas.android.com/apk/res/android"
xmlns:tools="http://schemas.android.com/tools"
android:layout_width="match_parent"
android:layout_height="match_parent"
android:orientation="vertical"
tools:context="com.harvic.try_eventbus_1.SecondActivity" >
<Button
android:id="@+id/btn_first_event"
android:layout_width="match_parent"
android:layout_height="wrap_content"
android:text="First Event"/>
</LinearLayout>
MainActivity.java (点击btn跳转到第二个Activity)
public class MainActivity extends Activity {
Button btn;
@Override
protected void onCreate(Bundle savedInstanceState) {
super.onCreate(savedInstanceState);
setContentView(R.layout.activity_main);
btn = (Button) findViewById(R.id.btn_try);
btn.setOnClickListener(new View.OnClickListener() {
@Override
public void onClick(View v) {
// TODO Auto-generated method stub
Intent intent = new Intent(getApplicationContext(),
SecondActivity.class);
startActivity(intent);
}
});
}
}
到这,基本框架就搭完了,下面开始按步骤使用EventBus了。
2、新建一个类FirstEvent
package com.harvic.other;
public class FirstEvent {
private String mMsg;
public FirstEvent(String msg) {
// TODO Auto-generated constructor stub
mMsg = msg;
}
public String getMsg(){
return mMsg;
}
}
这个类很简单,构造时传进去一个字符串,然后可以通过getMsg()获取出来。
3、在要接收消息的页面注册EventBus:
在上面的GIF图片的演示中,大家也可以看到,我们是要在MainActivity中接收发过来的消息的,所以我们在MainActivity中注册消息。
通过我们会在OnCreate()函数中注册EventBus,在OnDestroy()函数中反注册。所以整体的注册与反注册的代码如下:
package com.example.tryeventbus_simple;
import com.harvic.other.FirstEvent;
import de.greenrobot.event.EventBus;
import android.app.Activity;
import android.content.Intent;
import android.os.Bundle;
import android.util.Log;
import android.view.View;
import android.widget.Button;
import android.widget.TextView;
import android.widget.Toast;
public class MainActivity extends Activity {
Button btn;
TextView tv;
@Override
protected void onCreate(Bundle savedInstanceState) {
super.onCreate(savedInstanceState);
setContentView(R.layout.activity_main);
//注册EventBus
EventBus.getDefault().register(this);
btn = (Button) findViewById(R.id.btn_try);
tv = (TextView)findViewById(R.id.tv);
btn.setOnClickListener(new View.OnClickListener() {
@Override
public void onClick(View v) {
// TODO Auto-generated method stub
Intent intent = new Intent(getApplicationContext(),
SecondActivity.class);
startActivity(intent);
}
});
}
@Override
protected void onDestroy(){
super.onDestroy();
EventBus.getDefault().unregister(this);//反注册EventBus
}
}
4、发送消息
发送消息是使用EventBus中的Post方法来实现发送的,发送过去的是我们新建的类的实例!
EventBus.getDefault().post(new FirstEvent("FirstEvent btn clicked"));
完整的SecondActivity.Java的代码如下:
package com.example.tryeventbus_simple;
import com.harvic.other.FirstEvent;
import de.greenrobot.event.EventBus;
import android.app.Activity;
import android.os.Bundle;
import android.view.View;
import android.widget.Button;
public class SecondActivity extends Activity {
private Button btn_FirstEvent;
@Override
protected void onCreate(Bundle savedInstanceState) {
super.onCreate(savedInstanceState);
setContentView(R.layout.activity_second);
btn_FirstEvent = (Button) findViewById(R.id.btn_first_event);
btn_FirstEvent.setOnClickListener(new View.OnClickListener() {
@Override
public void onClick(View v) {
// TODO Auto-generated method stub
EventBus.getDefault().post(
new FirstEvent("FirstEvent btn clicked"));
}
});
}
}
5、接收消息
接收消息时,我们使用EventBus中最常用的onEventMainThread()函数来接收消息,具体为什么用这个,我们下篇再讲,这里先给大家一个初步认识,要先能把EventBus用起来先。
在MainActivity中重写onEventMainThread(FirstEvent event),参数就是我们自己定义的类:
在收到Event实例后,我们将其中携带的消息取出,一方面Toast出去,一方面传到TextView中;
public void onEventMainThread(FirstEvent event) {
String msg = "onEventMainThread收到了消息:" + event.getMsg();
Log.d("harvic", msg);
tv.setText(msg);
Toast.makeText(this, msg, Toast.LENGTH_LONG).show();
}
完整的MainActiviy代码如下:
package com.example.tryeventbus_simple;
import com.harvic.other.FirstEvent;
import de.greenrobot.event.EventBus;
import android.app.Activity;
import android.content.Intent;
import android.os.Bundle;
import android.util.Log;
import android.view.View;
import android.widget.Button;
import android.widget.TextView;
import android.widget.Toast;
public class MainActivity extends Activity {
Button btn;
TextView tv;
@Override
protected void onCreate(Bundle savedInstanceState) {
super.onCreate(savedInstanceState);
setContentView(R.layout.activity_main);
EventBus.getDefault().register(this);
btn = (Button) findViewById(R.id.btn_try);
tv = (TextView)findViewById(R.id.tv);
btn.setOnClickListener(new View.OnClickListener() {
@Override
public void onClick(View v) {
// TODO Auto-generated method stub
Intent intent = new Intent(getApplicationContext(),
SecondActivity.class);
startActivity(intent);
}
});
}public void onEventMainThread(FirstEvent event) {
String msg = "onEventMainThread收到了消息:" + event.getMsg();
Log.d("harvic", msg);
tv.setText(msg);
Toast.makeText(this, msg, Toast.LENGTH_LONG).show();
}@Override
protected void onDestroy(){
super.onDestroy();
EventBus.getDefault().unregister(this);
}
}
好了,到这,基本上算初步把EventBus用起来了,下篇再讲讲EventBus的几个函数,及各个函数间是如何识别当前如何调用哪个函数的。
源码地址:EventBus_jb51.rar
以上就是本文的全部内容,希望对大家的学习有所帮助,也希望大家多多支持脚本之家。
您可能感兴趣的文章:

- Android之利用EventBus进行消息传递
- Android之利用EventBus进行消息传递
- Android消息传递之基于RxJava实现一个EventBus - RxBus
- Android: 如何利用Handler处理和发送消息来实现页面刷新的功能
- 示例C#利用UdpClient发送广播消息
- [转载]利用Bundle实现Android Activity间消息的传递
- 利用Bundle实现Android Activity间消息的传递
- 【第三篇】学习 android 事件总线androidEventbus之list数据事件的传递,发送list数据事件到另外一个Activity
- Android中通过EventBus传递消息数据
- 利用Bundle实现Android Activity间消息的传递
- 示例C#利用UdpClient发送广播消息<转>
- android 入门学习笔记 利用bundle实现android,activity间消息的传递
- Android 与 native C 利用本地socket进行消息传递
- android studio for android learning (十一) 利用bundle在activity之间进行数据传递示例
- 【转】利用Bundle实现Android Activity间消息的传递
- Android: 如何利用Handler处理和发送消息来实现页面刷新的功能
- Android利用Bundle实现Activity间消息的传递
- Android EventBus 传递消息
- 主题:利用Bundle实现Android Activity间消息的传递
- 利用Kafka发送/消费消息-Java示例