Android利用WindowManager生成悬浮按钮及悬浮菜单
2017-01-22 08:36
696 查看
简介
本文模仿实现的是360手机卫士基础效果,同时后续会补充一些WindowManager的原理知识。
整体思路
360手机卫士的内存球其实就是一个没有画面的应用程序,整个应用程序的主体是一个Service。我们的程序开始以后,启动一个service,同时关闭activity即可:
public class MainActivity extends Activity {
private static final String TAG = MainActivity.class.getSimpleName();
@Override
protected void onCreate(Bundle savedInstanceState) {
super.onCreate(savedInstanceState);
startService(new Intent(this, FloatWindowService.class));
finish();
}
}
import android.os.IBinder;
import android.util.Log;
import java.util.Timer;
import java.util.TimerTask;
public class FloatWindowService extends Service {
private static final String TAG = FloatWindowService.class.getSimpleName();
public FloatWindowService() {
}
@Override
public int onStartCommand(Intent intent, int flags, int startId) {
Log.d(TAG, "on start command");
FloatWindowManager.instance(getApplicationContext()).createFloatWindow();
return super.onStartCommand(intent, flags, startId);
}
@Override
public IBinder onBind(Intent intent) {
// TODO: Return the communication channel to the service.
throw new UnsupportedOperationException("Not yet implemented");
}
}
我们要注意的是,传统的Service默认是运行在UI线程中的,这点与封装了一个Thread和Handler的intentService不同,所以我们可以直接在Service中更改UI相关的内容。
再来看一下FloatWindowManager中的方法:
public void createFloatWindow() {
if (isWindowShowing()) return;
WindowManager windowManager = getWindowManger(context);
int screenWidth = windowManager.getDefaultDisplay().getWidth();
int screenHeight = windowManager.getDefaultDisplay().getHeight();
if (floatLayout == null) {
floatLayout = new FloatLayout(context);
if (smallLayoutParams == null) {
smallLayoutParams = new WindowManager.LayoutParams();
smallLayoutParams.type = WindowManager.LayoutParams.TYPE_PHONE;
smallLayoutParams.format = PixelFormat.RGBA_8888;
smallLayoutParams.flags = WindowManager.LayoutParams.FLAG_NOT_TOUCH_MODAL
| WindowManager.LayoutParams.FLAG_NOT_FOCUSABLE;
smallLayoutParams.gravity = Gravity.LEFT | Gravity.TOP;
smallLayoutParams.width = FloatLayout.viewWidth;
smallLayoutParams.height = FloatLayout.viewHeight;
smallLayoutParams.x = screenWidth;
smallLayoutParams.y = screenHeight / 2;
}
}
windowManager.addView(floatLayout,smallLayoutParams);
}
以及自定义的View:
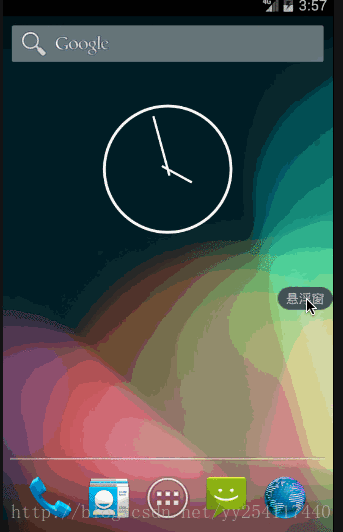
<?xml version="1.0" encoding="utf-8"?>
<LinearLayout xmlns:android="http://schemas.android.com/apk/res/android"
android:id="@+id/small_layout"
android:background="@drawable/bg_small"
android:orientation="vertical" android:layout_width="60dip"
android:layout_height="25dip">
<TextView
android:layout_width="match_parent"
android:gravity="center"
android:text="悬浮窗"
android:layout_height="match_parent" />
</LinearLayout>
public class FloatLayout extends LinearLayout {
public static int viewWidth;
public static int viewHeight;
private WindowManager windowManager;
public FloatLayout(final Context context) {
super(context);
windowManager = (WindowManager) context.getSystemService(Context.WINDOW_SERVICE);
LayoutInflater.from(context).inflate(R.layout.small_layout, this);
View view = findViewById(R.id.small_layout);
viewWidth = view.getLayoutParams().width;
viewHeight = view.getLayoutParams().height;
setOnTouchListener(new OnTouchListener() {
@Override
public boolean onTouch(View v, MotionEvent event) {
FloatWindowManager.instance(context).createFloatMenu();
return true;
}
});
}
}
自定义的View除了加载了一个布局,就是设置了一个Touch监听器,用于点击悬浮窗弹出菜单。注意这里要使用 view.getLayoutParams() 来获取视图的宽和高,因为在构造方法中,这个View并没有被measure完成,所以采用view.getHeight得到的宽高是0。
创建菜单的方法类似,同样通过WindowManager:
public void createFloatMenu() {
if (menuLayout != null) return;
Log.d(TAG, "create float menu");
WindowManager windowManager = getWindowManger(context);
if (menuLayout == null){
menuLayout = new MenuLayout(context);
menuLayoutParams = new WindowManager.LayoutParams();
menuLayoutParams.type = WindowManager.LayoutParams.TYPE_PHONE;
menuLayoutParams.format = PixelFormat.RGBA_8888;
}
windowManager.addView(menuLayout,menuLayoutParams);
}
自定义的菜单将背景设置成半透明,同时分成上下两部分,上部分点击删除菜单,下部分是一些展示的内容:
<?xml version="1.0" encoding="utf-8"?>
<LinearLayout xmlns:android="http://schemas.android.com/apk/res/android"
android:orientation="vertical" android:layout_width="match_parent"
android:background="#96000000"
android:layout_height="match_parent">
<LinearLayout
android:layout_width="match_parent"
android:id="@+id/trans_part"
android:orientation="horizontal"
android:layout_weight="1"
android:layout_height="0dp"></LinearLayout>
<LinearLayout
android:layout_width="match_parent"
android:layout_weight="1"
android:background="@color/colorPrimary"
android:layout_height="0dp">
<TextView
android:layout_width="match_parent"
android:text="存放content"
android:layout_height="match_parent" />
</LinearLayout>
</LinearLayout>
public class MenuLayout extends LinearLayout {
public MenuLayout(final Context context) {
super(context);
LayoutInflater.from(context).inflate(R.layout.transparent_layout,this);
View view = findViewById(R.id.trans_part);
view.setOnClickListener(new OnClickListener() {
@Override
public void onClick(View v) {
FloatWindowManager.instance(context).removeMenuLayout();
}
});
}
}
可以看见,实现悬浮窗,其实就是通过windowManager.addView 时,在LayoutParam 的type设置为TYPE_PHONE,这样你的视图就是系统级视图,可以覆盖在全部程序的最上面。其余的,更多的是自定义View的知识。
以上就是本文的全部内容,希望对大家的学习有所帮助,也希望大家多多支持脚本之家。
您可能感兴趣的文章:

相关文章推荐
- 利用WindowManager生成悬浮按钮及悬浮菜单
- 利用Window和WindowManager实现悬浮窗效果——Android开发艺术探索笔记
- Android编程:悬浮菜单按钮FloatingActionButton实例
- android WindowManager可拖动悬浮按钮
- Android CircularFloatingActionMenu:作为系统级按钮悬浮桌面弹出菜单使用(3)
- Android CircularFloatingActionMenu:作为系统级按钮悬浮桌面弹出菜单使用(3)
- Android编程:扇形展开的悬浮菜单按钮CircularFloatingActionMenu实例
- Android利用WindowManager实现悬浮窗
- Android CircularFloatingActionMenu:作为系统级按钮悬浮桌面弹出菜单使用(3)
- Android 菜单BoomMenu(悬浮按钮弹出菜单)
- Android利用悬浮按钮实现翻页效果
- Android之WindowManager实现悬浮按钮
- Android 利用WindowManager实现悬浮窗
- Android系统原理与源码分析(1):利用Java反射技术阻止通过按钮关闭对话框
- 利用div+css生成简单的导航菜单,简单实用
- 如何在Android平板电脑POWER按钮菜单中添加休眠功能
- Android系统原理与源码分析(1):利用Java反射技术阻止通过按钮关闭对话框
- tabHost研究二 ,android应用中,大部分的软件都会采用把按钮放在底部显示(tabHost)。利用三个Radiobutton嵌套在RadioGroup 。
- 如何利用 VB6 Addin 动态生成菜单
- UINavigationController专栏--利用按钮宏定义构建一个简单的双项菜单