【翻译】使用Visual Studio在Azure上部署Asp.Net Core Web应用
2017-01-16 10:38
323 查看
配置运行环境
Install the latest Azure SDK for Visual Studio. The SDK installs Visual Studio if you don't already have it. 安装Azure SDK for Visual Studio,如果你的Visual Studio还没有安装这个SDK的话Install .NET Core + Visual Studio tooling
安装.NET Core + Visual Studio tooling
Verify your Azure account. You can open a free Azure account or Activate Visual Studio subscriber benefits.
验证你的Azure账号。你可以注册一个免费的Azure账号也可以激活你的Visual Studio的Azure信用额度。
创建Web应用
In the Visual Studio Start Page, tap New Project.... 在Visual Studio启示页面,点击New Project…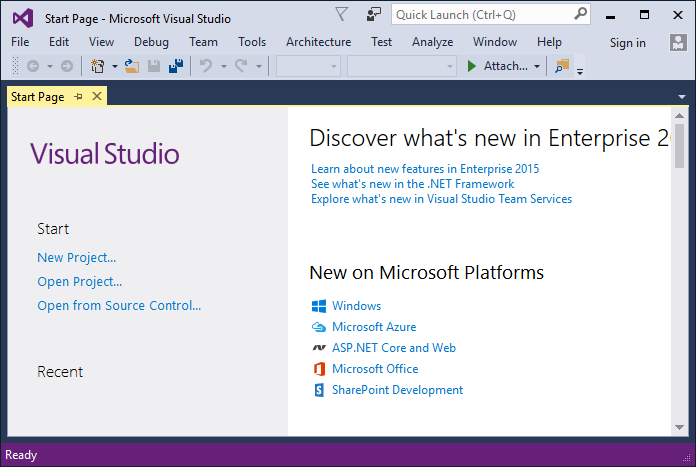
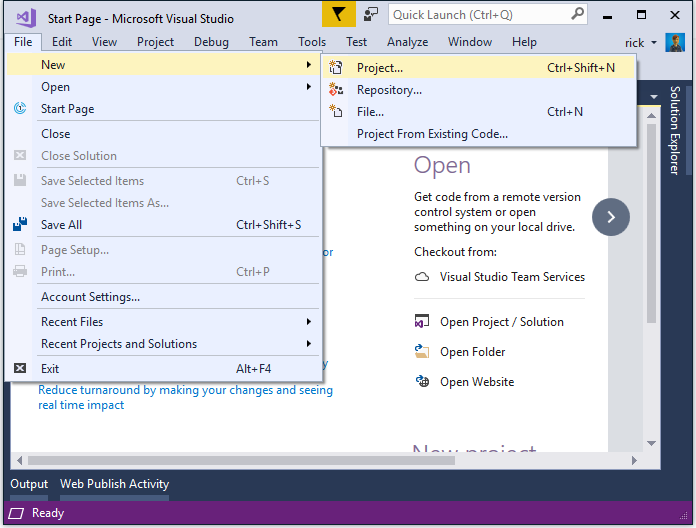
Alternatively, you can use the menus to create a new project. Tap File > New > Project.... 你也可以通过菜单来创建一个新的项目。点击File > New > Project…
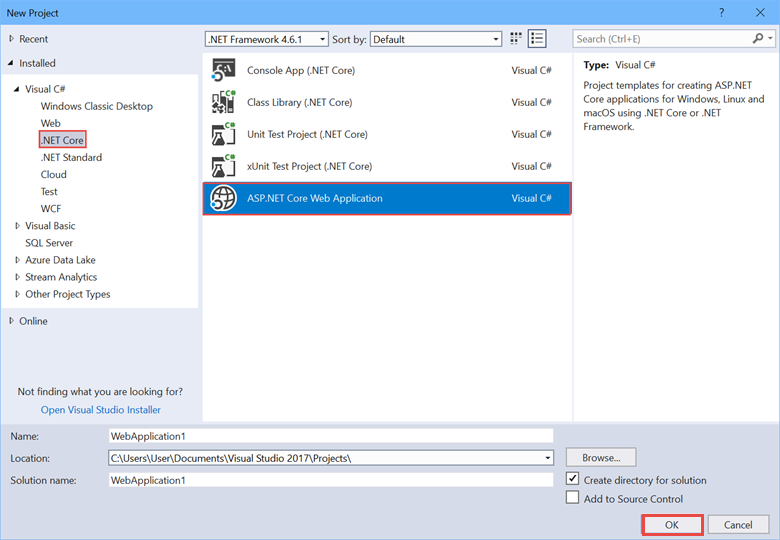
Complete the New Project dialog: 完成新项目的创建 In the left pane, tap Web
在左边面板,点击Web
In the center pane, tap ASP.NET Core Web Application (.NET Core)
在中间的面板,点击选择Asp.Net Core Web Application(.Net Core)
Tap OK
[b]点击OK[/b]
In the New ASP.NET Core Web Application (.NET Core) dialog: 在New Asp.Net Core Web Application(.Net Core)对话框中: Tap Web Application
点击Web Application
Verify Authentication is set to Individual User Accounts
Authentication设置成Individual User Accounts
Verify Host in the cloud is not checked
不选中Host in the Cloud
Tap OK
点击OK
在本地测试应用
Press Ctrl-F5 to run the app locally按Ctrl+F5在本地运行应用
Tap the About and Contact links. Depending on the size of your device, you might need to tap the navigation icon to show the links
点击About和Contact链接,根据你设备分辨率的大小,你可能需要点击导航图标才能看到这些链接。
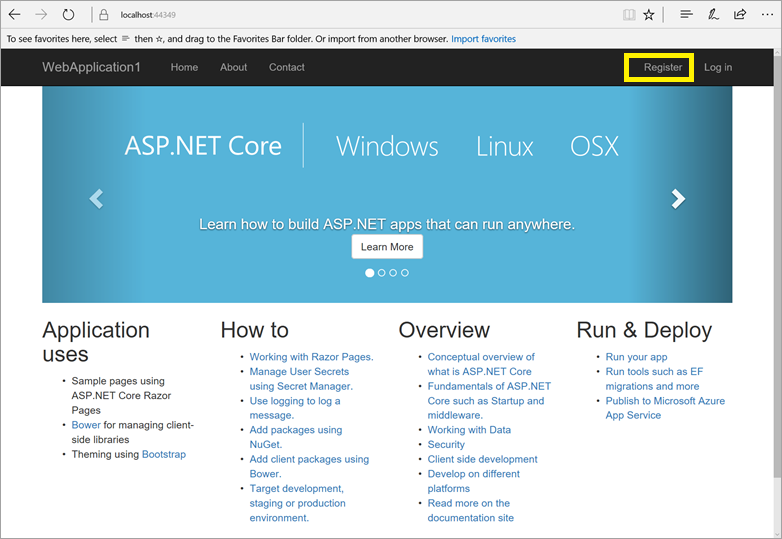
Tap Register and register a new user. You can use a fictitious email address. When you submit, you'll get the following error: 点击注册链接注册一个新的用户。你可以输入虚拟的Email地址,当你点击提交的时候,你会看到错误:
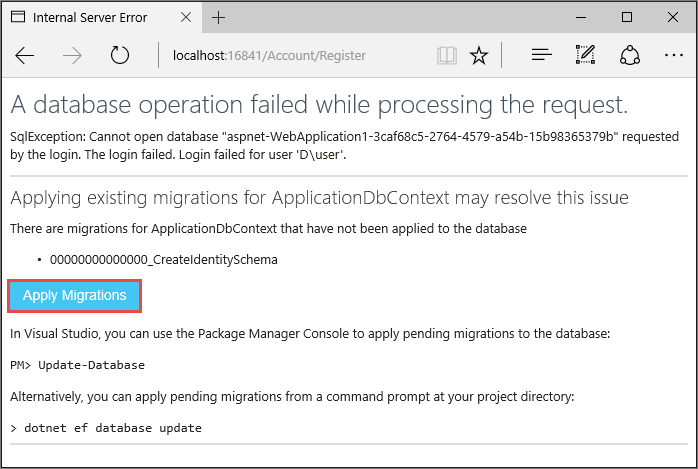
You can fix the problem in two different ways: 你可以使用以下两种方式修复问题: Tap Apply Migrations and, once the page updates, refresh the page;
点击Apply Migrations,等待更新后,刷新页面
Run the following from a command prompt in the project's directory:
在命令终端下,到项目目录运行以下命令:
dotnet ef database update
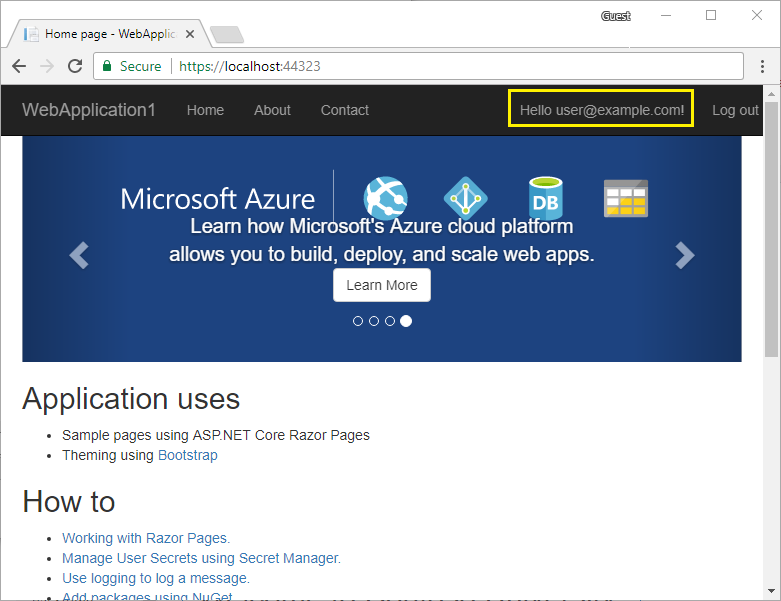
The app displays the email used to register the new user and a Log off link.
刷新页面后,页面会显示我们注册的新用户和看到一个Log off的链接。
应用部署到Azure
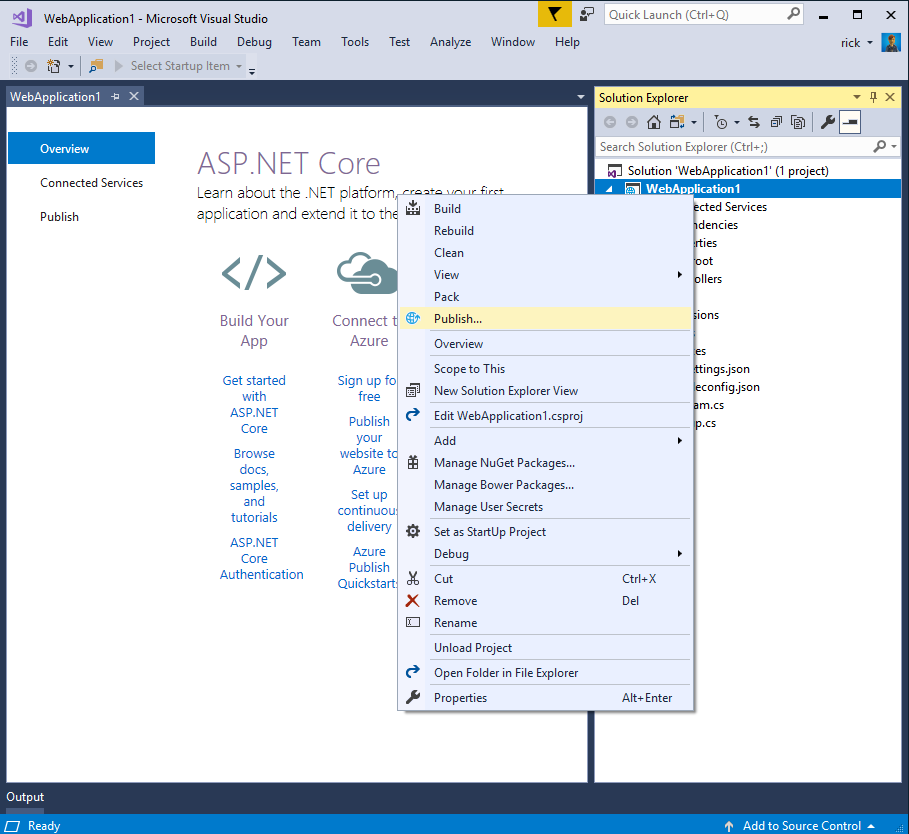
Right-click on the project in Solution Explorer and select Publish....在Solution Explorer右键项目,点击Publish
In the Publish dialog, tap Microsoft Azure App Service.
在Publish对话框中,点击Microsoft Azure App service.
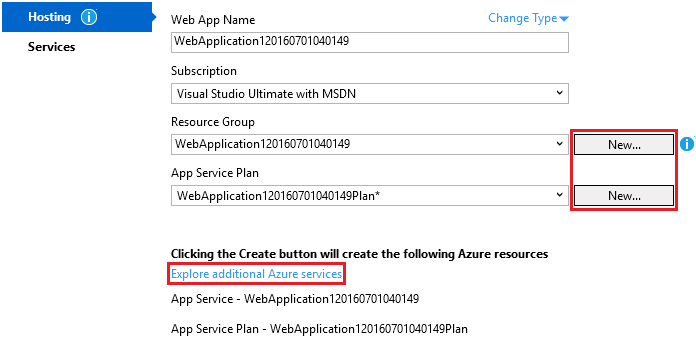
Tap New... to create a new resource group. Creating a new resource group will make it easier to delete all the Azure resources you create in this tutorial.
点击New创建一个新的资源组。创建新的资源组可以方便你删除所有在Azure上创建的范例资源。
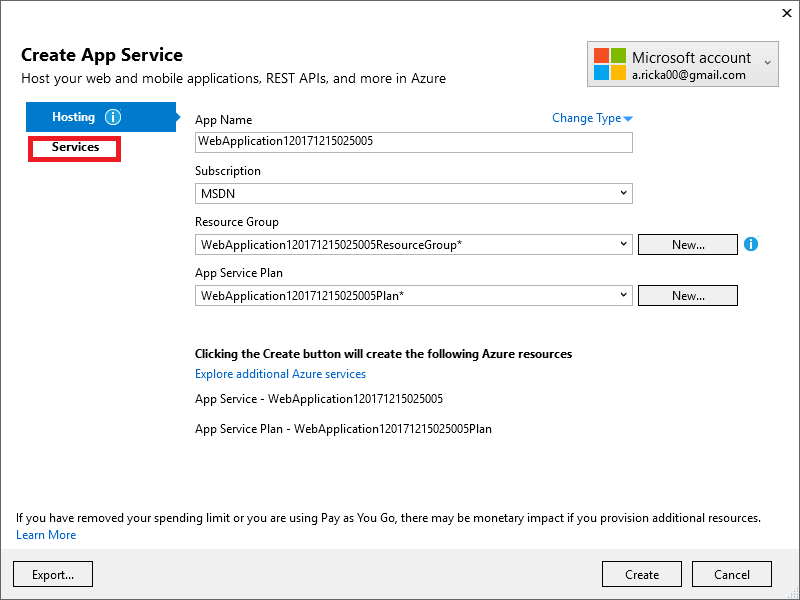
Create a new resource group and app service plan:
添加一个新的Resource group和app service plan:
Tap New... for the resource group and enter a name for the new resource group
在resource group点击New,然后为这个资源组取名
Tap New... for the app service plan and select a location near you. You can keep the default generated name
在app service plan点击New,选择一个
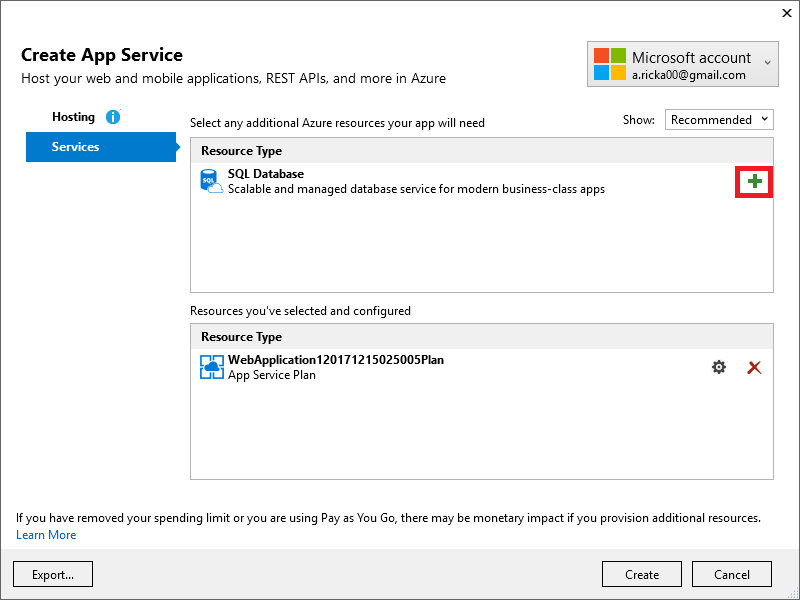
Tap Explore additional Azure services to create a new database
点击Explore additional Azure services去创建一个新的数据库
Tap the green + icon to create a new SQL Database
点击绿色的加号图标创建一个新的Sql数据库
Tap New... on the Configure SQL Database dialog to create a new database server.
在Configure Sql Database对话框中点击New创建一个新的数据库
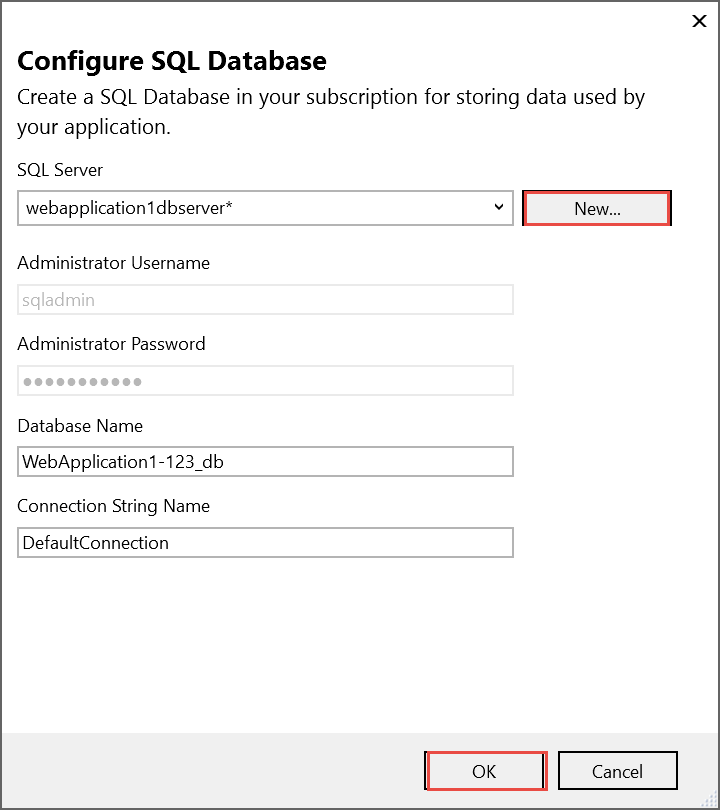
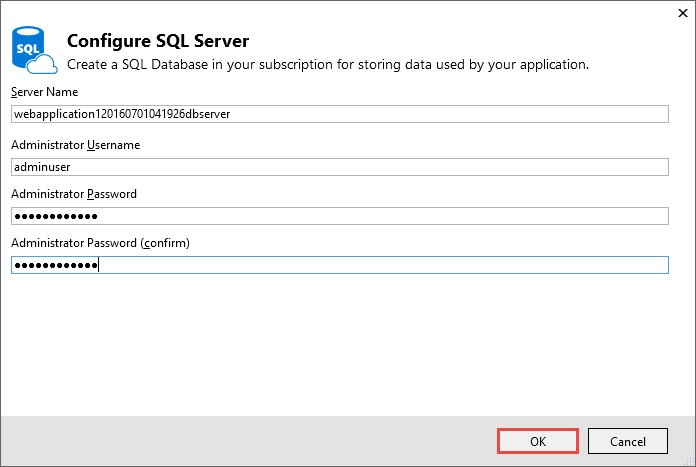
Enter an administrator user name and password, and then tap OK. Don't forget the user name and password you create in this step. You can keep the default Server Name
输入一个管理员名和密码,点击OK。不要忘记你设置的用户名和密码。ServerName可以保持默认的。
Tap OK on the Configure SQL Database dialog
在Configure SQL Database对话框点击OK
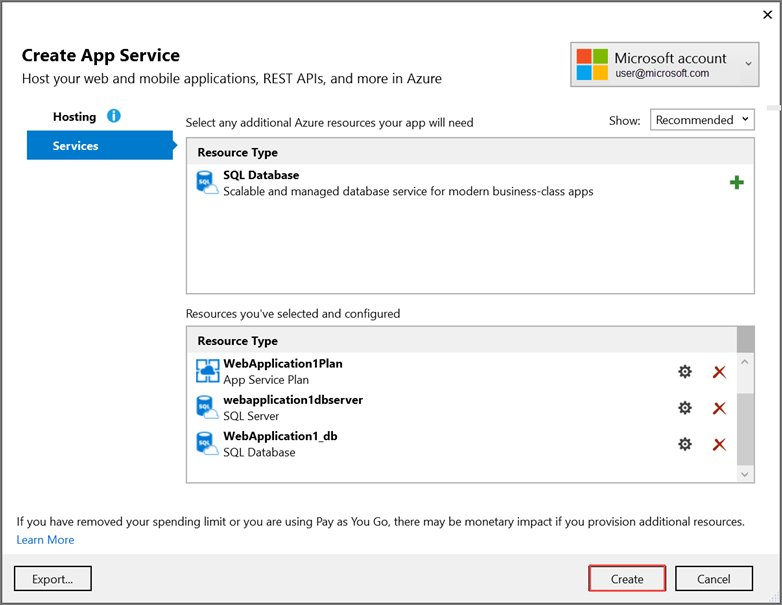
Tap Create on the Create App Service dialog
在Creat App Service对话框点击Create

Tap Next in the Publish dialog
在Publish对话框点击Next
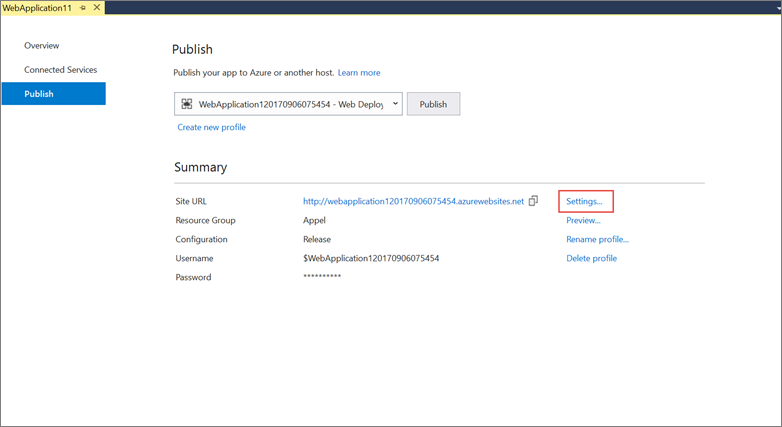
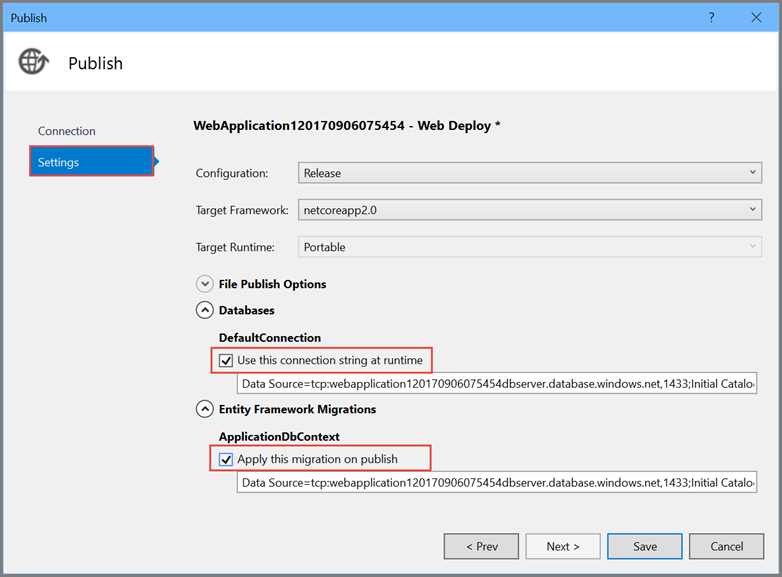
On the Settings stage of the Publish dialog:
点击Publish对话框的Settings标签
Expand Databases and check Use this connection string at runtime
扩展Databases,选中Use this connection string at runtime
Expand Entity Framework Migrations and check Apply this migration on publish
扩展Entity Framework Migrations,选中Apply this migration on publish
Tap Publish and wait until Visual Studio finishes publishing your app
点击Publish,等待Visual Studio完成发布你的应用。
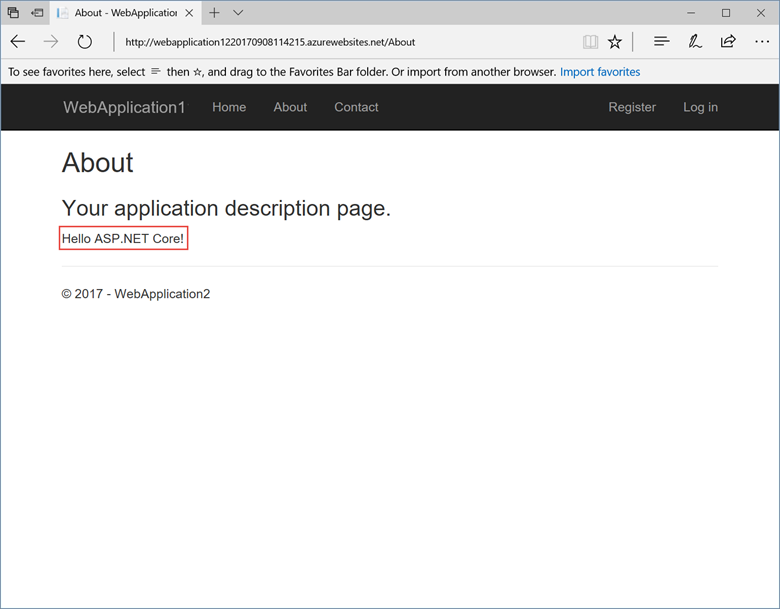
Visual Studio will publish your app to Azure and launch the cloud app in your browser.
Visual Studio会在发布到Azure后通过浏览器打开你在云端部署的应用。
在Azure上测试你的应用
Test the About and Contact links测试About和Contact链接
Register a new user
注册一个用户
更新应用
Edit theViews/Home/About.cshtmlRazor view file and change its contents. For example:
编辑Views/Home/About.cshtml文件,修改它。参考:
@{
ViewData["Title"] = "About";
}
<h2>@ViewData["Title"].</h2>
<h3>@ViewData["Message"]</h3>

<p>My updated about page.</p>
Right-click on the project and tap Publish... again
再次右键项目点击Publish
After the app is published, verify the changes you made are available on Azure
发布后,检查下在Azure端的应用是否改变
清除应用
When you have finished testing the app, go to the Azure portal and delete the app.当你完成测试后,去Azure后台删除这个应用。
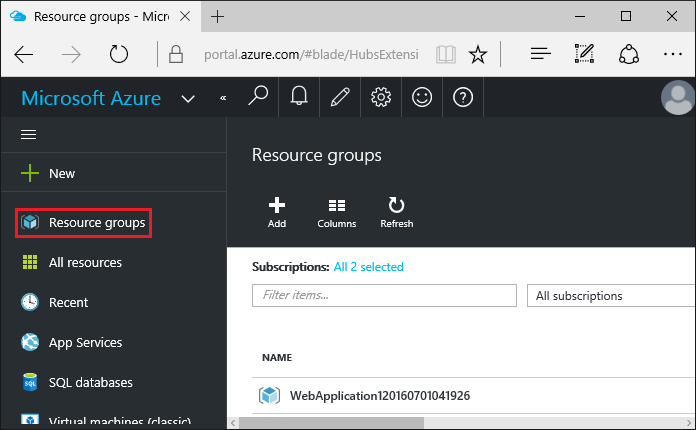
Select Resource groups, then tap the resource group you created
选择Resource groups,然后选中你创建的资源组
In the Resource group blade, tap Delete
在Resource group选项卡中,点击Delete
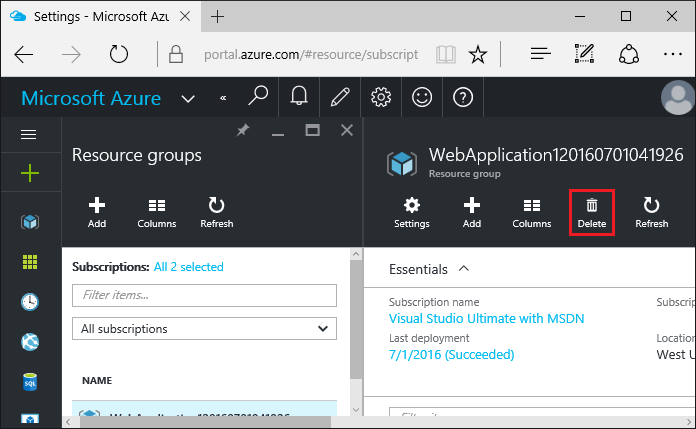
Enter the name of the resource group and tap Delete. Your app and all other resources created in this tutorial are now deleted from Azure
输入资源组名点击Delete。你的应用和创建的资源在Azure中将会被删除。
原文链接
https://docs.microsoft.com/zh-cn/aspnet/core/tutorials/publish-to-azure-webapp-using-vs
相关文章推荐
- 使用 Visual Studio 将 ASP.NET Web 应用部署到 Azure
- [New Portal]Windows Azure Cloud Service (33) 使用Visual Studio 2012 部署Cloud Service
- 使用 Visual Studio 2017 部署 Azure 应用服务的 Web 应用
- [翻译]使用C#创建SQL Server的存储过程(Visual Studio 2005 + SQL Server 2005)
- [翻译]使用C#创建SQL Server的存储过程(Visual Studio 2005 + SQL Server 2005)
- 使用Visual Studio 部署SharePoint时提示“路径中具有非法字符”
- 初学者的福音——在Visual studio中使用Azure例子程序(.NET)
- Crystal Support 之最高阅览量文章:怎样部署使用 Crystal Reports 和 VS.NET 的程序?(翻译:海波.NET)
- 怎样部署使用 Crystal Reports 和 VS.NET 的程序?(翻译:海波.NET)
- [Azure] 使用 Visual Studio 2013 管理中国版 Azure 订阅
- 使用Visual Studio 2010来部署Windows应用程序
- 【翻译自mos文章】使用asm来部署 超大数据库(10TB到PB 范围)--针对oracle 10G
- [翻译]使用C#创建SQL Server的存储过程(Visual Studio 2005 + SQL Server 2005)
- [翻译]使用C#创建SQL Server的存储过程(Visual Studio 2005 + SQL Server 2005) (转)
- 关于使用Visual Studio 2008 建立Setup And Deployment Project(安装与部署项目)制作安装.net 安装程序,插入Custom Actions(自定义动作)的办法
- 使用Kinect,Azure,Windows Phone和Windows8的家庭安全系统(翻译)
- Crystal Support 之最高阅览量文章:怎样部署使用 Crystal Reports 和 VS.NET 的程序?(翻译:海波.NET)
- [翻译]使用C#创建SQL Server的存储过程(Visual Studio 2005 + SQL Server 2005)【转】
- 使用Visual Studio 2010来部署Windows应用程序
- 使用CSDN Code将网站部署到Windows Azure Website上