caffe+python+mnist从图片训练到测试单张图片
2016-12-29 11:34
417 查看
环境:caffe已经装好,GPU训练模式,ubuntu14,
1.从图片格式的数据集开始,下载了mnist图片格式的数据集,下载地址:http://download.csdn.net/download/magicarcher/9529956
解压以后放在caffe-master/data/Mnist_image中,MNIST是一个手写数字数据库,它有60000个训练样本集和10000个测试样本集。
2.数据准备,转换成lmdb格式
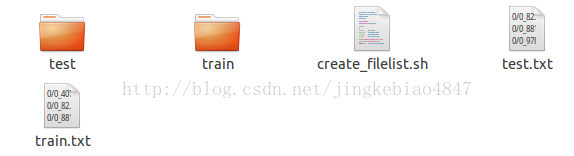
首先是在caffe-master/data/Mnist_image中新建一个create_filelist.sh脚本来生成训练和测试数据的标签文件(就是指定什么图片是什么类别的txt):
解释-f6-7:
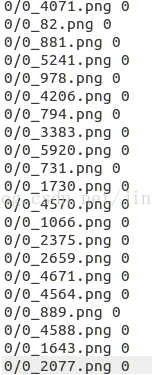
比如路径$DATA_TRAIN/$i/ -name *.png = ../../data/Mnist_image/train/0/0_1.png,f6-7就是被/分隔开的第6段和第7段的内容:0/0_1.png
在此路径caffe-master/data/Mnist_image中运行:
然后在caffe-master/examples中新建一个文件夹Mnist_image,在Mnist_image中新建脚本文件create_lmdb.sh:

于是生成如上两个lmdb文件夹。
3.计算均值并保存
图片减去均值再训练,会提高训练速度和精度。因此,一般都会有这个操作。
caffe程序提供了一个计算均值的文件compute_image_mean.cpp,我们直接使用就可以了:
生成均值文件mean.binaryproto,但是好像默认的生成路径在根目录下。
4.创建模型并修改配置文件
模型就用examples中自带的模型,位置在examples/mnist目录下, 将需要的两个配置文件lenet_solver.prototxt和lenet_train_val.prototxt,复制到examples/Mnist_image/
c8c0
目录下,更名为solver.prototxt和train_val.prototxt,打开solver.prototxt,只需修改两个路径,其他参数不用修改:?????????test?那train呢?
# The train/test net protocol buffer definition
net: "examples/Mnist_image/train_test.prototxt" #指定训练模型文件的位置
# test_iter specifies how many forward passes the test should carry out.
# In the case of MNIST, we have test batch size 100 and 100 test iterations,
# covering the full 10,000 testing images.
test_iter: 100
# Carry out testing every 500 training iterations.
test_interval: 500
# The base learning rate, momentum and the weight decay of the network.
base_lr: 0.01
momentum: 0.9
weight_decay: 0.0005
# The learning rate policy
lr_policy: "inv"
gamma: 0.0001
power: 0.75
# Display every 100 iterations
display: 100
# The maximum number of iterations
max_iter: 10000
# snapshot intermediate results
snapshot: 5000
snapshot_prefix: "examples/Mnist_image/caffenet_train"
# solver mode: CPU or GPU
solver_mode: GPU然后train_val.prototxt也只用修改一下路径,参数什么的都不用改。
name: "LeNet"
layer {
name: "mnist"
type: "Data"
top: "data"
top: "label"
include {
phase: TRAIN
}
transform_param {
scale: 0.00390625
}
data_param {
source: "examples/mnist/mnist_train_lmdb"
batch_size: 64
backend: LMDB
}
}
layer {
name: "mnist"
type: "Data"
top: "data"
top: "label"
include {
phase: TEST
}
transform_param {
scale: 0.00390625
}
data_param {
source: "examples/mnist/mnist_test_lmdb"
batch_size: 100
backend: LMDB
}
}
layer {
name: "conv1"
type: "Convolution"
bottom: "data"
top: "conv1"
param {
lr_mult: 1
}
param {
lr_mult: 2
}
convolution_param {
num_output: 20
kernel_size: 5
stride: 1
weight_filler {
type: "xavier"
}
bias_filler {
type: "constant"
}
}
}
layer {
name: "pool1"
type: "Pooling"
bottom: "conv1"
top: "pool1"
pooling_param {
pool: MAX
kernel_size: 2
stride: 2
}
}
layer {
name: "conv2"
type: "Convolution"
bottom: "pool1"
top: "conv2"
param {
lr_mult: 1
}
param {
lr_mult: 2
}
convolution_param {
num_output: 50
kernel_size: 5
stride: 1
weight_filler {
type: "xavier"
}
bias_filler {
type: "constant"
}
}
}
layer {
name: "pool2"
type: "Pooling"
bottom: "conv2"
top: "pool2"
pooling_param {
pool: MAX
kernel_size: 2
stride: 2
}
}
layer {
name: "ip1"
type: "InnerProduct"
bottom: "pool2"
top: "ip1"
param {
lr_mult: 1
}
param {
lr_mult: 2
}
inner_product_param {
num_output: 500
weight_filler {
type: "xavier"
}
bias_filler {
type: "constant"
}
}
}
layer {
name: "relu1"
type: "ReLU"
bottom: "ip1"
top: "ip1"
}
layer {
name: "ip2"
type: "InnerProduct"
bottom: "ip1"
top: "ip2"
param {
lr_mult: 1
}
param {
lr_mult: 2
}
inner_product_param {
num_output: 10
weight_filler {
type: "xavier"
}
bias_filler {
type: "constant"
}
}
}
layer {
name: "accuracy"
type: "Accuracy"
bottom: "ip2"
bottom: "label"
top: "accuracy"
include {
phase: TEST
}
}
layer {
name: "loss"
type: "SoftmaxWithLoss"
bottom: "ip2"
bottom: "label"
top: "loss"
}
5.训练
同样从位置在examples/mnist目录下, 复制lenet_train.sh到examples/Mnist_image目录,并更名为train.sh,修改路径:
6.使用deploy.py生成deploy.prototxt
在examples/Mnist_image目录下新建deploy.py:
因为classify.py中的测试接口caffe.Classifier需要训练图片的均值文件作为输入参数,而实际lenet-5训练时并未计算均值文件,所以这里创建一个全0的均值文件输入。编写一个zeronp.py文件如下

执行
1
生成均值文件 meanfile.npy。
在examples/Mnist_image中新建synset_words.txt:
0 zero
1 one
2 two
3 three
4 four
5 five
6 six
7 seven
8 eight
9 nine
8.修改classify.py保存为classifymnist.py文件
在目录caffe-master/python中有classify.py文件,复制一份并改名为classifymnist.py然后进行如下修改:
借鉴了http://blog.csdn.net/lanxuecc/article/details/52485077的博主一系列的文章,表示感谢,这里只是自己记录学习过程,如果侵权,很抱歉
1.从图片格式的数据集开始,下载了mnist图片格式的数据集,下载地址:http://download.csdn.net/download/magicarcher/9529956
解压以后放在caffe-master/data/Mnist_image中,MNIST是一个手写数字数据库,它有60000个训练样本集和10000个测试样本集。
2.数据准备,转换成lmdb格式
首先是在caffe-master/data/Mnist_image中新建一个create_filelist.sh脚本来生成训练和测试数据的标签文件(就是指定什么图片是什么类别的txt):
# !/usr/bin/env sh
DATA_TRAIN=../../data/Mnist_image/train #../使得能直接在这个目录运行create_filelist.sh
DATA_TEST=../../data/Mnist_image/test
MY=../../data/Mnist_image

echo "Create train.txt..."
rm -rf $MY/train.txt #删除原有的train.txt,在重复生成train.txt的时候用到
for i in 0 1 2 3 4 5 6 7 8 9
do
find $DATA_TRAIN/$i/ -name *.png | cut -d '/' -f6-7 | sed "s/$/ $i/">>$MY/train.txt #以/为分隔符,截取第6-7段作为图片在train.txt中的名称,后面加上标签0~9中一个
done
echo "Create test.txt..."
rm -rf $MY/test.txt
for i in 0 1 2 3 4 5 6 7 8 9
do
find $DATA_TEST/$i/ -name *.png | cut -d '/' -f6-7 | sed "s/$/ $i/">>$MY/test.txt
done
echo "All done"
解释-f6-7:
比如路径$DATA_TRAIN/$i/ -name *.png = ../../data/Mnist_image/train/0/0_1.png,f6-7就是被/分隔开的第6段和第7段的内容:0/0_1.png
在此路径caffe-master/data/Mnist_image中运行:
create_filelist.sh就得到train.txt和test.txt文件:
然后在caffe-master/examples中新建一个文件夹Mnist_image,在Mnist_image中新建脚本文件create_lmdb.sh:
#!/usr/bin/env sh
# Create the imagenet lmdb inputs
# N.B. set the path to the imagenet train + val data dirs
set -e

EXAMPLE=../../examples/Mnist_image        #放得到的lmdb、训练得到的模型的路径
DATA=../../data/Mnist_image               #获取数据的路径,注意我们的mnist数据集中的图片都是单通道的(可以用python命令shape来看图片形状是(20,20),证明是单通道)
TOOLS=../..ild/tools                      #使用caffe的工具进行转换格式的路径

TRAIN_DATA_ROOT=$DATA/train/              #根目录
TEST_DATA_ROOT=$DATA/test/

rm $EXAMPLE/number_train_lmdb -rf
rm  $EXAMPLE/number_test_lmdb -rf

# 这个不用了,数据集中的图像都是20*20
#Set RESIZE=true to resize the images to 256x256. Leave as false if images have
# already been resized using another tool.
RESIZE=true
if $RESIZE; then
RESIZE_HEIGHT=20
RESIZE_WIDTH=20
else
RESIZE_HEIGHT=0
RESIZE_WIDTH=0
fi

if [ ! -d "$TRAIN_DATA_ROOT" ]; then
echo "Error: TRAIN_DATA_ROOT is not a path to a directory: $TRAIN_DATA_ROOT"
echo "Set the TRAIN_DATA_ROOT variable in create_imagenet.sh to the path" \
"where the ImageNet training data is stored."
exit 1
fi

if [ ! -d "$TEST_DATA_ROOT" ]; then
echo "Error: TEST_DATA_ROOT is not a path to a directory: $TEST_DATA_ROOT"
echo "Set the TEST_DATA_ROOT variable in create_imagenet.sh to the path" \
"where the ImageNet validation data is stored."
exit 1
fi

echo "Creating train lmdb..."

GLOG_logtostderr=1 $TOOLS/convert_imageset \   #convert_imageaet的用法
--resize_height=$RESIZE_HEIGHT \
--resize_width=$RESIZE_WIDTH \
--shuffle \
--gray=true \                               #注意因为训练数据是灰度图,所以这里要令gray=true,默认是false,就会导致训练得到的lmdb是3通道的
$TRAIN_DATA_ROOT \                          #根目录
$DATA/train.txt \                           #train.txt的路径
$EXAMPLE/number_train_lmdb                  #放生成的lmdb的路径

echo "Creating val lmdb..."

GLOG_logtostderr=1 $TOOLS/convert_imageset \
--resize_height=$RESIZE_HEIGHT \
--resize_width=$RESIZE_WIDTH \
--shuffle \
--gray=true \
$TEST_DATA_ROOT\
$DATA/test.txt \
$EXAMPLE/number_test_lmdb

echo "Done."
于是生成如上两个lmdb文件夹。
3.计算均值并保存
图片减去均值再训练,会提高训练速度和精度。因此,一般都会有这个操作。
caffe程序提供了一个计算均值的文件compute_image_mean.cpp,我们直接使用就可以了:
sudo build/tools/compute_image_mean examples/Mnist_image/number_train_lmdb examples/Mnist_image/mean.binaryproto1
生成均值文件mean.binaryproto,但是好像默认的生成路径在根目录下。
4.创建模型并修改配置文件
模型就用examples中自带的模型,位置在examples/mnist目录下, 将需要的两个配置文件lenet_solver.prototxt和lenet_train_val.prototxt,复制到examples/Mnist_image/
c8c0
目录下,更名为solver.prototxt和train_val.prototxt,打开solver.prototxt,只需修改两个路径,其他参数不用修改:?????????test?那train呢?
# The train/test net protocol buffer definition
net: "examples/Mnist_image/train_test.prototxt" #指定训练模型文件的位置
# test_iter specifies how many forward passes the test should carry out.
# In the case of MNIST, we have test batch size 100 and 100 test iterations,
# covering the full 10,000 testing images.
test_iter: 100
# Carry out testing every 500 training iterations.
test_interval: 500
# The base learning rate, momentum and the weight decay of the network.
base_lr: 0.01
momentum: 0.9
weight_decay: 0.0005
# The learning rate policy
lr_policy: "inv"
gamma: 0.0001
power: 0.75
# Display every 100 iterations
display: 100
# The maximum number of iterations
max_iter: 10000
# snapshot intermediate results
snapshot: 5000
snapshot_prefix: "examples/Mnist_image/caffenet_train"
# solver mode: CPU or GPU
solver_mode: GPU然后train_val.prototxt也只用修改一下路径,参数什么的都不用改。
name: "LeNet"
layer {
name: "mnist"
type: "Data"
top: "data"
top: "label"
include {
phase: TRAIN
}
transform_param {
scale: 0.00390625
}
data_param {
source: "examples/mnist/mnist_train_lmdb"
batch_size: 64
backend: LMDB
}
}
layer {
name: "mnist"
type: "Data"
top: "data"
top: "label"
include {
phase: TEST
}
transform_param {
scale: 0.00390625
}
data_param {
source: "examples/mnist/mnist_test_lmdb"
batch_size: 100
backend: LMDB
}
}
layer {
name: "conv1"
type: "Convolution"
bottom: "data"
top: "conv1"
param {
lr_mult: 1
}
param {
lr_mult: 2
}
convolution_param {
num_output: 20
kernel_size: 5
stride: 1
weight_filler {
type: "xavier"
}
bias_filler {
type: "constant"
}
}
}
layer {
name: "pool1"
type: "Pooling"
bottom: "conv1"
top: "pool1"
pooling_param {
pool: MAX
kernel_size: 2
stride: 2
}
}
layer {
name: "conv2"
type: "Convolution"
bottom: "pool1"
top: "conv2"
param {
lr_mult: 1
}
param {
lr_mult: 2
}
convolution_param {
num_output: 50
kernel_size: 5
stride: 1
weight_filler {
type: "xavier"
}
bias_filler {
type: "constant"
}
}
}
layer {
name: "pool2"
type: "Pooling"
bottom: "conv2"
top: "pool2"
pooling_param {
pool: MAX
kernel_size: 2
stride: 2
}
}
layer {
name: "ip1"
type: "InnerProduct"
bottom: "pool2"
top: "ip1"
param {
lr_mult: 1
}
param {
lr_mult: 2
}
inner_product_param {
num_output: 500
weight_filler {
type: "xavier"
}
bias_filler {
type: "constant"
}
}
}
layer {
name: "relu1"
type: "ReLU"
bottom: "ip1"
top: "ip1"
}
layer {
name: "ip2"
type: "InnerProduct"
bottom: "ip1"
top: "ip2"
param {
lr_mult: 1
}
param {
lr_mult: 2
}
inner_product_param {
num_output: 10
weight_filler {
type: "xavier"
}
bias_filler {
type: "constant"
}
}
}
layer {
name: "accuracy"
type: "Accuracy"
bottom: "ip2"
bottom: "label"
top: "accuracy"
include {
phase: TEST
}
}
layer {
name: "loss"
type: "SoftmaxWithLoss"
bottom: "ip2"
bottom: "label"
top: "loss"
}
5.训练
同样从位置在examples/mnist目录下, 复制lenet_train.sh到examples/Mnist_image目录,并更名为train.sh,修改路径:
#!/usr/bin/env sh
set -e

.build/tools/caffe train --solver=examples/Mnist_image/solver.prototxt $@
然后在caffe-master目录运行examples/Mnist_image/train_lenet.sh ,就会开始训练得到caffenet_train_iter_10000.caffemodel。整个训练过程就完了,最后就是为了得到这个caffemodel模型。下面尝试对任意一张图片使用这个caffemodel进行测试,看是否准确。
6.使用deploy.py生成deploy.prototxt
在examples/Mnist_image目录下新建deploy.py:
# -*- coding: utf-8 -*-
caffe_root = '/home/cvlab01/2016liulu/caffe-master/'
import sys
sys.path.insert(0, caffe_root + 'python')
from caffe  import layers as L,params as P,to_proto
root='/home/cvlab01/2016liulu/caffe-master/'
deploy='/home/cvlab01/2016liulu/caffe-master/examples/Mnist_image/deploy.prototxt'    #文件保存路径

def create_deploy():
#少了第一层,data层
conv1=L.Convolution(name='conv1',bottom='data', kernel_size=5, stride=1,num_output=20, pad=0,weight_filler=dict(type='xavier'))
pool1=L.Pooling(conv1,name='pool1',pool=P.Pooling.MAX, kernel_size=2, stride=2)
conv2=L.Convolution(pool1, name='conv2',kernel_size=5, stride=1,num_output=50, pad=0,weight_filler=dict(type='xavier'))
pool2=L.Pooling(conv2, name='pool2',top='pool2', pool=P.Pooling.MAX, kernel_size=2, stride=2)
fc3=L.InnerProduct(pool2, name='ip1',num_output=500,weight_filler=dict(type='xavier'))
relu3=L.ReLU(fc3, name='relu1',in_place=True)
fc4 = L.InnerProduct(relu3, name='ip2',num_output=10,weight_filler=dict(type='xavier'))
#最后没有accuracy层,但有一个Softmax层
prob=L.Softmax(fc4, name='prob')
return to_proto(prob)
def write_deploy():
with open(deploy, 'w') as f:
f.write('name:"LeNet"\n')
f.write('layer {\n')
f.write('name:"data"\n')
f.write('type:"Input"\n')
f.write('input_param { shape : {')
f.write('dim:1 ')
f.write('dim:3 ')
f.write('dim:28 ')
f.write('dim:28 ')
f.write('} }\n\n')
f.write(str(create_deploy()))
if __name__ == '__main__':
write_deploy()运行deploy.py生成的deploy.prototxt如下:name: "LeNet"
layer {
name: "data"
type: "Input"
top: "data"
input_param { shape: { dim: 1 dim: 1 dim: 20 dim: 20 } }#灰度图像,dim为1,不能弄错了
}
#/*卷积层与全连接层中的权值学习率,偏移值学习率,偏移值初始化方式,因为这些值在caffemodel文件中已经提供*/
layer {
name: "conv1"
type: "Convolution"
bottom: "data"
top: "conv1"
convolution_param {
num_output: 20
kernel_size: 5
stride: 1
weight_filler {
type: "xavier"
}
}
}
layer {
name: "pool1"
type: "Pooling"
bottom: "conv1"
top: "pool1"
pooling_param {
pool: MAX
kernel_size: 2
stride: 2
}
}
layer {
name: "conv2"
type: "Convolution"
bottom: "pool1"
top: "conv2"
convolution_param {
num_output: 50
kernel_size: 5
stride: 1
weight_filler {
type: "xavier"
}
}
}
layer {
name: "pool2"
type: "Pooling"
bottom: "conv2"
top: "pool2"
pooling_param {
pool: MAX
kernel_size: 2
stride: 2
}
}
layer {
name: "ip1"
type: "InnerProduct"
bottom: "pool2"
top: "ip1"
inner_product_param {
num_output: 500
weight_filler {
type: "xavier"
}
}
}
layer {
name: "relu1"
type: "ReLU"
bottom: "ip1"
top: "ip1"
}
layer {
name: "ip2"
type: "InnerProduct"
bottom: "ip1"
top: "ip2"
inner_product_param {
num_output: 10
weight_filler {
type: "xavier"
}
}
}
#/*删除了原有的测试模块的测试精度层*/
#/*输出层的类型由SoftmaxWithLoss变成Softmax,训练是输出时是loss,应用时是prob。*/
layer {
name: "prob"
type: "Softmax"
bottom: "ip2"
top: "prob"
}7.准备均值文件meanfile.npy和synset_words.txt因为classify.py中的测试接口caffe.Classifier需要训练图片的均值文件作为输入参数,而实际lenet-5训练时并未计算均值文件,所以这里创建一个全0的均值文件输入。编写一个zeronp.py文件如下
执行
python zeronp.py1
1
生成均值文件 meanfile.npy。
在examples/Mnist_image中新建synset_words.txt:
0 zero
1 one
2 two
3 three
4 four
5 five
6 six
7 seven
8 eight
9 nine
8.修改classify.py保存为classifymnist.py文件
在目录caffe-master/python中有classify.py文件,复制一份并改名为classifymnist.py然后进行如下修改:
#!/usr/bin/env python
#coding:utf-8
"""
classify.py is an out-of-the-box image classifer callable from the command line.

By default it configures and runs the Caffe reference ImageNet model.
"""
caffe_root = '/home/cvlab01/2016liulu/caffe-master/'
import sys
sys.path.insert(0, caffe_root + 'python')

import numpy as np
import os
import sys
import argparse
import glob
import time
import pandas as pd #插入数据分析包

import caffe

def main(argv):
pycaffe_dir = os.path.dirname(__file__)

parser = argparse.ArgumentParser()
# Required arguments: input and output files.
parser.add_argument(
"input_file",
help="Input image, directory, or npy."
)
parser.add_argument(
"output_file",
help="Output npy filename."
)
# Optional arguments.
parser.add_argument(
"--model_def",
default=os.path.join(pycaffe_dir,
"../examples/Mnist_image/deploy.prototxt"), #指定deploy.prototxt的模型位置
help="Model definition file."
)
parser.add_argument(
"--pretrained_model",
default=os.path.join(pycaffe_dir,
"../examples/Mnist_image/caffenet_train_iter_10000.caffemodel"), #指定caffemodel模型位置,这就是我们前面自己训练得到的模型
help="Trained model weights file."
)
#######新增^^^^^^^^^start^^^^^^^^^^^^^^^^^^^^^^
parser.add_argument(
"--labels_file",
default=os.path.join(pycaffe_dir,
"../examples/Mnist_image/synset_words.txt"), #指定输出结果对应的类别名文件???????????????????????????
help="mnist result words file"
)
parser.add_argument(
"--force_grayscale",
action='store_true',   #增加一个变量将输入图像强制转化为灰度图,因为lenet-5训练用的就是灰度图
help="Converts RGB images down to single-channel grayscale versions," +
"useful for single-channel networks like MNIST."
)
parser.add_argument(
"--print_results",
action='store_true', #输入参数要求打印输出结果
help="Write output text to stdout rather than serializing to a file."
)
#######新增^^^^^^^^^end^^^^^^^^^^^^^^^^^^^^^^
parser.add_argument(
"--gpu",
action='store_true',
help="Switch for gpu computation."
)
parser.add_argument(
"--center_only",
action='store_true',
help="Switch for prediction from center crop alone instead of " +
"averaging predictions across crops (default)."
)
parser.add_argument(
"--images_dim",
default='20,20', #指定图像寬高
help="Canonical 'height,width' dimensions of input images."
)
parser.add_argument(
"--mean_file",
default=os.path.join(pycaffe_dir,
'../examples/Mnist_image/meanfile.npy'), #指定均值文件
help="Data set image mean of [Channels x Height x Width] dimensions " +
"(numpy array). Set to '' for no mean subtraction."
)
parser.add_argument(
"--input_scale",
type=float,
help="Multiply input features by this scale to finish preprocessing."
)
parser.add_argument(
"--raw_scale",
type=float,
default=255.0,
help="Multiply raw input by this scale before preprocessing."
)
parser.add_argument(
"--channel_swap",
default='2,1,0',
help="Order to permute input channels. The default converts " +
"RGB -> BGR since BGR is the Caffe default by way of OpenCV."
)
parser.add_argument(
"--ext",
default='jpg',
help="Image file extension to take as input when a directory " +
"is given as the input file."
)
args = parser.parse_args()

image_dims = [int(s) for s in args.images_dim.split(',')]

mean, channel_swap = None, None
if args.mean_file:
mean = np.load(args.mean_file).mean(1).mean(1)
if args.channel_swap:
channel_swap = [int(s) for s in args.channel_swap.split(',')]

if args.gpu:
caffe.set_mode_gpu()
print("GPU mode")
else:
caffe.set_mode_cpu()
print("CPU mode")

# Make classifier.
classifier = caffe.Classifier(args.model_def, args.pretrained_model,
image_dims=image_dims, mean=mean,
input_scale=args.input_scale, raw_scale=args.raw_scale,
channel_swap=None)

# Load numpy array (.npy), directory glob (*.jpg), or image file.
args.input_file = os.path.expanduser(args.input_file)
if args.input_file.endswith('npy'):
print("Loading file: %s" % args.input_file)
inputs = np.load(args.input_file)
elif os.path.isdir(args.input_file):
print("Loading folder: %s" % args.input_file)
inputs =[caffe.io.load_image(im_f)
for im_f in glob.glob(args.input_file + '/*.' + args.ext)]
else:
print("Loading file: %s" % args.input_file)
inputs = [caffe.io.load_image(args.input_file,not args.force_grayscale)] #强制图片为灰度图

print("Classifying %d inputs." % len(inputs))

# Classify.
start = time.time()
scores = classifier.predict(inputs, not args.center_only).flatten()
print("Done in %.2f s." % (time.time() - start))

#增加输出结果打印到终端^^^start^^^^^
# print
if args.print_results:
with open(args.labels_file) as f:
labels_df = pd.DataFrame([{'synset_id':l.strip().split(' ')[0], 'name': ' '.join(l.strip().split(' ')[1:]).split(',')[0]} for l in f.readlines()])
labels = labels_df.sort('synset_id')['name'].values

indices =(-scores).argsort()[:5]
predictions = labels[indices]
print predictions
print scores

meta = [(p, '%.5f' % scores[i]) for i,p in zip(indices, predictions)]
print meta
#增加输出结果打印到终端vvvvendvvvvvvv

# Save
print("Saving results into %s" % args.output_file)
np.save(args.output_file, predictions)

if __name__ == '__main__':
main(sys.argv)8.测试,在classifymnist.py目录下准备一个灰度图像3.jpg,大小和mnist中一样,然后执行:python classifymnist.py --print_results --force_grayscale --center_only --labels_file ../examples/Mnist_image/synset_words.txt ../examples/Mnist_image/3.jpg resultsfile
借鉴了http://blog.csdn.net/lanxuecc/article/details/52485077的博主一系列的文章,表示感谢,这里只是自己记录学习过程,如果侵权,很抱歉

相关文章推荐
- caffe+python+mnist从图片训练到测试单张图片
- caffe+python+mnist从图片训练到测试单张图片
- 用caffe训练好的lenet_iter_10000.caffemodel测试单张mnist图片
- 手把手教你用python写脚本看caffe训练好的网络测试单张图片的输出
- 用caffe训练好的lenet_iter_10000.caffemodel测试单张mnist图片
- 用caffe训练好的lenet_iter_10000.caffemodel测试单张mnist图片
- caffe+python 使用训练好的VGG16模型 对 单张图片进行分类,输出置信度
- Mnist数据集下载、转换为lmdb,训练、测试、生成mean文件、生成label.txt、单张图片分类测试、可视化网络、可视化loss和accurate
- caffe(二): 利用训练好的MNIST模型测试自己的手写字符图片
- caffe+python 使用训练好的VGG16模型 对 单张图片进行分类,输出置信度
- 【caffe】caffe在windows用训练好的模型对单张图片测试——【caffe学习三】
- Caffe学习系列(12):训练和测试自己的图片
- caffe示例实现之4在MNIST手写数字数据集上训练与测试LeNet
- ubuntu14.04+caffe训练测试自己的图片数据
- Caffe学习系列(12):训练和测试自己的图片
- Ubuntu14.04+caffe+cuda7.5 环境搭建以及MNIST数据集的训练与测试
- Caffe系列(9):训练和测试自己的图片
- Caffe学习系列(12):训练和测试自己的图片
- caffe 实验中输入数据和label都是图片时,训练或测试数据列表train.txt生成方法(linux指令总结)
- caffe的python接口学习:用训练好的模型(caffemodel或者h5)来分类新的图片