集群监控系统【zabbix】
2016-12-21 22:19
260 查看
作者:【吴业亮】云计算开发工程师
博客:http://blog.csdn.net/wylfengyujiancheng
集群监控系统
前言
Zabbix 是由 Alexei Vladishev 开发的一种网络监视、管理系统,基于 Server-Client 架构。可用于监视各种网络服务、服务器和网络机器等状态。
使用各种 Database-end 如 MySQL, PostgreSQL, SQLite, Oracle 或 IBM DB2 储存资料。Server 端基于 C语言、Web 管理端 frontend 则是基于 PHP 所制作的。Zabbix 可以使用多种方式监视。可以只使用 Simple Check 不需要安装 Client 端,亦可基于 SMTP 或 HTTP … 各种协定做死活监视。在客户端如 UNIX, Windows 中安装 Zabbix Agent 之后,可监视 CPU Load、网络使用状况、硬盘容量等各种状态。而就算没有安装 Agent 在监视对象中,Zabbix 也可以经由 SNMP、TCP、ICMP、利用 IPMI、SSH、telnet 对目标进行监视。另外,Zabbix 包含 XMPP 等各种 Item 警示功能。Zabbix 的授权是属于 GPLv2。
一、安装http
1、安装软件包
2、删除欢迎词
3、修改配置文件
4、启动服务并设置开机启动
5、设置防火墙
6、写入测试文件
测试

二、安装PHP
1、安装软件包
修改配置文件
2、重启http服务
3、创建测试文件
4、测试

三、安装数据库
1、安装软件包
2、修改配置文件
3、启动服务并设置开机启动
4、初始化数据库
5、连接数据库
6、查看用户
7、显示数据库
8、配置防火墙
四、安装zabbix
1、安装依赖包
2、下载zabbix源
博客:http://blog.csdn.net/wylfengyujiancheng
集群监控系统
前言
Zabbix 是由 Alexei Vladishev 开发的一种网络监视、管理系统,基于 Server-Client 架构。可用于监视各种网络服务、服务器和网络机器等状态。
使用各种 Database-end 如 MySQL, PostgreSQL, SQLite, Oracle 或 IBM DB2 储存资料。Server 端基于 C语言、Web 管理端 frontend 则是基于 PHP 所制作的。Zabbix 可以使用多种方式监视。可以只使用 Simple Check 不需要安装 Client 端,亦可基于 SMTP 或 HTTP … 各种协定做死活监视。在客户端如 UNIX, Windows 中安装 Zabbix Agent 之后,可监视 CPU Load、网络使用状况、硬盘容量等各种状态。而就算没有安装 Agent 在监视对象中,Zabbix 也可以经由 SNMP、TCP、ICMP、利用 IPMI、SSH、telnet 对目标进行监视。另外,Zabbix 包含 XMPP 等各种 Item 警示功能。Zabbix 的授权是属于 GPLv2。
一、安装http
1、安装软件包
[root@zabbix]# yum -y install httpd
2、删除欢迎词
[root@zabbix]# rm -f /etc/httpd/conf.d/welcome.conf
3、修改配置文件
[root@zabbix]# vi /etc/httpd/conf/httpd.conf
# line 86: change to admin's email address
ServerAdmin root@srv.world
# line 95: change to your server's name
ServerName www.srv.world:80
# line 151: change
AllowOverride All
# line 164: add file name that it can access only with directory's name
DirectoryIndex index.html index.cgi index.php
# 在后面新增
# server's response header
ServerTokens Prod
# keepalive is ON
KeepAlive On
4、启动服务并设置开机启动
[root@zabbix]# systemctl start httpd
[root@zabbix]# systemctl enable httpd
5、设置防火墙
[root@zabbix]# firewall-cmd --add-service=http --permanent
success
[root@zabbix]# firewall-cmd --reload
Success
6、写入测试文件
[root@zabbix]# vi /var/www/html/index.html
<html>
<body>
<div style="width: 100%; font-size: 40px; font-weight: bold; text-align: center;">
Test Page
</div>
</body>
</html>
测试
二、安装PHP
1、安装软件包
[root@zabbix]# yum -y install php php-mbstring php-pear
修改配置文件
[root@zabbix]# vi /etc/php.ini
# line 878: 修改时区
date.timezone = "Asia/Shanghai"
2、重启http服务
[root@zabbix]# systemctl restart httpd
3、创建测试文件
[root@zabbix]# vi /var/www/html/index.php
<html>
<body>
<div style="width: 100%; font-size: 40px; font-weight: bold; text-align: center;">
<?php
print Date("Y/m/d");
?>
</div>
</body>
</html>
4、测试
三、安装数据库
1、安装软件包
[root@zabbix]# yum -y install mariadb-server
2、修改配置文件
[root@zabbix]# vi /etc/my.cnf
# add follows within [mysqld] section
[mysqld]
character-set-server=utf8
3、启动服务并设置开机启动
[root@zabbix]# systemctl start mariadb
[root@zabbix]# systemctl enable mariadb
4、初始化数据库
[root@zabbix]# mysql_secure_installation

NOTE: RUNNING ALL PARTS OF THIS SCRIPT IS RECOMMENDED FOR ALL MariaDB
SERVERS IN PRODUCTION USE!  PLEASE READ EACH STEP CAREFULLY!

In order to log into MariaDB to secure it, we'll need the current
password for the root user.  If you've just installed MariaDB, and
you haven't set the root password yet, the password will be blank,
so you should just press enter here.

Enter current password for root (enter for none):
OK, successfully used password, moving on...

Setting the root password ensures that nobody can log into the MariaDB
root user without the proper authorisation.

# set root password
Set root password? [Y/n] y
New password:
Re-enter new password:
Password updated successfully!
Reloading privilege tables..
... Success!

By default, a MariaDB installation has an anonymous user, allowing anyone
to log into MariaDB without having to have a user account created for
them.  This is intended only for testing, and to make the installation
go a bit smoother.  You should remove them before moving into a
production environment.
# remove anonymous users
Remove anonymous users? [Y/n] y
... Success!

Normally, root should only be allowed to connect from 'localhost'.  This
ensures that someone cannot guess at the root password from the network.

# disallow root login remotely
Disallow root login remotely? [Y/n] y
... Success!

By default, MariaDB comes with a database named 'test' that anyone can
access.  This is also intended only for testing, and should be removed
before moving into a production environment.

# remove test database
Remove test database and access to it? [Y/n] y
- Dropping test database...
... Success!
- Removing privileges on test database...
... Success!

Reloading the privilege tables will ensure that all changes made so far
will take effect immediately.

# reload privilege tables
Reload privilege tables now? [Y/n] y
... Success!

Cleaning up...

All done!  If you've completed all of the above steps, your MariaDB
installation should now be secure.

Thanks for using MariaDB!
5、连接数据库
[root@zabbix]# mysql -u root -p
Enter password:     # MariaDB root password you set
Welcome to the MariaDB monitor.  Commands end with ; or \g.
Your MariaDB connection id is 3
Server version: 5.5.37-MariaDB MariaDB Server

Copyright (c) 2000, 2014, Oracle, Monty Program Ab and others.

Type 'help;' or '\h' for help. Type '\c' to clear the current input statement.
6、查看用户
MariaDB [(none)]> select user,host,password from mysql.user;
+------+-----------+-------------------------------------------+
| user | host      | password                                  |
+------+-----------+-------------------------------------------+
| root | localhost | *xxxxxxxxxxxxxxxxxxxxxxxxxxxxxxxxxxxxxxxx |
| root | 127.0.0.1 | *xxxxxxxxxxxxxxxxxxxxxxxxxxxxxxxxxxxxxxxx |
| root | ::1       | *xxxxxxxxxxxxxxxxxxxxxxxxxxxxxxxxxxxxxxxx |
+------+-----------+-------------------------------------------+
3 rows in set (0.00 sec)
7、显示数据库
MariaDB [(none)]> show databases;
+--------------------+
| Database           |
+--------------------+
| information_schema |
| mysql              |
| performance_schema |
+--------------------+
3 rows in set (0.00 sec)

MariaDB [(none)]> exit
Bye
8、配置防火墙
[root@zabbix]# firewall-cmd --add-service=mysql --permanent
success
[root@zabbix]# firewall-cmd --reload
Success
四、安装zabbix
1、安装依赖包
[root@zabbix]# yum -y install php-mysql php-gd php-xml php-bcmath
2、下载zabbix源
[root@zabbix]# yum -y install http://repo.zabbix.com/zabbix/3.2/rhel/7/x86_64/zabbix-release-3.2-1.el7.noarch.rpm[/code]
3、安装Zabbix server.[root@zabbix]# yum -y install zabbix-get zabbix-server-mysql zabbix-web-mysql zabbix-agent
4、创建Zabbix数据库和用户[root@zabbix]# mysql -u root -p Enter password: Welcome to the MariaDB monitor. Commands end with ; or \g. Your MariaDB connection id is 10 Server version: 5.5.50-MariaDB MariaDB Server Copyright (c) 2000, 2016, Oracle, MariaDB Corporation Ab and others. Type 'help;' or '\h' for help. Type '\c' to clear the current input statement. MariaDB [(none)]> create database zabbix; Query OK, 1 row affected (0.00 sec) MariaDB [(none)]> grant all privileges on zabbix.* to zabbix@'localhost' identified by 'password'; #将密码给我自己的密码 Query OK, 0 rows affected (0.00 sec) MariaDB [(none)]> grant all privileges on zabbix.* to zabbix@'%' identified by 'password'; Query OK, 0 rows affected (0.00 sec) MariaDB [(none)]> flush privileges; Query OK, 0 rows affected (0.00 sec) MariaDB [(none)]> exit Bye
5、导入数据库[root@zabbix]# cd /usr/share/doc/zabbix-server-mysql-*/ [root@dlp zabbix-server-mysql-3.2.0]# gunzip create.sql.gz [root@dlp zabbix-server-mysql-3.2.0]# mysql -u root -p zabbix < create.sql
配置Zabbix Server.[root@zabbix]# vi /etc/zabbix/zabbix_server.conf # line 82: 新增 DBHost=localhost # line 116: add DB password for Zabbix DBPassword=password
6、启动zabbix-server 服务并设置zabbix-server 开机启动[root@zabbix]# systemctl start zabbix-server [root@zabbix]# systemctl enable zabbix-server
7、配置和启动Zabbix Agent来监控自己[root@zabbix]# vi /etc/zabbix/zabbix_agentd.conf # line 95: specify Zabbix server Server=127.0.0.1 # line 136: specify Zabbix server ServerActive=127.0.0.1 # line 147: change to the own hostname Hostname=zabbix
8、启动zabbix-agent服务并设置zabbix-agent开机启动[root@zabbix]# systemctl start zabbix-agent [root@zabbix]# systemctl enable zabbix-agent
9、修改http配置文件[root@zabbix]# vi /etc/httpd/conf.d/zabbix.conf # line 10: add access permittion for Zabbix Web frontend #允许访问的网段 Require ip 127.0.0.1 10.0.0.0/24 # 配置时区 php_value date.timezone Asia/Shanghai
10、重启http服务[root@zabbix]# systemctl restart httpd
11、配置selinux[root@zabbix]# setsebool -P httpd_can_connect_zabbix on
12、配置防火墙[root@zabbix]# firewall-cmd --add-service={http,https} --permanent success [root@zabbix]# firewall-cmd --add-port={10051/tcp,10050/tcp} --permanent success [root@zabbix]# firewall-cmd --reload success
打开UI
http://(Zabbix server’s hostname or IP address)/zabbix/
点击ok
填写数据库信息
填写主机名
点击下一步
点击完成
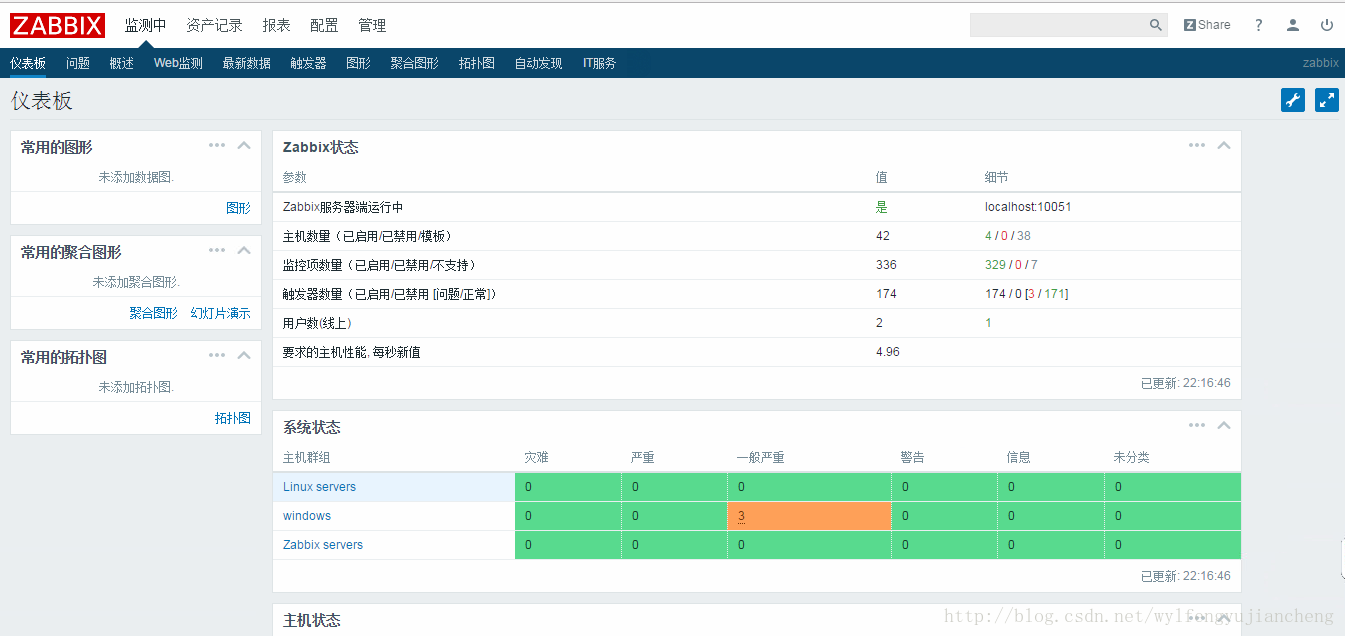
登录UI ,用户名及密码admin/zabbix
参考:
http://www.zabbix.com/download


相关文章推荐
- 集群cpu使用率监控系统的简单实现(二)监控端的实现
- zabbix 系统监控
- 开源企业级监控系统-zabbix(一)
- Ganglia分布式集群监控系统安装手册
- 集群监控系统Ganglia应用案例
- zabbix 分布式监控系统
- linux系统监控之zabbix agentd安装
- 集群下的ganglia多点系统监控原理
- Linux 系统 Zabbix 监控
- 集群监控解决方案zabbix简介
- 分布式监控系统 ZABBIX
- zabbix监控系统之使用ztc mysql模板
- zabbix监控系统之简单监控
- 简单安装 分布式监控系统 Zabbix 2.0.6
- zabbix分布式监控系统安装(一)
- centos5.5上源码安装zabbix监控系统
- 使用Ganglia监控系统监控集群(debian)
- zabbix监控系统之监控nginx
- zabbix搭建并结合mikoomi插件监控hadoop集群
- Zabbix:企业级分布式系统监控部署 ( ERIKXUE 薛忠权 奋斗在京)