Android开发之数据存储全方案
2016-12-16 16:28
477 查看
Android中主要提供了三种方式用于简单地实现数据持久化功能,即文件存储、SharedPreference存储以及数据库存储。
一、文件存储:
Context类中提供了一个openFileOutput()方法,可以用于将数据存储到指定的文件中,下面代码就是将数据存储到文件中。
从文件中读取数据,Context类中还提供一个openFileInput()方法。
二、SharedPreference存储:
Android中提供了3种方法用于得到SharedPreference:
1,Context类中getSharedPreference()方法;
2,Activity类中getpreferences()方法;
3,PreferenceManager类中getDefaultSharedPreference()方法。
看一下SharedPreference的简单使用:
一个简单的登录界面,使用SharedPreference用于记住密码;
源代码:http://download.csdn.net/detail/duoduo_11011/9713402
三、使用LitePal操作数据库
本来想用Android提供的SQLite,但是发现LitePal操作数据库真的超级简便。所以以后项目中如果操作数据库请使用LitePal来实现。
LitePal是一款开源的Android数据库框架,它采用了对象关系的映射(ORM)的模式。开源框架github的主页上有详细的使用文档,地址是:https://github.com/LitePalFramework/LitePal。
1,配置LitePal,编辑app/build.gradle文件:
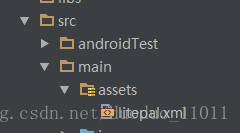
2,配置litepal.xml文件。右键app/src/main 目录→
New→Directory,创建一个assets目录,然后在新建一个litepal.xml文件。
编辑litepal.xml文件的内容,将Book类映射到模型列表中:
3,还需在配置清单文件中修改:
接下来就是使用了:
首先定义一个表中属性类,如Book。
使用LitePal来操作数据啦,超级简单。看代码:
布局文件也亮出来:
总结:LitePal开源库很好,很方便。所以多建议去github关注一下那很好的开源项目。
一、文件存储:
Context类中提供了一个openFileOutput()方法,可以用于将数据存储到指定的文件中,下面代码就是将数据存储到文件中。
private void save(String inputText) {
FileOutputStream out = null;
BufferedWriter writer = null;

try {
out = openFileOutput("data",MODE_PRIVATE);
writer = new BufferedWriter(new OutputStreamWriter(out));
writer.write(inputText);
}catch (Exception e) {
e.printStackTrace();
}finally {
try {
if (writer != null) {
writer.close();
}
}catch (IOException e) {
e.printStackTrace();
}
}

}
从文件中读取数据,Context类中还提供一个openFileInput()方法。
/**
* 从文件中读取数据
* @return
*/
public String load() {
FileInputStream in = null;
BufferedReader reader = null;
StringBuilder content = new StringBuilder();
try {
in = openFileInput("data");
reader = new BufferedReader(new InputStreamReader(in));
String line = "";
while ((line = reader.readLine()) != null) {
content.append(line);
}
}catch (Exception e) {
e.printStackTrace();
}finally {
if (reader != null) {
try {
reader.close();
}catch (IOException e) {
e.printStackTrace();
}
}
}

return  content.toString();

}
二、SharedPreference存储:
Android中提供了3种方法用于得到SharedPreference:
1,Context类中getSharedPreference()方法;
2,Activity类中getpreferences()方法;
3,PreferenceManager类中getDefaultSharedPreference()方法。
看一下SharedPreference的简单使用:
一个简单的登录界面,使用SharedPreference用于记住密码;
源代码:http://download.csdn.net/detail/duoduo_11011/9713402
三、使用LitePal操作数据库
本来想用Android提供的SQLite,但是发现LitePal操作数据库真的超级简便。所以以后项目中如果操作数据库请使用LitePal来实现。
LitePal是一款开源的Android数据库框架,它采用了对象关系的映射(ORM)的模式。开源框架github的主页上有详细的使用文档,地址是:https://github.com/LitePalFramework/LitePal。
1,配置LitePal,编辑app/build.gradle文件:
dependencies {
compile fileTree(dir: 'libs', include: ['*.jar'])
testCompile 'junit:junit:4.12'
compile 'org.litepal.android:core:1.3.2'
compile 'com.android.support:appcompat-v7:24.2.1'
}
2,配置litepal.xml文件。右键app/src/main 目录→
New→Directory,创建一个assets目录,然后在新建一个litepal.xml文件。
编辑litepal.xml文件的内容,将Book类映射到模型列表中:
<?xml version="1.0" encoding="utf-8"?>
<litepal>
<dbname value = "BookStore"></dbname>
<version value = "1"></version>
<list>
<mapping class = "com.gyq.litepaltest.Book"></mapping>
<mapping class = "com.gyq.litepaltest.Category"></mapping>
</list>
</litepal>
3,还需在配置清单文件中修改:
<?xml version="1.0" encoding="utf-8"?>
<manifest xmlns:android="http://schemas.android.com/apk/res/android"
package="com.gyq.litepaltest">

<application
**android:name="org.litepal.LitePalApplication"**
android:allowBackup="true"
android:icon="@mipmap/ic_launcher"
android:label="@string/app_name"
android:supportsRtl="true"
android:theme="@style/AppTheme">
<activity android:name=".MainActivity">
<intent-filter>
<action android:name="android.intent.action.MAIN" />

<category android:name="android.intent.category.LAUNCHER" />
</intent-filter>
</activity>
</application>

</manifest>
接下来就是使用了:
首先定义一个表中属性类,如Book。
package com.gyq.litepaltest;

import org.litepal.crud.DataSupport;

/**
* ${DESC}
* author: 龚友强
* create at 2016/12/16 14:46
*/
public class Book extends DataSupport{
private int id;
private String author;
private double price;
private int pages;
private String name;

//新增一个出版社
private String press;

public String getPress() {
return press;
}

public void setPress(String press) {
this.press = press;
}

public int getId() {
return id;
}

public void setId(int id) {
this.id = id;
}

public String getAuthor() {
return author;
}

public void setAuthor(String author) {
this.author = author;
}

public double getPrice() {
return price;
}

public void setPrice(double price) {
this.price = price;
}

public int getPages() {
return pages;
}

public void setPages(int pages) {
this.pages = pages;
}

public String getName() {
return name;
}

public void setName(String name) {
this.name = name;
}
}
使用LitePal来操作数据啦,超级简单。看代码:
package com.gyq.litepaltest;

import android.os.Bundle;
import android.support.v7.app.AppCompatActivity;
import android.util.Log;
import android.view.View;
import android.widget.Button;

import org.litepal.crud.DataSupport;
import org.litepal.tablemanager.Connector;

import java.util.List;

public class MainActivity extends AppCompatActivity {
private static final String TAG = "MainActivity";
@Override
protected void onCreate(Bundle savedInstanceState) {
super.onCreate(savedInstanceState);
setContentView(R.layout.activity_main);

Button createDatabase = (Button)findViewById(R.id.create_database);

createDatabase.setOnClickListener(new View.OnClickListener() {
@Override
public void onClick(View v) {
Connector.getDatabase();
}
});

Button addData = (Button)findViewById(R.id.btn_add);
addData.setOnClickListener(new View.OnClickListener() {
@Override
public void onClick(View v) {
Book book = new Book();
book.setName("第一行代码2");
book.setAuthor("郭霖");
book.setPages(570);
book.setPrice(79.00);
book.setPress("人民邮电出版社");
book.save();

}
});

Button updateData = (Button)findViewById(R.id.btn_update);
updateData.setOnClickListener(new View.OnClickListener() {
@Override
public void onClick(View v) {
/*Book book = new Book();
book.setName("第一行代码1");
book.setAuthor("郭霖");
book.setPress("人民邮电出版社出版");
book.setPages(500);
book.setPrice(58.00);
book.save();
book.setPrice(45.98);
book.save();    //智能更新已经存在的这本书的价*/

Book book = new Book();
book.setPrice(35.89);
book.setPress("清华出版社");
book.updateAll("name = ? and author = ?","第一行代码1","郭霖");
}
});

Button deleteData = (Button)findViewById(R.id.btn_delete);
deleteData.setOnClickListener(new View.OnClickListener() {
@Override
public void onClick(View v) {
DataSupport.deleteAll(Book.class,"price < ?","60");
}
});

Button queryData = (Button)findViewById(R.id.btn_query);
queryData.setOnClickListener(new View.OnClickListener() {
@Override
public void onClick(View v) {
List<Book> books = DataSupport.findAll(Book.class);
for (Book book : books) {
Log.d(TAG, "book name is" + book.getName());
Log.d(TAG, "book author is" + book.getAuthor());
Log.d(TAG, "book price is" + book.getPrice());
Log.d(TAG, "book press is" + book.getPress());
Log.d(TAG, "book pages is" + book.getPages());
}
}
});
}
}
布局文件也亮出来:
<?xml version="1.0" encoding="utf-8"?>
<LinearLayout xmlns:android="http://schemas.android.com/apk/res/android"
xmlns:tools="http://schemas.android.com/tools"
android:layout_width="match_parent"
android:layout_height="match_parent"
android:orientation="vertical"
tools:context="com.gyq.litepaltest.MainActivity">

<Button
android:id="@+id/create_database"
android:layout_width="match_parent"
android:layout_height="wrap_content"
android:text="create database"/>

<Button
android:id="@+id/btn_add"
android:layout_width="match_parent"
android:layout_height="wrap_content"
android:text="add data"/>
<Button
android:id="@+id/btn_update"
android:layout_width="match_parent"
android:layout_height="wrap_content"
android:text="update data"/>
<Button
android:id="@+id/btn_delete"
android:layout_width="match_parent"
android:layout_height="wrap_content"
android:text="delete data"/>
<Button
android:id="@+id/btn_query"
android:layout_width="match_parent"
android:layout_height="wrap_content"
android:text="query data"/>
</LinearLayout>
总结:LitePal开源库很好,很方便。所以多建议去github关注一下那很好的开源项目。

相关文章推荐
- 【Android游戏开发十二】(保存游戏数据 [上文])详解SharedPreference 与 FIleInputStream/FileOutputStream将数据存储到SD卡中!
- Android(五)数据存储之五网络多线程断点下载-世事如棋,乾坤莫测,笑 ...  -  棒槌网@Android开发论坛 - Powered by
- [Android开发]NetWork数据存储
- Android游戏开发基础part9--游戏数据存储
- android开发数据存储方式
- 【Android游戏开发十二】详解SharedPreference 与 FIleInputStream/FileOutputStream将数据存储到SD卡中!
- 【Android游戏开发十三】(保存游戏数据 [下文])详解SQLite存储方式,并把SQLite的数据库文件存储在SD卡中!!!
- Android 开发中Parcel存储类型和数据容器
- Android开发之路十一-----SharePreferences进行数据存储和SQL数据库
- Android游戏开发基础part9--游戏数据存储
- 【Android游戏开发十三】(保存游戏数据 [下文])详解SQLite存储方式,并把SQLite的数据库文件存储在SD卡中!!!
- 【Android游戏开发十二】(保存游戏数据 [上文])详解SharedPreference 与 FIleInputStream/FileOutputStream将数据存储到SD卡中!
- 【Android游戏开发十三】(保存游戏数据 [下文])详解SQLite存储方式,并把SQLite的数据库文件存储在SD卡中!!!
- Android 开发中Parcel存储类型和数据容器
- Android开发——数据存储之ContentProvider(2)
- 【Android游戏开发十三】(保存游戏数据 [下文])详解SQLite存储方式
- Android开发之数据存储之二:SQLite数据库存储方式【免费提供源码下载】
- Android开发指南-框架主题-数据存储
- android开发(四):数据存储
- Android 开发中Parcel存储类型和数据容器