android网络编程
2016-12-09 17:18
148 查看
正文:在一个android应用中,网络部分的编程应该是整个APP里涉及到的最多的内容之一,可能也是最难的之一。说它多,毋庸置疑,当今的APP如果没有网络做支撑,任何内容将是死水一潭,就像我们在憋得不行的时候到处找卫生纸一样,现在的我们同样会因为某个地方没有WIFI而“憋得不行”,是的,我们需要上网!网络就像一道道连接世界的隐形光束,如果哪个地方没有被它照到,这个地方就是荒蛮之地,可见我们对网络的迫切地需求;说网络编程难,也不是我危言耸听:网络是变化的,是动态的,我们访问网络可能需要两拨人维护(android
client和server端),需要通过OSI七层协议或TCP/IP四层协议,需要迎合各种各样的网络传输协议(ftp,telnet,http1.1,http/2 等),需要上传和下载各种类型的文件(字符串,图片流,文件流 等),不同格式的数据,打包和解析方式也不同(XML格式(需要PULL,SAX,DOM 等解析方式),JSON格式(需要JSONObject,JSONArray或GSON或JACKSON等解析方式),流文件(Httpmine解析))等。。。说了这么多,你可能很恼火:网络用处这么广,却又这么难,到底还学不学?当然要学,因为正是它比较难,一些公司推出了各种各样的第三方jar包开源框架,这个框架为我们做了很好的代码封装,让我们方便地进行网络编程,下面我结合几个demo跟各位浅谈一下android的网络编程。
本文一共包含3个demo,他们分别是:
用户登录:用户在Android客户端输入用户名密码,上传至服务器,服务器通过查询数据库中的信息,给客户端返回一个正确性的提示。
用户注册:用户将自己输入的姓名和兴趣爱好,上传至服务器,服务器将新增用户添加至数据库中。
下载图片流
本文涉及的知识点:
在tomcat容器中搭建简单的Servlet,在doPost和doGet方法中通过参数HttpServletRequest对象和HttpServletResponse对象获取client端的内容或向client端发送内容。
在client端使用HttpClient对象或HttpURLConnection对象请求server,并使用这两个对象接收返回信息。
使用多线程、Handler、runOnUIThread等线程和异步知识,在主线程(UI线程)中更新UI,在子线程中访问网络,并利用Handler在线程之间传递信息。
利用JSONObject、JSONArray类封装、解析JSON格式的数据
弱引用
定制异常
IO流
本demo将实现从android客户端输入用户名密码,上传至服务器,服务器通过比对,返回客户端正确性信息。
- 服务器端使用tomcat容器装载Servlet web应用程序,通过doGet方式接收请求、处理、并返回客户端。
- 客户端通过HttpClient,以get/post方式请求server端
- 通过Handler实现UI更新
Server端需注意的几点:
- 由于tomcat容器最终运行的classes文件位于 /WebContent/WEB-INF/classes 中,然而创建Dynamic Web Project的时候,代码默认build成class文件的存放地址默认是 /工程名/build ,所以应把该存放地址改为 /WebContent/WEB-INF/classes 。
- 在tomcat中新建Servlet类时,默认的该Servlet的URL地址是 /Servlet类名,如果类名过长,可以在创建Servlet时,在URL mapping中修改一个虚拟映射的URL路径,方便访问。
- 无论客户端用哪种方式请求(get/post),在Server端用doGet和doPost方式都能接收,只需要在其中一个方法中调用另一个方法即可。
- 为了能够处理client端发送的中文信息,应设置字符的编码方式
2
1
2
[/code]
为了防止client端接收的消息乱码,应设置如下的编码方式
2
3
1
2
3
[/code]
服务器端代码如下:
2
3
4
5
6
7
8
9
10
11
12
13
14
15
16
17
18
19
20
21
22
23
24
25
26
27
28
29
30
31
32
33
34
35
36
37
38
39
40
41
42
43
44
45
46
47
48
49
50
51
52
53
54
55
56
57
58
59
60
61
62
63
64
65
66
67
68
69
70
71
1
2
3
4
5
6
7
8
9
10
11
12
13
14
15
16
17
18
19
20
21
22
23
24
25
26
27
28
29
30
31
32
33
34
35
36
37
38
39
40
41
42
43
44
45
46
47
48
49
50
51
52
53
54
55
56
57
58
59
60
61
62
63
64
65
66
67
68
69
70
71
[/code]
如上所示,request接收server传来的信息,为方便起见,直接判断用户名是否为tom,密码是否为123,若正确,则返回success!,否则返回failed!。
client端需注意的几点:
为使应用获得访问网络权限,应在AndroidManifest.xml中声明相应权限
一定不能在主线程中访问网络,否则会阻塞UI操作。
一定不能在子线程中更新UI,应使用异步请求,如Handler机制。
界面布局
界面布局很简单,就是两个输入框(EditText),一个清除button,一个注册button。不再做过多解释,代码如下:
2
3
4
5
6
7
8
9
10
11
12
13
14
15
16
17
18
19
20
21
22
23
24
25
26
27
28
29
30
31
32
33
34
35
36
37
38
39
40
41
42
43
44
45
46
47
48
49
50
51
52
53
54
55
56
57
58
59
60
61
62
63
64
65
66
67
68
69
70
71
72
73
74
75
76
77
1
2
3
4
5
6
7
8
9
10
11
12
13
14
15
16
17
18
19
20
21
22
23
24
25
26
27
28
29
30
31
32
33
34
35
36
37
38
39
40
41
42
43
44
45
46
47
48
49
50
51
52
53
54
55
56
57
58
59
60
61
62
63
64
65
66
67
68
69
70
71
72
73
74
75
76
77
[/code]
activity代码
本段代码主要用于初始化布局中的控件,绑定button监听器,开启一个线程用于访问server,在访问的过程中,可能会出现各种异常,可以通过try/catch块按照异常优先级进行捕捉,再强调一点,一定要在Handler中的handlerMessage中更新UI,代码如下:
2
3
4
5
6
7
8
9
10
11
12
13
14
15
16
17
18
19
20
21
22
23
24
25
26
27
28
29
30
31
32
33
34
35
36
37
38
39
40
41
42
43
44
45
46
47
48
49
50
51
52
53
54
55
56
57
58
59
60
61
62
63
64
65
66
67
68
69
70
71
72
73
74
75
76
77
78
79
80
81
82
83
84
85
86
87
88
89
90
91
92
93
94
95
96
97
98
99
100
101
102
103
104
105
106
107
108
109
110
111
112
113
114
115
116
117
118
119
120
121
122
123
124
125
126
127
128
129
130
131
132
133
134
135
136
137
138
139
140
141
142
143
144
145
146
147
148
149
150
151
152
153
154
155
156
157
158
159
160
161
162
163
164
165
166
167
168
169
170
171
172
173
174
175
176
177
178
179
180
181
182
183
184
185
186
187
188
189
190
191
192
193
194
1
2
3
4
5
6
7
8
9
10
11
12
13
14
15
16
17
18
19
20
21
22
23
24
25
26
27
28
29
30
31
32
33
34
35
36
37
38
39
40
41
42
43
44
45
46
47
48
49
50
51
52
53
54
55
56
57
58
59
60
61
62
63
64
65
66
67
68
69
70
71
72
73
74
75
76
77
78
79
80
81
82
83
84
85
86
87
88
89
90
91
92
93
94
95
96
97
98
99
100
101
102
103
104
105
106
107
108
109
110
111
112
113
114
115
116
117
118
119
120
121
122
123
124
125
126
127
128
129
130
131
132
133
134
135
136
137
138
139
140
141
142
143
144
145
146
147
148
149
150
151
152
153
154
155
156
157
158
159
160
161
162
163
164
165
166
167
168
169
170
171
172
173
174
175
176
177
178
179
180
181
182
183
184
185
186
187
188
189
190
191
192
193
194
[/code]
在上段代码中,继承了一个定制的Handler类,定义了一个弱引用类型的activity,用于处理当内存出现OOM时(Out Of Memory)时,系统及时调用GC机制(Garbage Collection),方便垃圾回收;另外程序会根据优先级对异常进行捕捉,如先捕捉连接服务器超时的异常(在规定的时间内没有连接到服务器,用ConnectTimeoutException类捕捉),在捕捉服务器响应超时异常(在规定的时间内服务器无响应,用SocketTimeoutException类捕捉),接着是业务异常(用户名或密码输入错误,用定制Exception类捕捉),最后是其他异常(用Exception类捕捉)。下面是定制的Exception类定义:
2
3
4
5
6
7
8
9
10
11
12
13
1
2
3
4
5
6
7
8
9
10
11
12
13
[/code]
连接server端的client业务代码 (get请求)
定义一个接口,用于声明访问网络的方法并抛出异常,代码如下:
2
3
1
2
3
[/code]
程序使用HttpClient访问网络,用get方式请求,特别说明一点,HttpClient在Android2.3版本后就不推荐使用了,在Android6.0中更是直接被废弃了,若想访问网络可以使用HttpURLConnection,该类会在后面介绍,虽然被废弃了,不过还是有必要介绍一下,毕竟访问方式差不多,步骤如下:
定义HttpClient对象(HttpClient是个接口,只能new它的实现类DefaultHttpClient);
创建HttpGet/HttpPost对象,传入String类型的URL地址参数;
调用HttpClient类的execute方法,传入参数HttpGet/HttpPst对象,返回HttpResponse对象,该对象就是Server端返回给client端的信息;
判断返回的信息中携带的响应码是否为200,若不是200,说明出错,抛出异常;
通过entity实体解析HttpResponse对象,处理返回结果。
具体访问网络代码如下:
2
3
4
5
6
7
8
9
10
11
12
13
14
15
16
17
18
19
20
21
22
1
2
3
4
5
6
7
8
9
10
11
12
13
14
15
16
17
18
19
20
21
22
[/code]
注意一点:http协议的get请求方式如下
http://localhost:8080/test/login.do/?参数键=参数值&参数键=参数值 . . . . . .
每个参数的参数键都应与Server端接收到的键一致。
连接server端的client业务代码 (post请求)
与get请求不同,post请求将不会把参数键和参数值直接写在URL之后,而是写在请求的内容中,看得出来,**当传递数据的隐秘性不高、数据量比较小时,适合使用get请求访问server,当数据量比较大(>256bytes),且数据隐秘性比较高时(包含用户的密码等内容),应当考虑使用post请求。**post请求代码如下:
2
3
4
5
6
7
8
9
10
11
12
13
14
15
16
17
18
19
20
21
22
23
24
25
26
27
28
29
30
31
32
33
1
2
3
4
5
6
7
8
9
10
11
12
13
14
15
16
17
18
19
20
21
22
23
24
25
26
27
28
29
30
31
32
33
[/code]
之后的代码与get方式相同。由于参数不能跟在URL后面,post请求使用NameValuePair对象存储需要传递的键值对,接着把这些对象存储在ArrayList中,最后调用GetPost的setEntity方法将list封装成一个实体,这样就可以将post作为execute方法中的参数传递出去了。而无论使用get请求还是post请求,Server端都不用修改代码。
至此第一个demo完成。
本demo用于将用户名和兴趣爱好数组上传至Server端,大部分内容与demo1相仿,不同点主要数据采用了JSON格式封装,server端需要用json-lib解析,server端所需json-lib.jar包及其依赖包如下:
commons-beanutils-1.8.0.jar
commons-collections-3.2.1.jar
commons-lang-2.5.jar
commons-logging-1.1.1.jar
ezmorph-1.0.6.jar
json-lib-2.4-jdk15.jar
一个用户输入(EditText),一个兴趣爱好选择组(RaidioGroup),代码如下:
2
3
4
5
6
7
8
9
10
11
12
13
14
15
16
17
18
19
20
21
22
23
24
25
26
27
28
29
30
31
32
33
34
35
36
37
38
39
40
41
42
43
44
45
46
47
48
49
50
51
52
53
54
55
56
57
58
59
60
61
62
63
64
65
66
67
68
69
70
71
72
73
74
75
76
77
78
79
80
81
82
83
84
85
86
87
88
89
90
91
1
2
3
4
5
6
7
8
9
10
11
12
13
14
15
16
17
18
19
20
21
22
23
24
25
26
27
28
29
30
31
32
33
34
35
36
37
38
39
40
41
42
43
44
45
46
47
48
49
50
51
52
53
54
55
56
57
58
59
60
61
62
63
64
65
66
67
68
69
70
71
72
73
74
75
76
77
78
79
80
81
82
83
84
85
86
87
88
89
90
91
[/code]
所见即所得

由于本demo的activity和demo1相仿,故不再给出。
client端采用HttpClient访问网络,使用post请求。
代码如下:
2
3
4
5
6
7
8
9
10
11
12
13
14
15
16
17
18
19
20
21
22
23
24
25
26
27
28
29
30
31
32
33
34
35
36
37
38
39
40
41
42
43
44
1
2
3
4
5
6
7
8
9
10
11
12
13
14
15
16
17
18
19
20
21
22
23
24
25
26
27
28
29
30
31
32
33
34
35
36
37
38
39
40
41
42
43
44
[/code]
用户在界面上输入用户名,并勾选兴趣爱好,用户名以字符串的形式传入该方法,兴趣爱好以list的形式传入方法,则JSON格式的数据为如下形式:
1
[/code]
JSON格式的数据也是以键值对的形式存在,对象中可以包含对象(JSONObject),也可以包含集合(JSONArray),反过来,集合中可以包含单个对象,也可以包含集合,即集合和对象可以相互嵌套。本例中,最外层是一个对象,里面包含了一个对象和一个简单集合,故封装JSON数据如上面代码所示。
client端接收server端的相应结果,首先用工具类UtilEntity对象把JSON数据解析成字符串,然后从Server端可知,封装的JSON数据格式为
1
[/code]
下面是Server端的代码:
2
3
4
5
6
7
8
9
10
11
12
13
14
15
16
17
18
19
20
21
22
23
24
25
26
27
28
29
30
31
32
33
34
35
36
37
38
39
40
41
42
43
44
45
46
47
48
1
2
3
4
5
6
7
8
9
10
11
12
13
14
15
16
17
18
19
20
21
22
23
24
25
26
27
28
29
30
31
32
33
34
35
36
37
38
39
40
41
42
43
44
45
46
47
48
[/code]
特别说明一下,Server端的JSONObject和JSONArray来自第三方框架json-lib.jar,client端来自org.json包。
至此第二个demo结束。
本demo将以HttpURLConnection请求server上的一个图片流,
采用HttpURLConnection访问网络步骤如下:
创建HttpURLConnection对象;
创建URL对象,传入URL对象地址参数;
调用URL对象的openConnection方法,打开连接(openConnection);
设置连接参数;
连接(设置本次连接的参数);
接收返回数据 对数据进行操作(connect)。
2
3
4
5
6
7
8
9
10
11
12
13
14
15
16
17
18
19
20
21
22
23
24
25
26
27
28
29
30
31
32
33
34
35
36
37
38
39
40
41
42
43
44
45
46
47
48
49
50
51
52
53
54
55
56
57
58
59
60
61
62
63
64
65
66
67
68
69
70
71
72
73
74
75
76
77
78
79
80
81
82
83
84
85
86
87
88
89
1
2
3
4
5
6
7
8
9
10
11
12
13
14
15
16
17
18
19
20
21
22
23
24
25
26
27
28
29
30
31
32
33
34
35
36
37
38
39
40
41
42
43
44
45
46
47
48
49
50
51
52
53
54
55
56
57
58
59
60
61
62
63
64
65
66
67
68
69
70
71
72
73
74
75
76
77
78
79
80
81
82
83
84
85
86
87
88
89
[/code]
利用HttpURLConnection访问网络的几点注意事项:
该方式的get请求形式与HttpClient类似,都是在URL后加”?”并拼接键值对,中间用”&”隔开。
post请求的实质也是拼接键值对,只是不能跟在URL后,将键值对拼接后转换成字节数组的形式传递。
HttpURLConnection对象可以在打开连接后对本次连接做一些配置,比如设置连接server时限,server响应的时限,请求方式,读写server端的权限,是否使用缓冲等。
2
3
4
5
6
7
8
9
10
11
12
13
14
15
16
17
18
19
20
21
22
23
24
25
26
27
28
29
30
31
32
33
34
35
36
37
38
39
40
41
42
43
44
45
46
47
48
49
50
51
52
53
54
55
1
2
3
4
5
6
7
8
9
10
11
12
13
14
15
16
17
18
19
20
21
22
23
24
25
26
27
28
29
30
31
32
33
34
35
36
37
38
39
40
41
42
43
44
45
46
47
48
49
50
51
52
53
54
55
[/code]
代码首先从服务器磁盘中读取一张图片流到Servlet中,接着传到client端,由于是以流的形式传递,故不能一次传完,否则会比较占用空间,而应使用边存边发的形式。即先从server端读取1kb,再向client传递1kb,由于该图片流可能无法被1kb等分,故应调用outputStream含有三个参数的write方法,该方法的第三个参数将计算读到文件大小的偏移量,所以最后不会出现最后一段流按1kb计算的情况。
至此,demo#3结束。
client和server端),需要通过OSI七层协议或TCP/IP四层协议,需要迎合各种各样的网络传输协议(ftp,telnet,http1.1,http/2 等),需要上传和下载各种类型的文件(字符串,图片流,文件流 等),不同格式的数据,打包和解析方式也不同(XML格式(需要PULL,SAX,DOM 等解析方式),JSON格式(需要JSONObject,JSONArray或GSON或JACKSON等解析方式),流文件(Httpmine解析))等。。。说了这么多,你可能很恼火:网络用处这么广,却又这么难,到底还学不学?当然要学,因为正是它比较难,一些公司推出了各种各样的第三方jar包开源框架,这个框架为我们做了很好的代码封装,让我们方便地进行网络编程,下面我结合几个demo跟各位浅谈一下android的网络编程。
网络编程的demo介绍
本文一共包含3个demo,他们分别是:用户登录:用户在Android客户端输入用户名密码,上传至服务器,服务器通过查询数据库中的信息,给客户端返回一个正确性的提示。
用户注册:用户将自己输入的姓名和兴趣爱好,上传至服务器,服务器将新增用户添加至数据库中。
下载图片流
本文涉及的知识点:
在tomcat容器中搭建简单的Servlet,在doPost和doGet方法中通过参数HttpServletRequest对象和HttpServletResponse对象获取client端的内容或向client端发送内容。
在client端使用HttpClient对象或HttpURLConnection对象请求server,并使用这两个对象接收返回信息。
使用多线程、Handler、runOnUIThread等线程和异步知识,在主线程(UI线程)中更新UI,在子线程中访问网络,并利用Handler在线程之间传递信息。
利用JSONObject、JSONArray类封装、解析JSON格式的数据
弱引用
定制异常
IO流
demo#1: 用户登录
本demo将实现从android客户端输入用户名密码,上传至服务器,服务器通过比对,返回客户端正确性信息。- 服务器端使用tomcat容器装载Servlet web应用程序,通过doGet方式接收请求、处理、并返回客户端。
- 客户端通过HttpClient,以get/post方式请求server端
- 通过Handler实现UI更新
server端浅析
Server端需注意的几点:- 由于tomcat容器最终运行的classes文件位于 /WebContent/WEB-INF/classes 中,然而创建Dynamic Web Project的时候,代码默认build成class文件的存放地址默认是 /工程名/build ,所以应把该存放地址改为 /WebContent/WEB-INF/classes 。
- 在tomcat中新建Servlet类时,默认的该Servlet的URL地址是 /Servlet类名,如果类名过长,可以在创建Servlet时,在URL mapping中修改一个虚拟映射的URL路径,方便访问。
- 无论客户端用哪种方式请求(get/post),在Server端用doGet和doPost方式都能接收,只需要在其中一个方法中调用另一个方法即可。
- 为了能够处理client端发送的中文信息,应设置字符的编码方式
// 处理接收到的client的编码方式
request.setCharacterEncoding("UTF-8");12
1
2
[/code]
为了防止client端接收的消息乱码,应设置如下的编码方式
// 防止发送到client端乱码
response.setCharacterEncoding("UTF-8");
response.setContentType("text/html;charset=UTF-8");12
3
1
2
3
[/code]
服务器端代码如下:
@WebServlet("/login.do")
public class SecondVanpersieServletForAndroidLogin extends HttpServlet {
private static final long serialVersionUID = 1L;

/**
* @see HttpServlet#HttpServlet()
*/
public SecondVanpersieServletForAndroidLogin() {
super();
// TODO Auto-generated constructor stub
}

protected void doGet(HttpServletRequest request, HttpServletResponse response)
throws ServletException, IOException {
// TODO Auto-generated method stub

/*      //用于测试服务器无响应异常
try {
Thread.sleep(5000);
} catch (InterruptedException e) {
// TODO Auto-generated catch block
e.printStackTrace();
}
*/
// response.getWriter().append("Served
// at:").append(request.getContextPath());
// 防止发送到client端乱码
response.setCharacterEncoding("UTF-8");
response.setContentType("text/html;charset=UTF-8");
// Server端的输出以打印流的形式回传client
//PrintWriter out = null;
OutputStream out =null;

// 处理接收到的client的编码方式
request.setCharacterEncoding("UTF-8");

// 接收client的LoginName键中的值
String loginName = request.getParameter("LoginName");
// 接收client的LoginPassword键中的值
String loginPassword = request.getParameter("LoginPassword");
System.out.println(loginName + "|" + loginPassword);

try {
//out = response.getWriter();
out= response.getOutputStream();
if (loginName.equals("tom") && loginPassword.equals("123")) {
// 登录正确
out.write("success!".getBytes("UTF-8"));

} else {
//登录失败
out.write("failed!".getBytes("UTF-8"));
}
} finally {
out.flush();
out.close();
}

}

protected void doPost(HttpServletRequest request, HttpServletResponse response)
throws ServletException, IOException {
// TODO Auto-generated method stub
// System.out.println("--doPost--");
doGet(request, response);
}

}
12
3
4
5
6
7
8
9
10
11
12
13
14
15
16
17
18
19
20
21
22
23
24
25
26
27
28
29
30
31
32
33
34
35
36
37
38
39
40
41
42
43
44
45
46
47
48
49
50
51
52
53
54
55
56
57
58
59
60
61
62
63
64
65
66
67
68
69
70
71
1
2
3
4
5
6
7
8
9
10
11
12
13
14
15
16
17
18
19
20
21
22
23
24
25
26
27
28
29
30
31
32
33
34
35
36
37
38
39
40
41
42
43
44
45
46
47
48
49
50
51
52
53
54
55
56
57
58
59
60
61
62
63
64
65
66
67
68
69
70
71
[/code]
如上所示,request接收server传来的信息,为方便起见,直接判断用户名是否为tom,密码是否为123,若正确,则返回success!,否则返回failed!。
client端浅析
client端需注意的几点:为使应用获得访问网络权限,应在AndroidManifest.xml中声明相应权限
<!-- 应用访问网络权限 -->

<uses-permission android:name="android.permission.INTERNET" />
一定不能在主线程中访问网络,否则会阻塞UI操作。
一定不能在子线程中更新UI,应使用异步请求,如Handler机制。
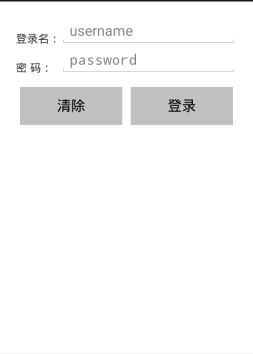
界面布局
界面布局很简单,就是两个输入框(EditText),一个清除button,一个注册button。不再做过多解释,代码如下:
<LinearLayout xmlns:android="http://schemas.android.com/apk/res/android"
android:layout_width="match_parent"
android:layout_height="match_parent"
android:layout_margin="20dp"
android:orientation="vertical" >

<LinearLayout
android:layout_width="match_parent"
android:layout_height="wrap_content"
android:orientation="horizontal" >

<TextView
android:layout_width="0dp"
android:layout_height="wrap_content"
android:layout_gravity="bottom"
android:layout_weight="1"
android:text="@string/text_login" />

<EditText
android:id="@+id/text_logininput"
android:layout_width="0dp"
android:layout_height="wrap_content"
android:layout_weight="4"
android:hint="@string/text_login_hint"
android:inputType="text"
android:selectAllOnFocus="true" />
</LinearLayout>

<LinearLayout
android:layout_width="match_parent"
android:layout_height="wrap_content"
android:orientation="horizontal" >

<TextView
android:layout_width="0dp"
android:layout_height="wrap_content"
android:layout_gravity="bottom"
android:layout_weight="1"
android:text="@string/text_password" />

<EditText
android:id="@+id/text_passwordinput"
android:layout_width="0dp"
android:layout_height="wrap_content"
android:layout_weight="4"
android:hint="@string/text_password_hint"
android:inputType="textPassword"
android:selectAllOnFocus="true" />
</LinearLayout>

<LinearLayout
android:layout_width="match_parent"
android:layout_height="wrap_content"
android:layout_marginTop="10dp"
android:gravity="center_vertical"
android:orientation="horizontal" >

<Button
android:id="@+id/button_clear"
style="?android:attr/buttonBarButtonStyle"
android:layout_width="0dp"
android:layout_height="wrap_content"
android:layout_margin="5dp"
android:layout_weight="1"
android:background="#69696969"
android:text="@string/button_clear" />

<Button
android:id="@+id/button_login"
style="?android:attr/buttonBarButtonStyle"
android:layout_width="0dp"
android:layout_height="wrap_content"
android:layout_margin="5dp"
android:layout_weight="1"
android:background="#69696969"
android:text="@string/button_login" />
</LinearLayout>
1
2
3
4
5
6
7
8
9
10
11
12
13
14
15
16
17
18
19
20
21
22
23
24
25
26
27
28
29
30
31
32
33
34
35
36
37
38
39
40
41
42
43
44
45
46
47
48
49
50
51
52
53
54
55
56
57
58
59
60
61
62
63
64
65
66
67
68
69
70
71
72
73
74
75
76
77
1
2
3
4
5
6
7
8
9
10
11
12
13
14
15
16
17
18
19
20
21
22
23
24
25
26
27
28
29
30
31
32
33
34
35
36
37
38
39
40
41
42
43
44
45
46
47
48
49
50
51
52
53
54
55
56
57
58
59
60
61
62
63
64
65
66
67
68
69
70
71
72
73
74
75
76
77
[/code]
activity代码
本段代码主要用于初始化布局中的控件,绑定button监听器,开启一个线程用于访问server,在访问的过程中,可能会出现各种异常,可以通过try/catch块按照异常优先级进行捕捉,再强调一点,一定要在Handler中的handlerMessage中更新UI,代码如下:
@SuppressWarnings("deprecation")
public class LoginActivity extends Activity {
private EditText mEditLogin;
private EditText mEditPassword;
private Button mButtonClear;
private Button mButtonLogin;
// 接口对象的引用=new 接口对象的实现类
private UserService mUserService = new UserServiceImplement();

// 登陆成功标志
private static final int FLAG_LOGIN_SUCCESS = 1;
// 登录异常显示的信息
private static final String MSG_LOGIN_ERROR = "登录出错!";
// 登陆成功显示的信息
private static final String MSG_LOGIN_SUCCESS = "登录成功!";
// 业务异常
public static final String MSG_LOGIN_FAILED = "登录名|密码出错";

// 接受服务器响应错误
public static final String MSG_SERVER_ERROR = "请求服务器错误";
// 连接服务器超时
public static final String MSG_REQUEST_TIMEOUT = "连接服务器超时";
// 服务器在规定时间未处理完业务
public static final String MSG_RESPONSE_TIMEOUT = "服务器处理超时";
// loading
private static ProgressDialog mDialog;

@Override
protected void onCreate(Bundle savedInstanceState) {
// TODO Auto-generated method stub
super.onCreate(savedInstanceState);
setContentView(R.layout.activity_login);
//初始化控件
init();
//绑定监听器
bindClickListener();
}

private void bindClickListener() {
// TODO Auto-generated method stub
mButtonLogin.setOnClickListener(new OnClickListener() {

@Override
public void onClick(View v) {
// TODO Auto-generated method stub
final String _editLoginName = mEditLogin.getText().toString();
final String _editPassword = mEditPassword.getText().toString();
// Toast.makeText(LoginActivity.this,
// _editLoginName + "|" + _editPassword,
// Toast.LENGTH_SHORT).show();

if (mDialog == null) {
mDialog = new ProgressDialog(LoginActivity.this);
}
mDialog.setTitle("请等待...");
mDialog.setMessage("登陆中...");
mDialog.setCancelable(false);
mDialog.show();
// 新开线程,将输入的用户名和密码提交至服务器
Thread thread = new Thread(new Runnable() {

@Override
public void run() {
// TODO Auto-generated method stub
try {
mUserService.userLogin(_editLoginName,
_editPassword);
// 在子线程中发消息 发给主线程的handler 让handler处理 (登陆成功)
handler.sendEmptyMessage(FLAG_LOGIN_SUCCESS);
}

// 捕获连接超时异常
catch (ConnectTimeoutException e) {
Message msg = new Message();

Bundle bundle = new Bundle();
bundle.putSerializable("ErrorMsg",
MSG_REQUEST_TIMEOUT);
msg.setData(bundle);
handler.sendMessage(msg);
}
// 服务器处理超时
catch (SocketTimeoutException e) {
// TODO: handle exception
Message msg = new Message();

Bundle bundle = new Bundle();
bundle.putSerializable("ErrorMsg",
MSG_RESPONSE_TIMEOUT);
msg.setData(bundle);
handler.sendMessage(msg);
}
// 业务异常
catch (ServiceRulesException e) {
Message msg = new Message();

Bundle bundle = new Bundle();
bundle.putSerializable("ErrorMsg", e.getMessage());
msg.setData(bundle);
handler.sendMessage(msg);
}

// 空指针异常
catch (Exception e) {
// TODO: handle exception
e.printStackTrace();
Message msg = new Message();

Bundle bundle = new Bundle();
bundle.putSerializable("ErrorMsg", MSG_LOGIN_ERROR);
msg.setData(bundle);
handler.sendMessage(msg);
}
}
});
thread.start();
}

});
mButtonClear.setOnClickListener(new OnClickListener() {

@Override
public void onClick(View v) {
// TODO Auto-generated method stub
mEditLogin.setText("");
mEditPassword.setText("");
Toast.makeText(LoginActivity.this, "cleared!",
Toast.LENGTH_SHORT).show();

}
});
}

private void showTip(String str) {
Toast.makeText(this, str, Toast.LENGTH_SHORT).show();
};

// 继承handler,目的是为了持有LoginActivity对象的引用
private static class IHandler extends Handler {
// 创建一个弱引用 可有效避免OOM
private final WeakReference<Activity> mActivity;

public IHandler(LoginActivity activity) {
mActivity = new WeakReference<Activity>(activity);
}

// 该方法可以收到子线程发出的消息,并对其处理(该方法在主线程中运行,可以更新UI)
@Override
public void handleMessage(Message msg) {
// TODO Auto-generated method stub

// 首先关闭ProgressDialog
if (mDialog != null) {
mDialog.dismiss();
}

// 在handler中获得主Activity的对象引用,这样可以调用Activity中的方法
// ((LoginActivity)mActivity.get()).showTip();

int flag = msg.what;
switch (flag) {
// 登录出错
case 0:
String errorMsg = (String) msg.getData().getSerializable(
"ErrorMsg");
((LoginActivity) mActivity.get()).showTip(errorMsg);

break;
// 登陆成功
case FLAG_LOGIN_SUCCESS:
((LoginActivity) mActivity.get()).showTip(MSG_LOGIN_SUCCESS);

break;

default:
break;
}
}

}

private IHandler handler = new IHandler(this);

// 初始化控件
private void init() {
// TODO Auto-generated method stub
mEditLogin = (EditText) findViewById(R.id.text_logininput);
mEditPassword = (EditText) findViewById(R.id.text_passwordinput);
mButtonClear = (Button) findViewById(R.id.button_clear);
mButtonLogin = (Button) findViewById(R.id.button_login);
}

}12
3
4
5
6
7
8
9
10
11
12
13
14
15
16
17
18
19
20
21
22
23
24
25
26
27
28
29
30
31
32
33
34
35
36
37
38
39
40
41
42
43
44
45
46
47
48
49
50
51
52
53
54
55
56
57
58
59
60
61
62
63
64
65
66
67
68
69
70
71
72
73
74
75
76
77
78
79
80
81
82
83
84
85
86
87
88
89
90
91
92
93
94
95
96
97
98
99
100
101
102
103
104
105
106
107
108
109
110
111
112
113
114
115
116
117
118
119
120
121
122
123
124
125
126
127
128
129
130
131
132
133
134
135
136
137
138
139
140
141
142
143
144
145
146
147
148
149
150
151
152
153
154
155
156
157
158
159
160
161
162
163
164
165
166
167
168
169
170
171
172
173
174
175
176
177
178
179
180
181
182
183
184
185
186
187
188
189
190
191
192
193
194
1
2
3
4
5
6
7
8
9
10
11
12
13
14
15
16
17
18
19
20
21
22
23
24
25
26
27
28
29
30
31
32
33
34
35
36
37
38
39
40
41
42
43
44
45
46
47
48
49
50
51
52
53
54
55
56
57
58
59
60
61
62
63
64
65
66
67
68
69
70
71
72
73
74
75
76
77
78
79
80
81
82
83
84
85
86
87
88
89
90
91
92
93
94
95
96
97
98
99
100
101
102
103
104
105
106
107
108
109
110
111
112
113
114
115
116
117
118
119
120
121
122
123
124
125
126
127
128
129
130
131
132
133
134
135
136
137
138
139
140
141
142
143
144
145
146
147
148
149
150
151
152
153
154
155
156
157
158
159
160
161
162
163
164
165
166
167
168
169
170
171
172
173
174
175
176
177
178
179
180
181
182
183
184
185
186
187
188
189
190
191
192
193
194
[/code]
在上段代码中,继承了一个定制的Handler类,定义了一个弱引用类型的activity,用于处理当内存出现OOM时(Out Of Memory)时,系统及时调用GC机制(Garbage Collection),方便垃圾回收;另外程序会根据优先级对异常进行捕捉,如先捕捉连接服务器超时的异常(在规定的时间内没有连接到服务器,用ConnectTimeoutException类捕捉),在捕捉服务器响应超时异常(在规定的时间内服务器无响应,用SocketTimeoutException类捕捉),接着是业务异常(用户名或密码输入错误,用定制Exception类捕捉),最后是其他异常(用Exception类捕捉)。下面是定制的Exception类定义:
public class ServiceRulesException extends Exception {

/**
* 定制Exception类,捕捉业务异常
*/
private static final long serialVersionUID = 1L;

public ServiceRulesException(String message) {
super(message);
}

}12
3
4
5
6
7
8
9
10
11
12
13
1
2
3
4
5
6
7
8
9
10
11
12
13
[/code]
连接server端的client业务代码 (get请求)
定义一个接口,用于声明访问网络的方法并抛出异常,代码如下:
public interface UserService {
public void userLogin(String loginName, String loginPassword)
throws Exception;12
3
1
2
3
[/code]
程序使用HttpClient访问网络,用get方式请求,特别说明一点,HttpClient在Android2.3版本后就不推荐使用了,在Android6.0中更是直接被废弃了,若想访问网络可以使用HttpURLConnection,该类会在后面介绍,虽然被废弃了,不过还是有必要介绍一下,毕竟访问方式差不多,步骤如下:
定义HttpClient对象(HttpClient是个接口,只能new它的实现类DefaultHttpClient);
创建HttpGet/HttpPost对象,传入String类型的URL地址参数;
调用HttpClient类的execute方法,传入参数HttpGet/HttpPst对象,返回HttpResponse对象,该对象就是Server端返回给client端的信息;
判断返回的信息中携带的响应码是否为200,若不是200,说明出错,抛出异常;
通过entity实体解析HttpResponse对象,处理返回结果。
具体访问网络代码如下:
public class UserServiceImplement implements UserService {
@Override
public void userLogin(String loginName, String loginPassword)
throws Exception {
@SuppressWarnings("deprecation")
HttpClient client = new DefaultHttpClient();
String uri = "http://192.168.1.103:8080/test/login.do?LoginName="+ loginName + "&LoginPassword=" + loginPassword;
HttpGet get = new HttpGet(uri);
HttpResponse response = client.execute(get);
int statusCode = response.getStatusLine().getStatusCode();
if (statusCode != HttpStatus.SC_OK)
{
throw new ServiceRulesException(LoginActivity.MSG_SERVER_ERROR);
}
String result = EntityUtils.toString(response.getEntity(), HTTP.UTF_8);
if (result.equals("success!")) {

} else {
throw new ServiceRulesException(LoginActivity.MSG_LOGIN_FAILED);
}

}12
3
4
5
6
7
8
9
10
11
12
13
14
15
16
17
18
19
20
21
22
1
2
3
4
5
6
7
8
9
10
11
12
13
14
15
16
17
18
19
20
21
22
[/code]
注意一点:http协议的get请求方式如下
http://localhost:8080/test/login.do/?参数键=参数值&参数键=参数值 . . . . . .
每个参数的参数键都应与Server端接收到的键一致。
连接server端的client业务代码 (post请求)
与get请求不同,post请求将不会把参数键和参数值直接写在URL之后,而是写在请求的内容中,看得出来,**当传递数据的隐秘性不高、数据量比较小时,适合使用get请求访问server,当数据量比较大(>256bytes),且数据隐秘性比较高时(包含用户的密码等内容),应当考虑使用post请求。**post请求代码如下:
// 以post方式请求
HttpParams params = new BasicHttpParams();
// 设置请求的字符集
HttpProtocolParams.setContentCharset(params, HTTP.UTF_8);
// 设置请求的超时时限为3秒,若loading3秒以上则抛异常 ConnectionTimeoutExeption异常
HttpConnectionParams.setConnectionTimeout(params, 3000);
// 设置服务器的响应超时时限,即收到了client的请求但在3秒内没完成操作 SocketTimeoutException
HttpConnectionParams.setSoTimeout(params, 3000);

SchemeRegistry registry = new SchemeRegistry();
// 设置请求协议,以http或HTTPS方式请求(HTTPS对应433端口,http对应80端口)
registry.register(new Scheme("https", PlainSocketFactory
.getSocketFactory(), 433));
registry.register(new Scheme("http", PlainSocketFactory
.getSocketFactory(), 80));
ClientConnectionManager conman = new ThreadSafeClientConnManager(
params, registry);

HttpClient client = new DefaultHttpClient(conman, params);
String url = "http://192.168.1.103:8080/test/login.do";
HttpPost post = new HttpPost(url);
// 用post方式传递参数 通过NameValuePair对象以键值对的方式传递
NameValuePair paramLoginName = new BasicNameValuePair("LoginName",loginName);
NameValuePair paramLoginPassword = new BasicNameValuePair(
"LoginPassword", loginPassword);
// 把参数放在List中
List<NameValuePair> postParams = new ArrayList<NameValuePair>();
postParams.add(paramLoginName);
postParams.add(paramLoginPassword);
// 把封装好的参数放在post中
post.setEntity(new UrlEncodedFormEntity(postParams, HTTP.UTF_8));
// 通过HttpClient的execute方法,将post作为参数 发送到server端
HttpResponse response = client.execute(post);12
3
4
5
6
7
8
9
10
11
12
13
14
15
16
17
18
19
20
21
22
23
24
25
26
27
28
29
30
31
32
33
1
2
3
4
5
6
7
8
9
10
11
12
13
14
15
16
17
18
19
20
21
22
23
24
25
26
27
28
29
30
31
32
33
[/code]
之后的代码与get方式相同。由于参数不能跟在URL后面,post请求使用NameValuePair对象存储需要传递的键值对,接着把这些对象存储在ArrayList中,最后调用GetPost的setEntity方法将list封装成一个实体,这样就可以将post作为execute方法中的参数传递出去了。而无论使用get请求还是post请求,Server端都不用修改代码。
至此第一个demo完成。
demo#2:用户注册
本demo用于将用户名和兴趣爱好数组上传至Server端,大部分内容与demo1相仿,不同点主要数据采用了JSON格式封装,server端需要用json-lib解析,server端所需json-lib.jar包及其依赖包如下:commons-beanutils-1.8.0.jar
commons-collections-3.2.1.jar
commons-lang-2.5.jar
commons-logging-1.1.1.jar
ezmorph-1.0.6.jar
json-lib-2.4-jdk15.jar
界面布局
一个用户输入(EditText),一个兴趣爱好选择组(RaidioGroup),代码如下:<LinearLayout xmlns:android="http://schemas.android.com/apk/res/android" android:layout_width="match_parent" android:layout_height="match_parent" android:layout_margin="20dp" android:orientation="vertical" > <LinearLayout android:layout_width="match_parent" android:layout_height="wrap_content" android:orientation="horizontal" > <TextView android:layout_width="0dp" android:layout_height="wrap_content" android:layout_gravity="bottom" android:layout_weight="1" android:text="@string/text_register" /> <EditText android:id="@+id/text_register_input" android:layout_width="0dp" android:layout_height="wrap_content" android:layout_weight="4" android:hint="@string/text_register_hint" android:inputType="text" android:selectAllOnFocus="true" /> </LinearLayout> <LinearLayout android:layout_width="match_parent" android:layout_height="wrap_content" android:layout_marginTop="20dp" android:orientation="vertical" > <TextView android:layout_width="wrap_content" android:layout_height="wrap_content" android:layout_gravity="bottom" android:text="@string/text_interesting" /> <CheckBox android:id="@+id/checkbox_music" android:layout_width="wrap_content" android:layout_height="wrap_content" android:checked="false" android:text="@string/checkbox_music" /> <CheckBox android:id="@+id/checkbox_game" android:layout_width="wrap_content" android:layout_height="wrap_content" android:checked="false" android:text="@string/checkbox_game" /> <CheckBox android:id="@+id/checkbox_swim" android:layout_width="wrap_content" android:layout_height="wrap_content" android:checked="false" android:text="@string/checkbox_swim" /> </LinearLayout> <LinearLayout android:layout_width="match_parent" android:layout_height="wrap_content" android:layout_marginTop="10dp" android:gravity="center_vertical" android:orientation="horizontal" > <Button android:id="@+id/button_register_clear" style="?android:attr/buttonBarButtonStyle" android:layout_width="0dp" android:layout_height="wrap_content" android:layout_margin="5dp" android:layout_weight="1" android:background="#69696969" android:text="@string/button_register_clear" /> <Button android:id="@+id/button_register" style="?android:attr/buttonBarButtonStyle" android:layout_width="0dp" android:layout_height="wrap_content" android:layout_margin="5dp" android:layout_weight="1" android:background="#69696969" android:text="@string/button_register" /> </LinearLayout> </LinearLayout>1
2
3
4
5
6
7
8
9
10
11
12
13
14
15
16
17
18
19
20
21
22
23
24
25
26
27
28
29
30
31
32
33
34
35
36
37
38
39
40
41
42
43
44
45
46
47
48
49
50
51
52
53
54
55
56
57
58
59
60
61
62
63
64
65
66
67
68
69
70
71
72
73
74
75
76
77
78
79
80
81
82
83
84
85
86
87
88
89
90
91
1
2
3
4
5
6
7
8
9
10
11
12
13
14
15
16
17
18
19
20
21
22
23
24
25
26
27
28
29
30
31
32
33
34
35
36
37
38
39
40
41
42
43
44
45
46
47
48
49
50
51
52
53
54
55
56
57
58
59
60
61
62
63
64
65
66
67
68
69
70
71
72
73
74
75
76
77
78
79
80
81
82
83
84
85
86
87
88
89
90
91
[/code]
所见即所得
由于本demo的activity和demo1相仿,故不再给出。
client端发送请求封装JSON数据、接收响应解析JSON数据
client端采用HttpClient访问网络,使用post请求。代码如下:
@Override
public void userRegister(String registerName, List<String> interestingList)
throws Exception {
// TODO Auto-generated method stub

// JSON格式封装数据
HttpClient client = new DefaultHttpClient();
String uri = "http://localhost:8080/test/getstudent.do";
HttpPost post = new HttpPost(uri);

JSONObject obj = new JSONObject();
obj.put("RegisterName", registerName);
JSONArray arr = new JSONArray();
for (String _string : interestingList) {
arr.put(_string);
}
obj.put("Interesting", arr);
NameValuePair pair = new BasicNameValuePair("Data", obj.toString());
List<NameValuePair> data = new ArrayList<NameValuePair>();
data.add(pair);
post.setEntity(new UrlEncodedFormEntity(data, "UTF-8"));

HttpResponse response = client.execute(post);

int status = response.getStatusLine().getStatusCode();

if (status != HttpStatus.SC_OK) {
throw new ServiceRulesException(RegisterActivity.MSG_SERVER_ERROR);

}

String result = EntityUtils.toString(response.getEntity(), HTTP.UTF_8);
// 解析从server返回的Json数据
JSONObject _obj = new JSONObject(result);
String _result = _obj.getString("result");
if (result.equals("success!")) {
// 注册成功
} else {
// 注册失败
String errorMsg = _obj.getString("errorMsg");
throw new ServiceRulesException(errorMsg);
}

}12
3
4
5
6
7
8
9
10
11
12
13
14
15
16
17
18
19
20
21
22
23
24
25
26
27
28
29
30
31
32
33
34
35
36
37
38
39
40
41
42
43
44
1
2
3
4
5
6
7
8
9
10
11
12
13
14
15
16
17
18
19
20
21
22
23
24
25
26
27
28
29
30
31
32
33
34
35
36
37
38
39
40
41
42
43
44
[/code]
用户在界面上输入用户名,并勾选兴趣爱好,用户名以字符串的形式传入该方法,兴趣爱好以list的形式传入方法,则JSON格式的数据为如下形式:
var data={"RegisterName":"tom","Interesting":["swim","music","game"]};11
[/code]
JSON格式的数据也是以键值对的形式存在,对象中可以包含对象(JSONObject),也可以包含集合(JSONArray),反过来,集合中可以包含单个对象,也可以包含集合,即集合和对象可以相互嵌套。本例中,最外层是一个对象,里面包含了一个对象和一个简单集合,故封装JSON数据如上面代码所示。
client端接收server端的相应结果,首先用工具类UtilEntity对象把JSON数据解析成字符串,然后从Server端可知,封装的JSON数据格式为
var return={"result":"success!","errorMsg":"register success!" } {"result":"failed!","errorMsg":"register failed!"}11
[/code]
server端接收请求解析JSON数据、返回响应封装JSON数据
下面是Server端的代码:protected void doPost(HttpServletRequest request, HttpServletResponse response)
throws ServletException, IOException {
// TODO Auto-generated method stub
request.setCharacterEncoding("UTF-8");
// 解析client端传过来的json数据
String data = request.getParameter("Data");
// System.out.println(data);
JSONObject obj = JSONObject.fromObject(data);
String registerName = obj.getString("RegisterName");
System.out.println(registerName);
JSONArray arr = obj.getJSONArray("Interesting");
if (arr != null) {
for (Object object : arr) {
System.out.println(object);
}
}
// 封装json数据 向client端发送
/*
* { "result":"success!","errorMsg":"register success!" } {
* "result":"failed!","errorMsg":"register failed!"}
*/
response.setCharacterEncoding("UTF-8");
response.setContentType("text/html;charset=UTF-8");
PrintWriter out = null;
try {
out = response.getWriter();
ResultJSONBean jsonBean = new ResultJSONBean();
// success
jsonBean.setResult("success!");
jsonBean.setErrorMsg("register success!");
// failed
// jsonBean.setResult("failed!");
// jsonBean.setErrorMsg("register failed!");
JSONObject _obj = JSONObject.fromObject(jsonBean);
System.out.println(_obj);
out.write(_obj.toString());
} finally {
out.flush();
out.close();
}
}12
3
4
5
6
7
8
9
10
11
12
13
14
15
16
17
18
19
20
21
22
23
24
25
26
27
28
29
30
31
32
33
34
35
36
37
38
39
40
41
42
43
44
45
46
47
48
1
2
3
4
5
6
7
8
9
10
11
12
13
14
15
16
17
18
19
20
21
22
23
24
25
26
27
28
29
30
31
32
33
34
35
36
37
38
39
40
41
42
43
44
45
46
47
48
[/code]
特别说明一下,Server端的JSONObject和JSONArray来自第三方框架json-lib.jar,client端来自org.json包。
至此第二个demo结束。
demo#3: 从server下载一个图片流
本demo将以HttpURLConnection请求server上的一个图片流,采用HttpURLConnection访问网络步骤如下:
创建HttpURLConnection对象;
创建URL对象,传入URL对象地址参数;
调用URL对象的openConnection方法,打开连接(openConnection);
设置连接参数;
连接(设置本次连接的参数);
接收返回数据 对数据进行操作(connect)。
client端
@Override
public Bitmap getImage() throws Exception {
// TODO Auto-generated method stub
Bitmap _bitmap = null;
URL url = null;

// 该类是Java SDK里的类 而不是android里的类
// 首先 声明一个HttpsURLConnection对象
HttpURLConnection _httpURLConnection = null;
InputStream _inputStream = null;
// post请求方式
OutputStream out = null;
byte[] data = null;

try {

// 封装向server端发送的数据
Map<String, String> _params = new HashMap<String, String>();
_params.put("id", "1");
data = setPostPassParams(_params).toString().getBytes();

url = new URL("http://127.0.0.1:8080/test/getImage.jpg");
// 打开连接
_httpURLConnection = (HttpURLConnection) url.openConnection();
// 设置参数
// 设置请求服务器超时时间
_httpURLConnection.setConnectTimeout(5000);
// 设置服务器响应超时时间
_httpURLConnection.setReadTimeout(5000);

// 设置允许读取Server端信息权限
_httpURLConnection.setDoInput(true);
// 设置允许向server端发送信息权限
_httpURLConnection.setDoOutput(true);
// 不使用缓冲(希望每次都能从服务器端获取最新数据)
_httpURLConnection.setDefaultUseCaches(false);
// 设置请求方式
_httpURLConnection.setRequestMethod("POST");

// 连接
_httpURLConnection.connect();
// 获取服务器返回的响应状态码
int responceCode = _httpURLConnection.getResponseCode();
if (responceCode != HttpURLConnection.HTTP_OK) {
throw new ServiceRulesException("post请求服务器异常");
}
// 接收server发来的数据流
_inputStream = new BufferedInputStream(
_httpURLConnection.getInputStream());
// _inputStream = _httpURLConnection.getInputStream();
if (_inputStream != null)
// 把Server端传过来的inputstream转化为bitmap格式
_bitmap = BitmapFactory.decodeStream(_inputStream);

// 向Server端发送信息
out = _httpURLConnection.getOutputStream();
out.write(data);
out.flush();

} finally {
if (_inputStream != null) {
_inputStream.close();
}
if (_httpURLConnection != null) {
_httpURLConnection.disconnect();
}
}
return _bitmap;
}
// 通过httpURLConnection访问网络,并用post请求向服务器传递的参数
private static StringBuffer setPostPassParams(Map<String, String> params) {
StringBuffer string = new StringBuffer();
// k1=v1&k2=v2...
for (Map.Entry<String, String> entry : params.entrySet()) {
try {
string.append(entry.getKey()).append("=")
.append(URLEncoder.encode(entry.getValue(), "UTF-8"))
.append("&");

} catch (UnsupportedEncodingException e) {
// TODO Auto-generated catch block
e.printStackTrace();
}
// 去掉最后一个"&"号
string.deleteCharAt(string.length() - 1);
}

return string;
}12
3
4
5
6
7
8
9
10
11
12
13
14
15
16
17
18
19
20
21
22
23
24
25
26
27
28
29
30
31
32
33
34
35
36
37
38
39
40
41
42
43
44
45
46
47
48
49
50
51
52
53
54
55
56
57
58
59
60
61
62
63
64
65
66
67
68
69
70
71
72
73
74
75
76
77
78
79
80
81
82
83
84
85
86
87
88
89
1
2
3
4
5
6
7
8
9
10
11
12
13
14
15
16
17
18
19
20
21
22
23
24
25
26
27
28
29
30
31
32
33
34
35
36
37
38
39
40
41
42
43
44
45
46
47
48
49
50
51
52
53
54
55
56
57
58
59
60
61
62
63
64
65
66
67
68
69
70
71
72
73
74
75
76
77
78
79
80
81
82
83
84
85
86
87
88
89
[/code]
利用HttpURLConnection访问网络的几点注意事项:
该方式的get请求形式与HttpClient类似,都是在URL后加”?”并拼接键值对,中间用”&”隔开。
post请求的实质也是拼接键值对,只是不能跟在URL后,将键值对拼接后转换成字节数组的形式传递。
HttpURLConnection对象可以在打开连接后对本次连接做一些配置,比如设置连接server时限,server响应的时限,请求方式,读写server端的权限,是否使用缓冲等。
Server端
protected void doGet(HttpServletRequest request, HttpServletResponse response)
throws ServletException, IOException {
// TODO Auto-generated method stub
// response.getWriter().append("Served at:
// ").append(request.getContextPath());
System.out.println("---get---");
String id = request.getParameter("id");

/*
* 用输入流将磁盘上的图片读到Servlet中
*/
InputStream in = null;
/*
* 将读到的图片流写到response中发送给请求端
*/
OutputStream out = null;
try {
in = new FileInputStream(new File("F://图片素材/" + id + ".jpg"));

// 设置响应头 设置相应内容的长度
response.setContentLength(in.available());
// 设置响应头 设置MIME——标识向client端发送的文件类型 以便client端能够识别该类型文件

response.setContentType("image/jpeg");
out = response.getOutputStream();
// 输入流in和输出流out不能直接交换数据 需要先用in的read把图片以字符数组的形式读进来
// 用byte[]座位中间转换的介质不是一个好方法

/*
* //获得图片的字节大小 分配一个byte数组空间用于存放图片 byte[] b = new
* byte[in.available()]; //用in的read方法把图片的字节数组形式读进来 in.read(b);
* //再用out的write方法把字节数组形式的图片写到客户端 out.write(b);
*/
// 用边读边发的形式
// 先分配1024个字节(1KB)
byte[] b = new byte[1024];
// 只要这1024个字节没读完 就一直读 读一点 写一点
int read=0;
while((read=in.read(b))!=-1)
{
out.write(b, 0, read);
}

} catch (Exception _e) {
// TODO: handle exception
_e.printStackTrace();
} finally {
if (in != null) {
in.close();
}
if (out != null) {
out.flush();
out.close();
}
}12
3
4
5
6
7
8
9
10
11
12
13
14
15
16
17
18
19
20
21
22
23
24
25
26
27
28
29
30
31
32
33
34
35
36
37
38
39
40
41
42
43
44
45
46
47
48
49
50
51
52
53
54
55
1
2
3
4
5
6
7
8
9
10
11
12
13
14
15
16
17
18
19
20
21
22
23
24
25
26
27
28
29
30
31
32
33
34
35
36
37
38
39
40
41
42
43
44
45
46
47
48
49
50
51
52
53
54
55
[/code]
代码首先从服务器磁盘中读取一张图片流到Servlet中,接着传到client端,由于是以流的形式传递,故不能一次传完,否则会比较占用空间,而应使用边存边发的形式。即先从server端读取1kb,再向client传递1kb,由于该图片流可能无法被1kb等分,故应调用outputStream含有三个参数的write方法,该方法的第三个参数将计算读到文件大小的偏移量,所以最后不会出现最后一段流按1kb计算的情况。
至此,demo#3结束。

相关文章推荐
- Android网络编程之Http通信 推荐
- Android编程获取网络连接状态(3G/Wifi)及调用网络配置界面
- android通过webservice进行网络编程实例
- Android网络服务开发之http编程
- Android网络编程实践之旅(三):网络状态检测(续)
- android 网络编程的一些解决方案
- Android网络编程实践之旅(二):基于Socket的网络通信
- 黑马程序员Java培训和Android培训_网络编程
- android HttpURLConnection编程详解,获取网络图片,html代码查看
- Android 网络编程---STRUTS2,JSON,HttpClient
- android之socket网络编程
- Android网络编程之通过Get方法实现
- android 学习心得1---网络编程
- Android 的网络编程
- Android网络编程之WebKit应用 推荐
- Android网络编程之通过Post传递参数
- Android网络编程之Http通信
- Android 的网络编程
- Android网络服务开发之Socket编程
- Android网络编程实践之旅(一):网络状态检测