jersey学习笔记2-web服务
2016-12-08 17:42
393 查看
创建服务
mvn archetype:generate -DarchetypeArtifactId=jersey-quickstart-webapp -DarchetypeGroupId=org.glassfish.jersey.archetypes -DinteractiveMode=false -DgroupId=com.example -DartifactId=simple-service-webapp -Dpackage=com.example -DarchetypeVersion=2.9执行上面的mvn语句,从中央仓库取一个已经编译好的web项目。
项目下载成功后,用tree /f命令查看项目的结构,这个版本没有服务入口程序,但增加了web项目经典的两个文件index.jsp和web.xml。

将项目导入到myeclipse中,并按web项目进行配置。
资源类MyResource分析
@Path("myresource")public class MyResource {
@GET
@Produces(MediaType.TEXT_PLAIN)
public String getIt() {
return "Got it!";
}
}
@Path("myresource")是资料路径,@GET是请求方法,@Produces(MediaType.TEXT_PLAIN)是请求参数类型
服务首页index.html分析
<!DOCTYPE html><html>
<head>
<meta charset="UTF-8">
<title>Insert title here</title>
</head>
<body>
<h2>Jersey RESTFul Web Application!</h2>
<p>
<a href="webapi/myresource">Jersey resource</a>
</p>
<p>
Visit <a href="http://jersey.java.net">Project Jersey WebSite</a> for
more information on Jersey!
</p>
</body>
</html>
这是一个静态的html文件,当点击 <a href="webapi/myresource">Jersey resource</a>时,浏览器会发起请求,直接访问后台的资源类的get方法。
web服务配置web.xml分析
<?xml version="1.0" encoding="UTF-8"?><web-app version="2.5" xmlns="http://java.sun.com/xml/ns/javaee" xmlns:xsi="http://www.w3.org/2001/XMLSchema-instance"
xsi:schemaLocation="http://java.sun.com/xml/ns/javaee http://java.sun.com/xml/ns/javaee/web-app_2_5.xsd"&g 4000
t;
<welcome-file-list>
<welcome-file>index.html</welcome-file>
</welcome-file-list>
<servlet>
<servlet-name>Jersey Web Application</servlet-name>
<servlet-class>org.glassfish.jersey.servlet.ServletContainer</servlet-class>
<init-param>
<param-name>jersey.config.server.provider.packages</param-name>
<param-value>com.example</param-value>
</init-param>
<load-on-startup>1</load-on-startup>
</servlet>
<servlet-mapping>
<servlet-name>Jersey Web Application</servlet-name>
<url-pattern>/webapi/*</url-pattern>
</servlet-mapping>
</web-app>
web.xml可定义为三部分:
1、servlet版本的定义,本例中使用2.5,如果使用3.0版本。可以不需要web.xml配置。
2、定义servlet,定义名称、类、属性。
3、定义servlet-mapping,本例中servlet的作用域为/webapi/
运行服务
在jetty上运行服务
具体如何配置不再这里讲述。启动服务后,在浏览器中访问:http://localhost:8080/simple-service-webapp/,可以正常访问index.html
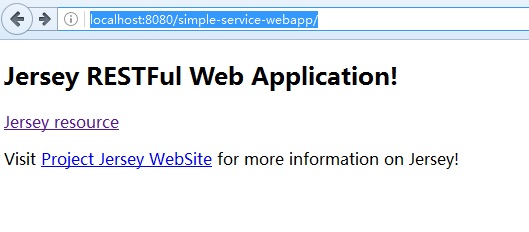
点击html中的"Jersey resource"链接,访问资源api:webapi/myresource,可以访问并成功返回,则表示服务发表成功。

在tomcat上运行服务
1、安装tomcat服务,不讲述过程了。2、将simple-service-webapp工程打成war包。mvn clean package -D skipTests=true,简单的mvn clean install,skipTests会忽略测试代码。
3、发布simple-service-webapp工程。
访问http://localhost:8080/simple-service-webapp/和http://localhost:8080/simple-service-webapp/webapi/myresource与在jetty上访问一致。
其它形式发布服务
public class AirApplication extends Application {@Override
public Set<Class<?>> getClasses() {
final Set<Class<?>> classes = new HashSet<Class<?>>();
classes.add(MyResource.class);
return classes;
}
}
public class AirApplication2 extends ResourceConfig {
public AirApplication2() {
packages("com.example");
}
}
最后需要在web.xml中配置在启动时加载这些服务:
<servlet>
<servlet-name>Jersey Web Application</servlet-name>
<servlet-class>org.glassfish.jersey.servlet.ServletContainer</servlet-class>
<init-param>
<param-name>javax.ws.rs.Application</param-name>
<param-value>com.example.AirApplication2</param-value>
</init-param>
<load-on-startup>1</load-on-startup>
</servlet>
<servlet-mapping>
<servlet-name>Jersey Web Application</servlet-name>
<url-pattern>/webapi/*</url-pattern>
</servlet-mapping>

相关文章推荐
- Web Service学习笔记:天气预报Web服务的使用方法
- web服务协同学习笔记(1)
- python学习笔记-基于flask的web服务提供
- Nginx 学习笔记(二)Web 服务启用 HTTP/2
- [ASP.NET学习笔记之二十八]ASP.NET中的Web服务
- 学习笔记:使用Web Service Software Factory开发简易留言本服务以及Mobile调用实现-1.创建Service
- WebService学习笔记-读取webxml.com.cn的天气服务信息
- dubbo学习笔记3 SpringMvc框架web形式 dubbo服务搭建 消费者
- 学习笔记 八: web服务
- linux学习笔记-工程师技术:HTTP服务基础(Web服务基本搭建)、网页内容访问、安全Web服务、动态网站的部署
- 微软企业库5.0学习笔记(11)WCF和ASP.NET Web服务应用程序
- 【学习笔记】JavaWeb 服务启动时,在后台启动加载一个线程
- 学习笔记:web服务的创建及使用
- C#webservice服务学习笔记
- Web服务及http协议_学习笔记
- Webservice学习笔记二,使用Axis发布简单的Web服务
- WebService学习笔记-读取webxml.com.cn的天气服务信息
- Python之学习笔记(web服务)
- Python学习笔记-实现探测Web服务质量
- Python学习笔记-实现探测Web服务质量