强大的Android图片下载缓存库——Picasso<一>
2016-11-24 14:50
525 查看
概述
在Android开发中,常需要从远程获取图片并显示在客户端,当然我们可以使用原生HttpUrlConnection和AsyncTask等操作来完成,但并不推荐,因为这样不仅需要我们编写大量的代码,还需要处理缓存和下载管理等。
应用程序总是从远程的服务器下载图像,你还必须考虑实现图像的缓存,以便提供良好的用户体验。 而Picasso提供自动图像缓存。
图像转换是一种需要警惕的操作。如果你的应用程序需要处理这种转换,你必须注意OutOfMemoryException。庆幸的是Picasso很好的注意到了这一点。
下载Picasso JAR文件,如果您使用eclipse作为您的开发IDE,那么只需将下载的picasso JAR文件复制到您的应用程序的lib文件夹。如果您使用Android Studio IDE,那么您必须在build.gradle文件中添加以下依赖关系。
Picasso还支持Maven项目。您可以配置Maven依赖为:
with(Context context) - Context是许多Android API调用所必需的。Picasso在这里没有区别。
load(String imageUrl) - 这里你指定应加载哪个图像。大多数情况下,它将是一个String,表示Internet图像的URL。
into(ImageView targetImageView) - 你的图像应该显示在的目标ImageView。
如果URL处的图像存在且你的ImageView可见,您将在几秒钟内看到该图像。如果图像不存在,Picasso将返回到错误回调,稍后我们将介绍。
这是从resourceId到Uri的简单转换的帮助方法:
上面展示了如何将单个图像加载到ImageView中。接下来将演示Picasso在ListView中的实现,其中每行包含一个ImageView。
其次,我们需要一个Activity,创建一个适配器并为ListView设置Adapter:
第三,让我们看看适配器的布局文件。
ListView项目的布局文件非常简单:
这将产生一个图像列表,每个图像的高度为200dp。
接下来,我们需要为ListView实现一个适配器,并将我们的Images示例图像绑定到适配器。每个View将显示一个图像。
我们在ImageListAdapter的getView()方法中使用Picasso库。你会看到Picasso的调用与以前使用的加载图像完全相同。
除此之外我们需要在ListView中重复使用布局,以创建快速而流畅的滚动体验。
Picasso的一个优点是它自动负责请求取消,清除ImageView,并将正确的图像加载到合适的ImageView中。
加载图像时,Picasso从以下三个地方获取图片:内存,磁盘和网络(从最快到最慢排序)。
空的ImageViews在任何UI看起来都不好。如果您使用**Picass**o,您最有可能通过互联网连接加载图片。根据用户的环境,这可能需要大量的时间。应用程序的预期行为是显示预加载的图片,直到加载和处理图像完成才显示网络图片。
只需调用Picasso.placeHolder()与drawable(资源)的引用,Picasso将显示它作为预加载图,直到你的实际图像准备好。
Error Placeholder: .error()
假设我们的应用程序尝试从网站加载图片,但是该网站目前已关闭。 Picasso给了我们方法来获取错误回调,并采取适当的操作。在大多数使用情况下,只要填充表示图像无法加载的占位图片就足够了。
使用方法与前面的预显示占位图片示例完全相同,只是使用了一个名为error()的函数调用:
如果您定义为load()值的图像无法加载,Picasso将显示R.mipmap.future_studio_launcher。
使用 noFade()
无论是否在加载图像之前显示占位图片,Picasso都会自动将图像以淡入的效果显示ImageView。如果您希望直接显示没有渐变效果的图像,请调用Picasso对象上的.noFade():
使用 noPlaceholder()
让我们考虑下面的情况:你想将一个图像加载到一个ImageView,并在一段时间后,你想加载一个不同的图像到同一个ImageView。使用默认配置,当您创建第二个Picasso调用时,ImageView的前一个图像将被清除,并显示由.placeholder()设置的占位图片。如果ImageView在您的UI中占有重要位置,这可能看起来很突兀,并且用户将可能注意到在几秒钟内图像之间的快速变化。
更好的解决方案是在第二个Picasso请求中调用.noPlaceholder()。这将保持上一个图像一直显示,直到加载第二个图像。它为您的用户带来更平滑的体验。
正如我们刚才所说的,在完成加载第一个图像后,它会立即开始第二个请求。然而,由于.noPlaceholder()调用,它将保持上一个图像的显示。
CenterCrop
CenterCrop()是一个裁剪方法,缩放图像,以便它填充整个ImageView,然后裁剪ImageView以外的额外图片。 ImageView将完全填充,但可能不会完整地显示图片。
CenterInside
CenterInside()也是一种裁剪方法,和CenterCrop()类似,图像将完全显示,但可能无法填充整个ImageView。
fit()将会测量ImageView的尺寸,并在内部使用resize()将图像尺寸减小到ImageView的尺寸。
关于fit()有两件事要知道。首先,调用fit()可以延迟图像请求,因为Picasso需要等待,直到可以测量ImageView的大小。第二,你只能使用fit()测量ImageView的大小。
优点是图像可能处于最低分辨率,而不影响其质量。较低的分辨率意味着缓存中保留的数据较少。这可以显著减少图像在您的应用程序的内存占用。总之,如果你喜欢较低的内存占用,加载时间稍快,fit()是一个十分有用的方法。
假设你正在建立一个应用,在顶部有一个大的具体的图片,在底部有较小的图像。
对于用户体验,最好是首先显示顶部图像元素,然后是底部不太紧急的ImageView。
XML Layout
我的XML设置并不重要。 只要理解它将呈现出如下图所示的界面:
MainActivity Code
在我们的Activity中,我们只需要将我们所希望的图像加载到三个ImageView中。 你现在应该知道如何正确的使用Picasso。 顶部图像将获得HIGH优先级:
两个小图像获得LOW 优先级 :
在Android开发中,常需要从远程获取图片并显示在客户端,当然我们可以使用原生HttpUrlConnection和AsyncTask等操作来完成,但并不推荐,因为这样不仅需要我们编写大量的代码,还需要处理缓存和下载管理等。
为什么要使用Picasso?
它简化了从外部网址加载图片并在应用程序上显示的过程。例如,从服务器下载图像是任何应用程序中最常见的任务之一。它需要相当多的代码来实现这一点通过Android网络API的相关方法。但是通过使用Picasso,你只需要简单的几行代码就可以实现。应用程序总是从远程的服务器下载图像,你还必须考虑实现图像的缓存,以便提供良好的用户体验。 而Picasso提供自动图像缓存。
图像转换是一种需要警惕的操作。如果你的应用程序需要处理这种转换,你必须注意OutOfMemoryException。庆幸的是Picasso很好的注意到了这一点。
如何使用Android的Picasso库?
设置Picasso库
使用Android的毕加索库之前,您必须添加为你的Android应用程序毕加索的依赖。下载Picasso JAR文件,如果您使用eclipse作为您的开发IDE,那么只需将下载的picasso JAR文件复制到您的应用程序的lib文件夹。如果您使用Android Studio IDE,那么您必须在build.gradle文件中添加以下依赖关系。
compile 'com.squareup.picasso:picasso:2.5.2'
Picasso还支持Maven项目。您可以配置Maven依赖为:
<dependency>
<groupId>com.squareup.picasso</groupId>
<artifactId>picasso</artifactId>
<version>2.5.2</version>
</dependency>
首先:从URL加载图片
Picasso类至少需要三个参数才能完成请求:with(Context context) - Context是许多Android API调用所必需的。Picasso在这里没有区别。
load(String imageUrl) - 这里你指定应加载哪个图像。大多数情况下,它将是一个String,表示Internet图像的URL。
into(ImageView targetImageView) - 你的图像应该显示在的目标ImageView。
ImageView targetImageView = (ImageView) findViewById(R.id.imageView);
String internetUrl = "http://i.imgur.com/DvpvklR.png";

Picasso
.with(context)
.load(internetUrl)
.into(targetImageView);
如果URL处的图像存在且你的ImageView可见,您将在几秒钟内看到该图像。如果图像不存在,Picasso将返回到错误回调,稍后我们将介绍。
从资源处加载图片
int resourceId = R.mipmap.ic_launcher;

Picasso
.with(context)
.load(resourceId)
.into(imageViewResource);
从文件中加载图片
当你让用户选择一张照片,以显示图像(类似于图库)这可能是有用的。该参数只是一个File对象。File file = new File(Environment.getExternalStoragePublicDirectory(Environment.DIRECTORY_PICTURES), "example.jpg"); Picasso .with(context) .load(file) .into(imageViewFile);
从Uri处加载图片
最后,你还可以加载由Uri定义的图像:Uri uri = resourceIdToUri(context, R.mipmap.ic_launcher); Picasso .with(context) .load(uri) .into(imageViewUri);
这是从resourceId到Uri的简单转换的帮助方法:
public static final String ANDROID_RESOURCE = "android.resource://";
public static final String FOREWARD_SLASH = "/";

private static Uri resourceIdToUri(Context context, int resourceId) {
return Uri.parse(ANDROID_RESOURCE + context.getPackageName() + FOREWARD_SLASH + resourceId);
}上面展示了如何将单个图像加载到ImageView中。接下来将演示Picasso在ListView中的实现,其中每行包含一个ImageView。
示例图库实现:ListView
首先,我们需要一些测试图像。public static String[] Images = {
"http://mimg.xmeise.com/thumb/m/allimg/160203/1-160203151139.jpg",
"http://mimg.xmeise.com/thumb/m/allimg/160203/1-160203151143.jpg",
"http://mimg.xmeise.com/thumb/m/allimg/160203/1-160203151146.jpg",
"http://mimg.xmeise.com/thumb/m/allimg/160203/1-160203151150.jpg",
"http://mimg.xmeise.com/thumb/m/allimg/160203/1-160203151155.jpg",
"http://mimg.xmeise.com/thumb/m/allimg/160203/1-160203151200.jpg",
"http://mimg.xmeise.com/thumb/m/allimg/160203/1-160203151206.jpg",
"http://mimg.xmeise.com/thumb/m/allimg/160203/1-160203151210.jpg",
"http://mimg.xmeise.com/thumb/m/allimg/160203/1-160203151215.jpg",
"http://mimg.xmeise.com/thumb/m/allimg/160203/1-160203151219.jpg",
"http://mimg.xmeise.com/thumb/m/allimg/160203/1-160203151223.jpg",
"http://mimg.xmeise.com/thumb/m/allimg/160203/1-160203151226.jpg",
"http://mimg.xmeise.com/thumb/m/allimg/160203/1-160203151229.jpg",
"http://mimg.xmeise.com/thumb/m/allimg/160203/1-160203151234.jpg",
"http://mimg.xmeise.com/thumb/m/allimg/160203/1-160203151237.jpg",
"http://mimg.xmeise.com/thumb/m/allimg/160203/1-160203151240.jpg",
"http://mimg.xmeise.com/thumb/m/allimg/160203/1-160203151242.jpg",
"http://mimg.xmeise.com/thumb/m/allimg/160203/1-160203151245.jpg"
};其次,我们需要一个Activity,创建一个适配器并为ListView设置Adapter:
public class PhotoExampleActivity extends AppCompatActivity {

@Override
protected void onCreate(Bundle savedInstanceState) {
super.onCreate(savedInstanceState);

setContentView(R.layout.activity_main);

listView.setAdapter(new ImageListAdapter(PhotoExampleActivity.this, Images));
}
}
第三,让我们看看适配器的布局文件。
ListView项目的布局文件非常简单:
<?xml version="1.0" encoding="utf-8"?>
<ImageView xmlns:android="http://schemas.android.com/apk/res/android"
android:layout_width="match_parent"
android:layout_height="200dp"/>
这将产生一个图像列表,每个图像的高度为200dp。
接下来,我们需要为ListView实现一个适配器,并将我们的Images示例图像绑定到适配器。每个View将显示一个图像。
public class ImageListAdapter extends ArrayAdapter {
private Context context;
private LayoutInflater inflater;

private String[] imageUrls;

public ImageListAdapter(Context context, String[] imageUrls) {
super(context, R.layout.listview_item_image, imageUrls);

this.context = context;
this.imageUrls = imageUrls;

inflater = LayoutInflater.from(context);
}

@Override
public View getView(int position, View convertView, ViewGroup parent) {
if (null == convertView) {
convertView = inflater.inflate(R.layout.listview_item_image, parent, false);
}

Picasso
.with(context)
.load(imageUrls[position])
.fit() // will explain later
.into((ImageView) convertView);

return convertView;
}
}我们在ImageListAdapter的getView()方法中使用Picasso库。你会看到Picasso的调用与以前使用的加载图像完全相同。
除此之外我们需要在ListView中重复使用布局,以创建快速而流畅的滚动体验。
Picasso的一个优点是它自动负责请求取消,清除ImageView,并将正确的图像加载到合适的ImageView中。
Picasso的缓存
当你向上和向下滚动的时候,你会看到,图像显示比以前更快。这些图像来自缓存,不再从网络加载。Picasso的缓存实现是完全封装好的,这使你使用起来更加方便。实现的高速缓存的大小取决于设备的磁盘大小。加载图像时,Picasso从以下三个地方获取图片:内存,磁盘和网络(从最快到最慢排序)。
示例图库实现:GridView
带有图像元素的GridView的实现与ListView实现没有任何区别。你实际上可以使用同一个适配器。只需切换到GridView的活动布局:<?xml version="1.0" encoding="utf-8"?> <GridView android:id="@+id/usage_example_gridview" xmlns:android="http://schemas.android.com/apk/res/android" android:layout_width="match_parent" android:layout_height="wrap_content" android:numColumns="2"/>
Picasso——Placeholders, Errors and Fading
Placeholder: .placeholder()空的ImageViews在任何UI看起来都不好。如果您使用**Picass**o,您最有可能通过互联网连接加载图片。根据用户的环境,这可能需要大量的时间。应用程序的预期行为是显示预加载的图片,直到加载和处理图像完成才显示网络图片。
只需调用Picasso.placeHolder()与drawable(资源)的引用,Picasso将显示它作为预加载图,直到你的实际图像准备好。
Picasso
.with(context)
.load(Images[0])
.placeholder(R.mipmap.ic_launcher) // can also be a drawable
.into(imageViewPlaceholder);
Error Placeholder: .error()
假设我们的应用程序尝试从网站加载图片,但是该网站目前已关闭。 Picasso给了我们方法来获取错误回调,并采取适当的操作。在大多数使用情况下,只要填充表示图像无法加载的占位图片就足够了。
使用方法与前面的预显示占位图片示例完全相同,只是使用了一个名为error()的函数调用:
Picasso
.with(context)
.load("http://mimg.xmeise.com/thumb/allimg/160203/1-160203151146.jpg")
.placeholder(R.mipmap.ic_launcher) // can also be a drawable
.error(R.mipmap.future_studio_launcher) // will be displayed if the image cannot be loaded
.into(imageViewError);如果您定义为load()值的图像无法加载,Picasso将显示R.mipmap.future_studio_launcher。
使用 noFade()
无论是否在加载图像之前显示占位图片,Picasso都会自动将图像以淡入的效果显示ImageView。如果您希望直接显示没有渐变效果的图像,请调用Picasso对象上的.noFade():
Picasso
.with(context)
.load(UsageExampleListViewAdapter.eatFoodyImages[0])
.placeholder(R.mipmap.ic_launcher) // can also be a drawable
.error(R.mipmap.future_studio_launcher) // will be displayed if the image cannot be loaded
.noFade()
.into(imageViewFade);
使用 noPlaceholder()
让我们考虑下面的情况:你想将一个图像加载到一个ImageView,并在一段时间后,你想加载一个不同的图像到同一个ImageView。使用默认配置,当您创建第二个Picasso调用时,ImageView的前一个图像将被清除,并显示由.placeholder()设置的占位图片。如果ImageView在您的UI中占有重要位置,这可能看起来很突兀,并且用户将可能注意到在几秒钟内图像之间的快速变化。
更好的解决方案是在第二个Picasso请求中调用.noPlaceholder()。这将保持上一个图像一直显示,直到加载第二个图像。它为您的用户带来更平滑的体验。
Picasso
.with(context)
.load(UsageExampleListViewAdapter.eatFoodyImages[0])
.placeholder(R.mipmap.ic_launcher) // can also be a drawable
.into(imageViewNoPlaceholder, new Callback() {
@Override
public void onSuccess() {
// once the image is loaded, load the next image
Picasso
.with(context)
.load(UsageExampleListViewAdapter.eatFoodyImages[1])
.noPlaceholder() // but don't clear the imageview or set a placeholder; just leave the previous image in until the new one is ready
.into(imageViewNoPlaceholder);
}

@Override
public void onError() {

}
});正如我们刚才所说的,在完成加载第一个图像后,它会立即开始第二个请求。然而,由于.noPlaceholder()调用,它将保持上一个图像的显示。
调整图像的大小
如果你的图像在界面上看起来过大或过小,您可以使用resize(horizontalSize,verticalSize)方法将图像的尺寸更改为更合适的大小,它将在图像显示在ImageView之前调整图像大小。Picasso .with(context) .load(UsageExampleListViewAdapter.eatFoodyImages[0]) .resize(600, 200) // resizes the image to these dimensions (in pixel). does not respect aspect ratio .into(imageViewResize);
使用scaleDown()
当使用resize()方法时,Picass**o也会更新你的图像。由于在不改进图像质量的情况下使较小的图像更大可能浪费计算时间,因此当原始图像具有比目标大小更大的尺寸时,调用**scaleDown(true)比用resize()更好。Picasso .with(context) .load(UsageExampleListViewAdapter.eatFoodyImages[0]) .resize(6000, 2000) .onlyScaleDown() // the image will only be resized if it's bigger than 6000x2000 pixels. .into(imageViewResizeScaleDown);
避免图像拉伸或缩放
和任何图像处理一样,调整图像大小可能真正扭曲宽高比和丑化图像显示。在大多数用例中,您希望防止这种情况发生。Picasso提供了两个选择,可以调用centerCrop()或centerInside()。CenterCrop
CenterCrop()是一个裁剪方法,缩放图像,以便它填充整个ImageView,然后裁剪ImageView以外的额外图片。 ImageView将完全填充,但可能不会完整地显示图片。
Picasso
.with(context)
.load(UsageExampleListViewAdapter.eatFoodyImages[0])
.resize(600, 200) // resizes the image to these dimensions (in pixel)
.centerCrop()
.into(imageViewResizeCenterCrop);
CenterInside
CenterInside()也是一种裁剪方法,和CenterCrop()类似,图像将完全显示,但可能无法填充整个ImageView。
Picasso
.with(context)
.load(UsageExampleListViewAdapter.eatFoodyImages[0])
.resize(600, 200)
.centerInside()
.into(imageViewResizeCenterInside);
使用fit()
Picasso有一个有的时候非常有用的:fit()。Picasso .with(context) .load(UsageExampleListViewAdapter.eatFoodyImages[0]) .fit() // call .centerInside() or .centerCrop() to avoid a stretched image .into(imageViewFit);
fit()将会测量ImageView的尺寸,并在内部使用resize()将图像尺寸减小到ImageView的尺寸。
关于fit()有两件事要知道。首先,调用fit()可以延迟图像请求,因为Picasso需要等待,直到可以测量ImageView的大小。第二,你只能使用fit()测量ImageView的大小。
优点是图像可能处于最低分辨率,而不影响其质量。较低的分辨率意味着缓存中保留的数据较少。这可以显著减少图像在您的应用程序的内存占用。总之,如果你喜欢较低的内存占用,加载时间稍快,fit()是一个十分有用的方法。
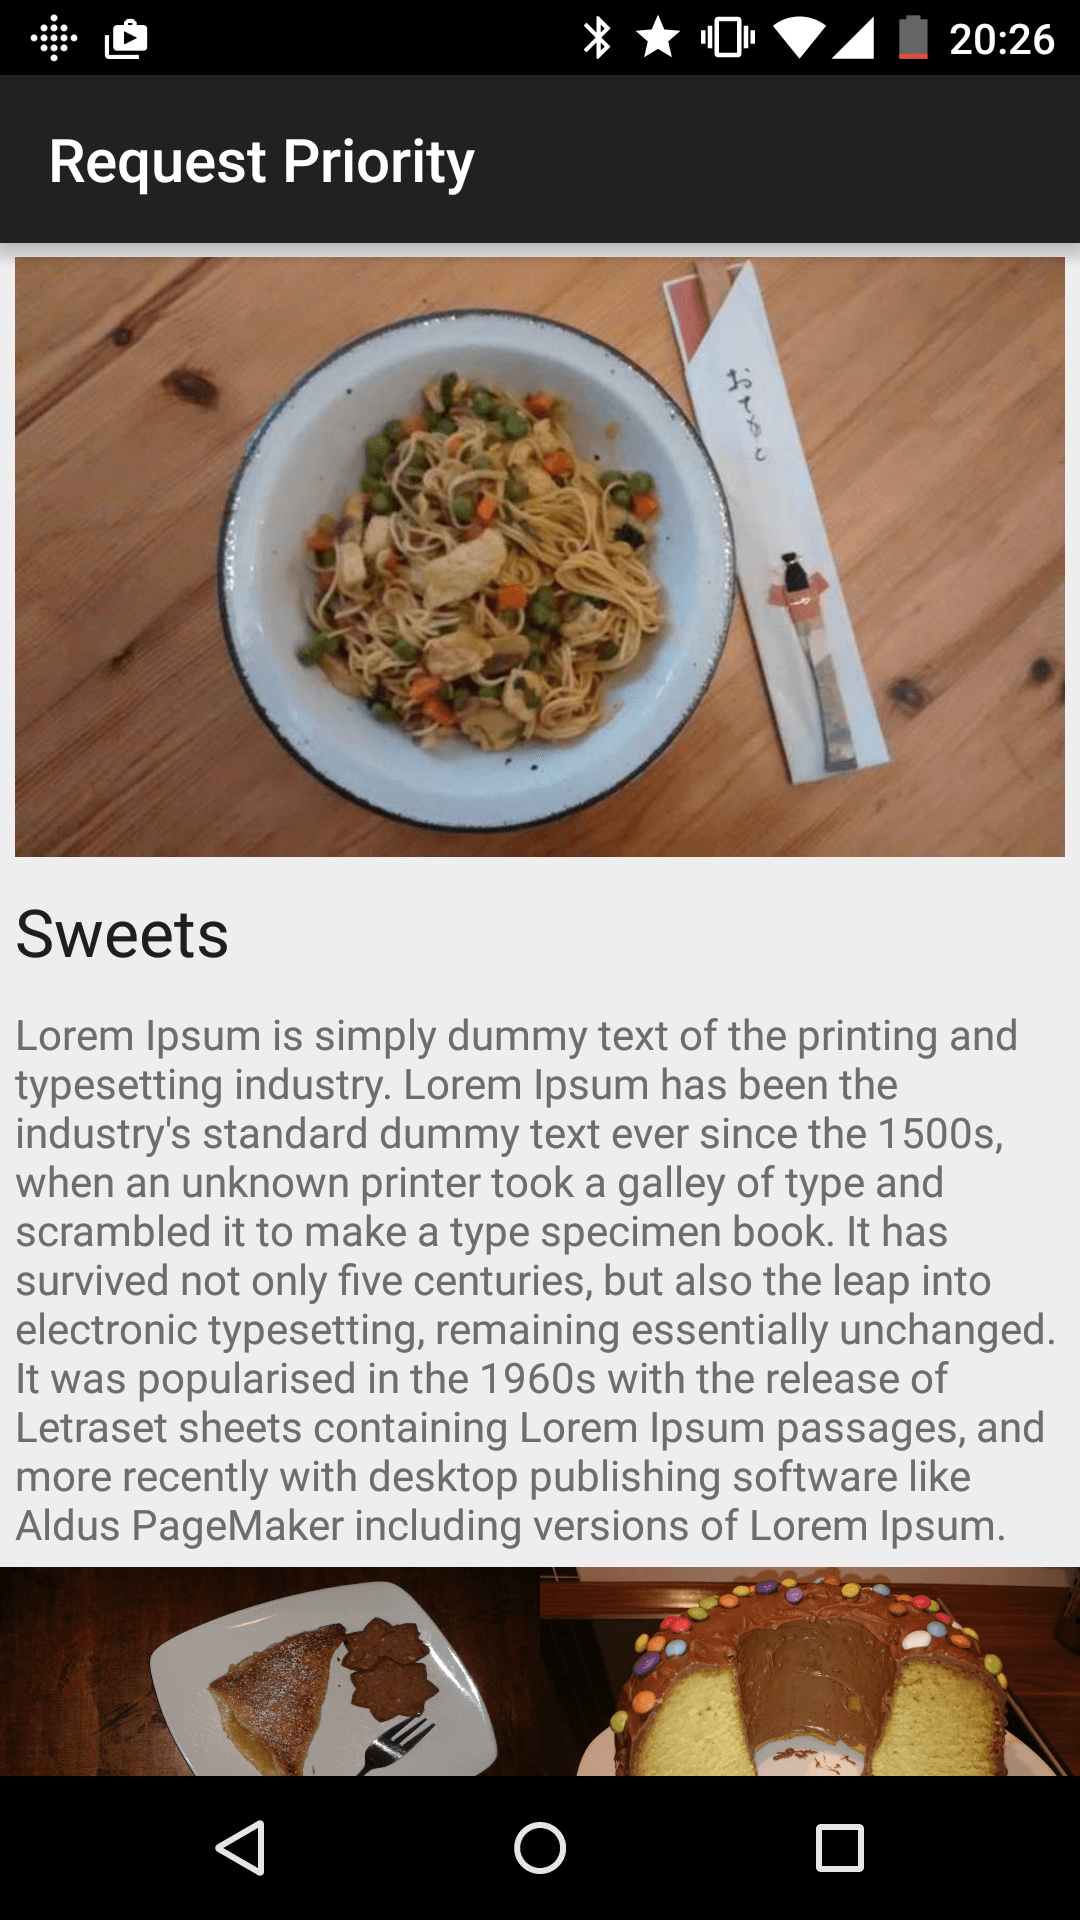
按图片优先级排序
也许你将遇到Picasso同时加载多个图像的情况。假设你正在建立一个应用,在顶部有一个大的具体的图片,在底部有较小的图像。
对于用户体验,最好是首先显示顶部图像元素,然后是底部不太紧急的ImageView。
Priority: High, Medium, Low
有时你可能需要优先处理图像加载,你可以使用priority()。 你可以选择三个常量之一,HIGH,MEDIUM或LOW。 默认情况下,所有请求的优先级为MEDIUM。 分配不同的优先级将影响Picasso的加载顺序。XML Layout
<ScrollView xmlns:android="http://schemas.android.com/apk/res/android"
android:layout_width="match_parent"
android:layout_height="wrap_content">

<LinearLayout
android:layout_width="match_parent"
android:layout_height="wrap_content"
android:orientation="vertical">

<ImageView
android:id="@+id/activity_request_priority_hero"
android:layout_width="match_parent"
android:layout_height="200dp"
android:layout_margin="5dp"/>

<TextView
android:id="@+id/textView"
android:layout_width="wrap_content"
android:layout_height="wrap_content"
android:layout_margin="5dp"
android:text="Sweets"
android:textAppearance="?android:attr/textAppearanceLarge"/>

<TextView
android:id="@+id/textView2"
android:layout_width="wrap_content"
android:layout_height="wrap_content"
android:layout_margin="5dp"
android:text="Lorem Ipsum is simply dummy text"/>

<LinearLayout
android:layout_width="match_parent"
android:layout_height="100dp"
android:layout_gravity="center_horizontal"
android:orientation="horizontal">

<ImageView
android:id="@+id/activity_request_priority_low_left"
android:layout_width="0dp"
android:layout_height="match_parent"
android:layout_weight="1"/>

<ImageView
android:id="@+id/activity_request_priority_low_right"
android:layout_width="0dp"
android:layout_height="match_parent"
android:layout_weight="1"/>
</LinearLayout>

</LinearLayout>
</ScrollView>
我的XML设置并不重要。 只要理解它将呈现出如下图所示的界面:
MainActivity Code
在我们的Activity中,我们只需要将我们所希望的图像加载到三个ImageView中。 你现在应该知道如何正确的使用Picasso。 顶部图像将获得HIGH优先级:
Picasso
.with(context)
.load(UsageExampleListViewAdapter.eatFoodyImages[0])
.fit()
.priority(Picasso.Priority.HIGH)
.into(imageViewHero);
两个小图像获得LOW 优先级 :
Picasso
.with(context)
.load(UsageExampleListViewAdapter.eatFoodyImages[1])
.fit()
.priority(Picasso.Priority.LOW)
.into(imageViewLowPrioLeft);

Picasso
.with(context)
.load(UsageExampleListViewAdapter.eatFoodyImages[2])
.fit()
.priority(Picasso.Priority.LOW)

相关文章推荐
- 强大的Android图片下载缓存库——Picasso<二>
- picasso_强大的Android图片下载缓存库
- Android图片加载库—Picasso一个强大的图像下载和缓存库
- picasso-强大的Android图片下载缓存库
- picasso-强大的Android图片下载缓存库
- Picasso picasso-强大的Android图片下载缓存库
- android的picasso强大的图片下载缓存库
- picasso-强大的Android图片下载缓存库
- picasso_强大的Android图片下载缓存库
- android:强大的图片下载和缓存库Picasso
- picasso-强大的Android图片下载缓存库
- picasso-强大的Android图片下载缓存库
- android:强大的图片下载和缓存库Picasso
- picasso-强大的Android图片下载缓存库
- android:强大的图片下载和缓存库Picasso
- 毕加索的艺术——Picasso,一个强大的Android图片下载缓存库,OkHttpUtils的使用,二次封装PicassoUtils实现微信精选
- picasso-强大的Android图片下载缓存库
- picasso-强大的Android图片下载缓存库
- Picasso:一个专为Android打造的强大的图片下载和缓存库
- android:强大的图片下载和缓存库Picasso